Table of Contents
User Guides
eSOne Mobile for Android
Introduction to eSOne Mobile for Android
eSOne Mobile for Android offers a convenient, portable, end-to-end documentation process on any device running the Android operating system, such as tablets or phones. Clinicians can easily review, edit and complete documentation on their mobile device, as well as submit dictations for transcription. eSOne Mobile is a safe, secure application that supports HIPAA compliance.
Dictations are retained on the mobile device for 14 days after the appointment date. Dictations are stored in a protected folder provided by the Android operating system that is only accessible by the eSOne application and they are also AES 256-bit encrypted.
System Requirements
-
eSOne Mobile for Android requires an Android operating system that still receives security updates from Android. As of 1/1/2024, version 9 or higher of the Android operating system is required. Open 'Settings' and tap 'About Phone' then 'Software Information' to confirm that the 'Android Version' or 'Firmware Version' listed is 8 or higher.
-
Internet Access through a wireless Local Area Network (LAN) connection or through a phone service provider. It is strongly recommended to use a Wi-Fi LAN connection when uploading dictations. Minimum bandwidth: LTE/4G data connection; recommended is stable Wi-Fi with 3 Mbps download/1 Mbps upload or greater.
-
A microphone for dictating is needed.
-
Communicates over port 443 to https://mobile.escription-one.com using TLS 1.2.
Important: Receiving Calls While Dictating
The eSOne mobile app cannot block incoming phone calls. If you have concerns about receiving calls while recording a dictation, switch your phone to 'Do Not Disturb' or 'Airplane Mode' while dictating. To continue using the application while in Airplane Mode, please enable Wi-Fi.
If a phone call is received while dictating, eSOne Mobile will pause the recording. Dictation that was made prior to the incoming call will not be lost; to resume dictating after finishing the call, tap the record button again and continue to dictate.
Installing eSOne Mobile for Android Devices
To install the eSOne Mobile app, first open the Google Play Store and search for "eSOne Mobile". Choose the eSOne Mobile application, then tap the Install button and follow on-screen instructions.
Starting eSOne Mobile for Android
![]() To start eSOne Mobile, tap the application icon. Use your InQuiry login credentials to log in. Both dictating users and non-dictating staff can log into eSOne Mobile.
To start eSOne Mobile, tap the application icon. Use your InQuiry login credentials to log in. Both dictating users and non-dictating staff can log into eSOne Mobile.
Select a Region
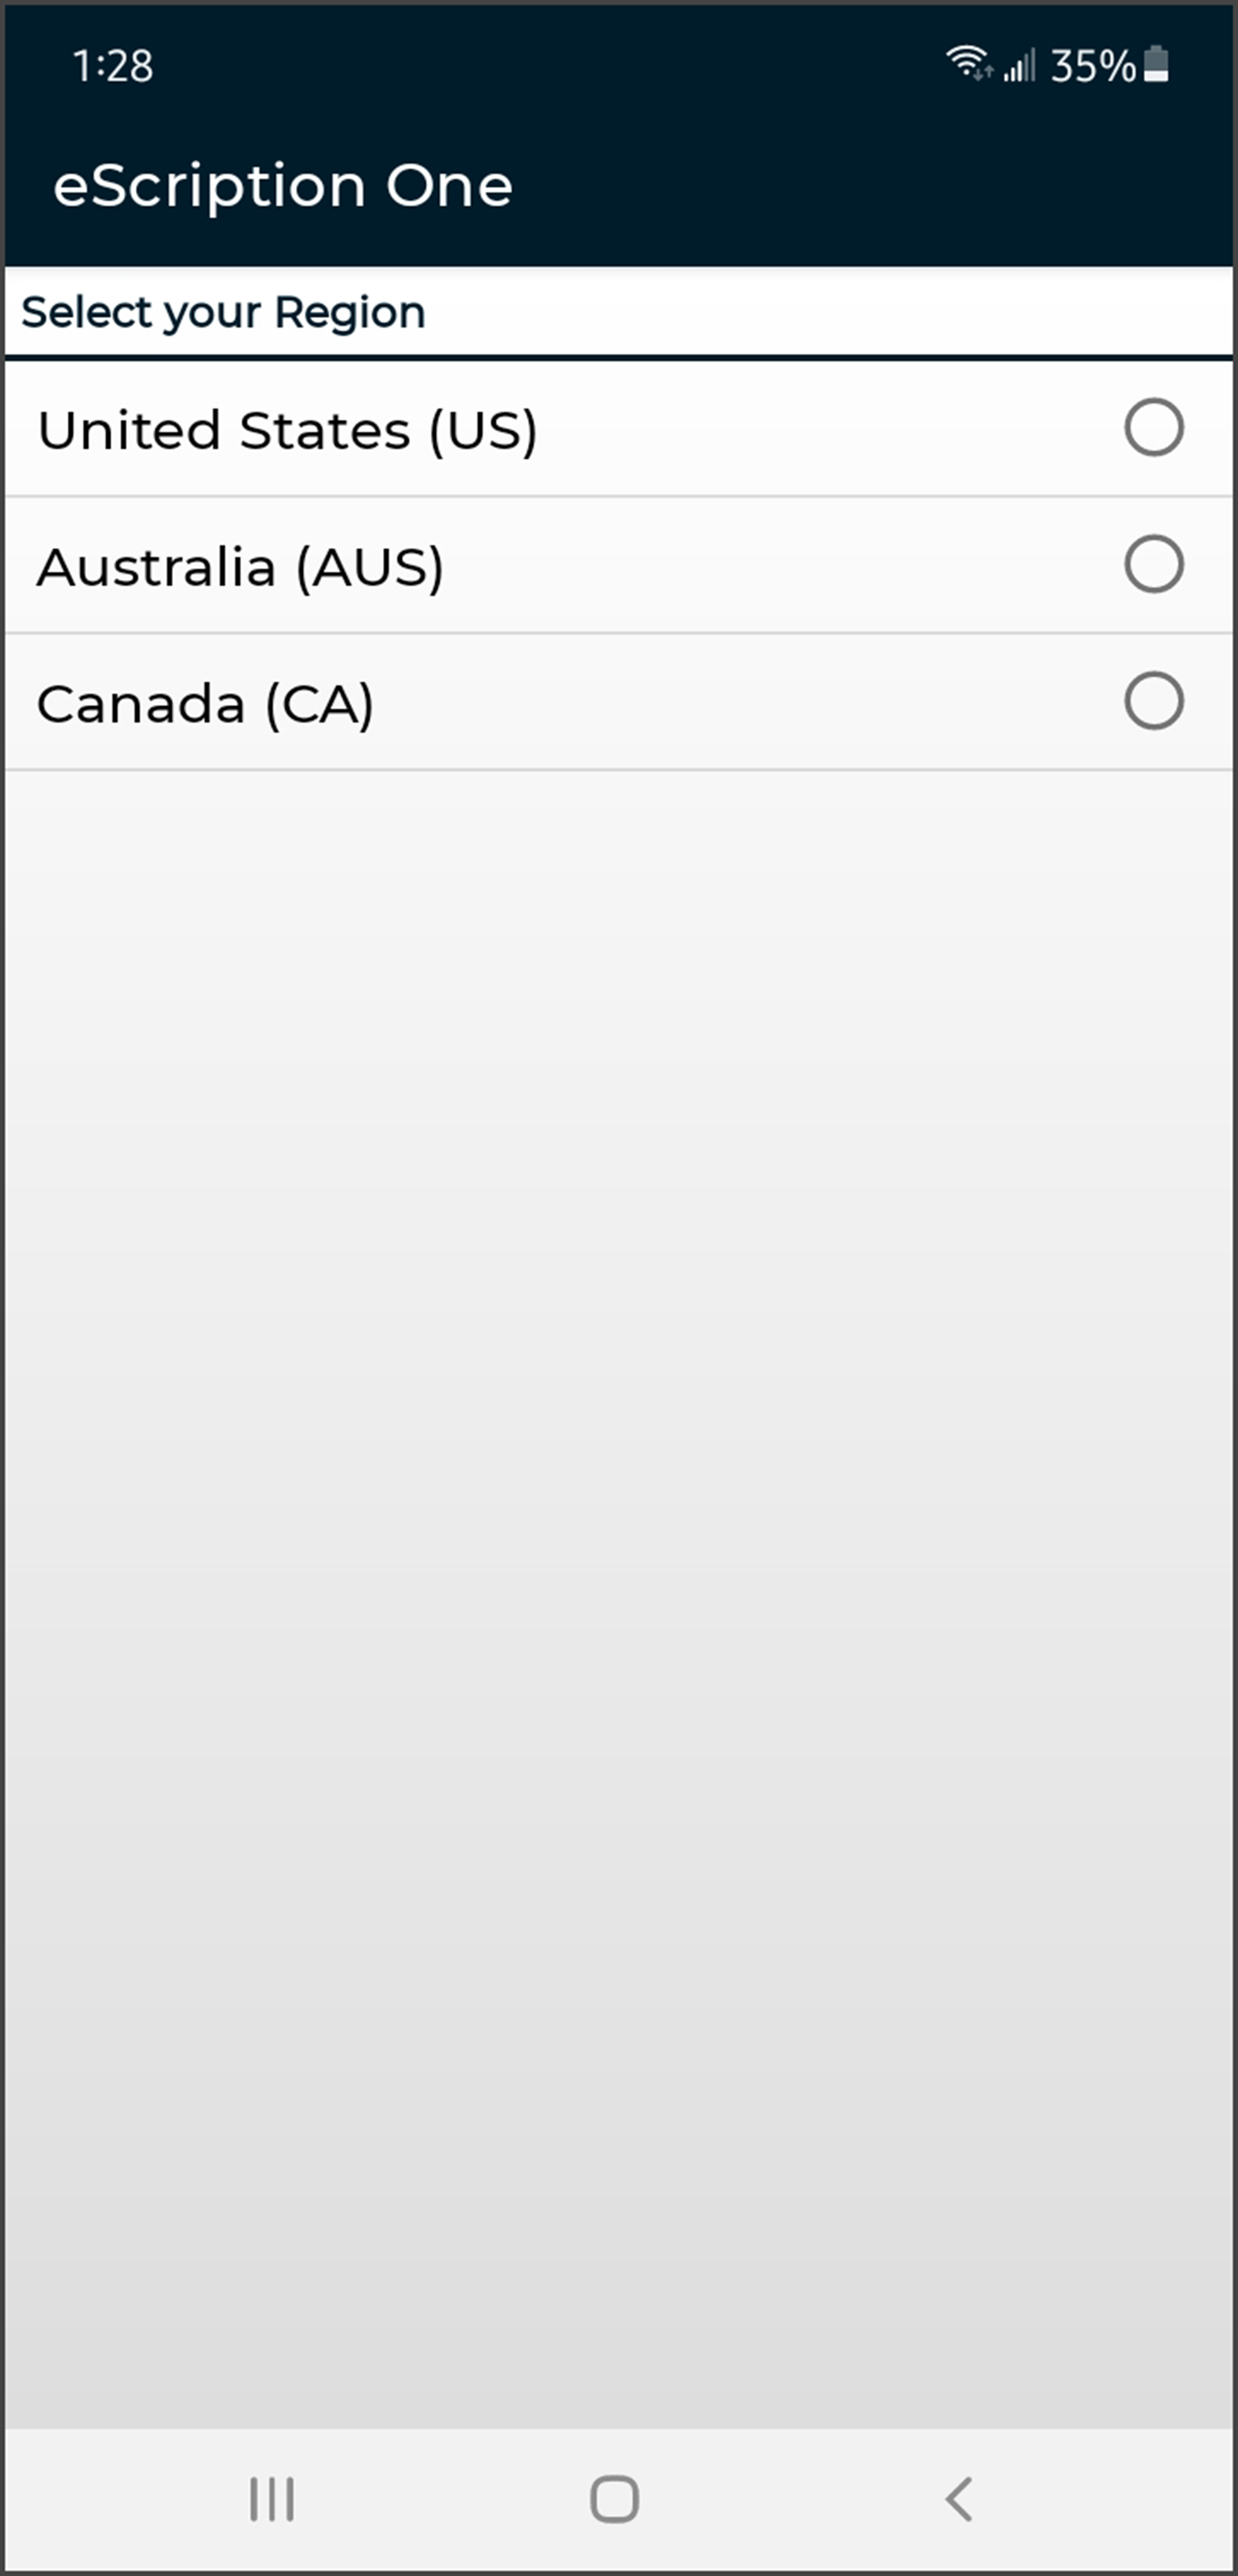 When the eSOne Mobile app is launched for the first time users will be prompted to select a region. This allows the app to connect to the proper servers. Choose the region that applies to the client and tap Select.
In the unlikely event that the region needs to be changed, the user will need to uninstall and reinstall the app.
Note
Uninstalling the app will permanently delete any incomplete (on-hold) dictations; please verify all started dictations have been uploaded prior to uninstalling the app. The user will be prompted to choose the region upon the first login after reinstalling the app.
Logging In
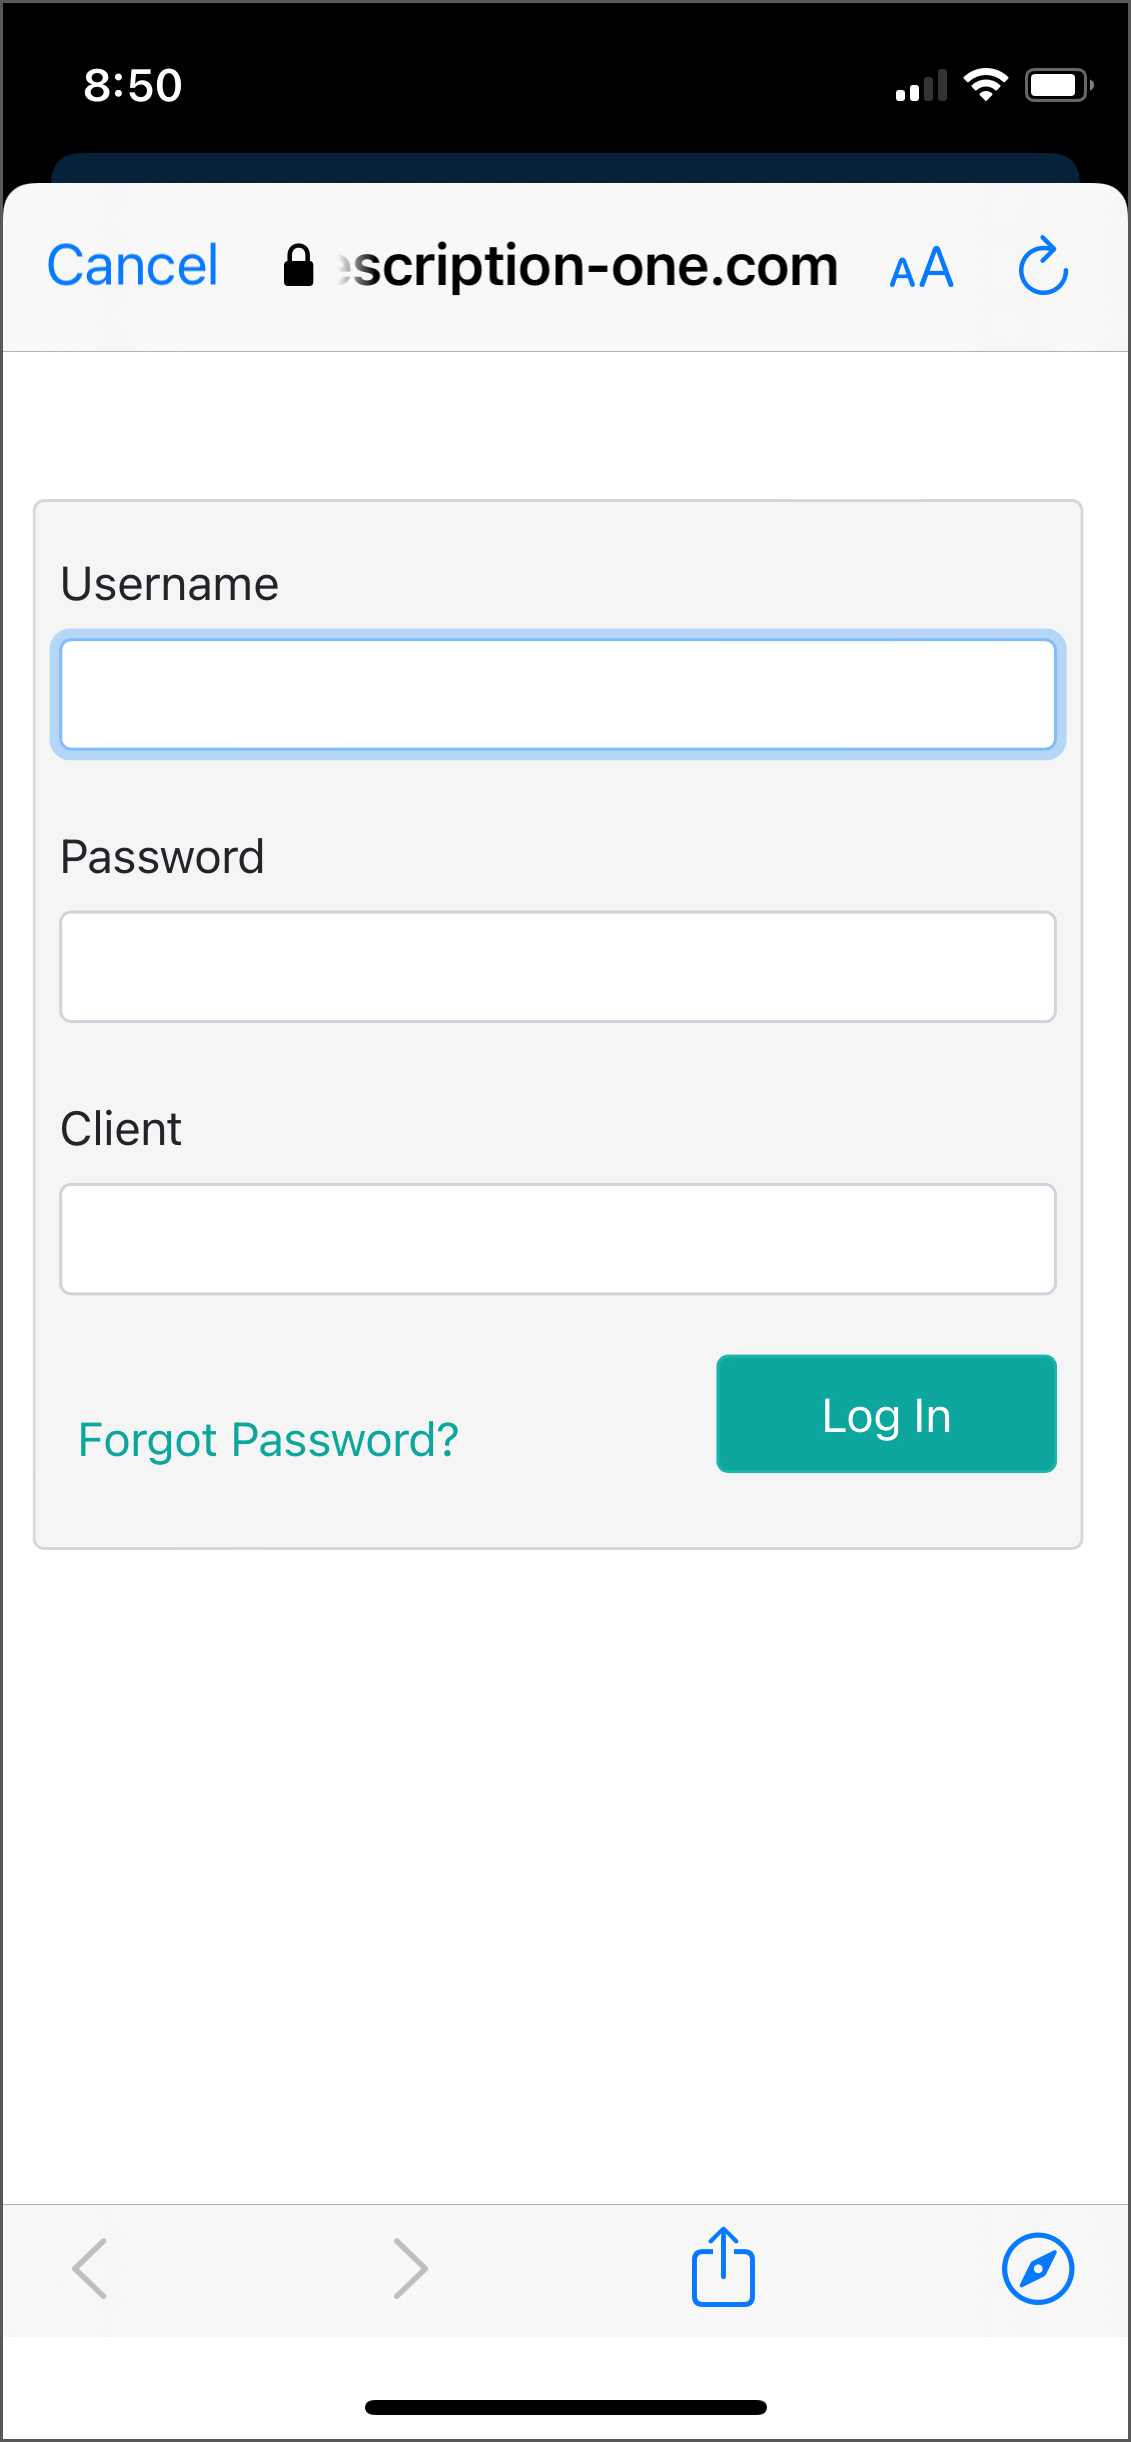
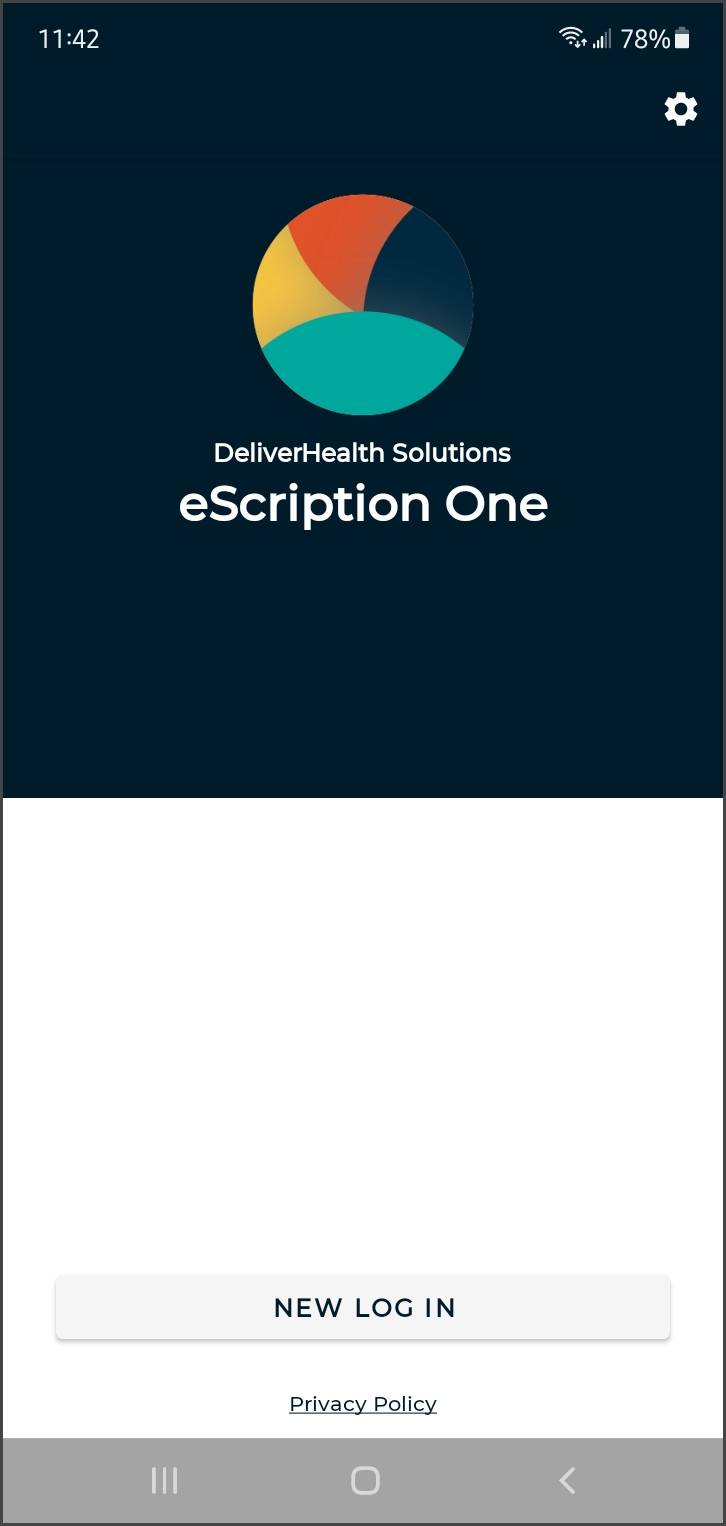 To log in, press the New Login button.
 The credentials screen opens.
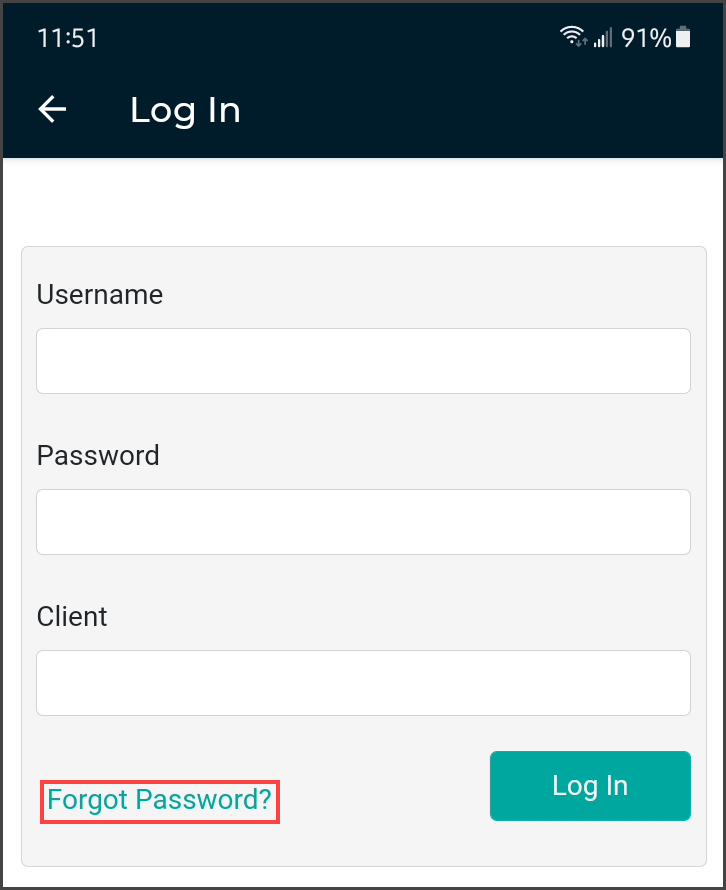
Enter username, password, and client code, then press Log In.
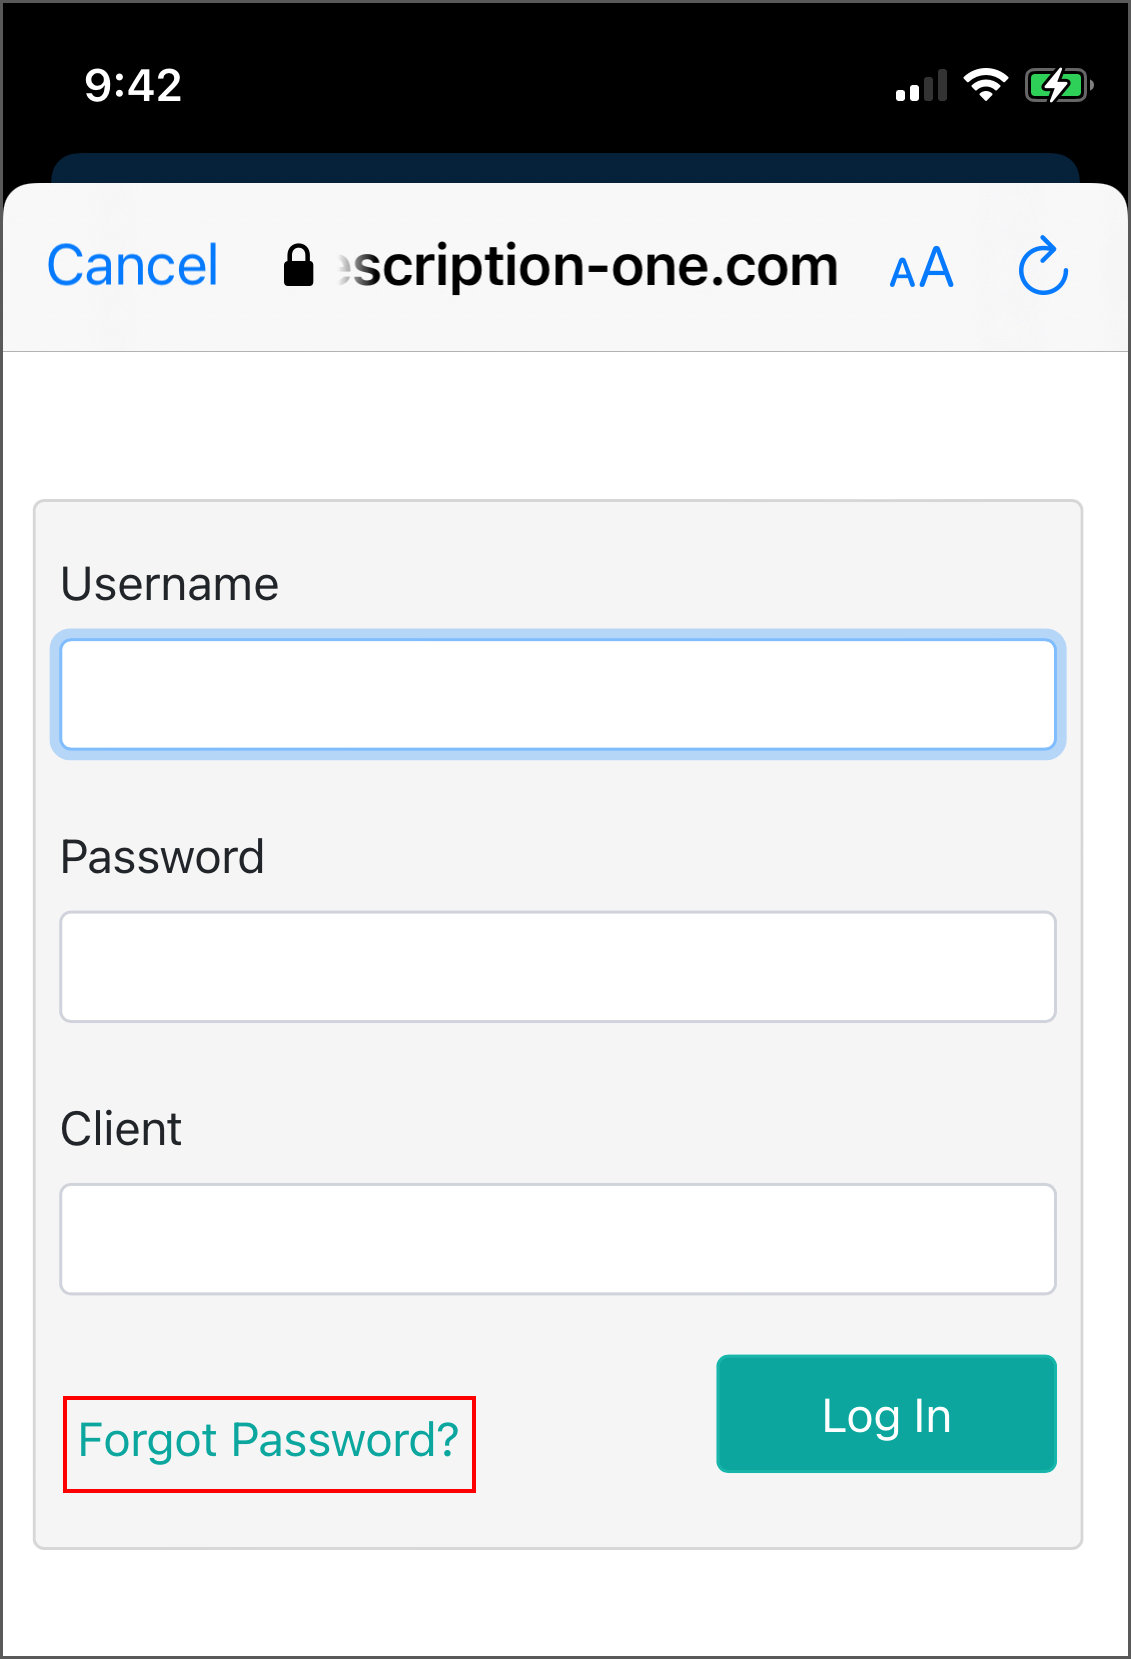
The 'Forgot Password?' link next to the Log In button allows users who have saved a valid email address to receive password reset instructions by email if it is lost or forgotten. For more information, go to Email Verification and Resetting Password.
Note
If multi-factor authentication (MFA) has been enabled for the client, please see Setting up Multi-Factor Authentication.
If the password has expired, the user will be prompted to change it. Enter the current password and then the new one. After verifying it, click Change Password.
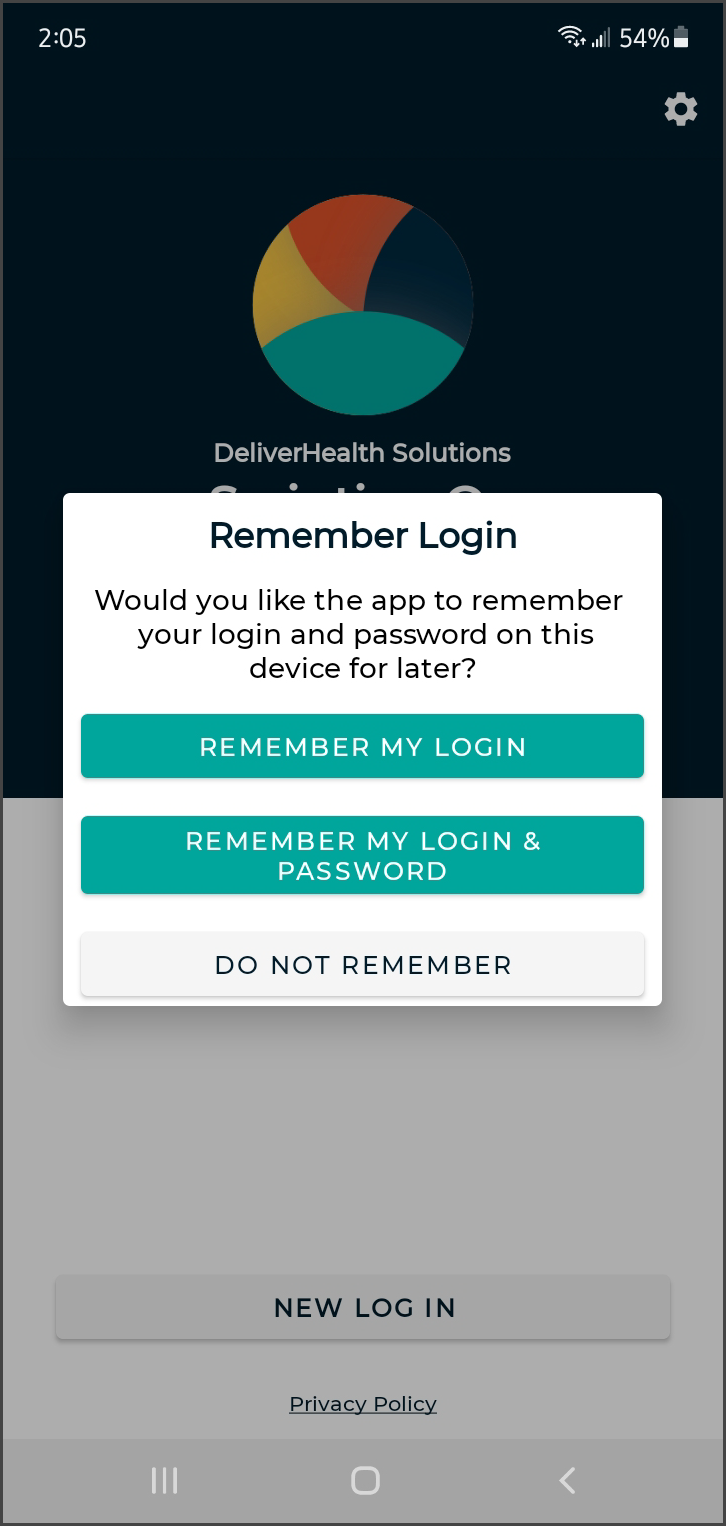 The first time a user logs in, the 'Remember Login' screen will appear next, asking if username and/or password should saved be on the device.
The 'Remember my login with password' option will not appear if the admin has disabled this feature for users.
Users can also choose Do not remember to be prompted to enter their username, password and client at each log in.
Note
This screen will initially appear for each profile logging in.
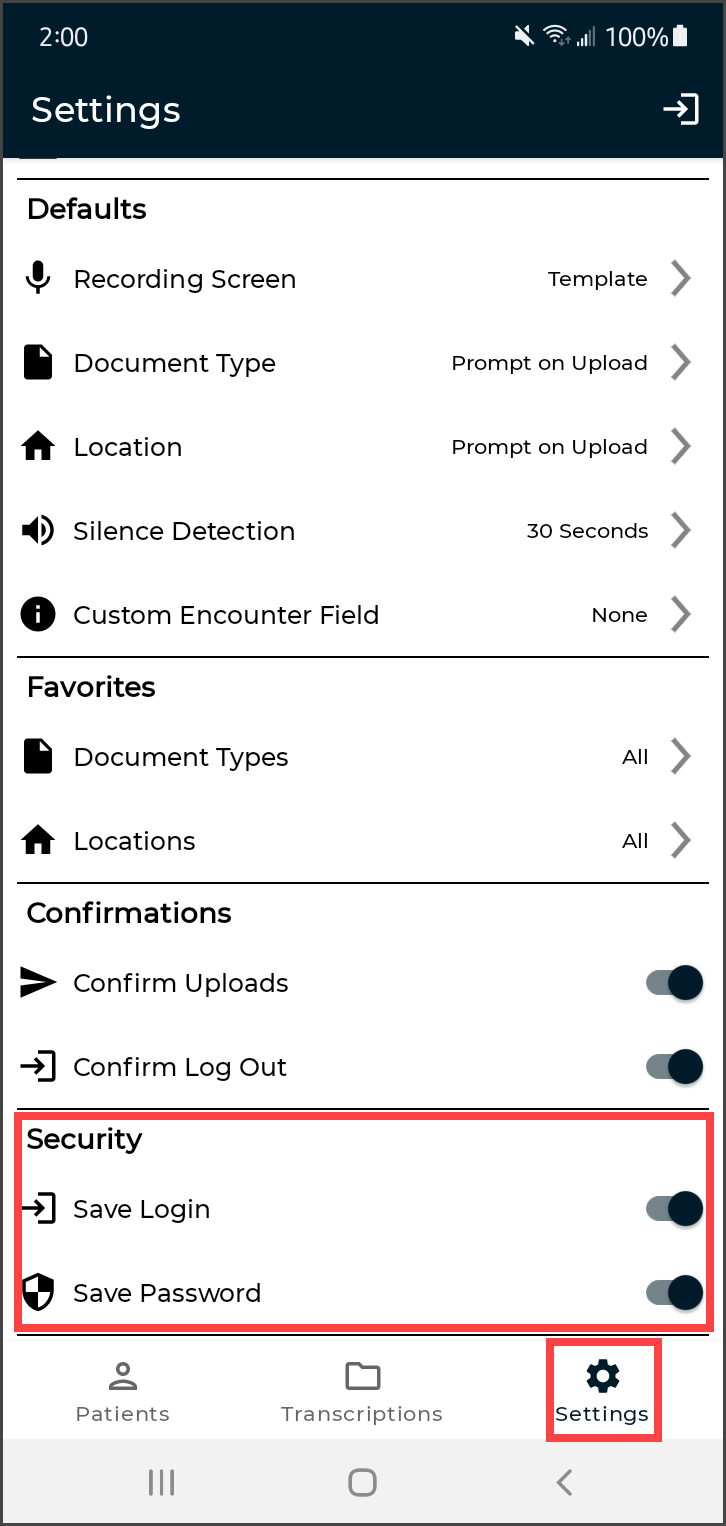 Login options can also be changed in the app's Settings tab.
If saving passwords is not allowed for users, the 'Save Password' option will be disabled on the Settings screen.
Note
Please note that with 'Save Password' enabled, anyone with access to the device can access the eSOne account and the confidential medical records in it.
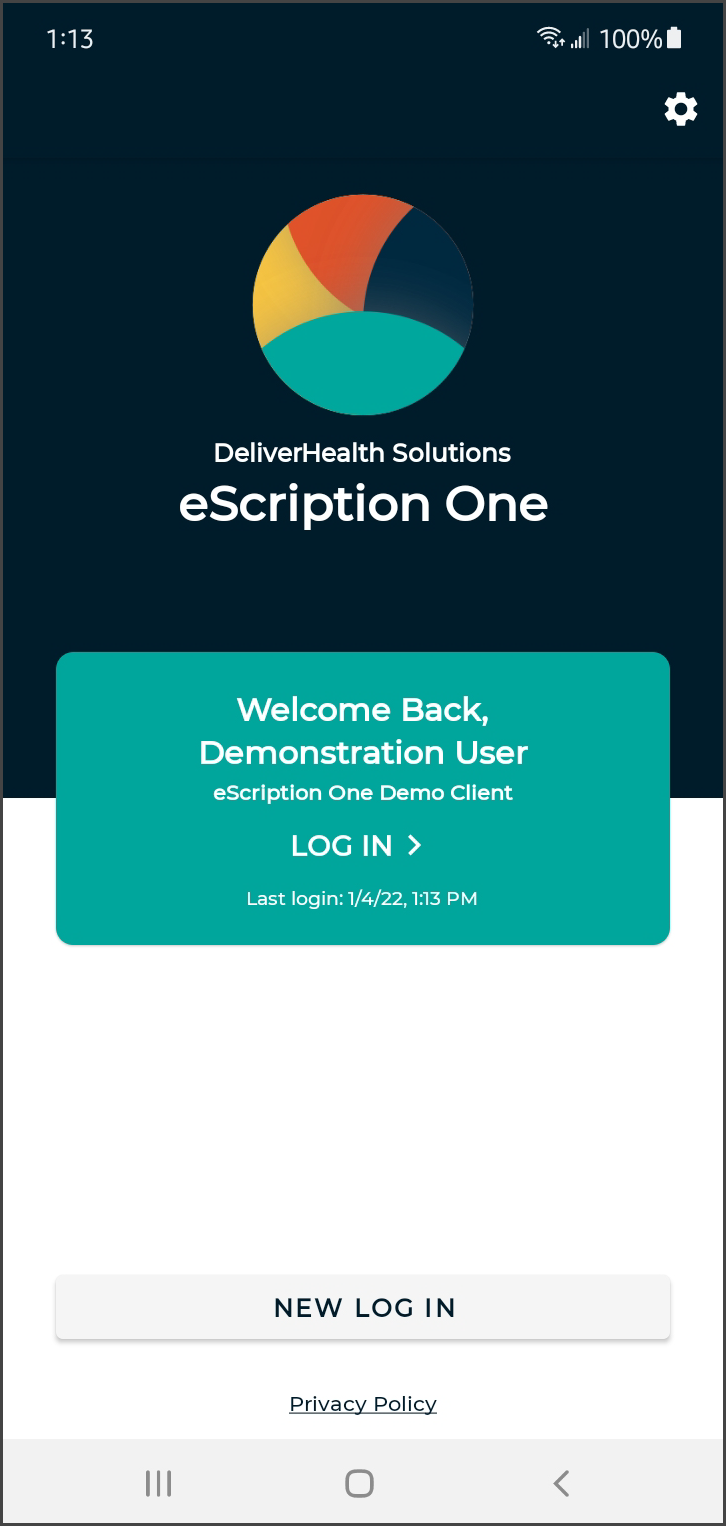 When the login name is saved, the profile appears on the login screen (with a combination of First name Last name). Tap the profile to log in as that user. Users will be prompted for the password if it has not been (or cannot be) saved.
Only the last saved profile to log in will appear on the login screen. Users can still link multiple profiles in the Settings tab to switch between profiles quickly.
Permissions
When entering the recording screen after the initial installation or reinstallation of the eSOne Mobile App, a request for permissions is presented. Permission to record audio, search for and connect to Bluetooth devices, and make and manage phone calls must be granted to enable recording controls.

Setting up Multi-Factor Authentication
Multi-factor authentication is another way to verify a user’s identity, adding an extra level of security to the login process. For eSOne applications, it is recommended that users set up MFA using the Auth0 Guardian authentication application. However, due to a limitation with the Auth0 Guardian app, users cannot set up MFA for the mobile apps on a mobile device. To do so, you must perform the initial setup on InQuiry or InSync. Once this initial setup is complete, MFA will work for the mobile app as well. Logging in will require you to accept a notification sent to your phone.
Note
Other authentication apps may work as well but are not officially supported.
Logging in with Multi-Factor Authentication
Once the initial MFA setup has been completed, you will subsequently log in to your mobile app as shown in the steps below.
Note
If you log in with saved credentials for both username and password, you will not need to authenticate with MFA. No notification will be sent to your phone.
-
Launch the eSOne mobile app.
-
Enter your login credentials.
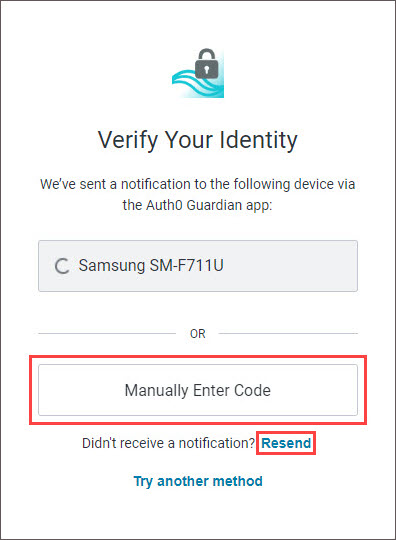
The 'Verify Your Identity' screen opens, indicating that a notification has been sent to your phone and is awaiting confirmation. -
Verify Authentication.
 Depending on your device and Guardian app settings, you may receive a push notification for the authentication request. If so, tap Allow in the push notification.
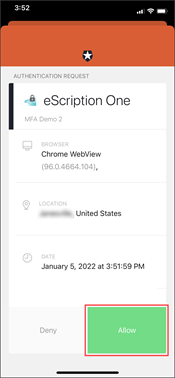 If a push notification was not received, open the Guardian app and tap Allow on the appropriate request.
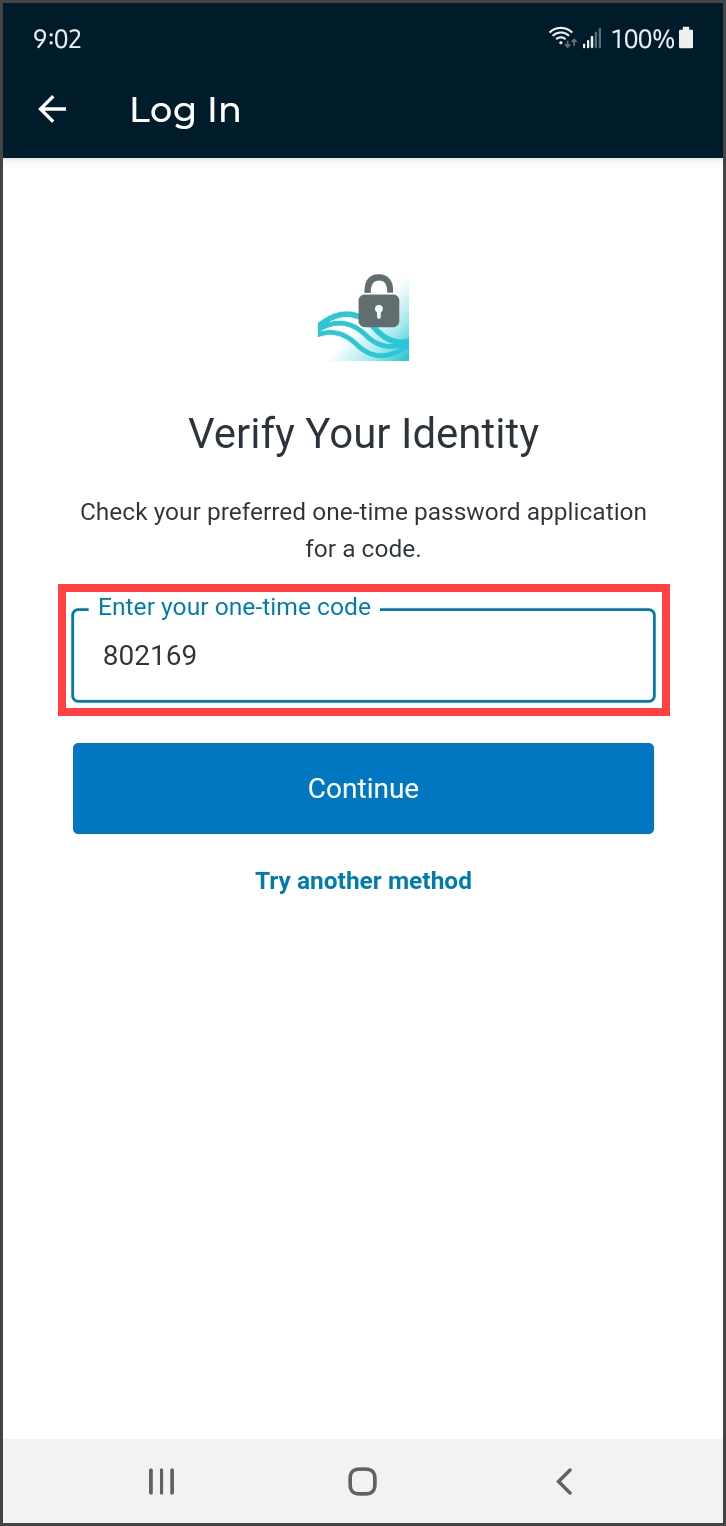
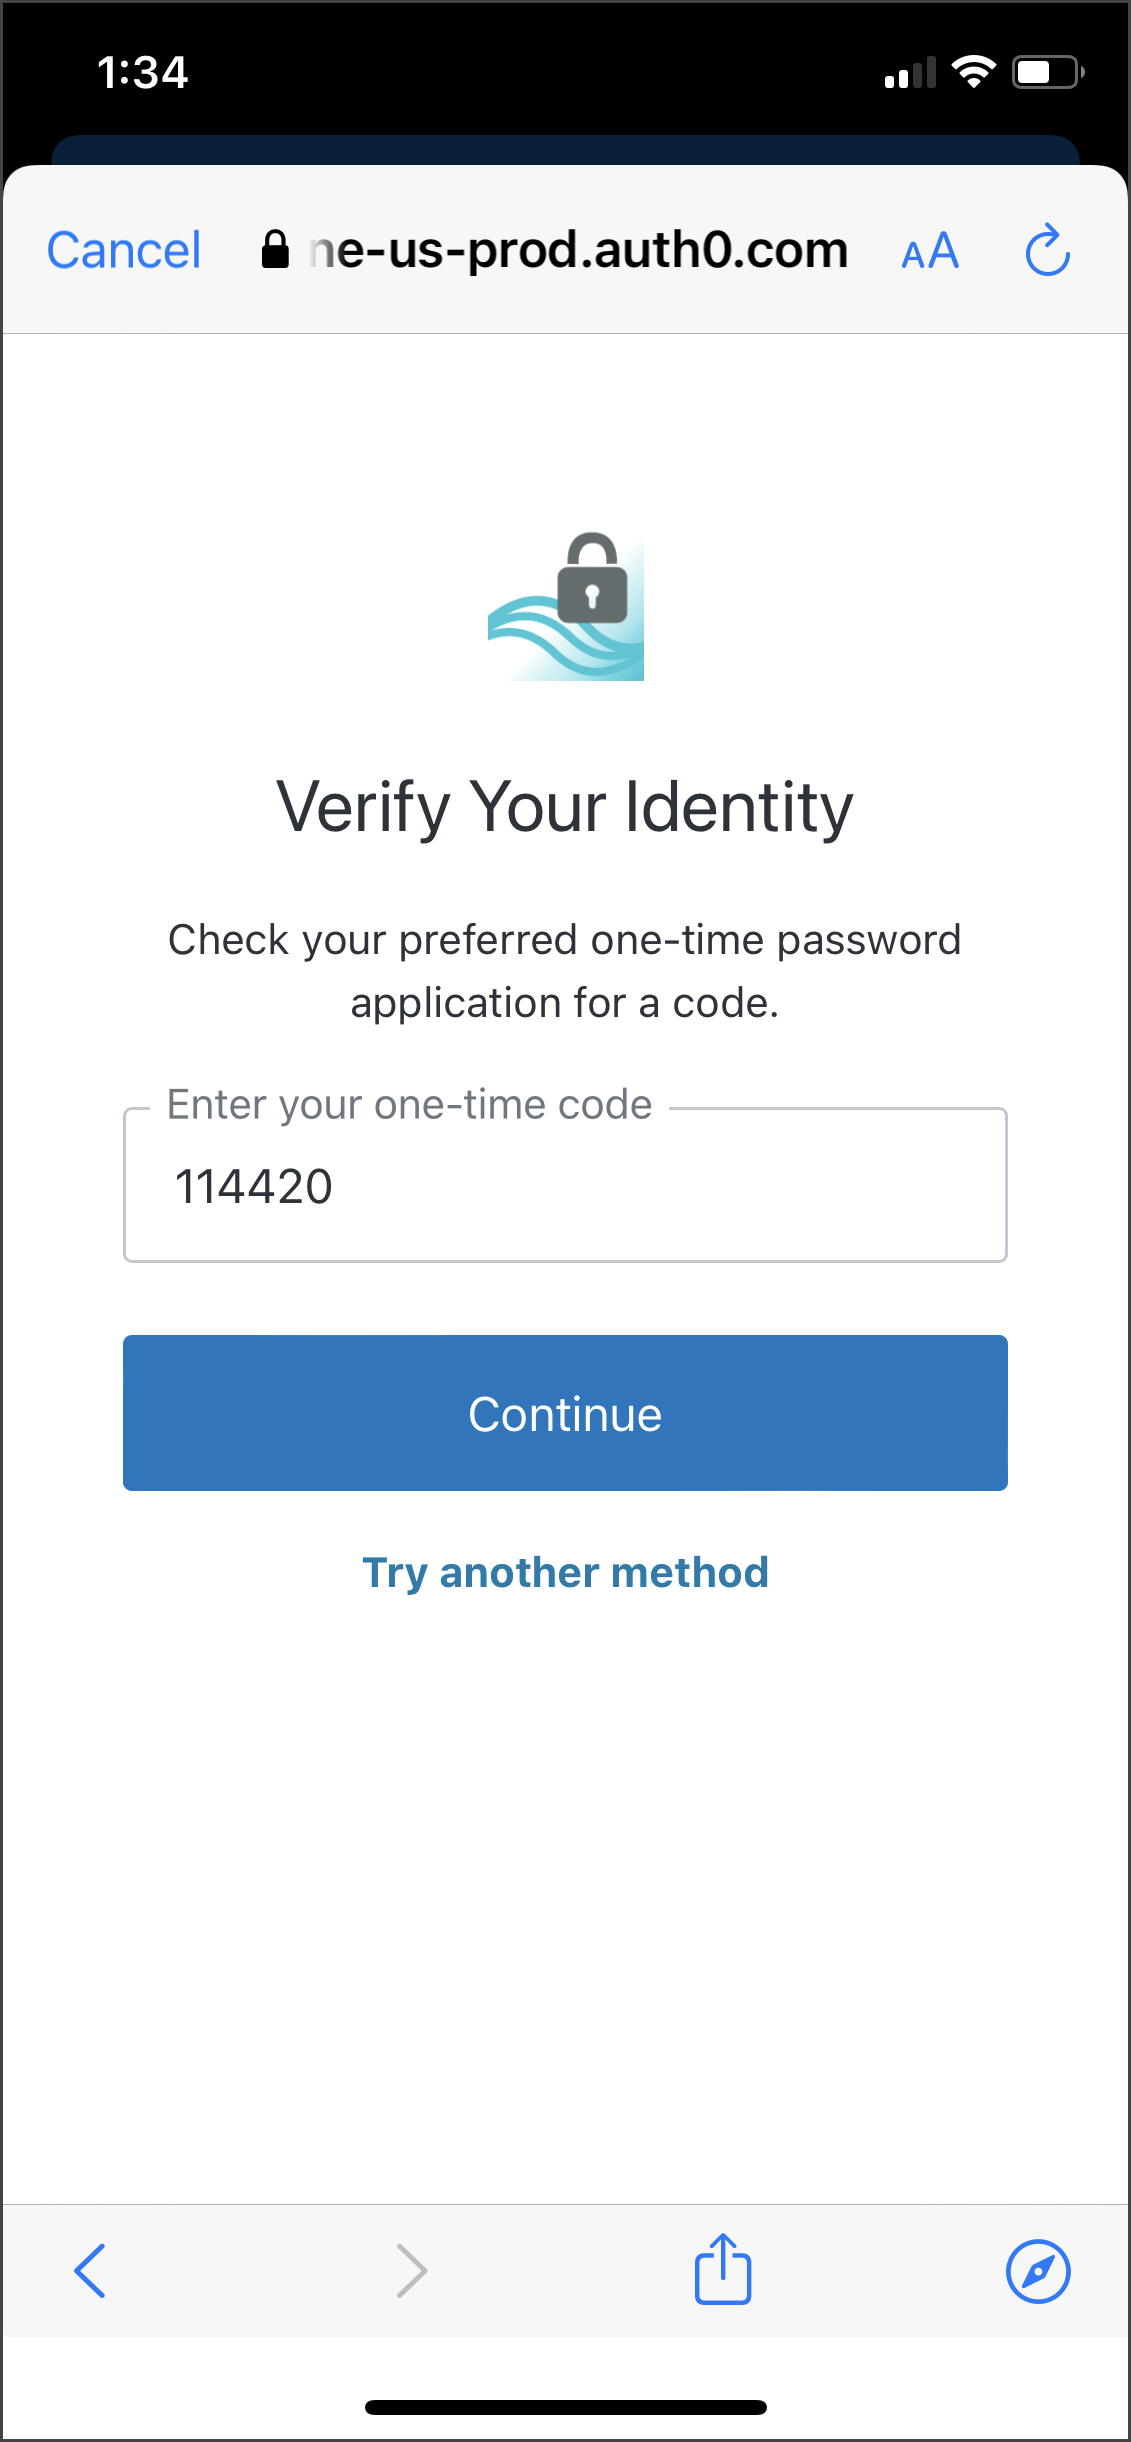
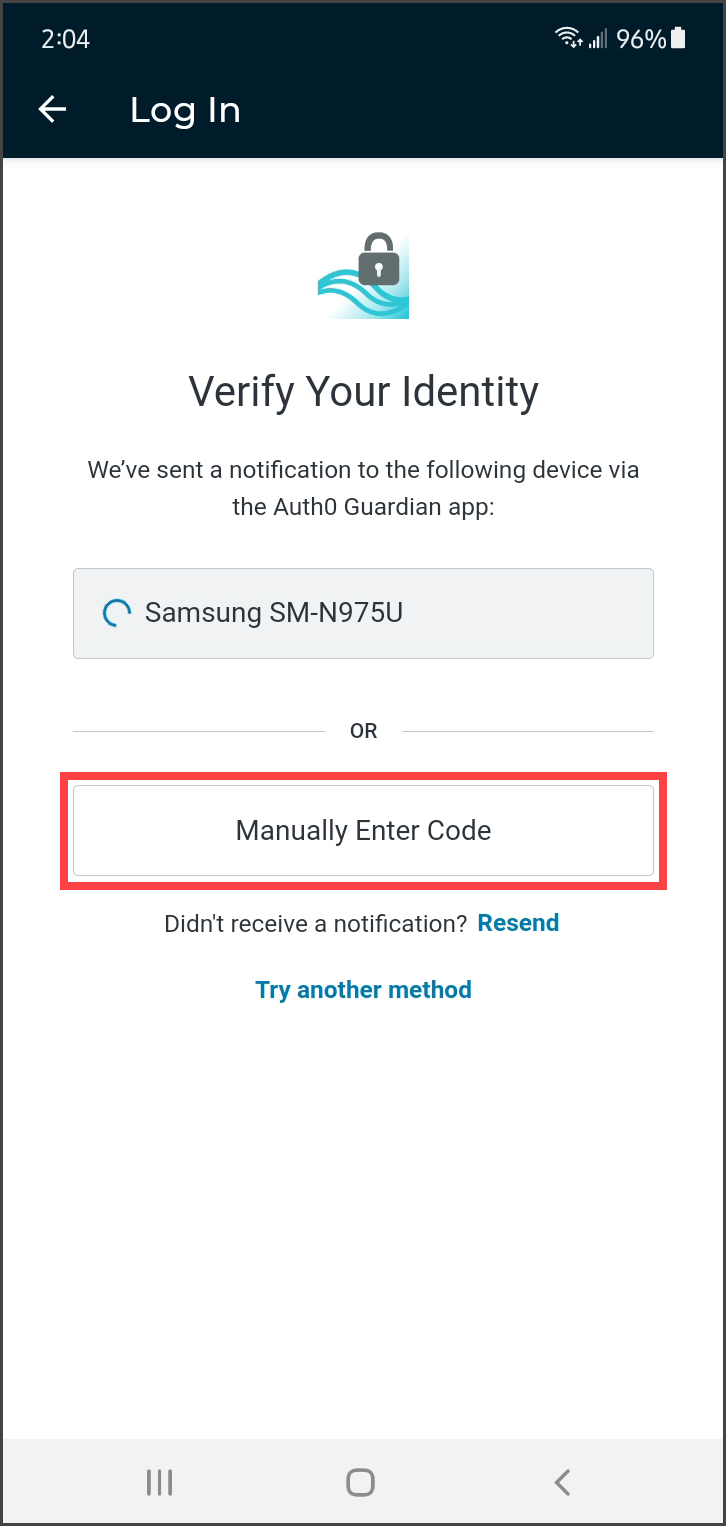 If you do not receive the notification, you can choose to have the notification resent, or you can manually enter the code by tapping Manually Enter Code on the 'Verify Your Identity' screen.
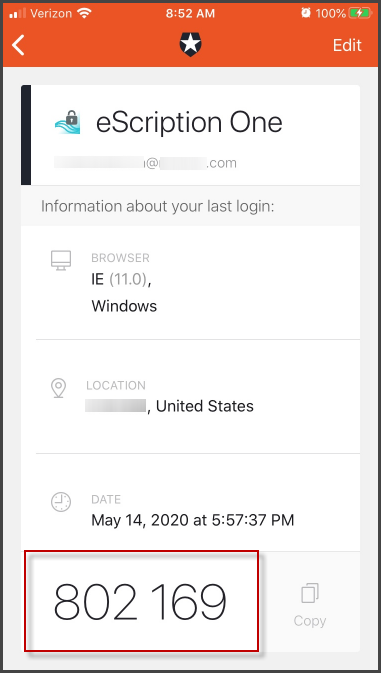
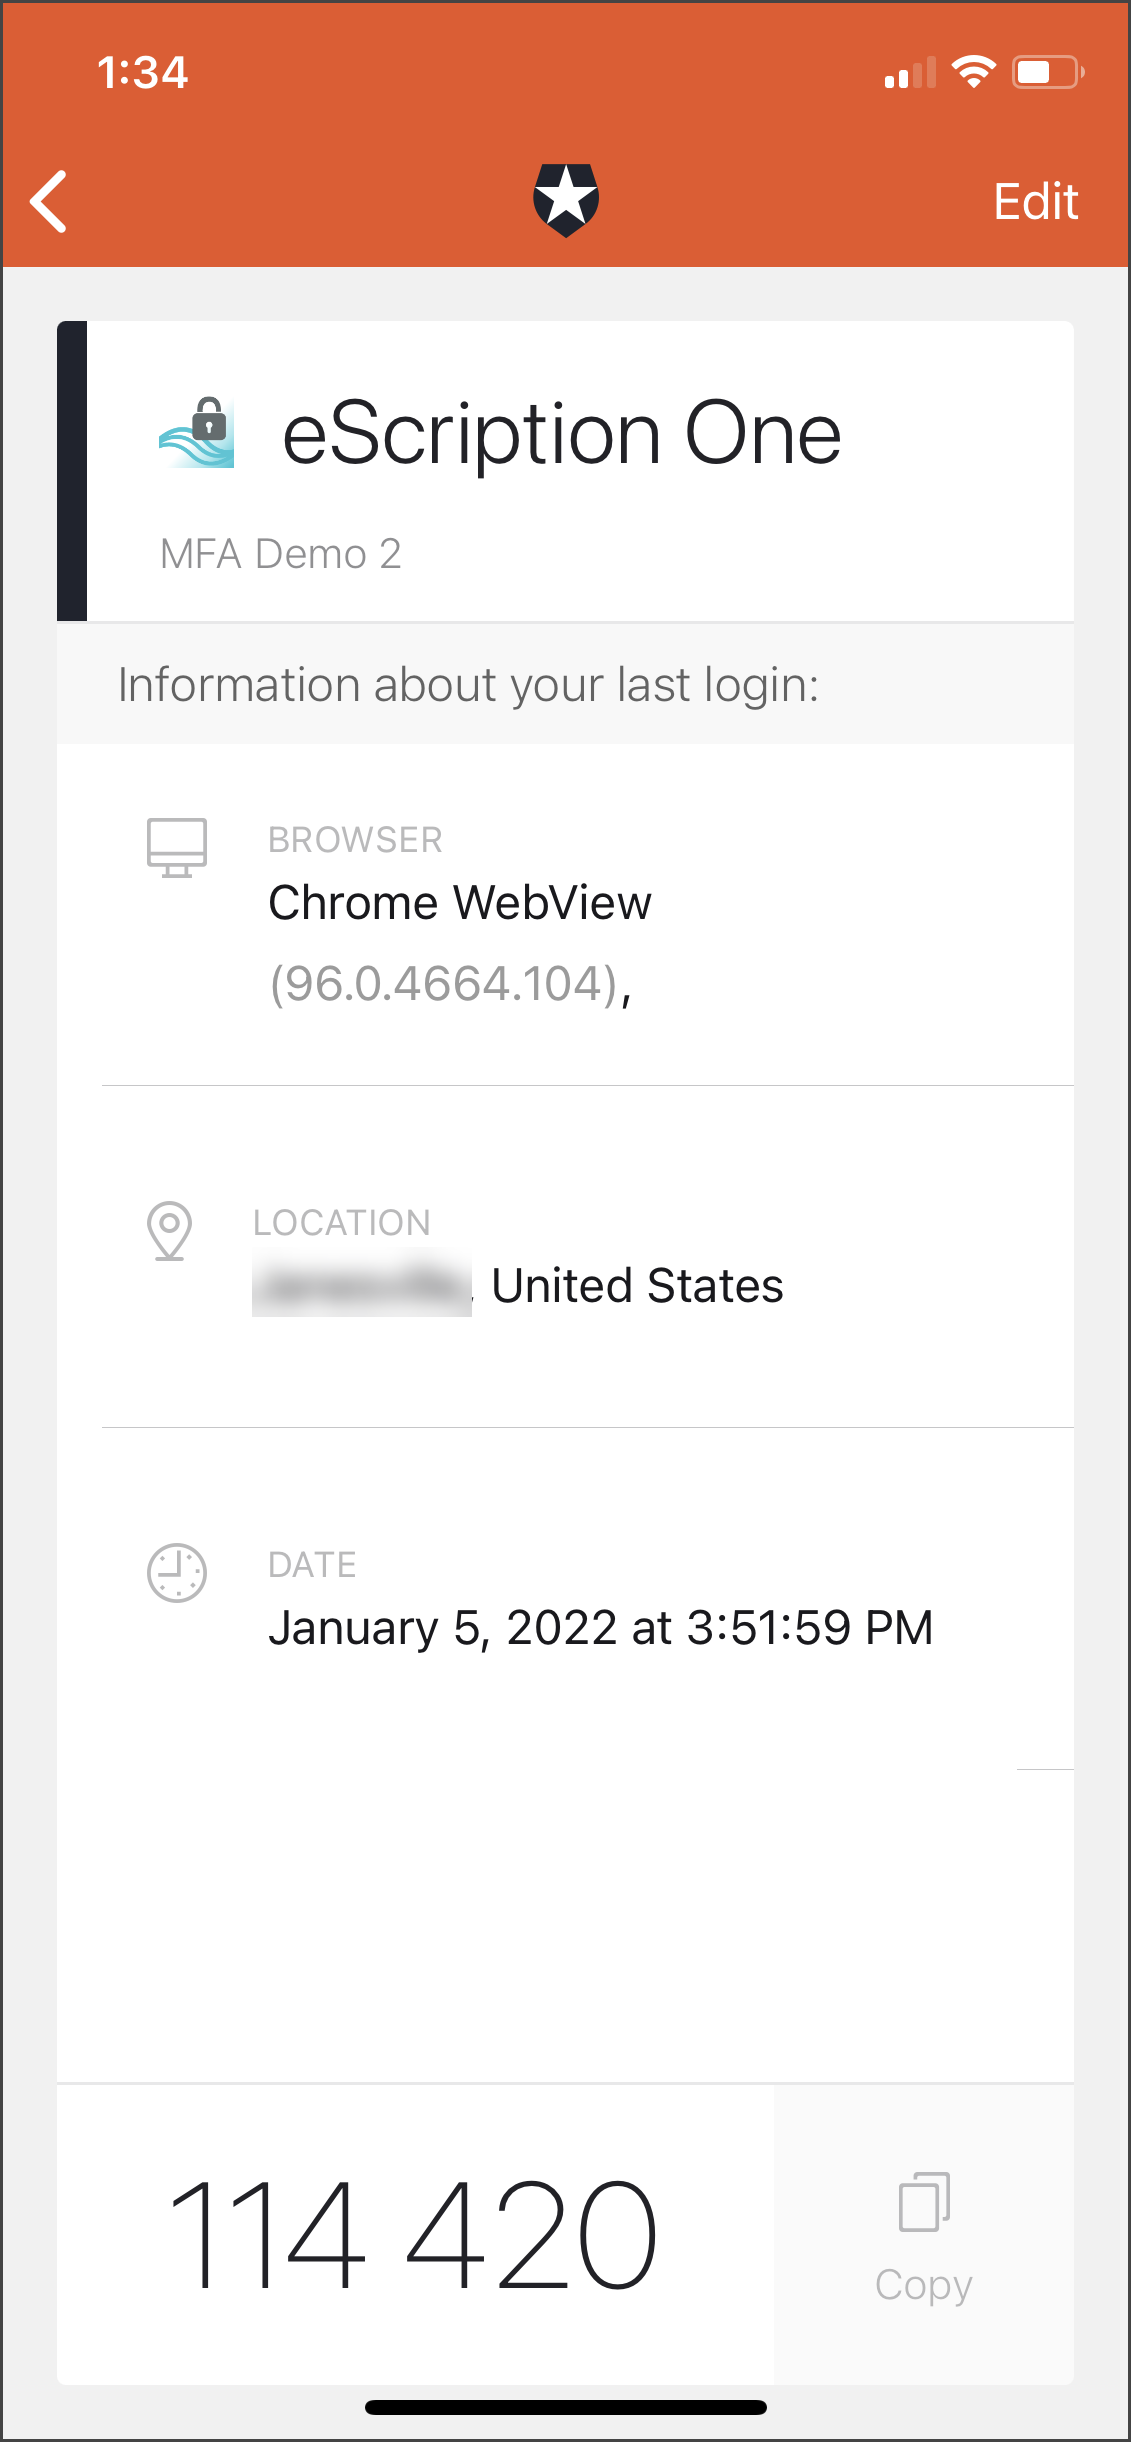
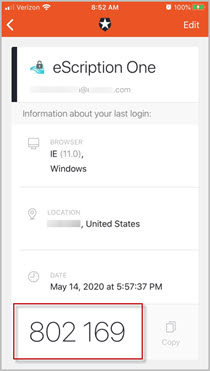
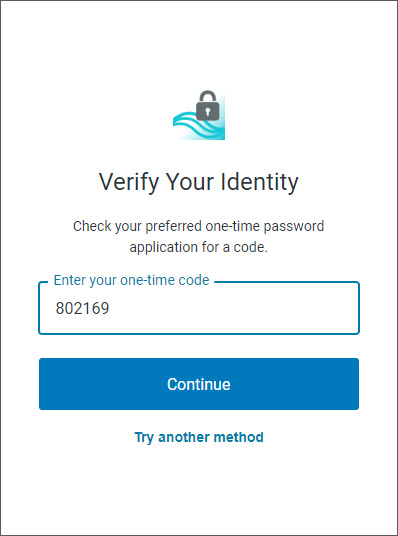
Open the Guardian app and choose the token for your user. A one-time code will appear at the bottom of the Guardian app. Enter this code on the 'Verify Your Identity' screen.
Click Continue. After successful authentication, you will automatically be logged into your eSOne app.
Note
If you cannot log in with MFA after having done so previously, please contact your admin to have it reset.
Email Verification
After logging in, the eSOne Mobile application checks for a valid and verified email address (if your client requires this).
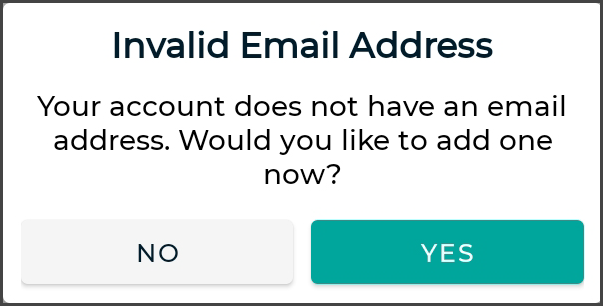
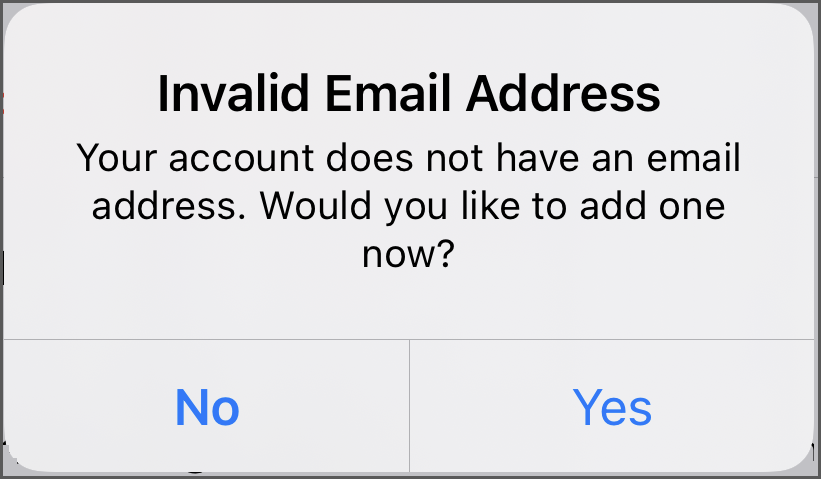
Valid Email Check: If you have not entered an email address, you will be prompted to add one. You can skip this step, but you will be prompted again on your next login.
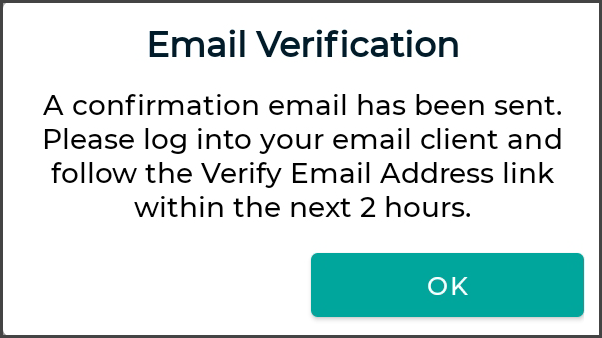
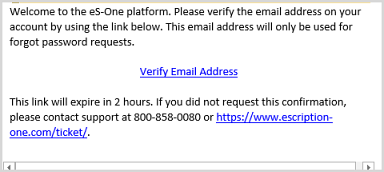
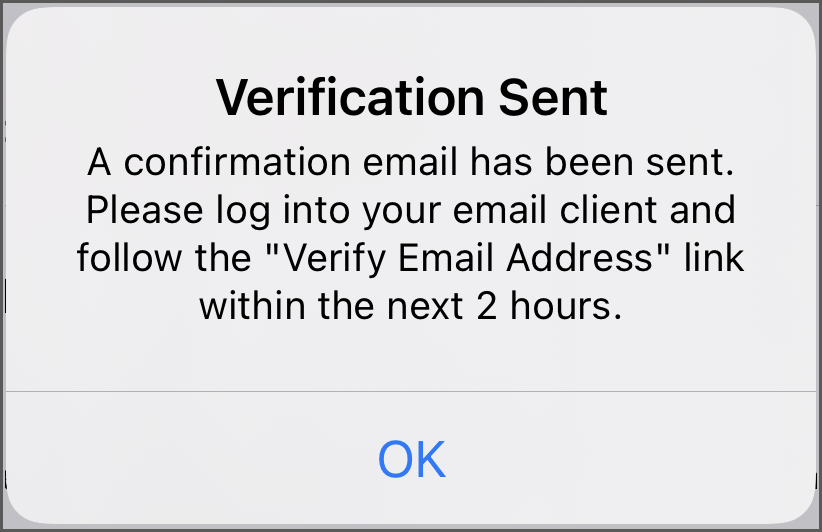
Email verification: Once an email address is added, an email is sent to your address to verify it.
Click the link in the email, and your address will be verified.
When accessing the eSOne Mobile application without a verified email address, you will receive a notice, but will still be able to use the application.
Editing email address: To edit the user email address, go to Contact Information in the Settings tab. If the email address has previously been verified and is then edited, you will be prompted to verify the updated email address.
Resetting your Password
If you have forgotten your password, you can reset it using the steps below.
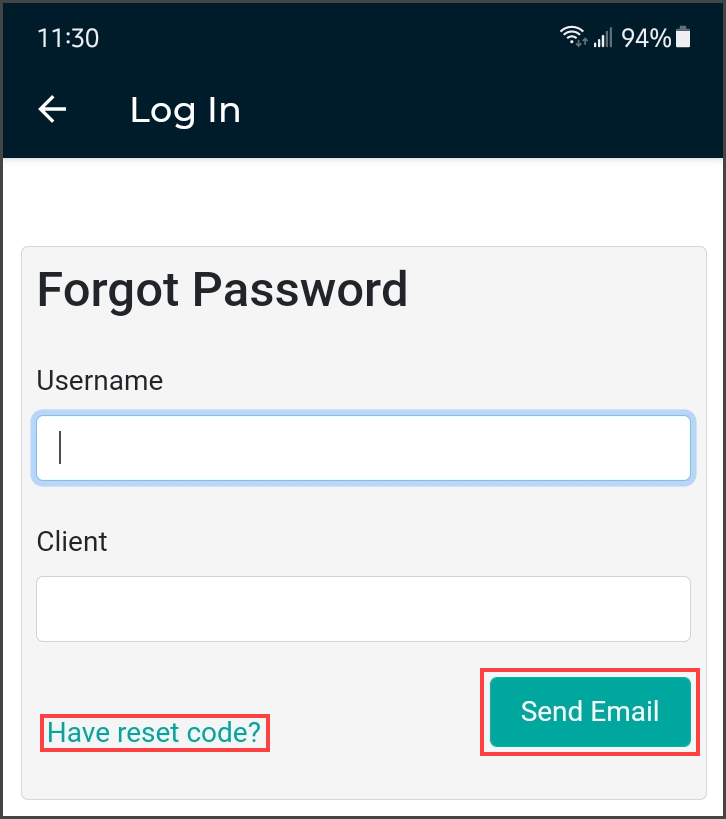 2. On the ‘Forgot Password’ screen, click either the Send Email button or Have reset code? link (if you already have a reset code).
If you did not enter your Username and Client Code on the login screen, you will need to enter them here.
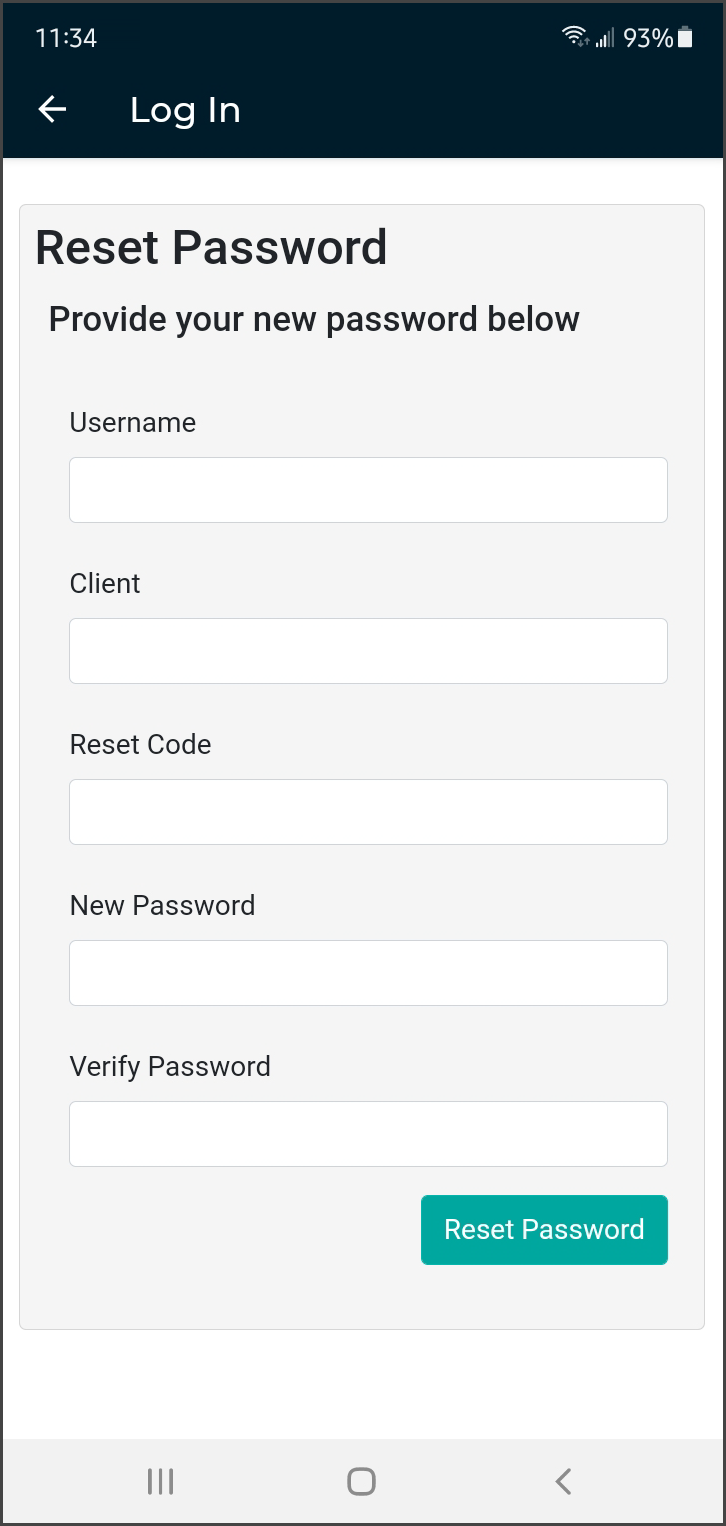 3. If you choose Send Email, you must have a verified email address. If so, an email will be sent to you with instructions and a link for resetting your password. Once you click the link in the email, the ‘Reset Password’ screen appears with the reset code filled in. Enter the remaining information, then click the Reset Password button.
If you choose Have reset code?, the ‘Reset Password’ screen appears without the reset code filled in. Enter the code and remaining information, then click the Reset Password button.
If you selected Send Email, you can also copy the code from the email and paste it here.
Using eSOne Mobile for Android
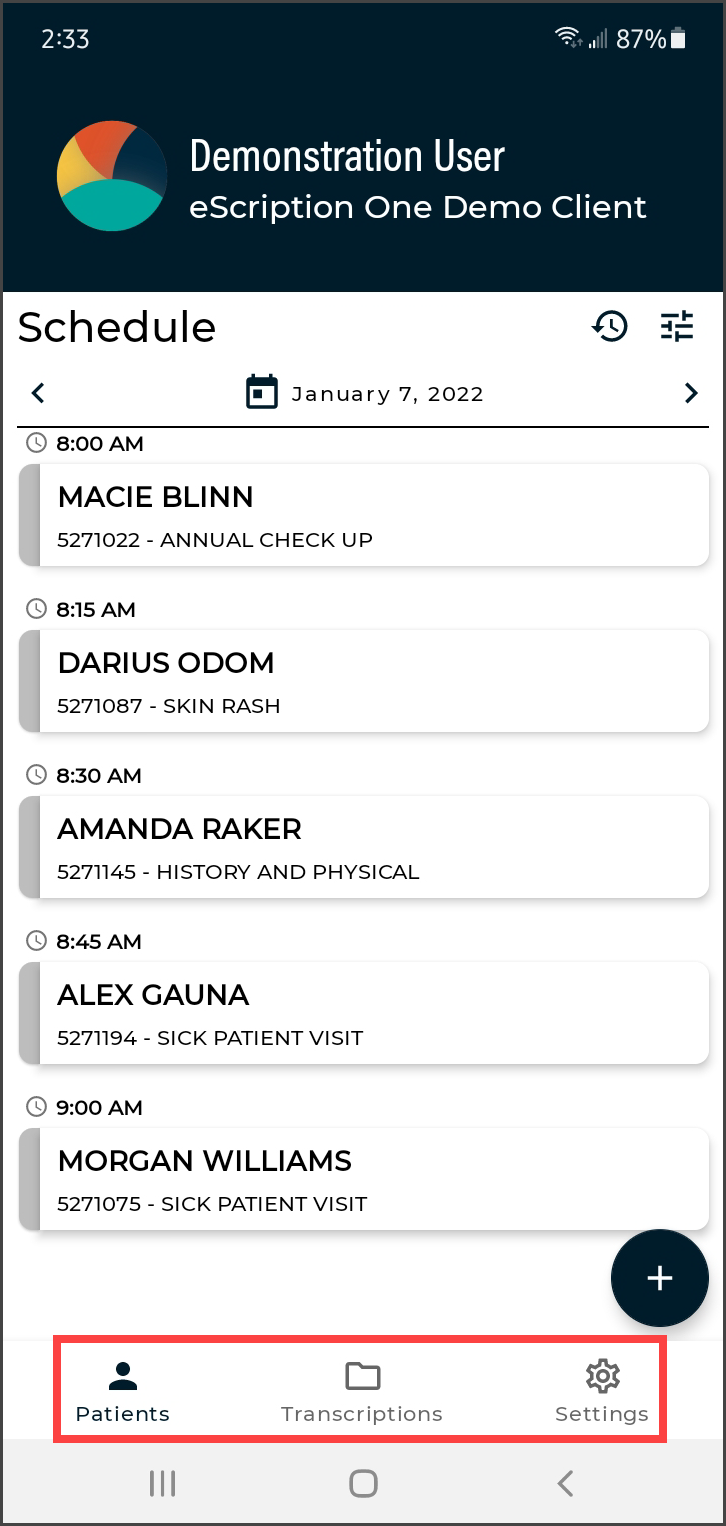 The eSOne Mobile application screens have three tabs at the bottom: Patients, Transcriptions, and Settings. Use these to navigate between the main screens of the app. The active tab is indicated with bold text and black-filled icons. The eSOne Mobile application displays the Patients tab after your initial login, or the last screen you visited in your previous session.
Patients
The patients tab opens the Patients screen, where users can record new dictations and view patient appointments (in an outpatient workflow) and/or inpatient encounters (in an inpatient workflow).
Transcriptions
The Transcriptions tab opens the Transcriptions screen, where users can view, approve/sign, and edit transcriptions.
Settings
The Settings tab opens the Settings screen, where users can configure default settings for appointments, document types, locations, and other application features. Users can also add or switch to linked accounts from this tab, as well as log out of the mobile app.
Logging Out
For security reasons, we recommend logging out of the mobile app when it is not in use. To do so, navigate to the Settings tab then tap the Logout icon in the upper right corner.
Patient Confidentiality
To ensure patient confidentiality, app content will be hidden when switching between apps. Screenshots will also not be permitted when the app is in use.
The Patients Tab
Use the Patients tab to view a list of patient appointments/encounters and create dictations.
By default, this tab is named Patients. The account administrator can change this label to something more appropriate to the client.
The eSOne mobile app supports outpatient and inpatient schedules. By default, the app opens to schedule (outpatient) mode. The mode can be changed in Filters the schedule filters. This section of the user guide will focus on the outpatient schedule mode. See Inpatient Workflow for more information about inpatient mode.
Filter and Sort the Schedule
Filters
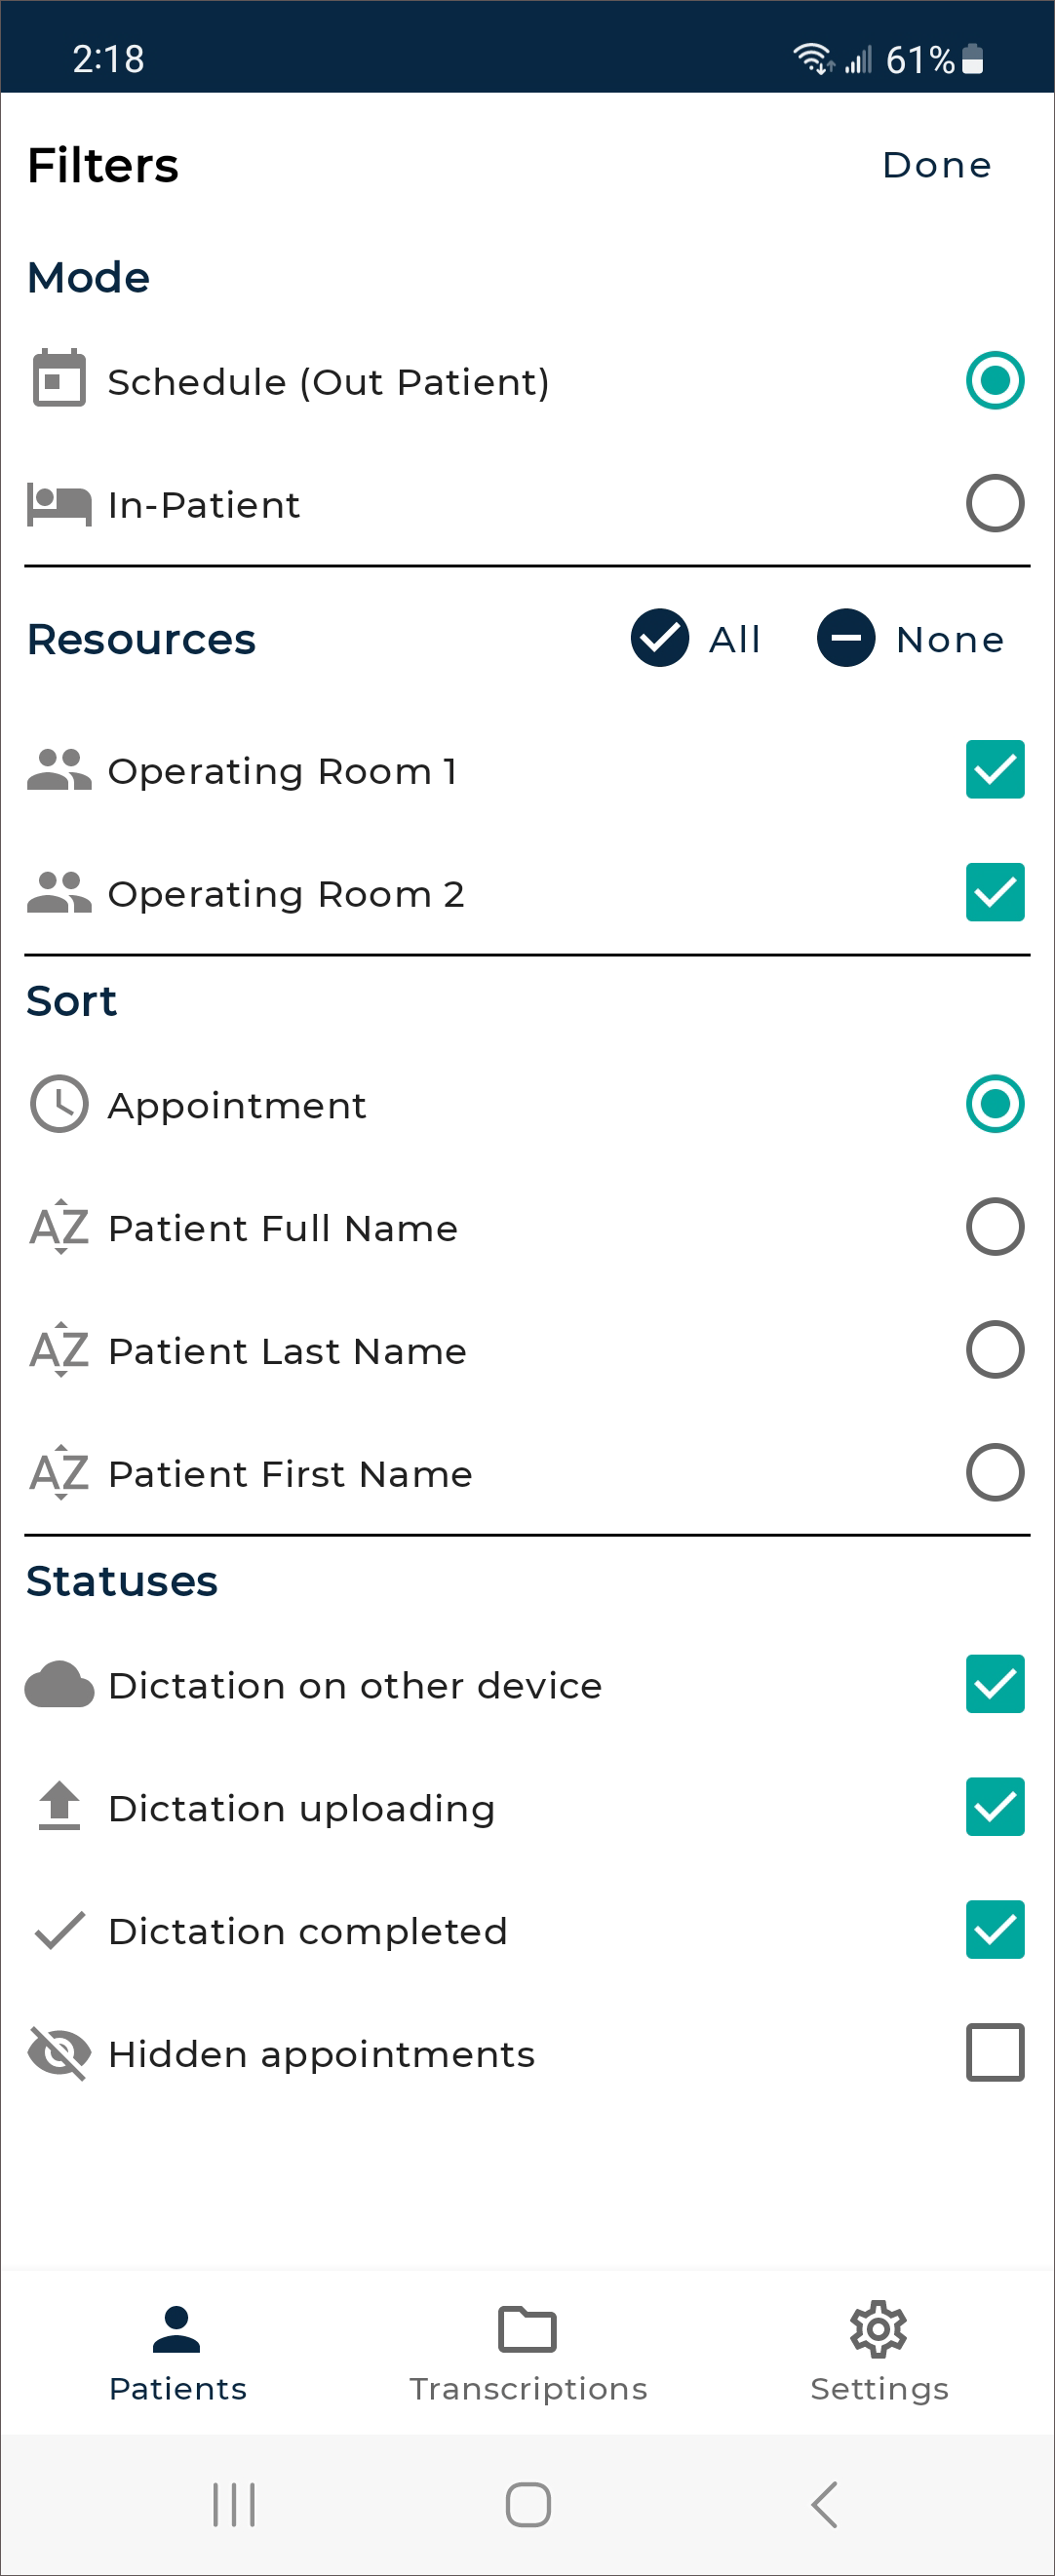
To change the schedule mode and filter the schedule, tap ![]() to open the Filters page. Tap the desired mode and/or filter and tap Done at the top of the Filters page to save changes.
to open the Filters page. Tap the desired mode and/or filter and tap Done at the top of the Filters page to save changes.
Mode
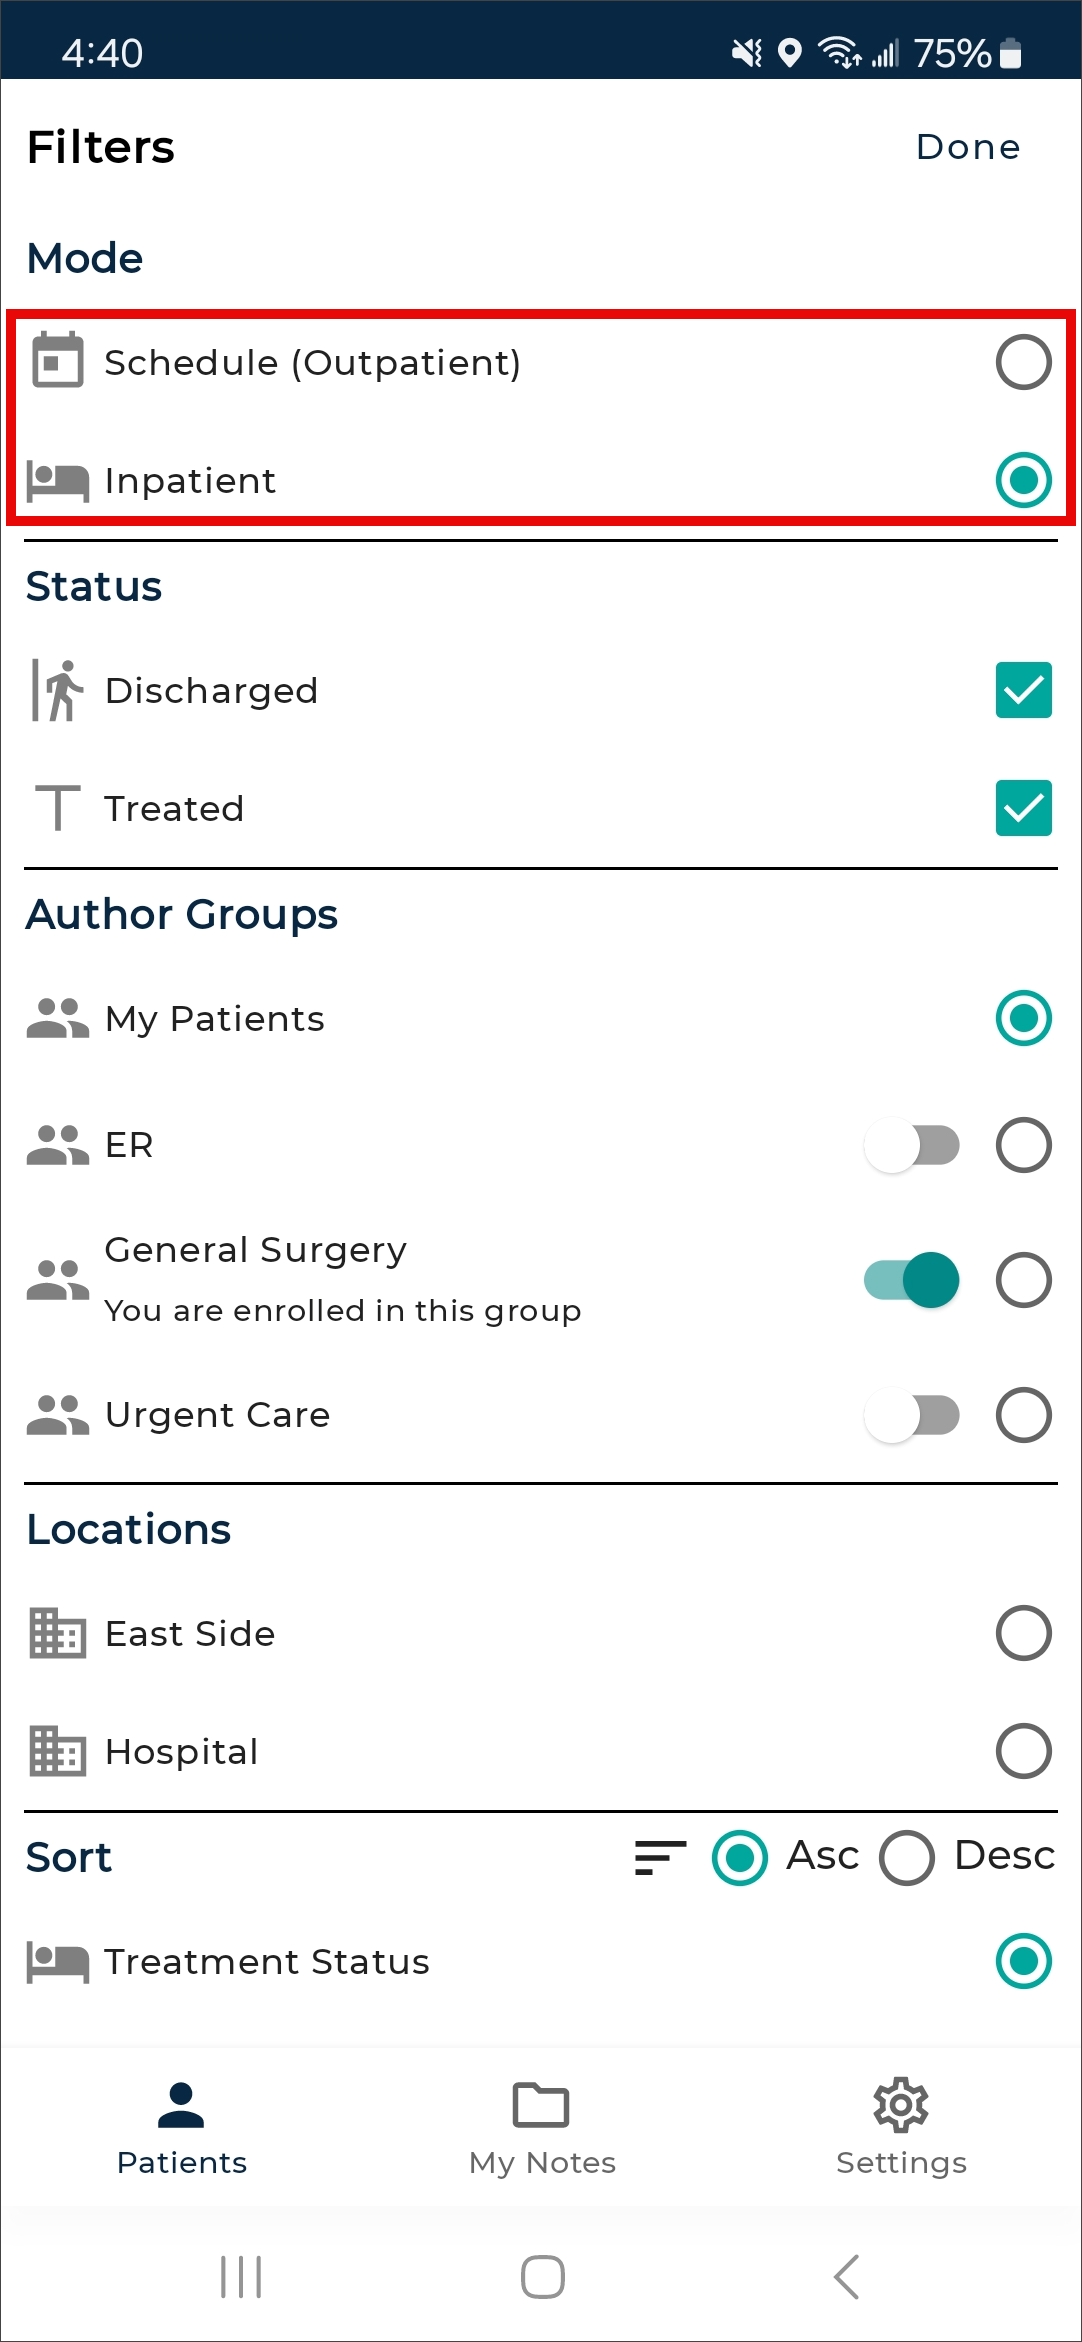
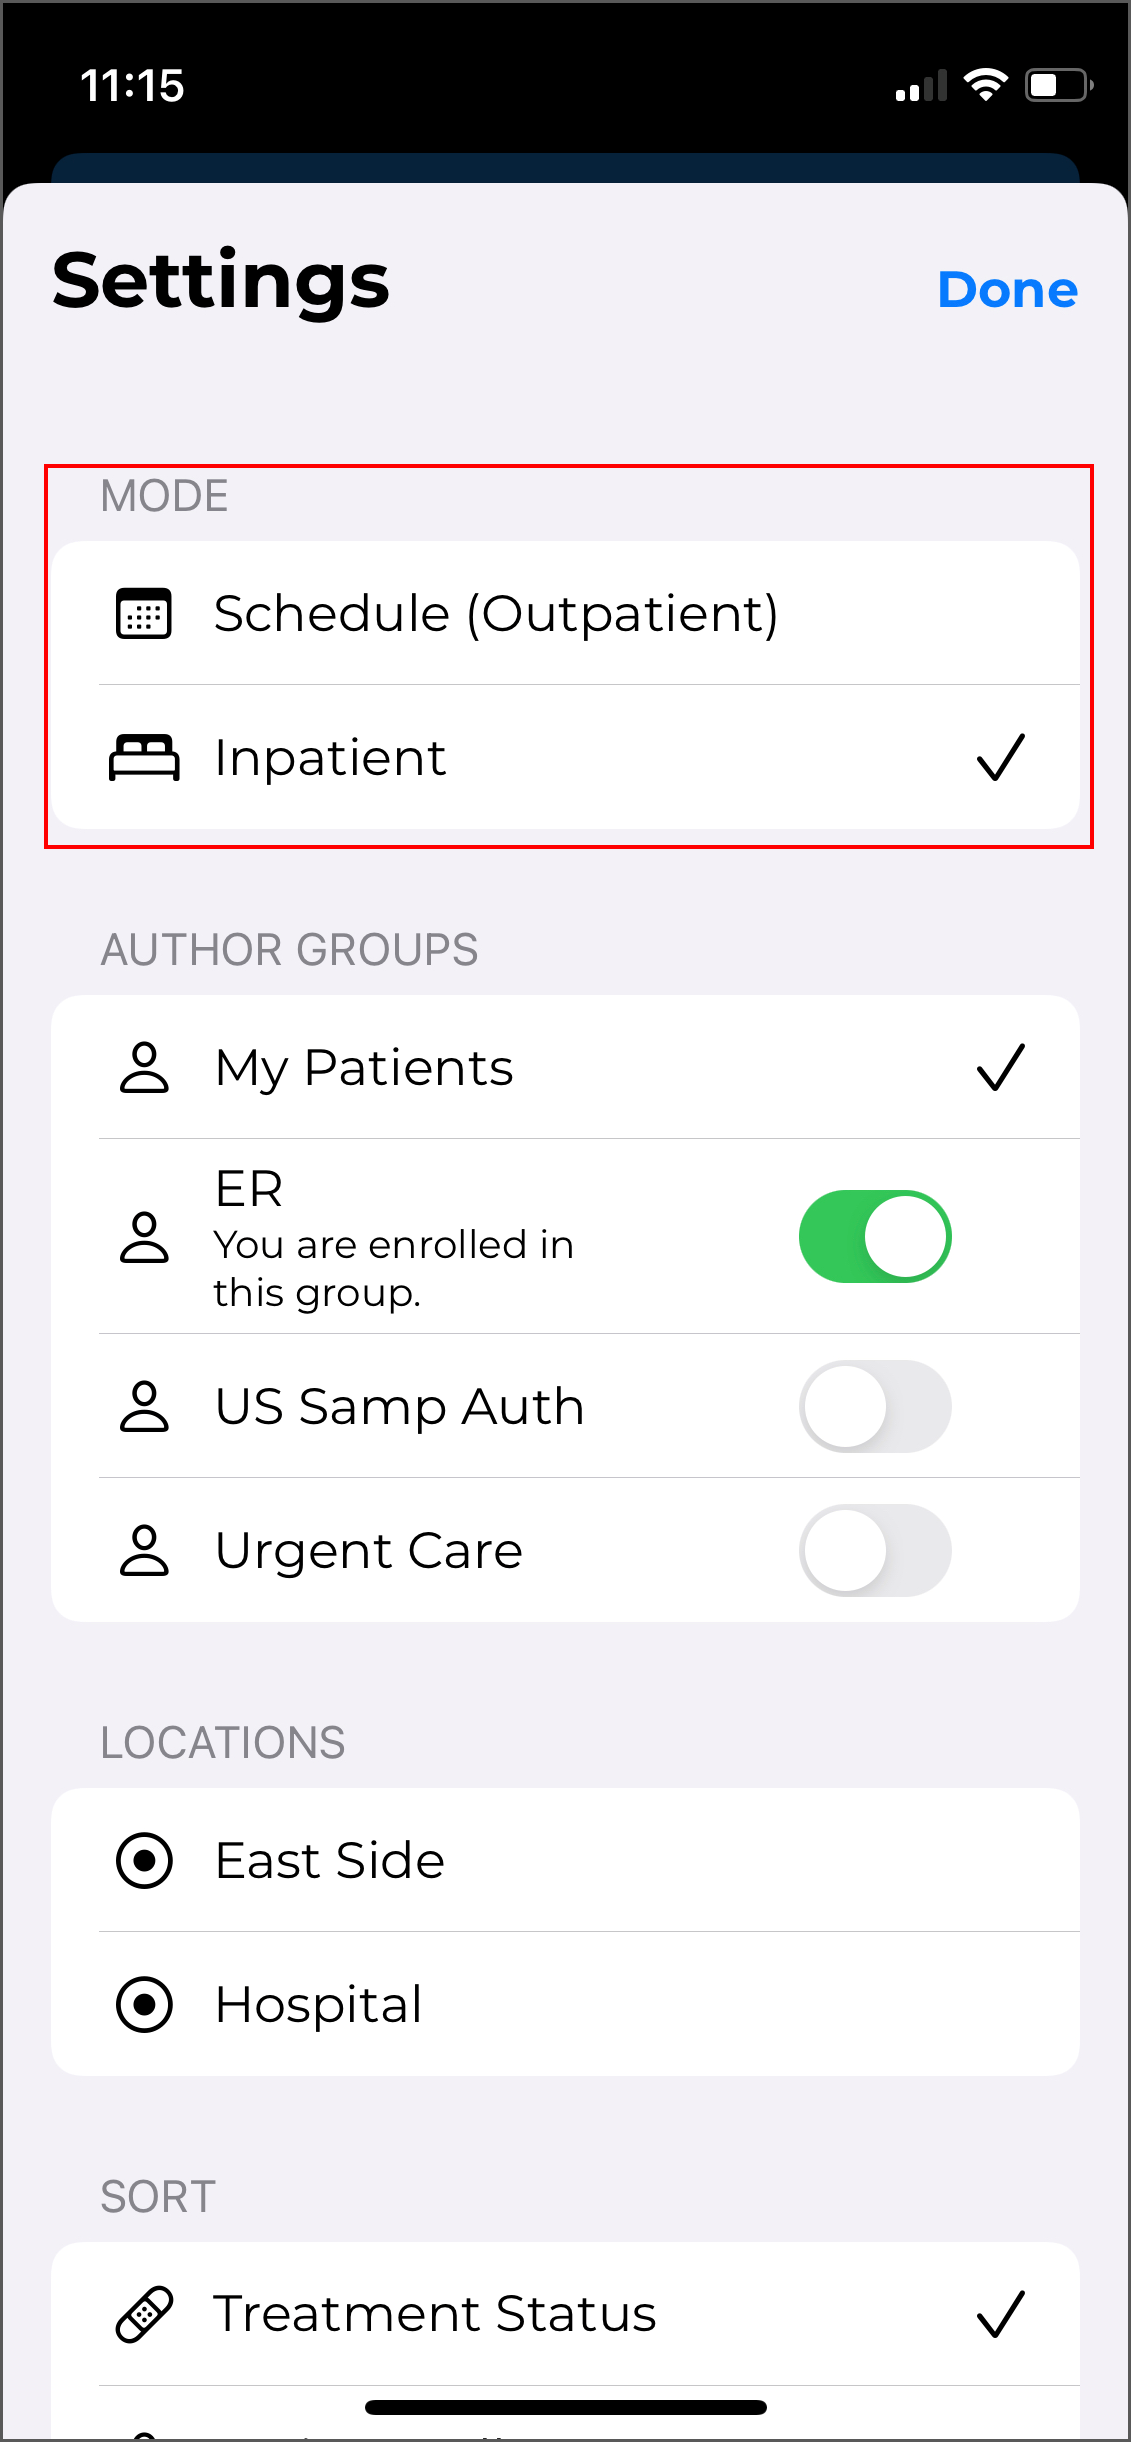
If the client supports both inpatient and outpatient workflows, users can switch between them by tapping the desired mode. For more information regarding the inpatient workflow within the mobile app, please see Inpatient Workflow. The following information in this section assumes an outpatient workflow is being used.
Resources
Schedule resources are used to assign patient appointments or encounters to specific clinicians or groups of clinicians. If a clinician belongs to multiple resource groups they can filter their appointment list to only display the selected resources.
Dictation Status
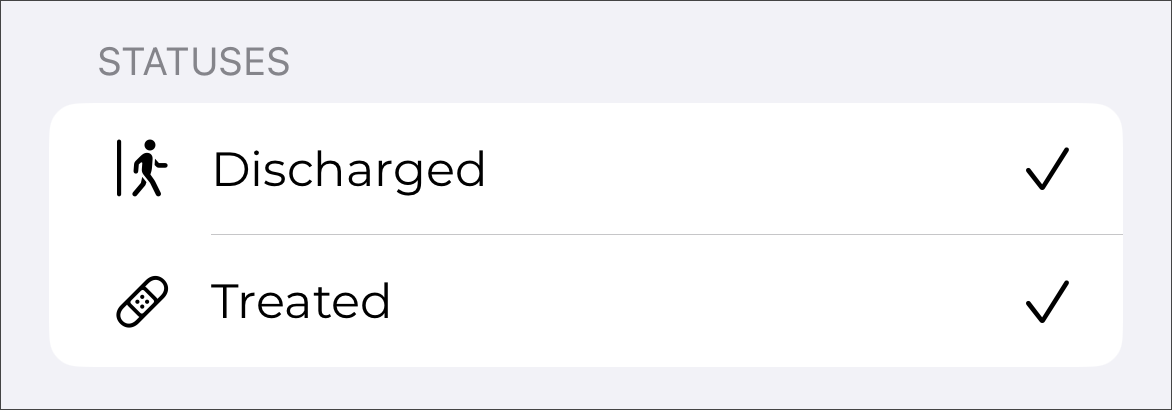
Users can minimize the number of appointments displayed on the schedule by filtering the list based on the dictation status. Statuses available for filtering are:
-
Dictation from another source - appointments with a dictation uploaded from a different mobile device or dictation source (InSync, InTouch, ShadowLink, etc.), or uploaded from this device but no longer stored on this device. Dictations uploaded from other devices or apps cannot be played from this device.
-
Dictation uploading - Dictations in the process of being uploaded to eSOne.
-
Dictation completed - Dictations that have been uploaded to eSOne from this device.
-
Hidden appointments - Appointments that the provider has hidden from the mobile app schedule.
Dictations that have a started (on-hold) dictation cannot be filtered out.
After all sorting and filtering changes have been made, scroll to the top of the page and press Done.
Sorting
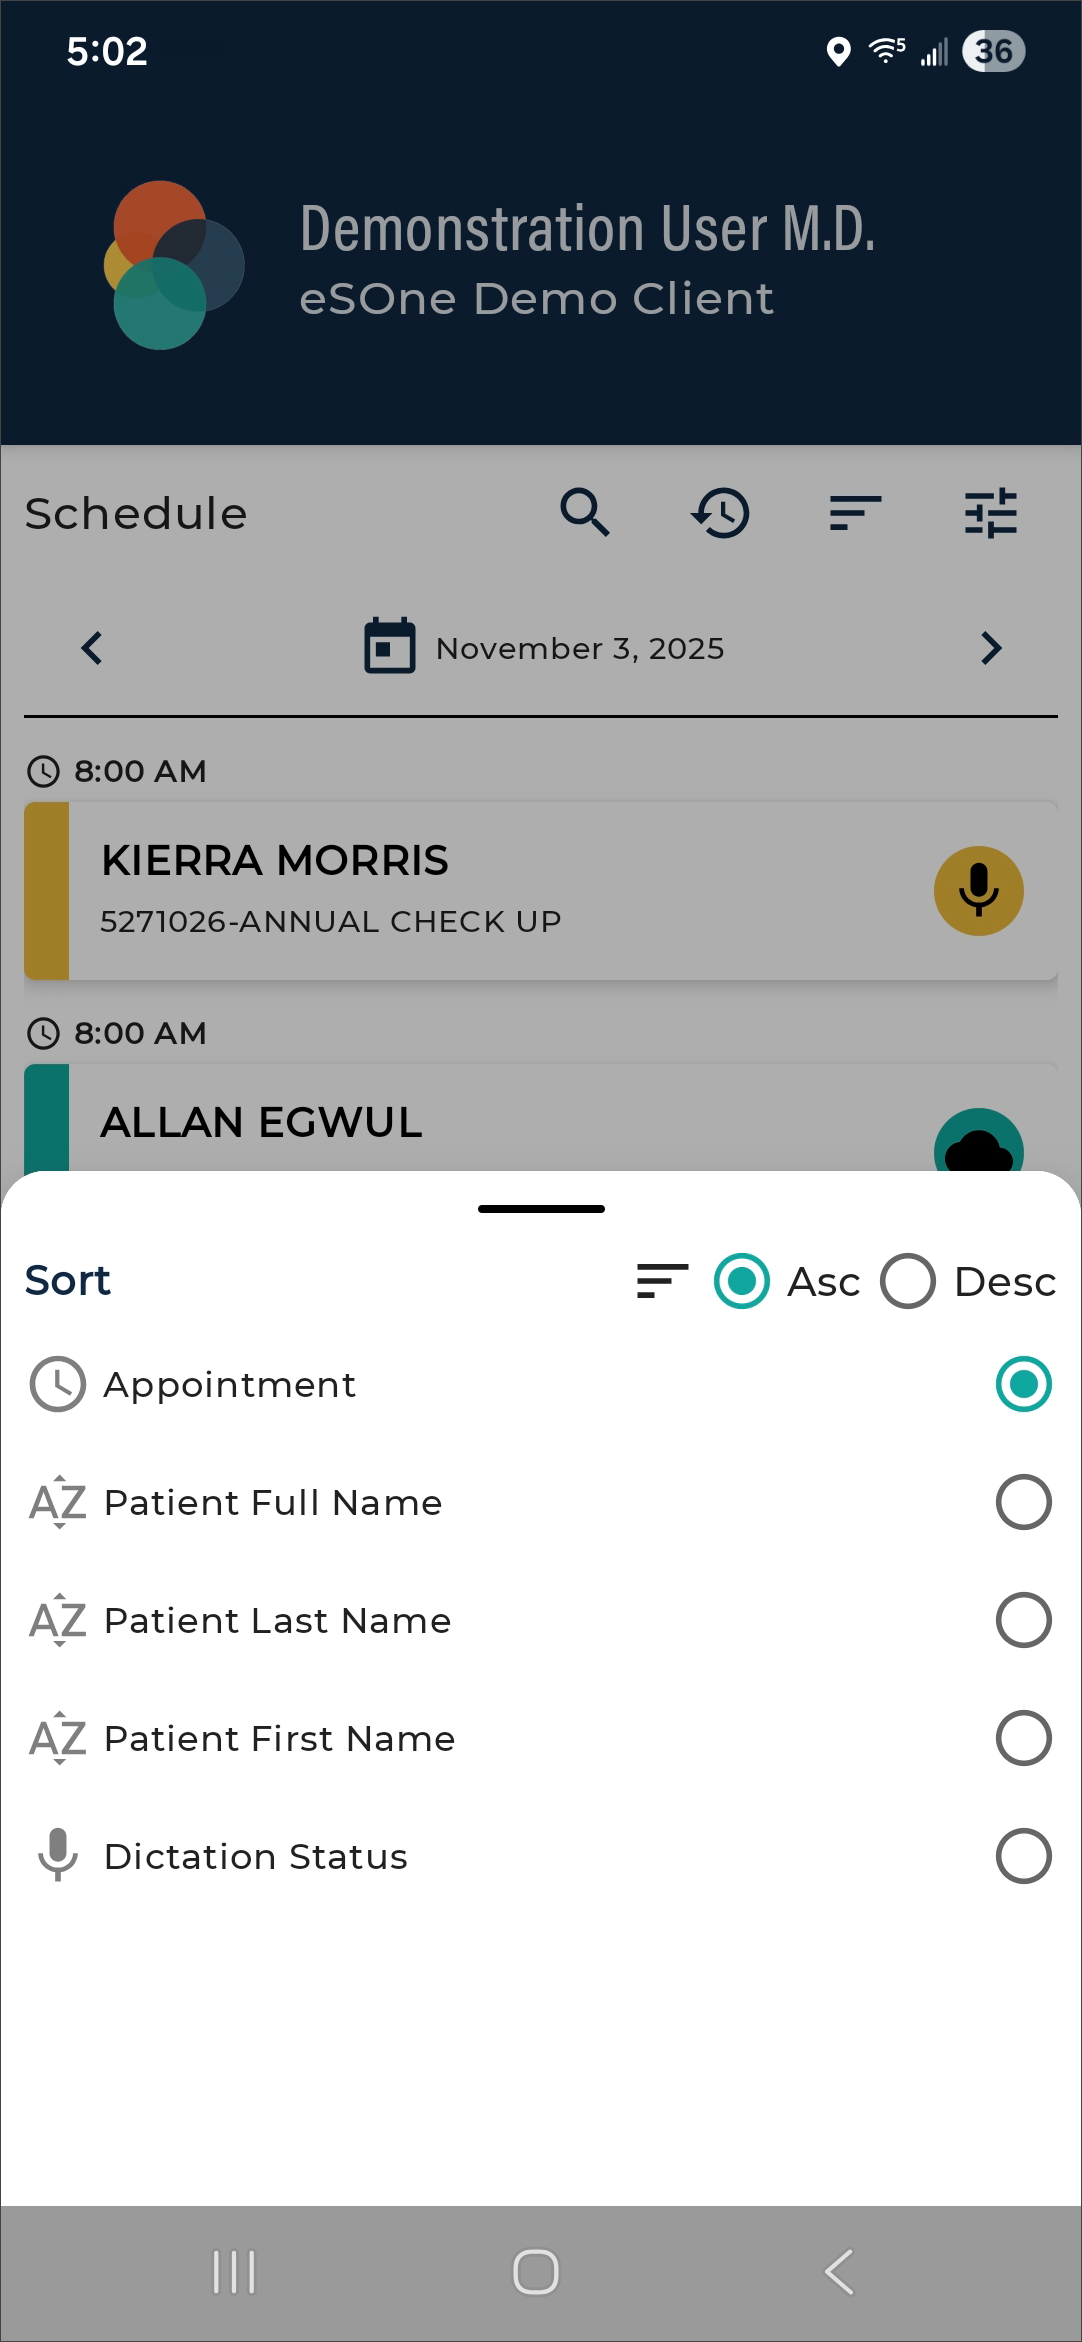
To change the sort order of the schedule, tap ![]() to open the sort options. One sort option can be applied to reorder the schedule based on user preference. The schedule can be sorted ascending (oldest to newest dates or A to Z) or descending (newest to oldest or Z to A). Tap the desired sort order (ascending or descending) then tap the sort option to order the schedule based on:
to open the sort options. One sort option can be applied to reorder the schedule based on user preference. The schedule can be sorted ascending (oldest to newest dates or A to Z) or descending (newest to oldest or Z to A). Tap the desired sort order (ascending or descending) then tap the sort option to order the schedule based on:
-
Appointment Time - appointments will be ordered based on the time of the appointment, then by dictation status in the following order: No Dictation, On-hold, Uploading, Completed, Dictation from another device).
-
Patient Full Name - appointments will be ordered alphabetically by the patients' full names (if the first names match then the middle initial and/or last names will be used to further order them).
-
Patient Last Name - appointments will be ordered alphabetically by the patients' last names, but will still appear in "First name Last name" format in the schedule list.
-
Patient First Name - appointments will be ordered alphabetically by the patients' first names.
-
Dictation Status - When sorted ascending, patients will be sorted first by dictation status (Dictation on Hold, Upload Complete, Dictation Not on Device) then by patient name.
Schedule
Patients and appointments will only appear in the Patients tab if the client is providing eSOne a data feed. If a data feed is not provided, users can create new dictations and optionally input a patient identifier.
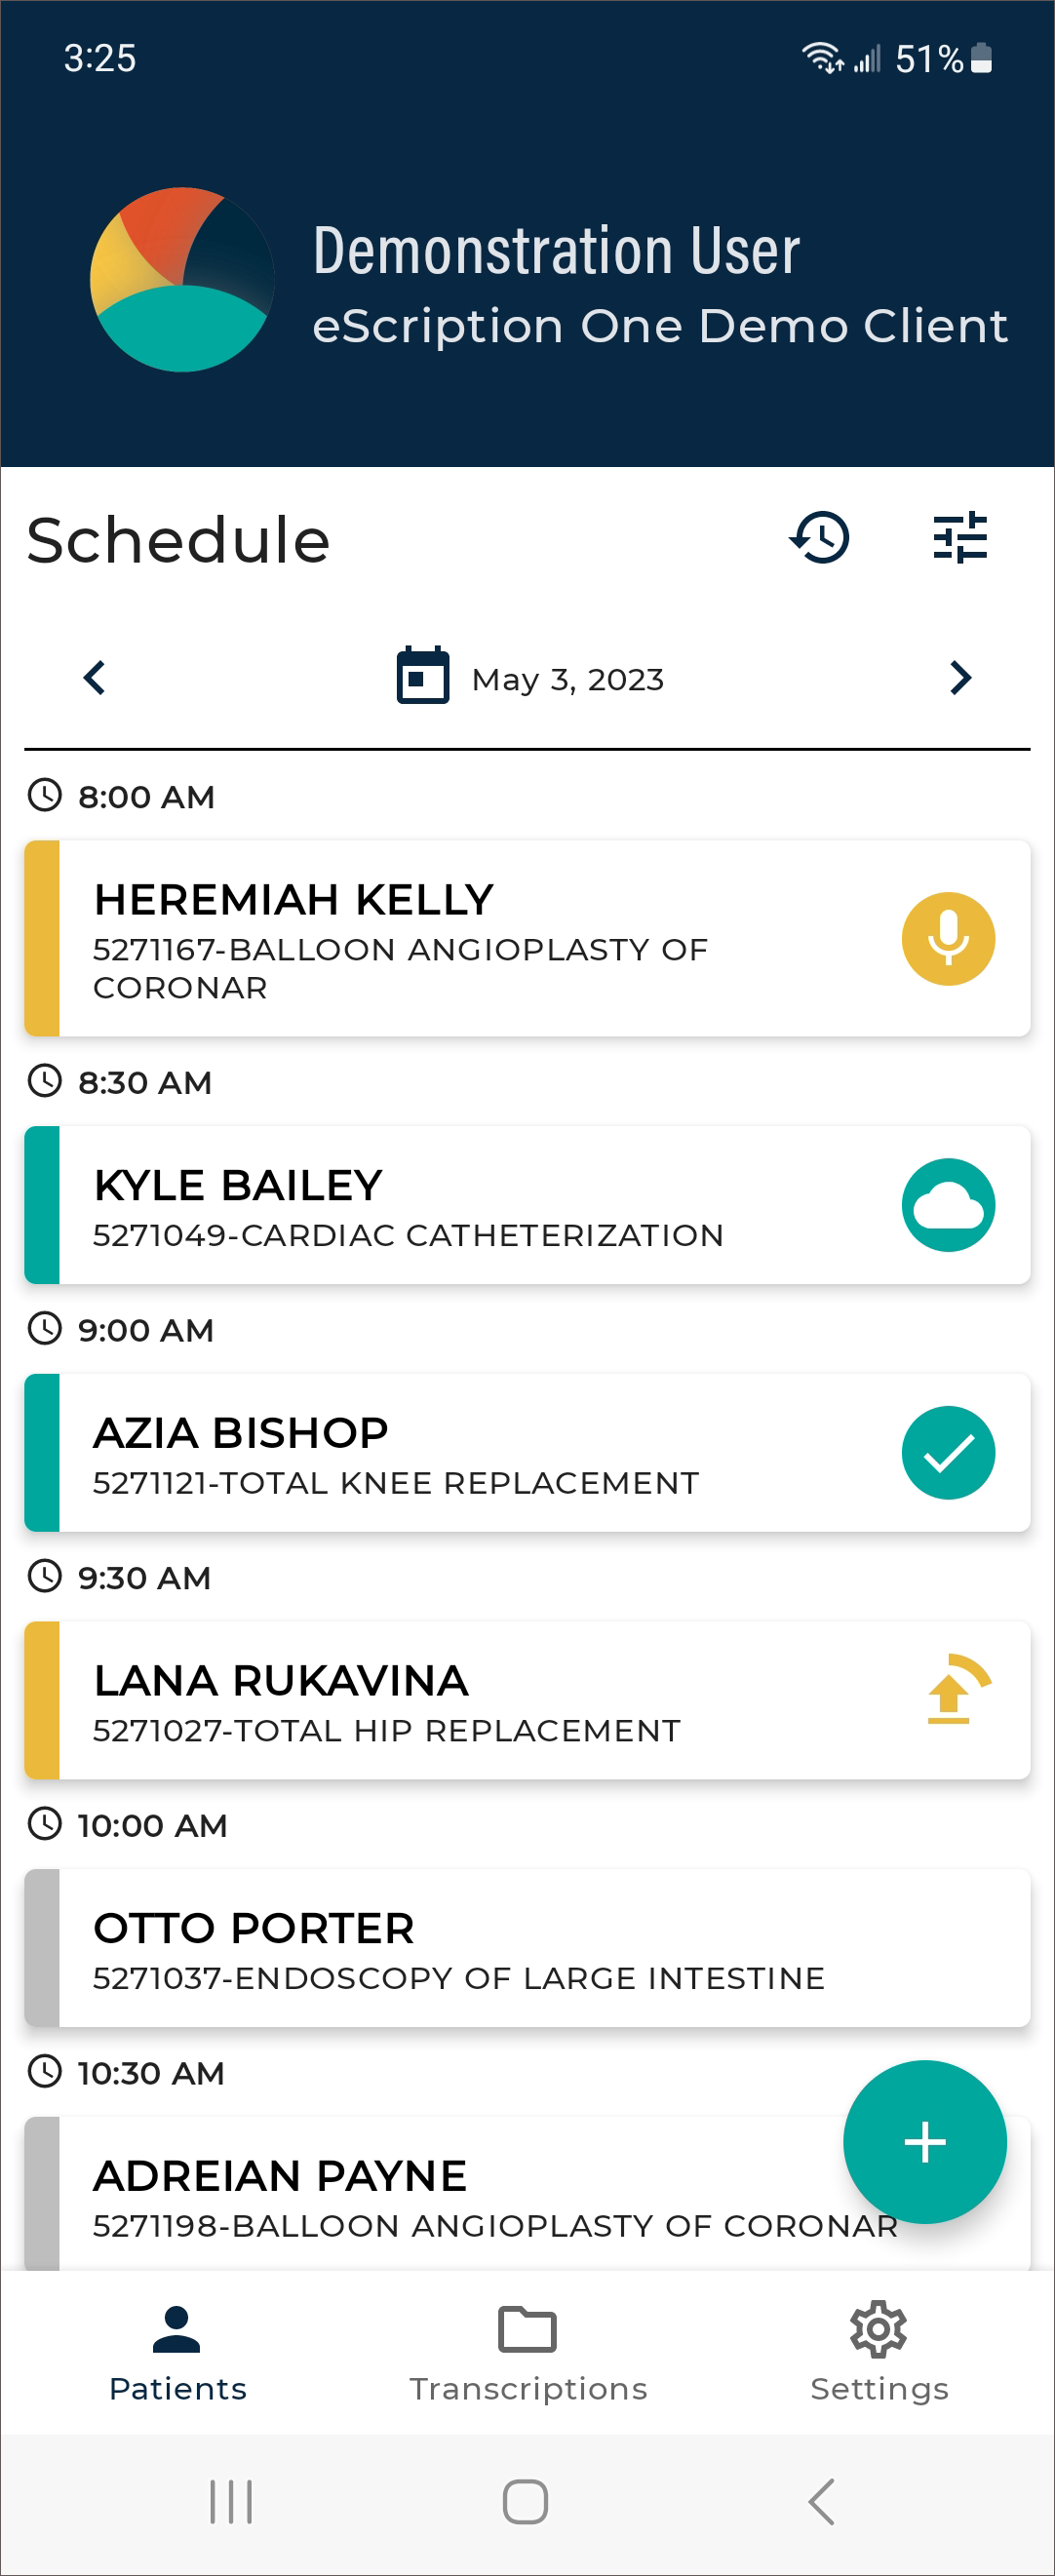
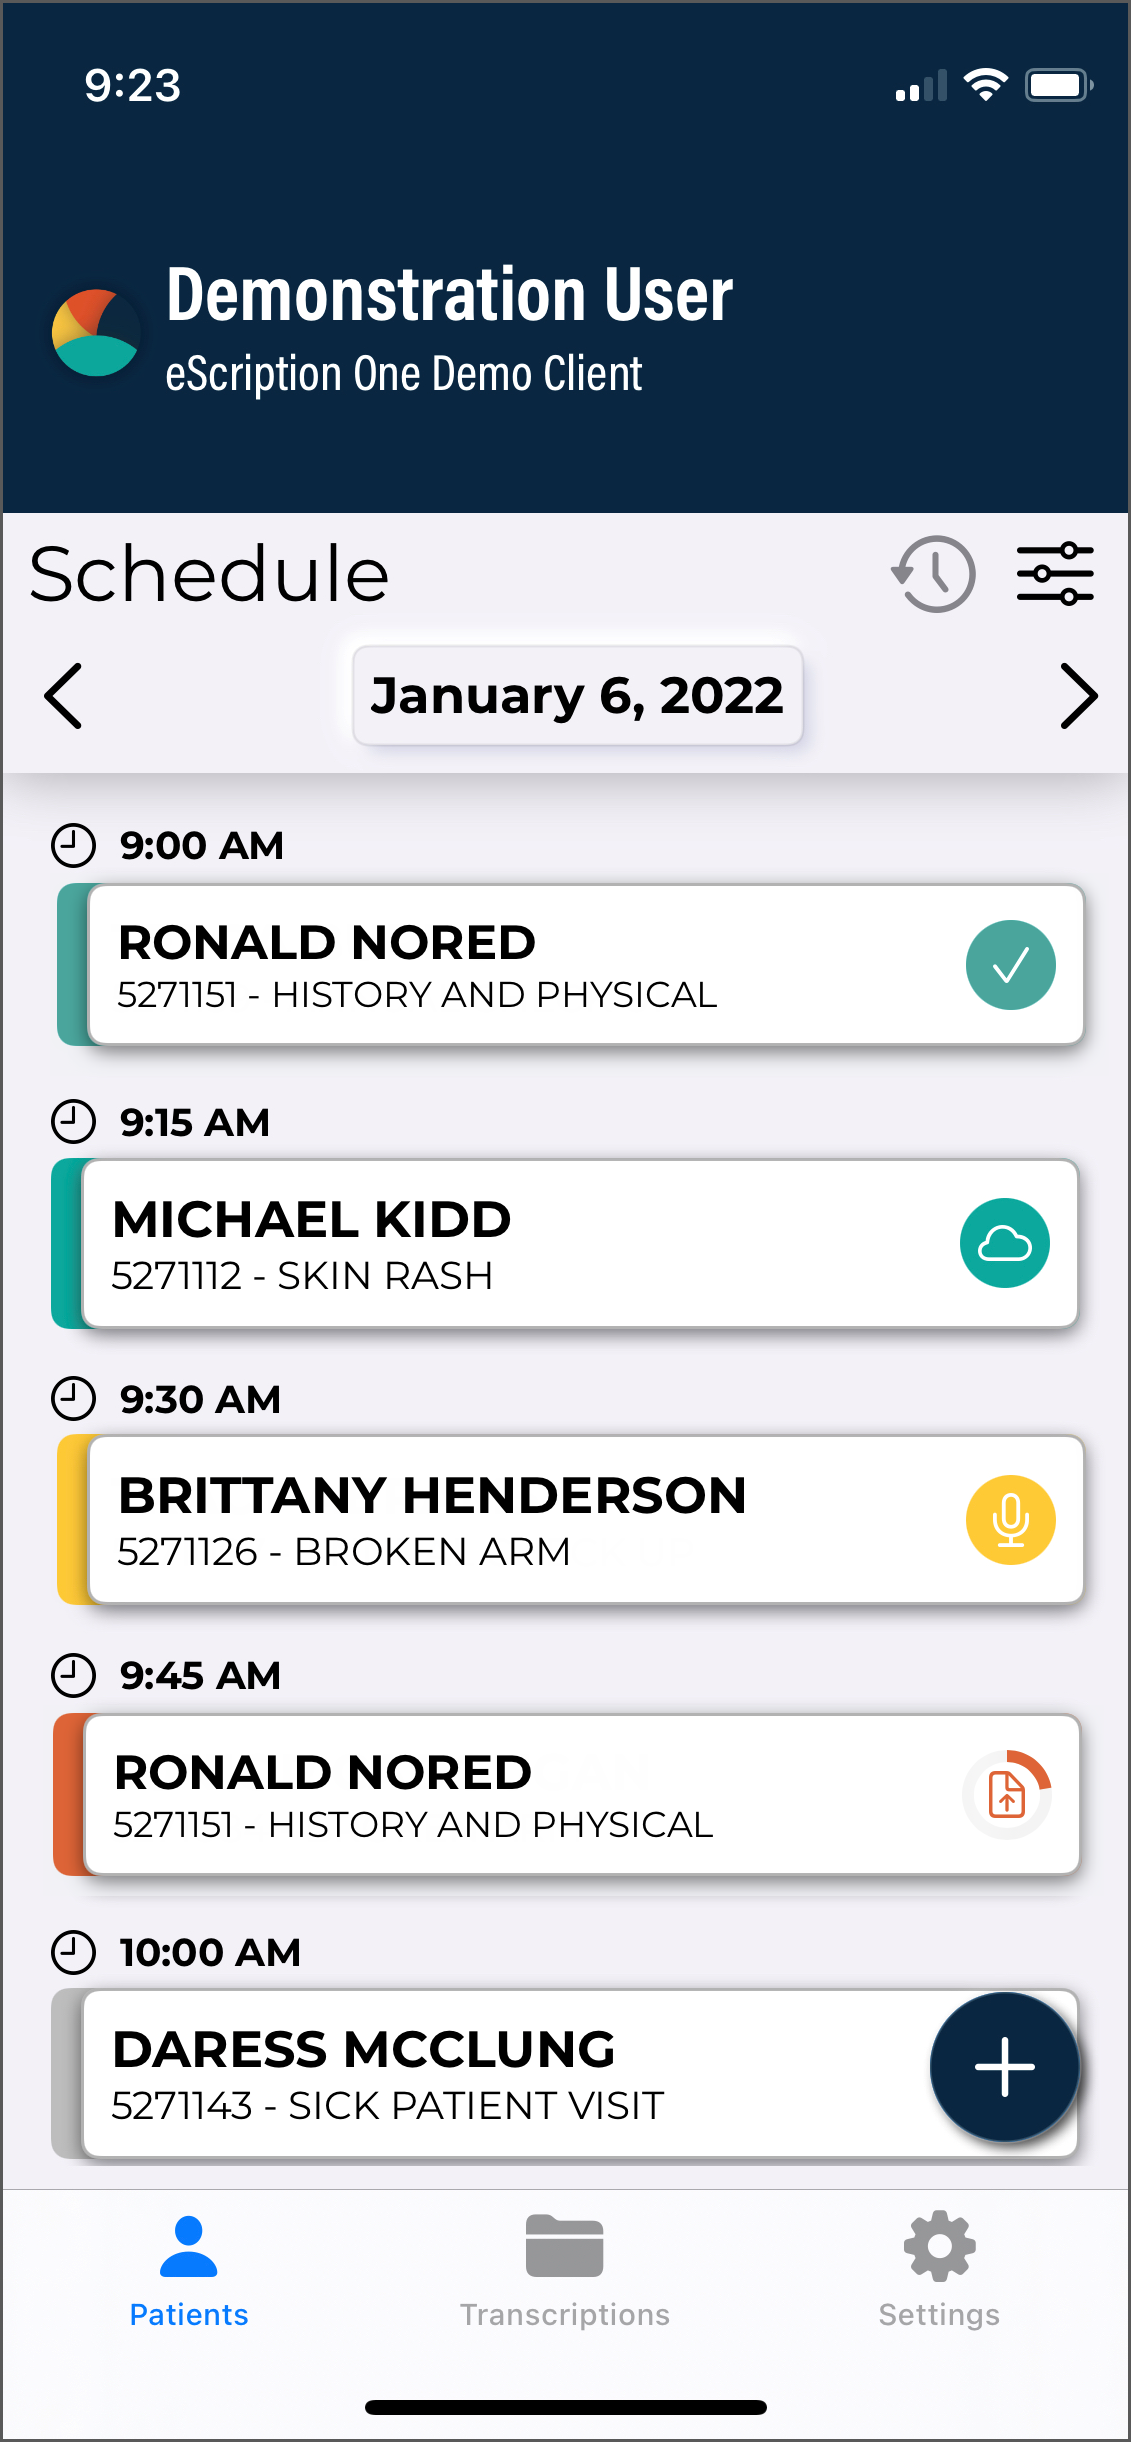
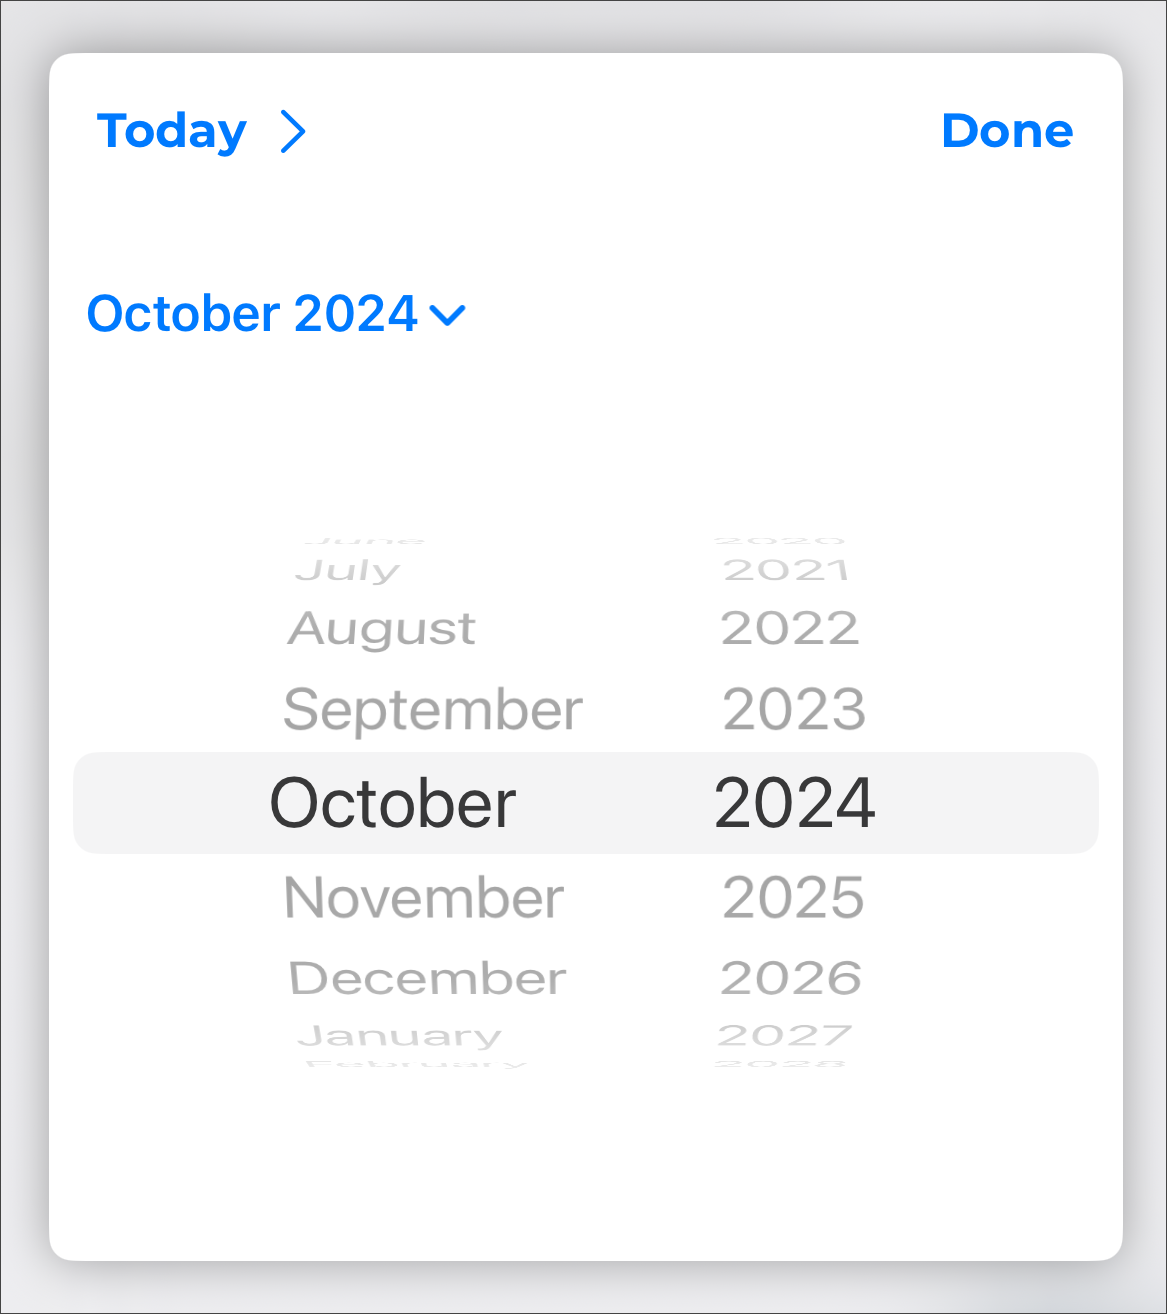
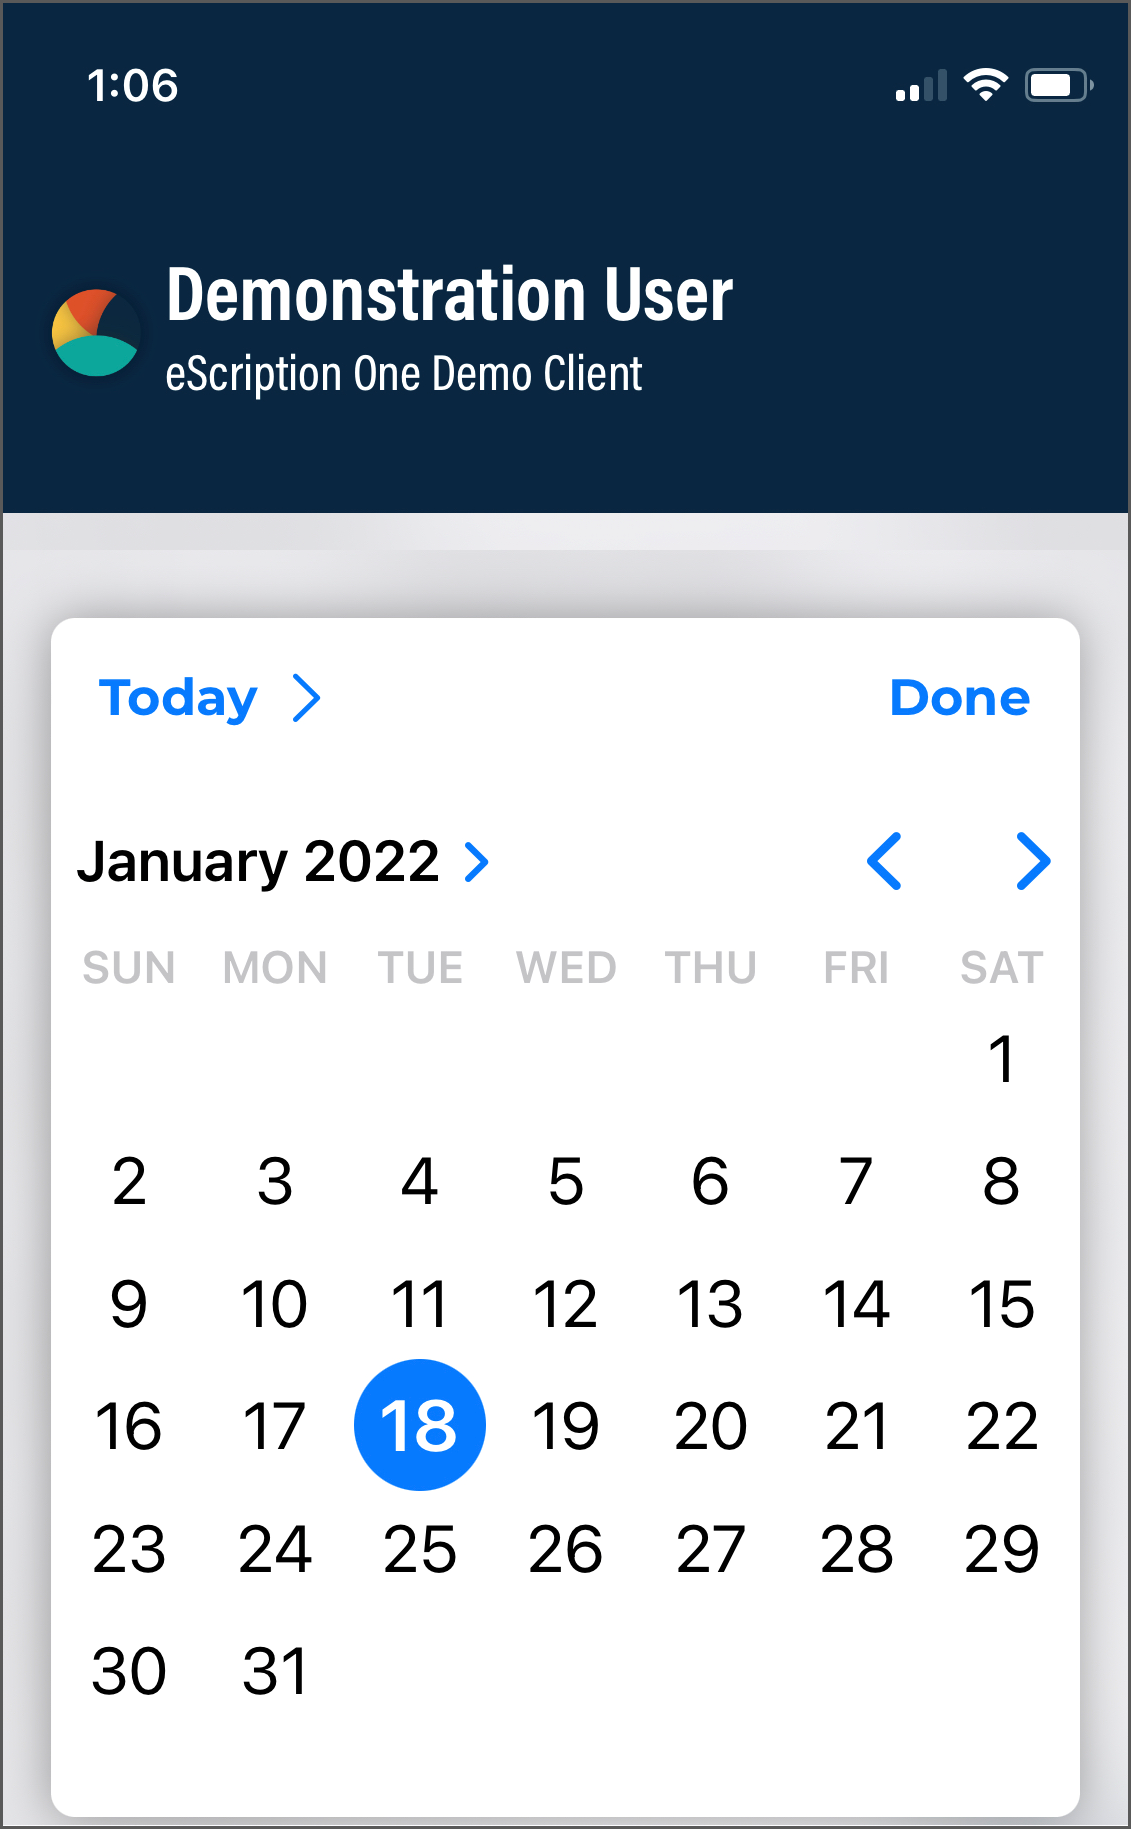
The schedule opens to the current date if the schedule was on the previous day's schedule in the prior session. Otherwise, the last date displayed in the schedule will open. Only one day will be displayed in the schedule at a time. To change the date tap on the calendar icon or date to open the date picker, or use the left or right arrows on either side of the date to move to the previous or next day, respectively.
Patient appointments are sorted by appointment time by default. Each appointment is separated by the appointment time, even if multiple patients share the same appointment time.
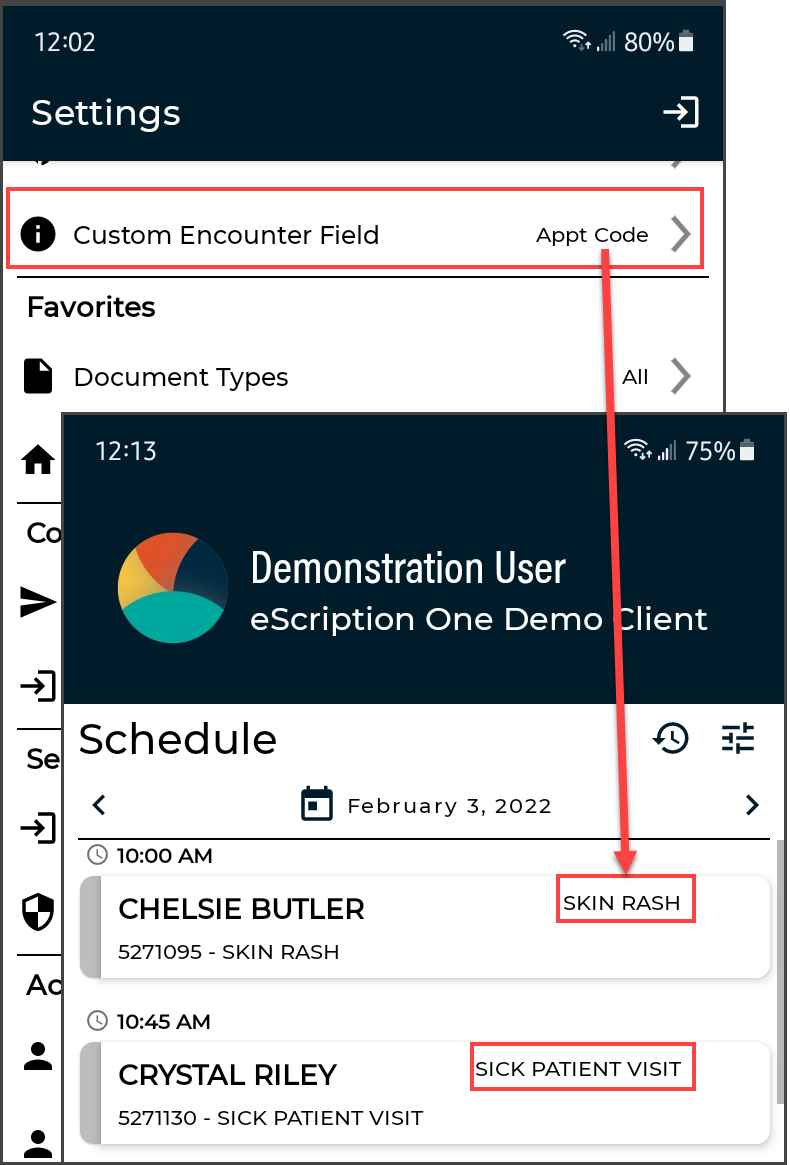
Each appointment displays the patient's full name, MRN, and a data field. This data field typically contains an appointment description, but depends on the data feed setup. An additional data field can be displayed when selected in the Settings tab.
The schedule will automatically refresh every 5 minutes. To manually refresh, swipe down on the schedule.
Dictation Status
An appointment may have one of several status icons and color coding to indicate the dictation status for that appointment.
![]() The appointment has a dictation that has been started but not yet uploaded.
The appointment has a dictation that has been started but not yet uploaded.
![]() The appointment has a dictation that is currently uploading.
The appointment has a dictation that is currently uploading.
![]() The appointment has a dictation that is currently uploading (longer dictations will show an upload status ring around the upload arrow).
The appointment has a dictation that is currently uploading (longer dictations will show an upload status ring around the upload arrow).
![]() A recorded dictation for this appointment has been successfully uploaded from this device.
A recorded dictation for this appointment has been successfully uploaded from this device.
![]() A dictation that is not on this device has been uploaded for this appointment.
A dictation that is not on this device has been uploaded for this appointment.
Note
An appointment without a dictation file will not have an icon next to it.
Incomplete Dictations
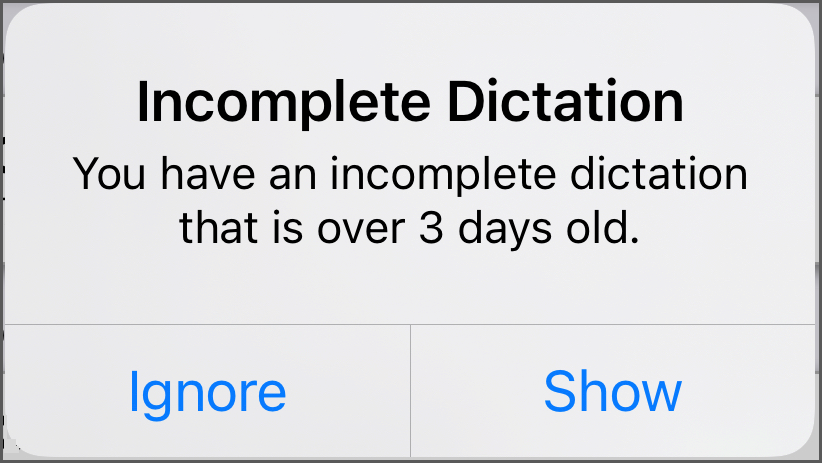
A reminder will be presented the first time the Patients tab is open each day if there is at least one started dictation 3 or more days old (based on the appointment date) that has not yet been uploaded. This reminder will only be presented once per day.
Tap Ignore to continue to the schedule as normal, or tap Show to open the schedule to the date of the oldest started dictation.
Users can also tap the ![]() Earliest Started Dictation button at the top of the schedule list to open the calendar to the earliest date with a started dictation that has not yet been uploaded.
Earliest Started Dictation button at the top of the schedule list to open the calendar to the earliest date with a started dictation that has not yet been uploaded.
Dictating from the Schedule and Search
Selecting an appointment from the schedule opens the Record screen with all available patient and appointment details and dictations controls. If the desired patient cannot be easily found in the schedule list or does not appear on the schedule, a patient or appointment search can be performed.
Patient and Appointment Search
Tap the Search button to search for an appointment already on the schedule list or to add the patient/appointment to the schedule that may not have previously appeared.
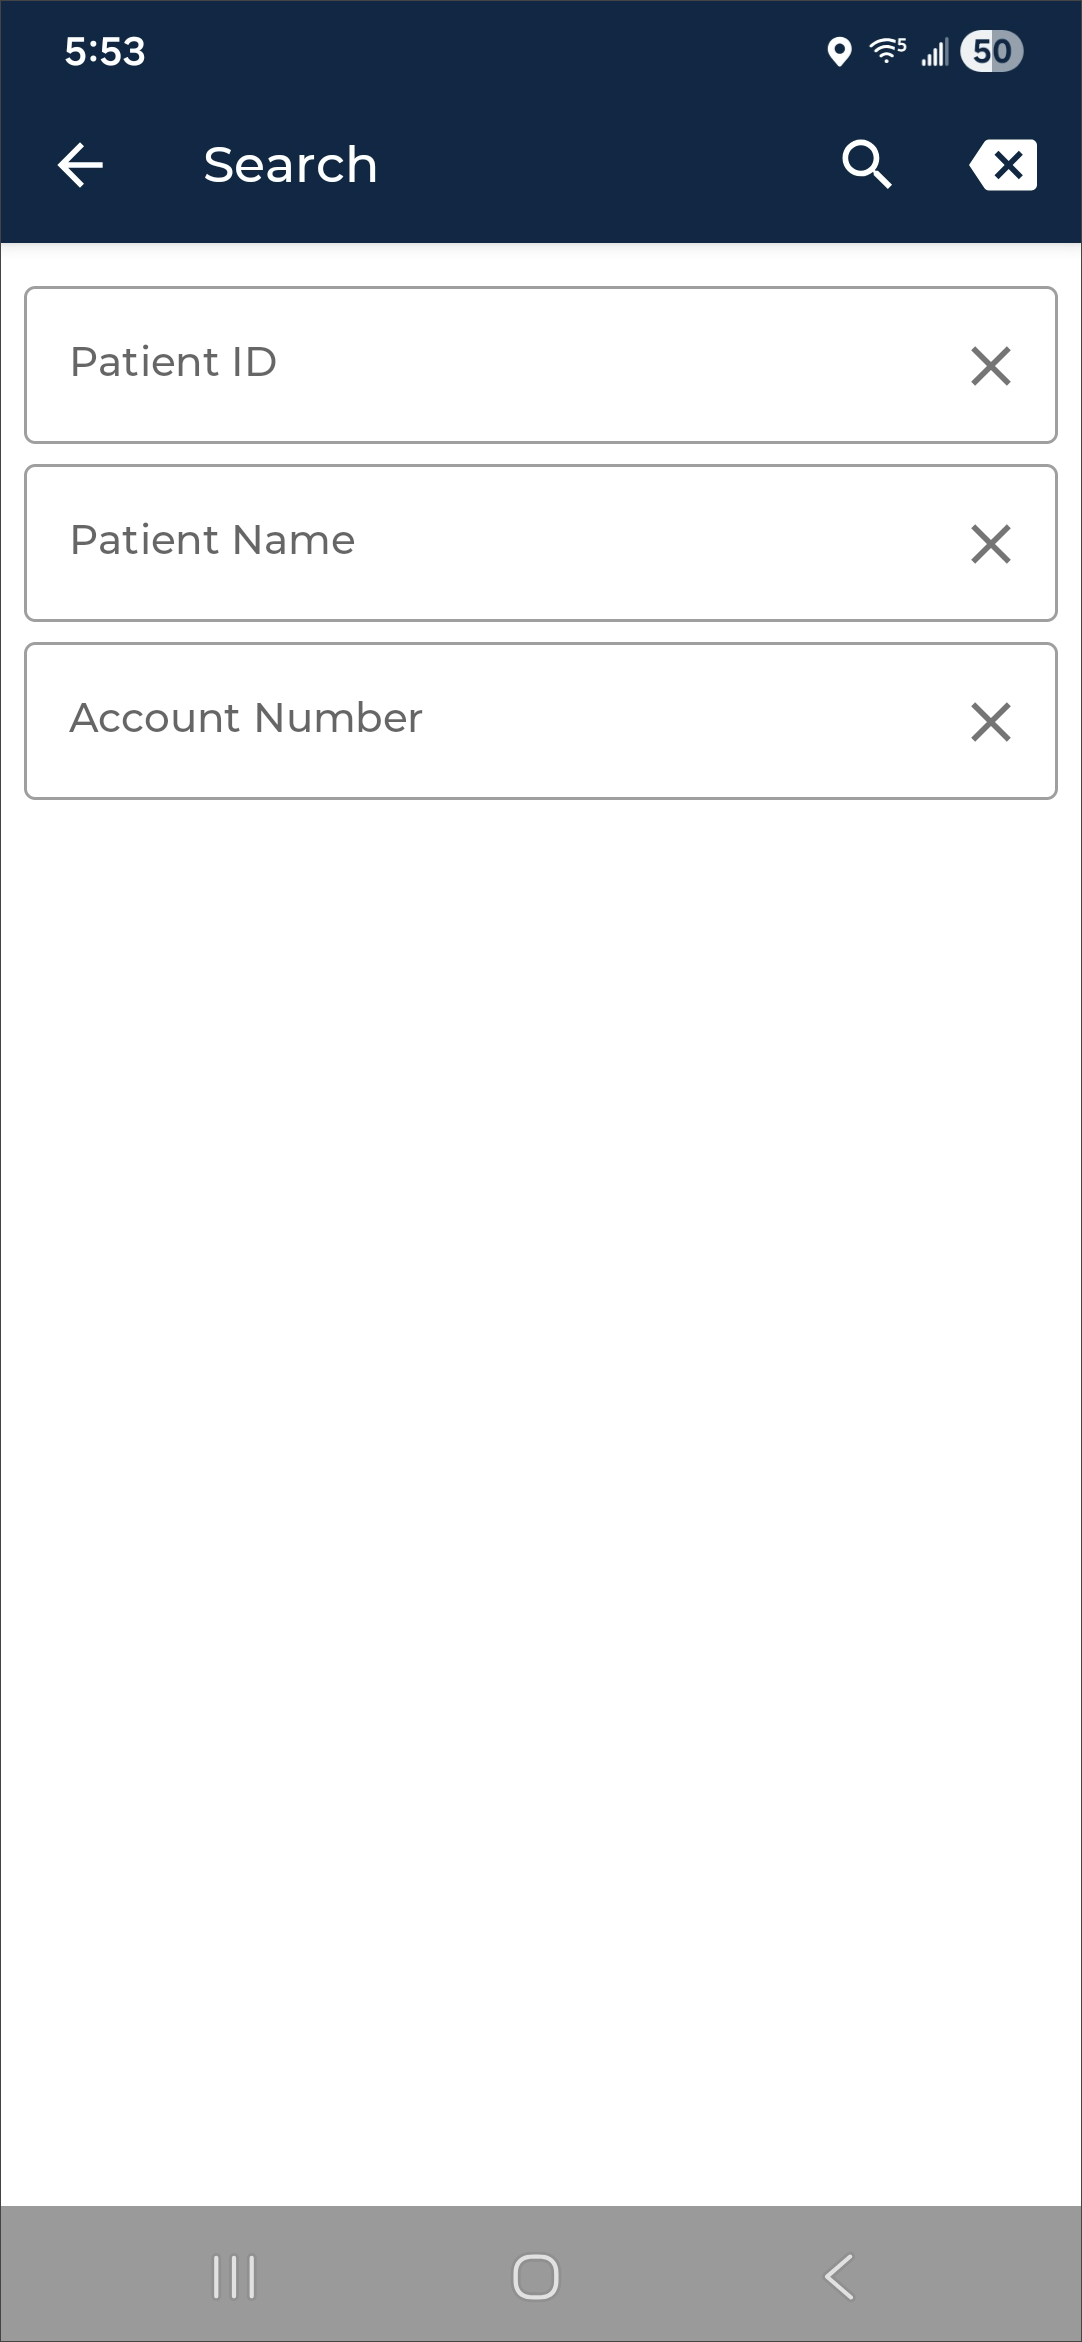
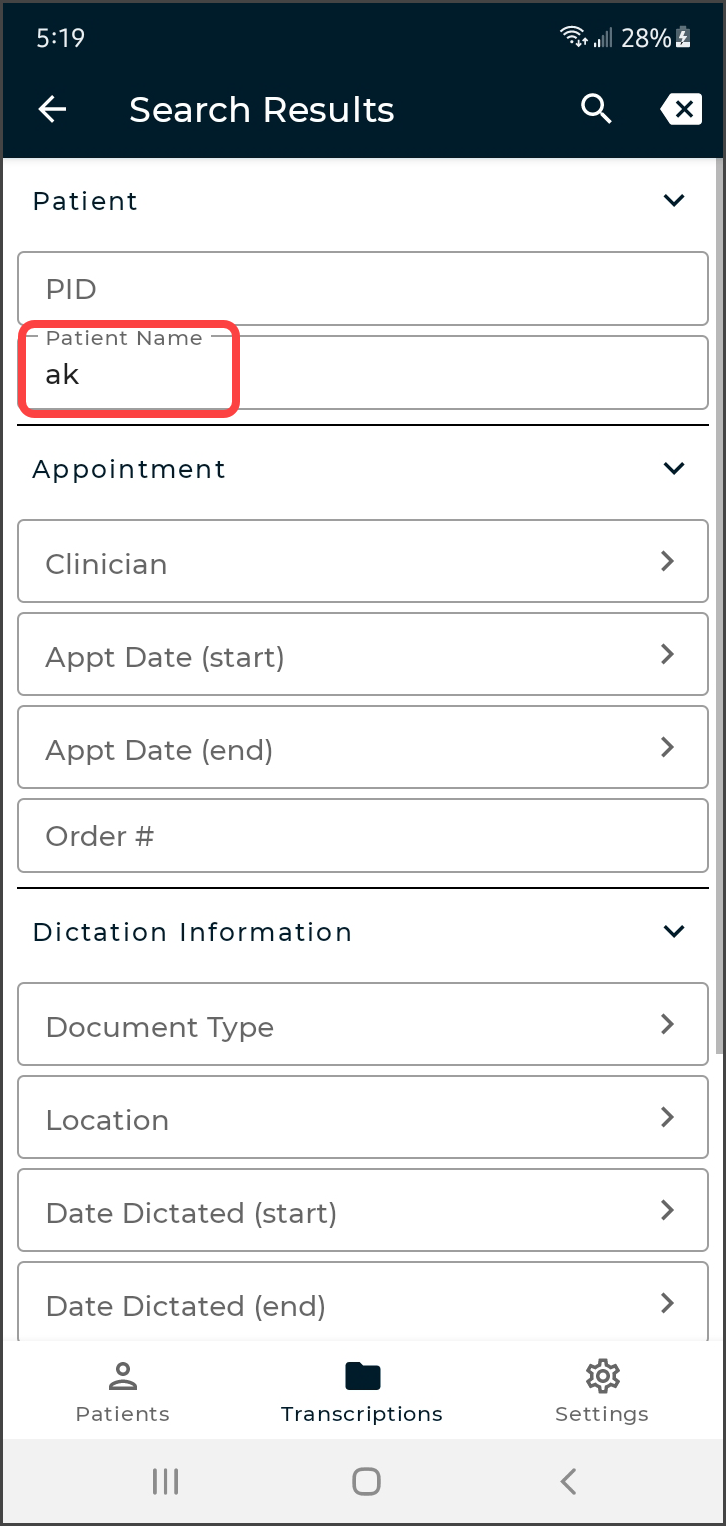
The Search dialog will open and prompt for Patient ID, Patient Name, and/or Account Number. The search field labels are customizable per client and may not match what is shown here. Patient and appointment records can only be searched if eSOne receives a data feed from the client.
Enter one or more search criteria. The Patient ID and Account Number must be full matches and the Patient Name can be a partial match of the first or last name. Tap the search key in the on-screen keyboard or ![]() to submit the search.
to submit the search.
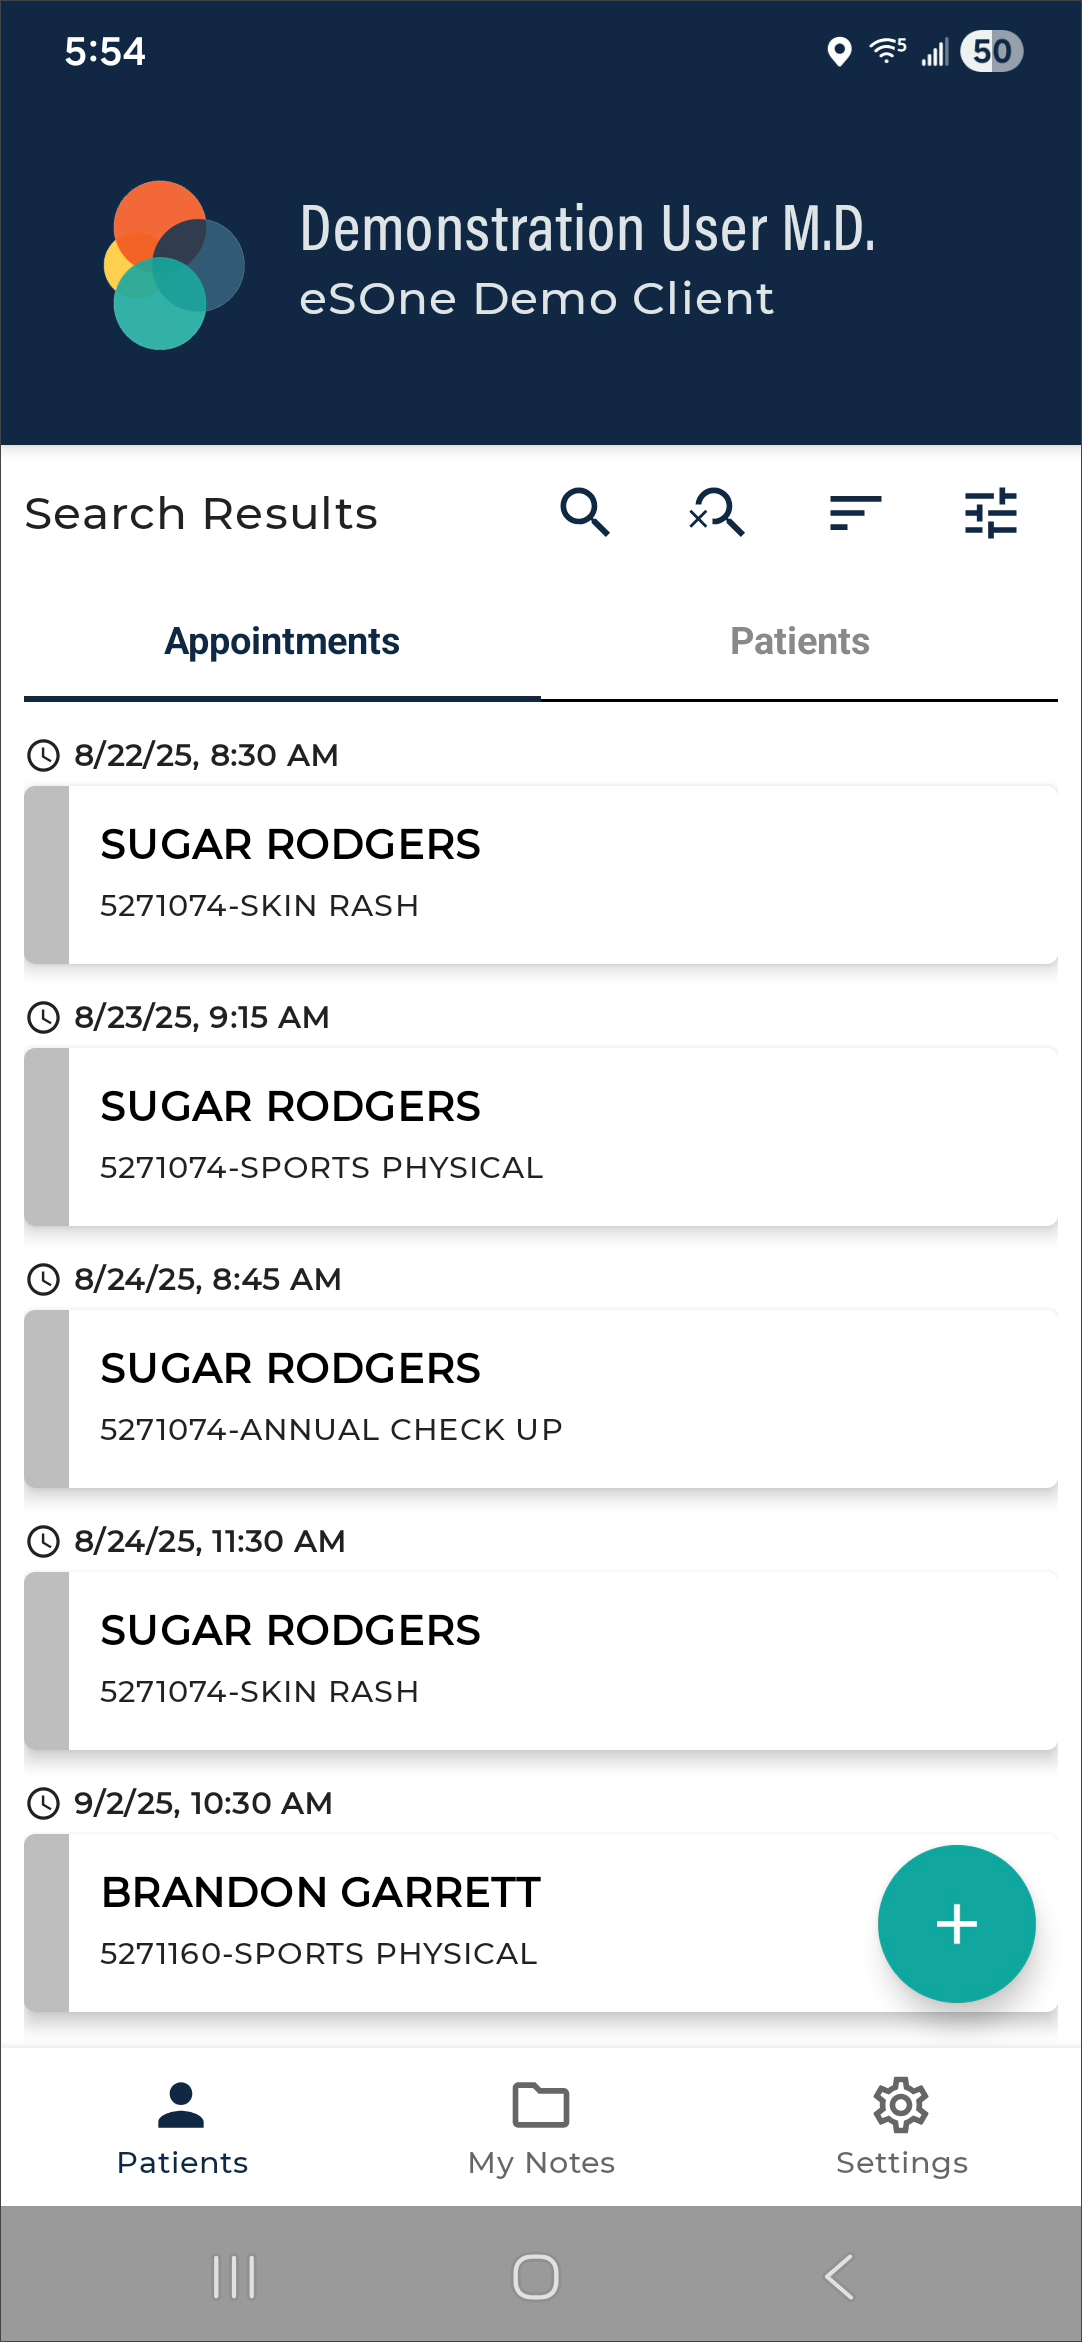
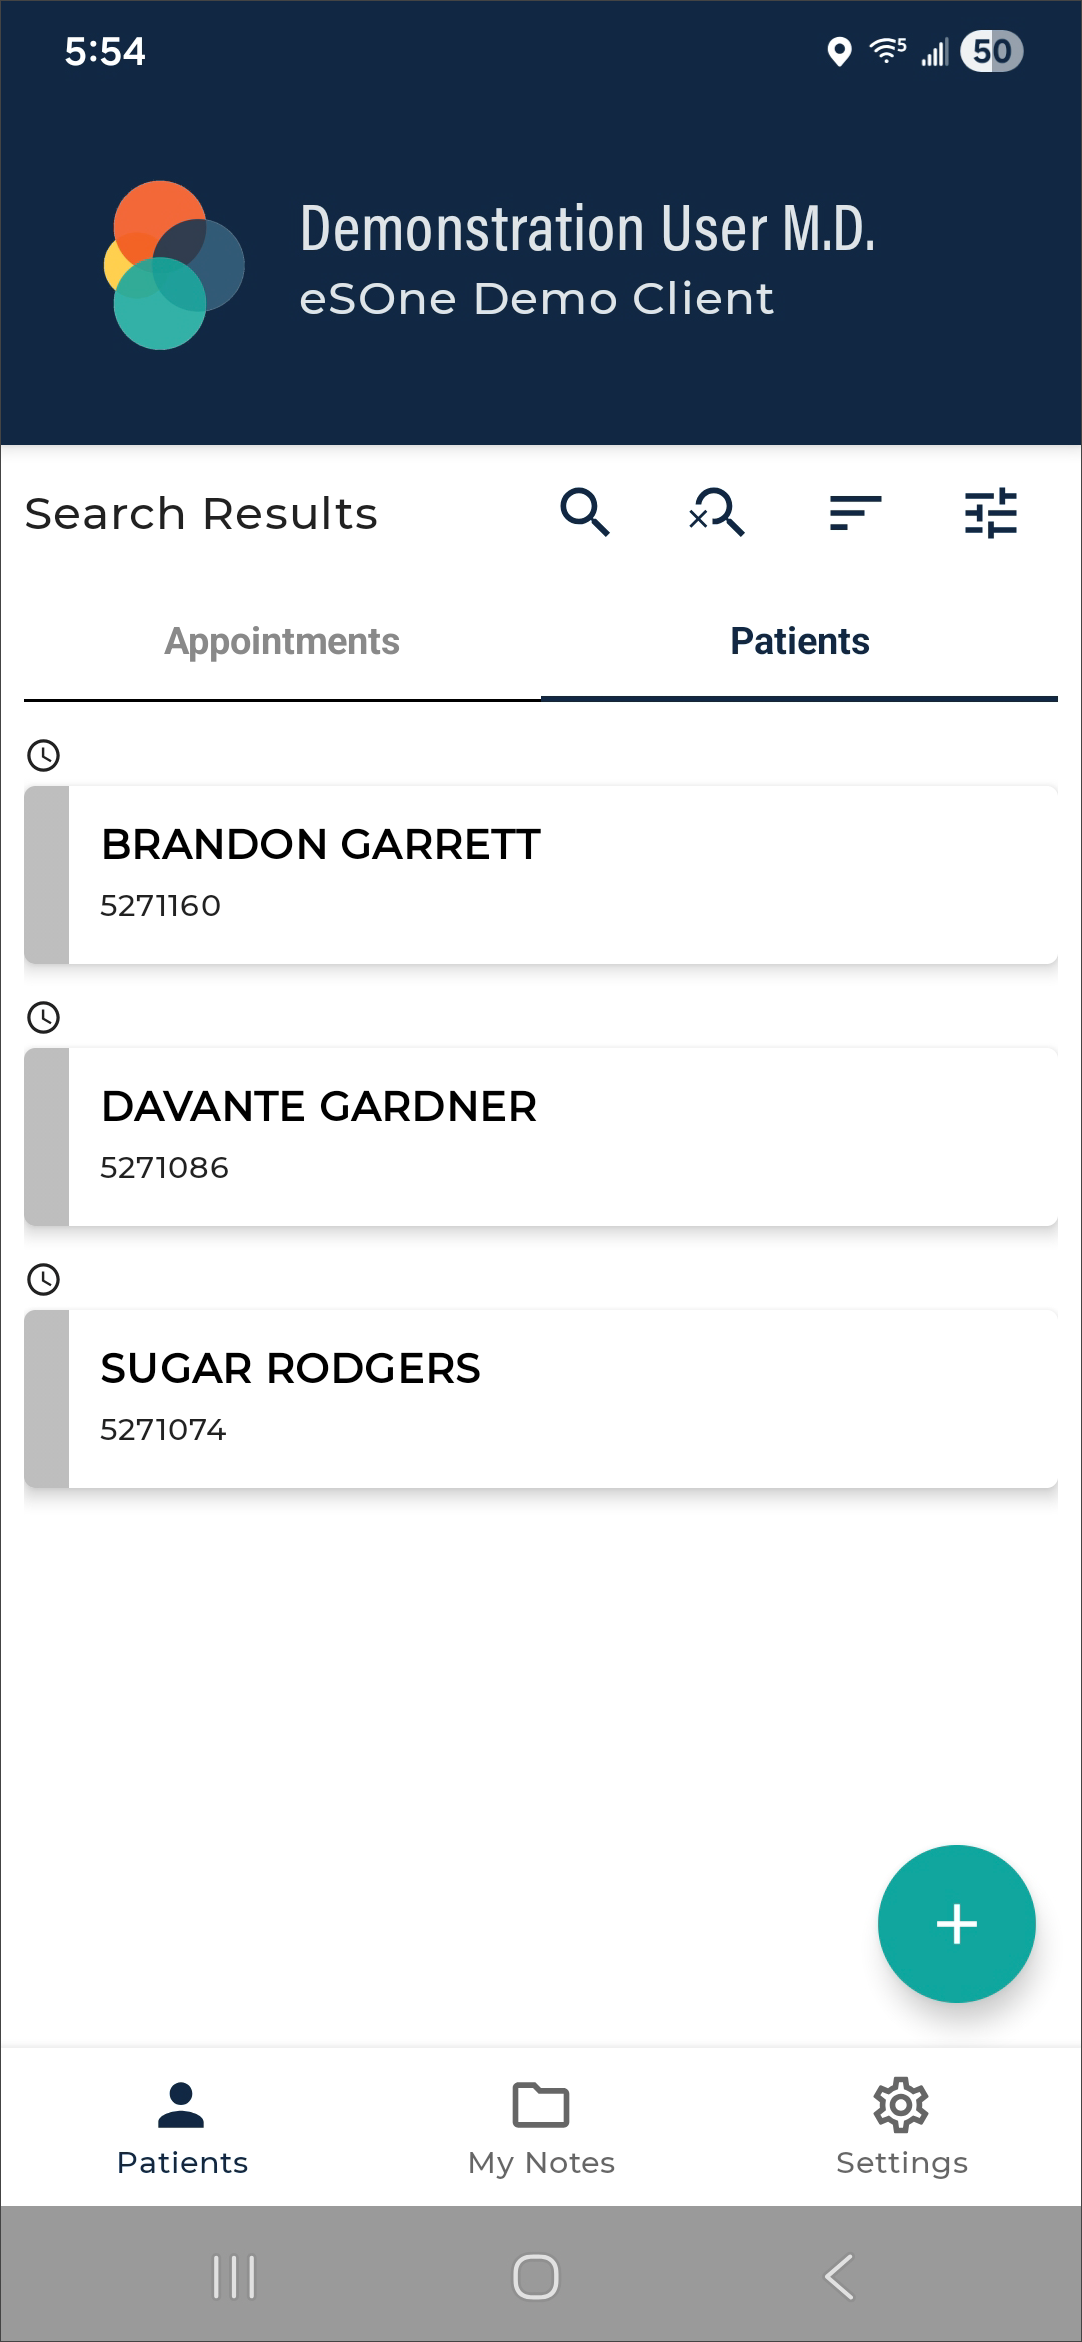
Search results will appear in two tabs: Appointments and Patients. Tap the desired patient or appointment to add the patient/appointment to the schedule and open the record screen.
Choosing an appointment from the Appointments tab will place it on the schedule at the designated date and time, including all associated appointment details.
Choosing a patient from the Patients tab will add that patient to the schedule, setting the appointment date to the current date and time. The appointment date and time can be changed if needed.
To return to the schedule without selecting a search result, tap ![]() .
.
Dictating Without an Appointment
![]() To create a new ad-hoc dictation without selecting a scheduled appointment or searching for a patient or appointment, tap the Add button within the Patients tab. The Document Type, Location, Appointment Date and Time, and patient prompt fields are editable.
To create a new ad-hoc dictation without selecting a scheduled appointment or searching for a patient or appointment, tap the Add button within the Patients tab. The Document Type, Location, Appointment Date and Time, and patient prompt fields are editable.
Tap the Document Type and Location fields to open the selection lists. These lists can be edited by selecting Favorites in the Settings tab. Tap the Appointment Date field to open the date picker. The patient prompt (Patient ID, Account Number, or Order Number) field will be editable and identified by a Clear button ![]() in the data field. Depending on the client setup, this prompt field could change based on the selected document type. Tap on the patient prompt field to enter data. The appointment date will populate with the date that was loaded in the schedule, along with the current time stamp. The Templates tab is available for reference. The History tab will populate with any prior transcriptions related to that patient.
in the data field. Depending on the client setup, this prompt field could change based on the selected document type. Tap on the patient prompt field to enter data. The appointment date will populate with the date that was loaded in the schedule, along with the current time stamp. The Templates tab is available for reference. The History tab will populate with any prior transcriptions related to that patient.
Note
The process for creating a new dictation for an inpatient encounter is different. Please see Inpatient Workflow for more information.
Record Screen
The Record screen can be accessed from the Patients tab by selecting a patient/appointment or pressing the Add button.
The Record screen opens to the Template sub-tab by default, unless changed in Settings tab > Record Screen. If an appointment that already has an uploaded dictation from the same device is opened, the Record screen will open to the History sub-tab.
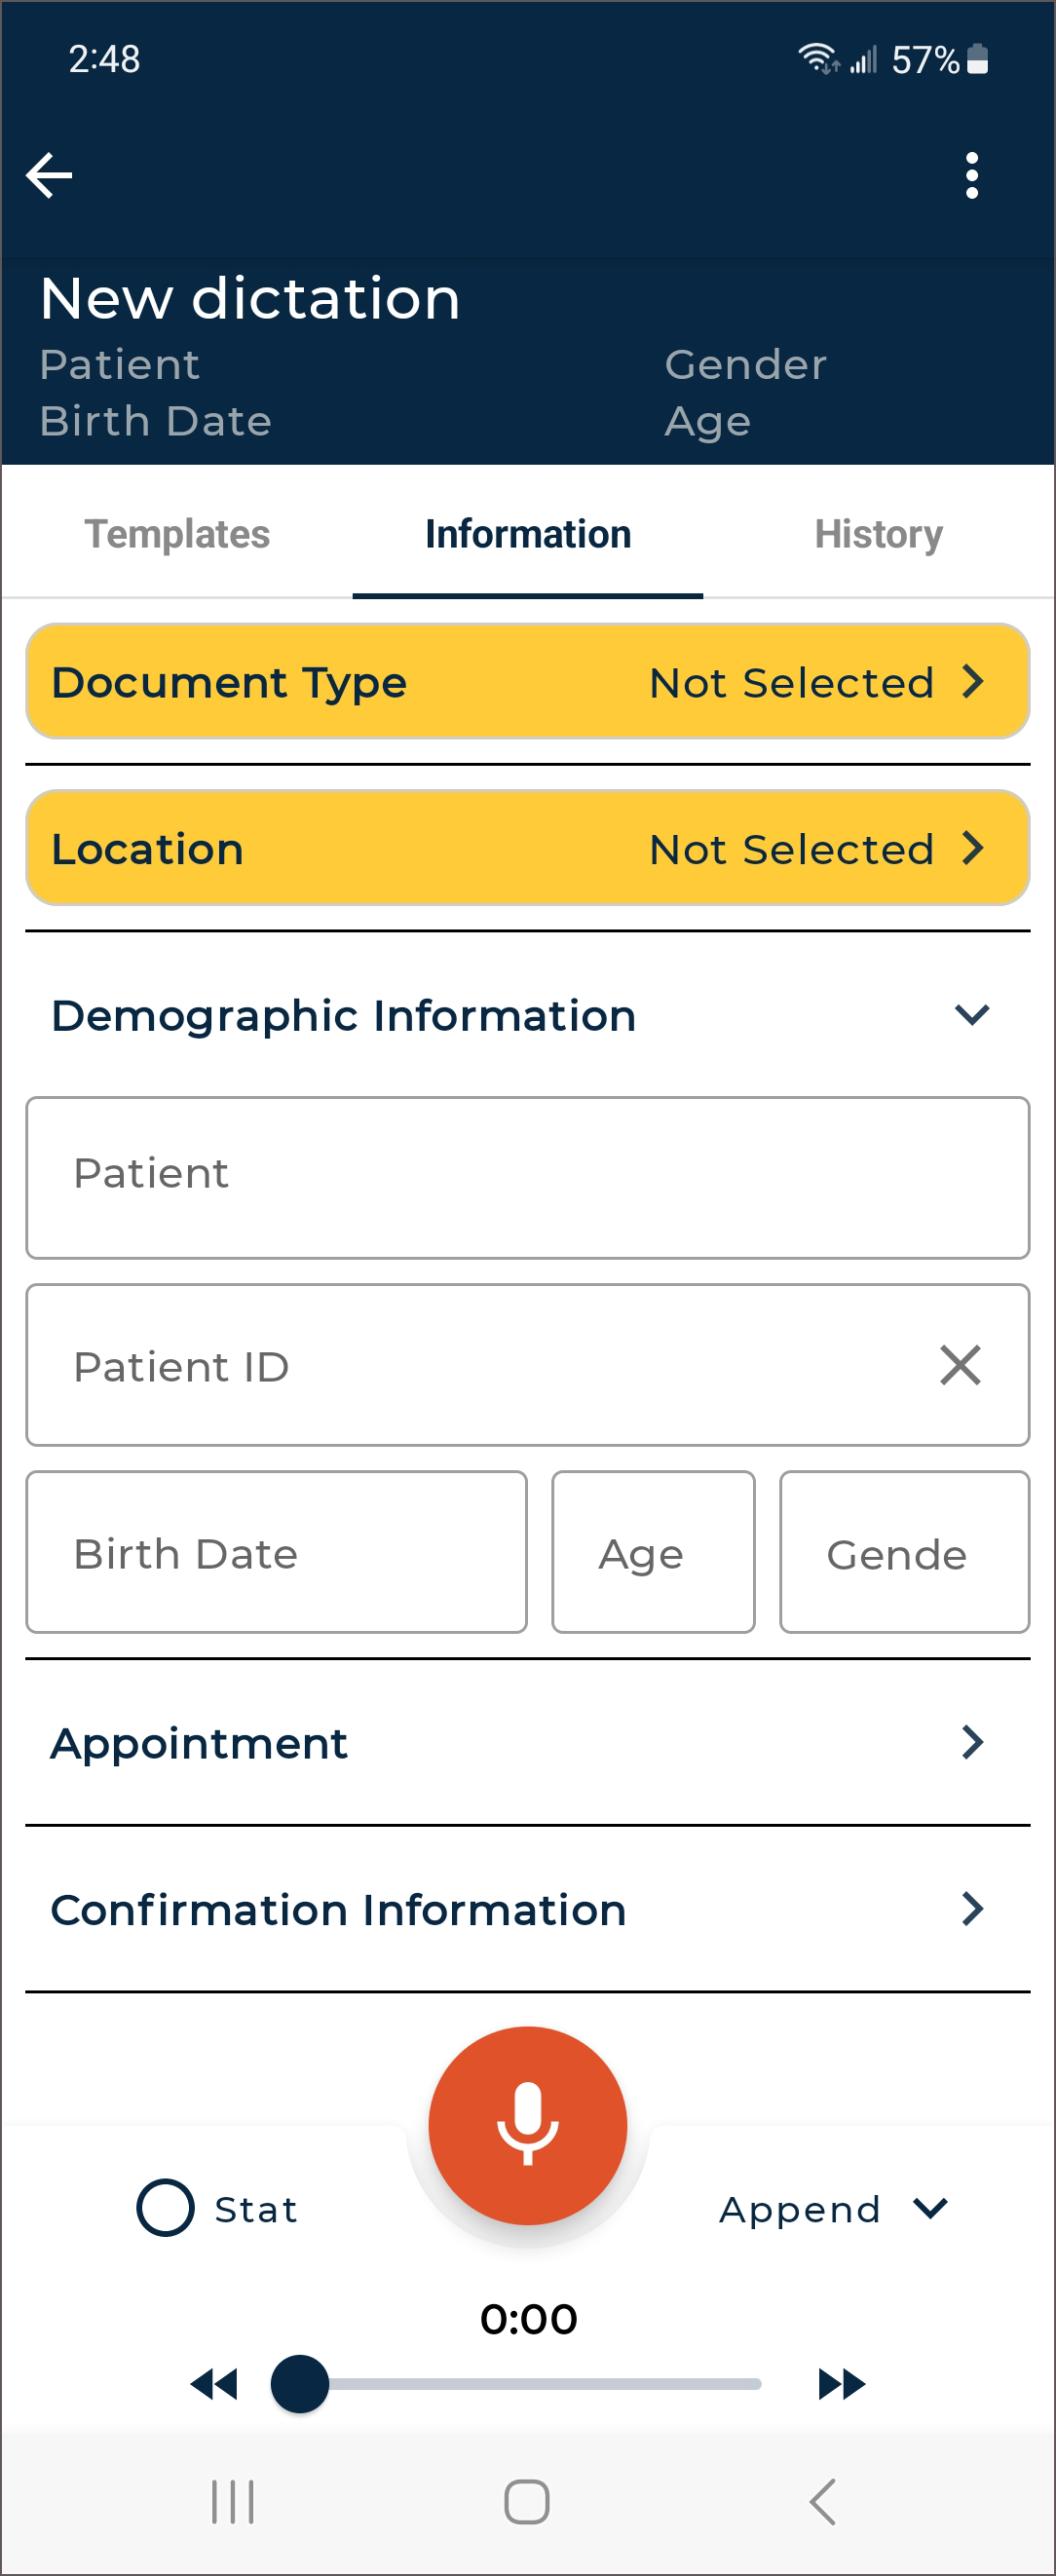
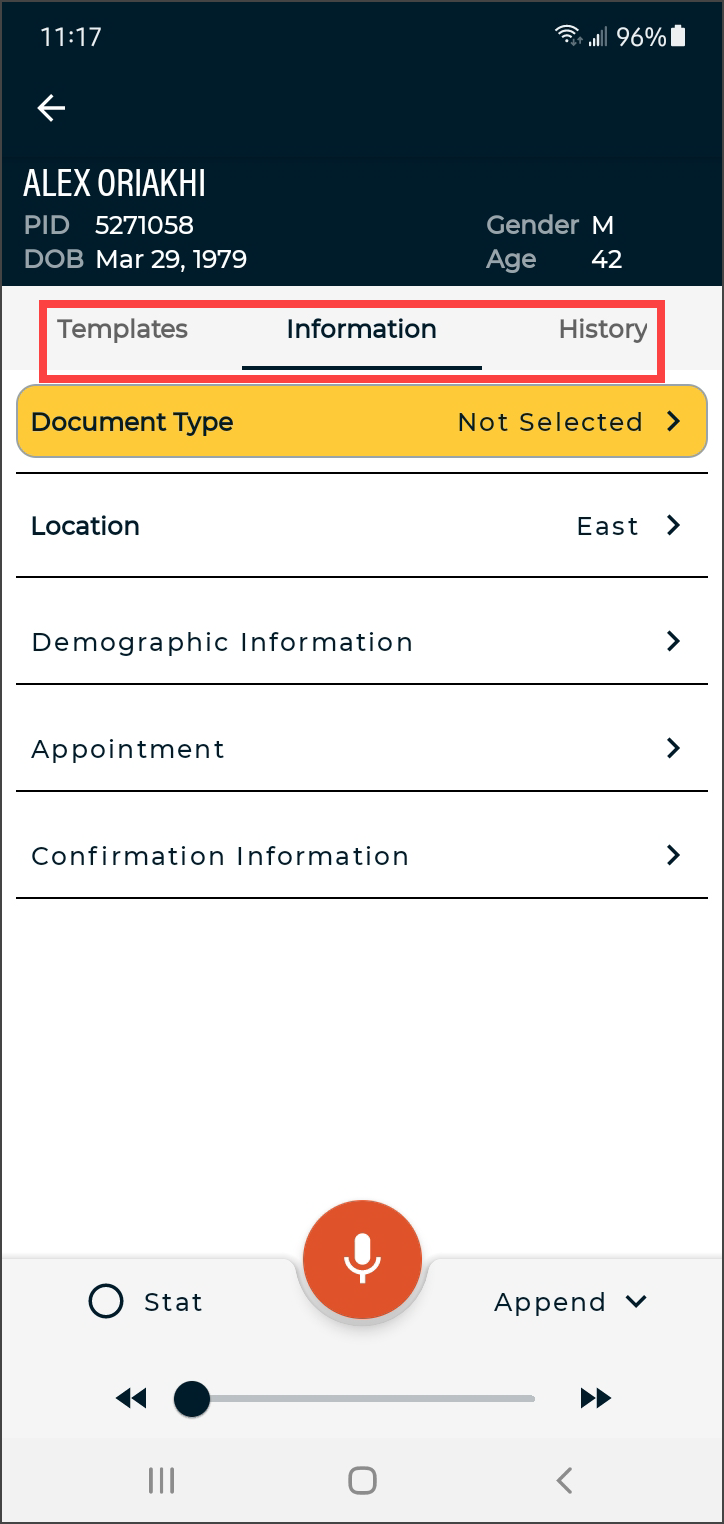
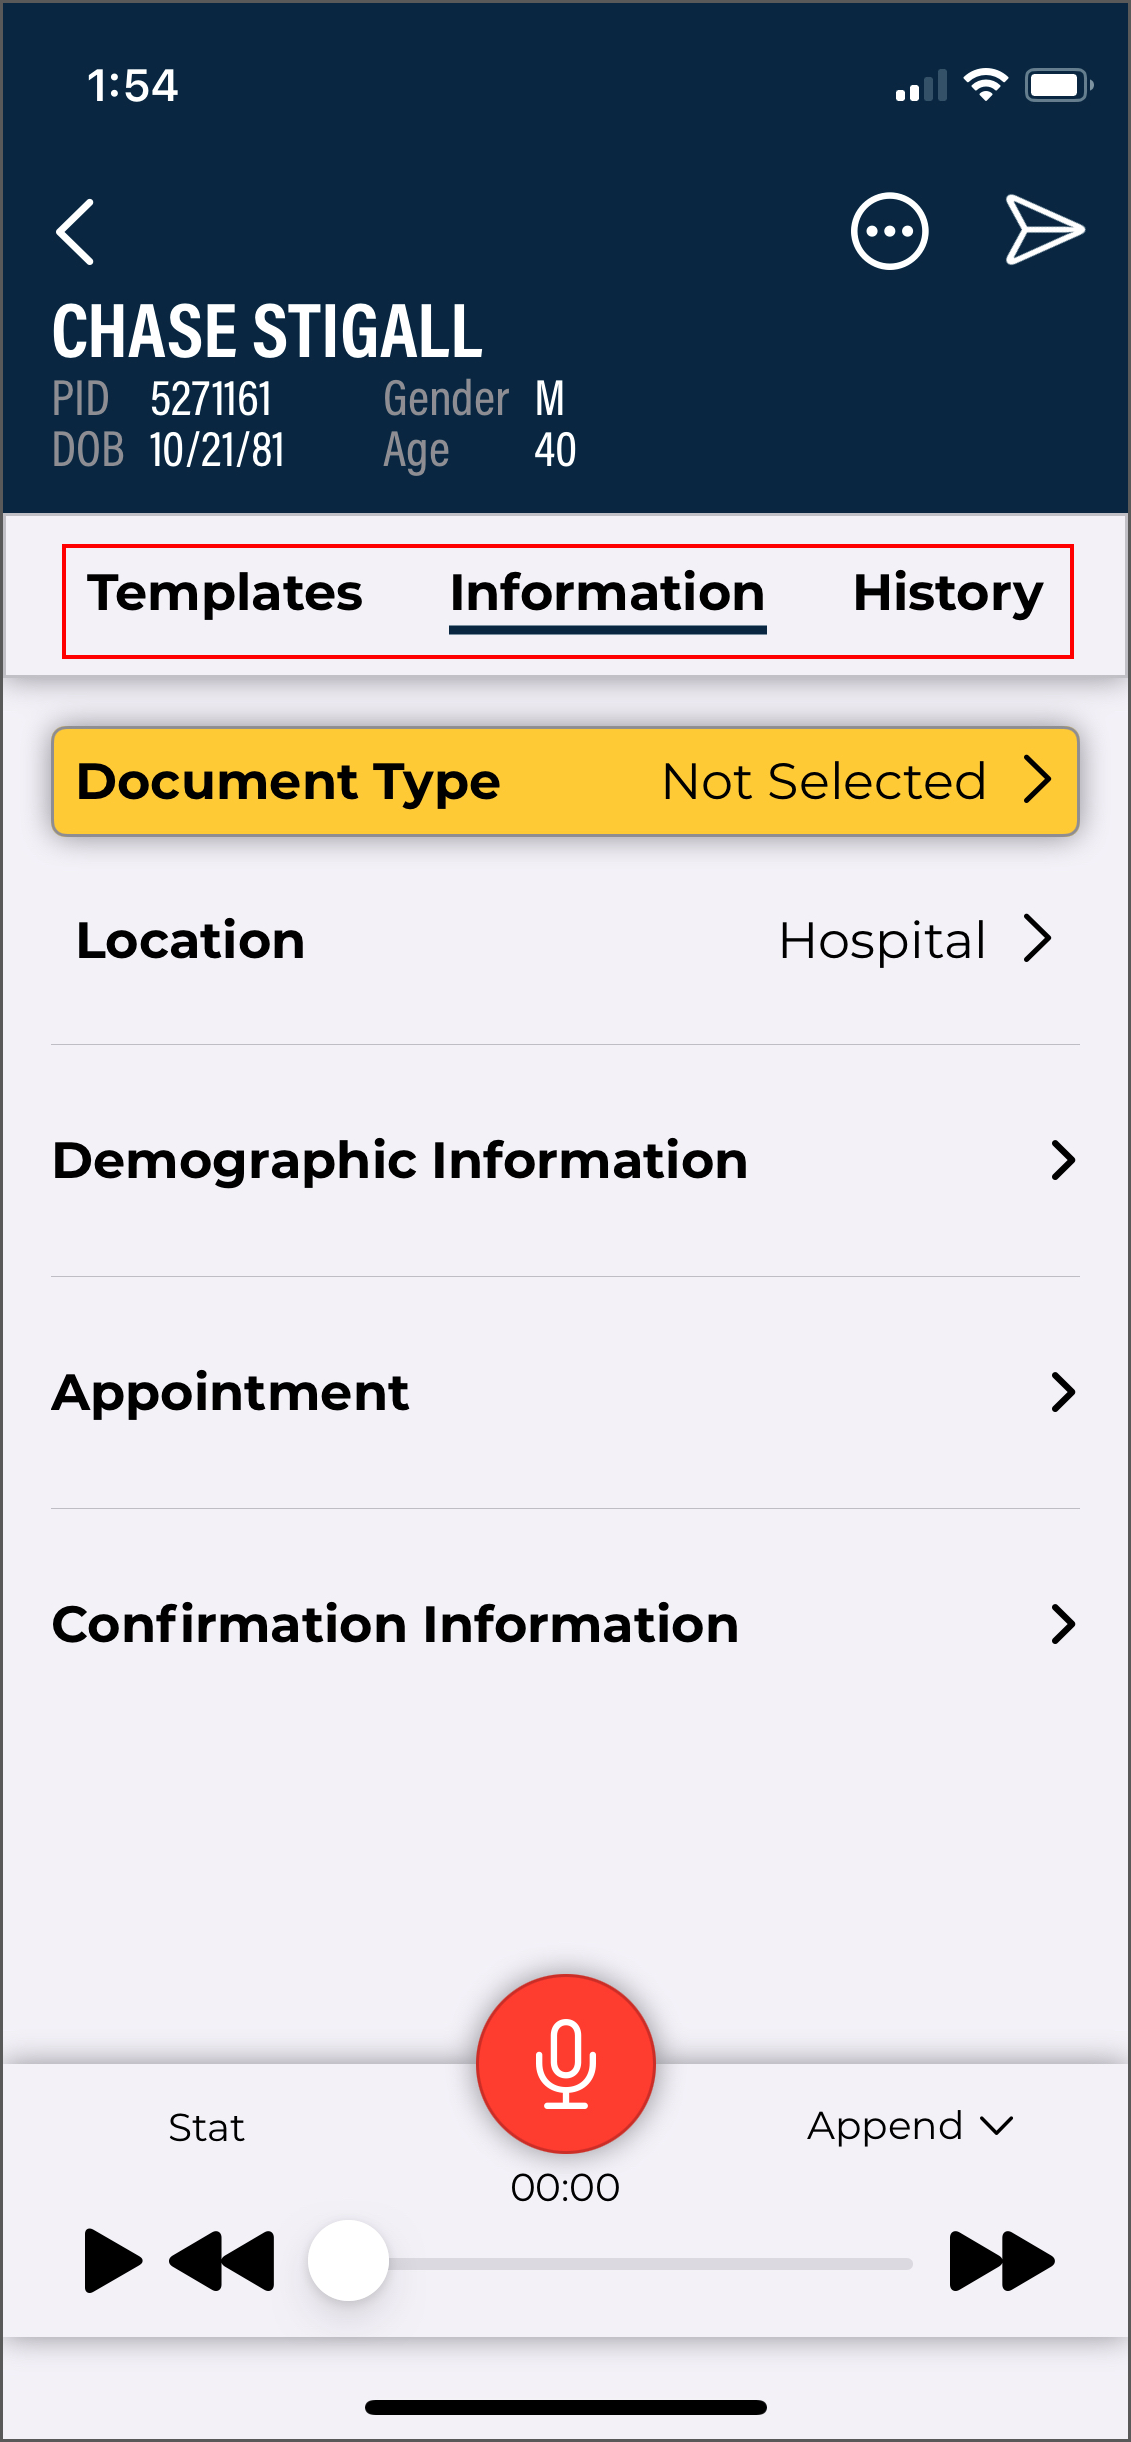
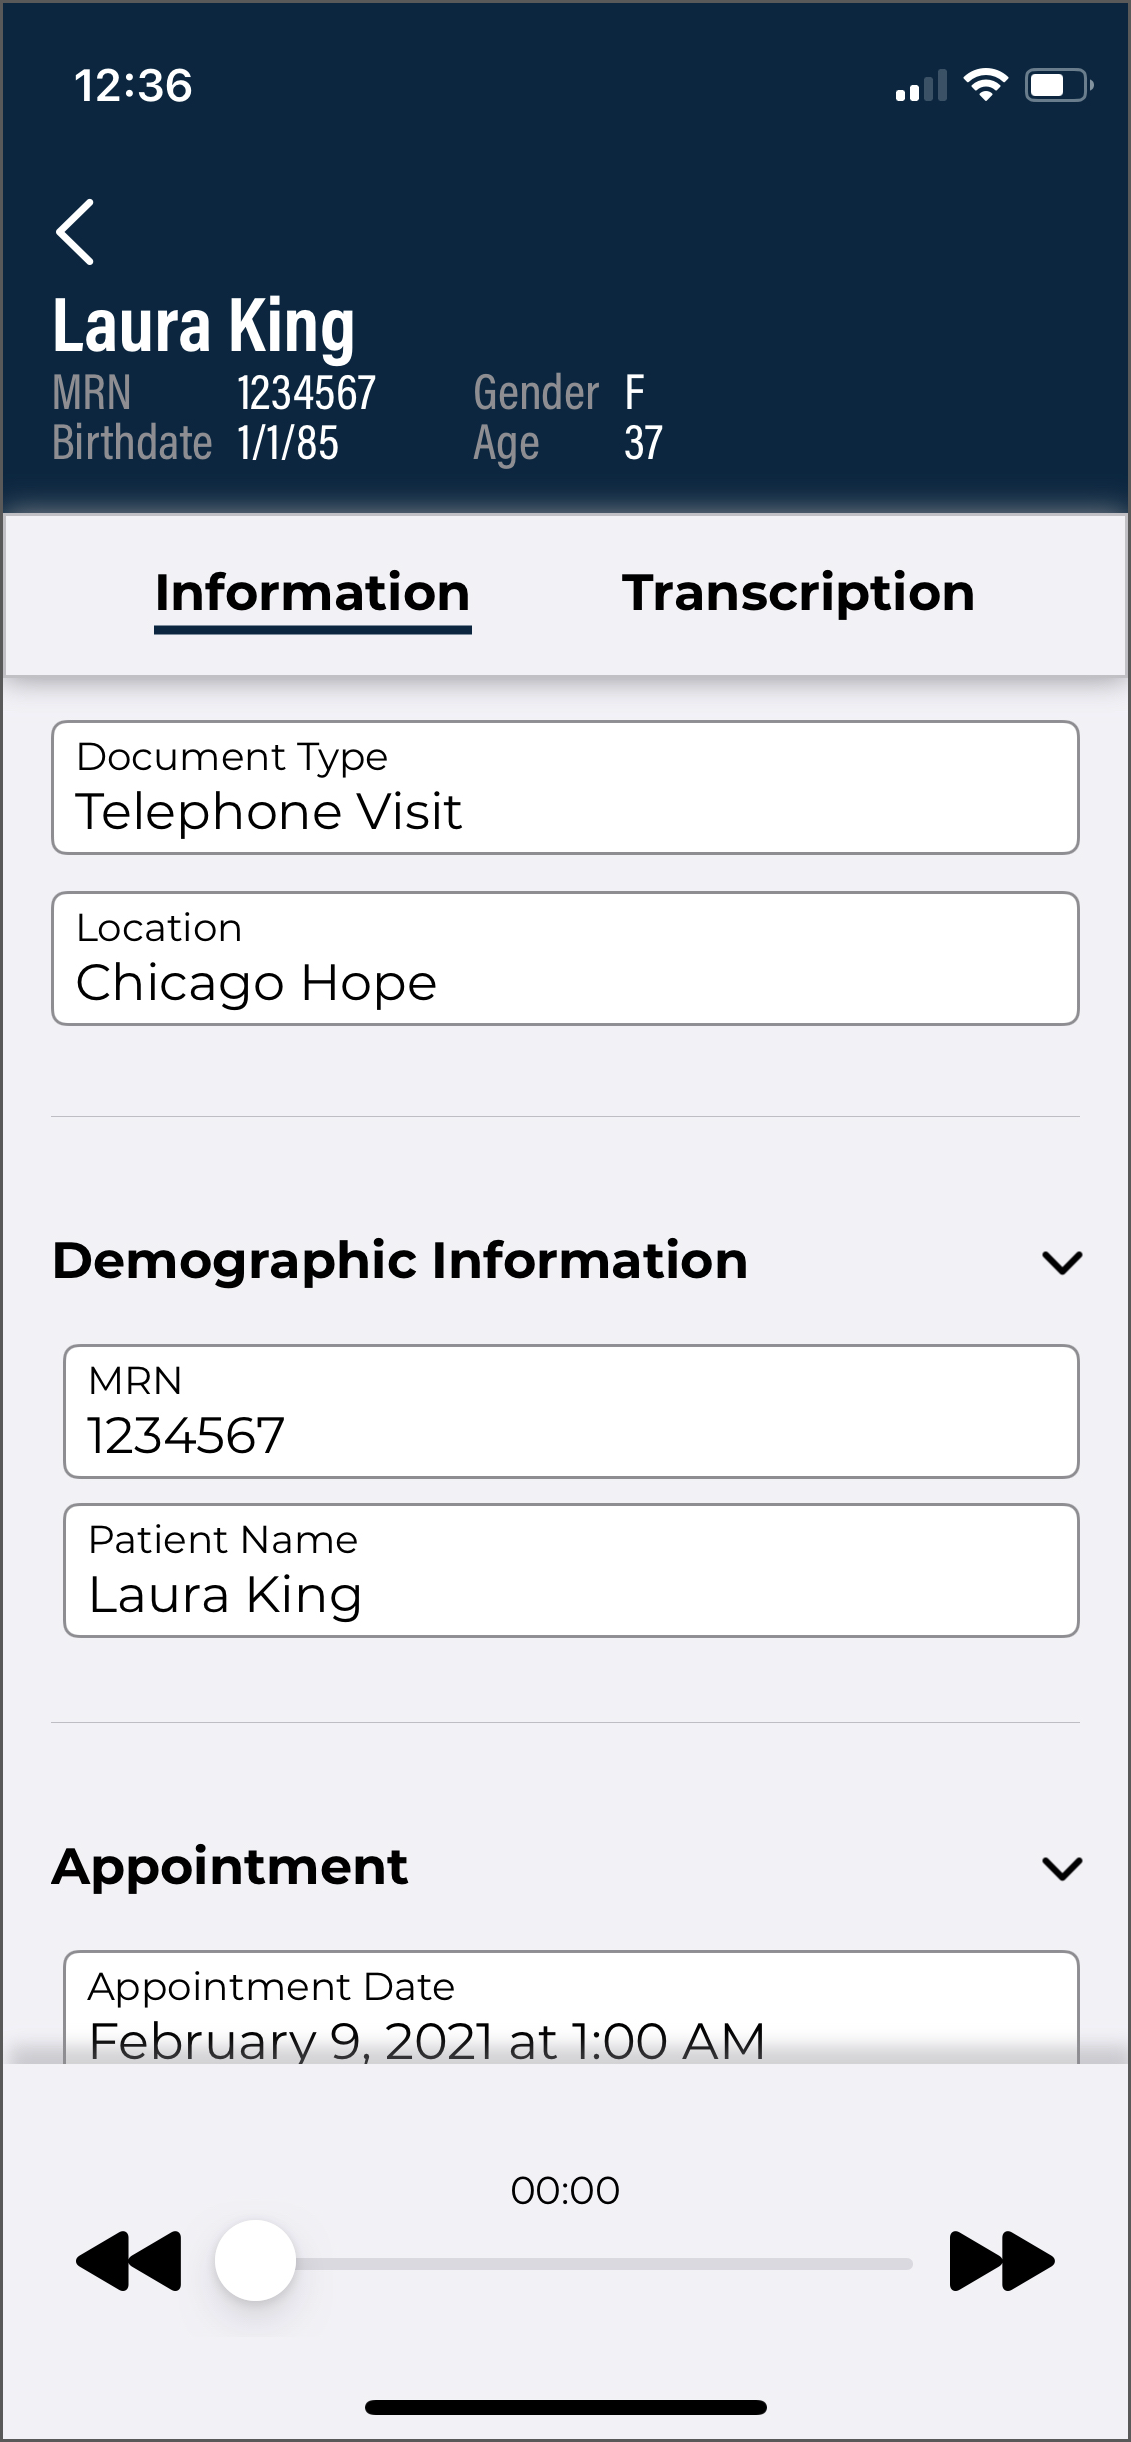
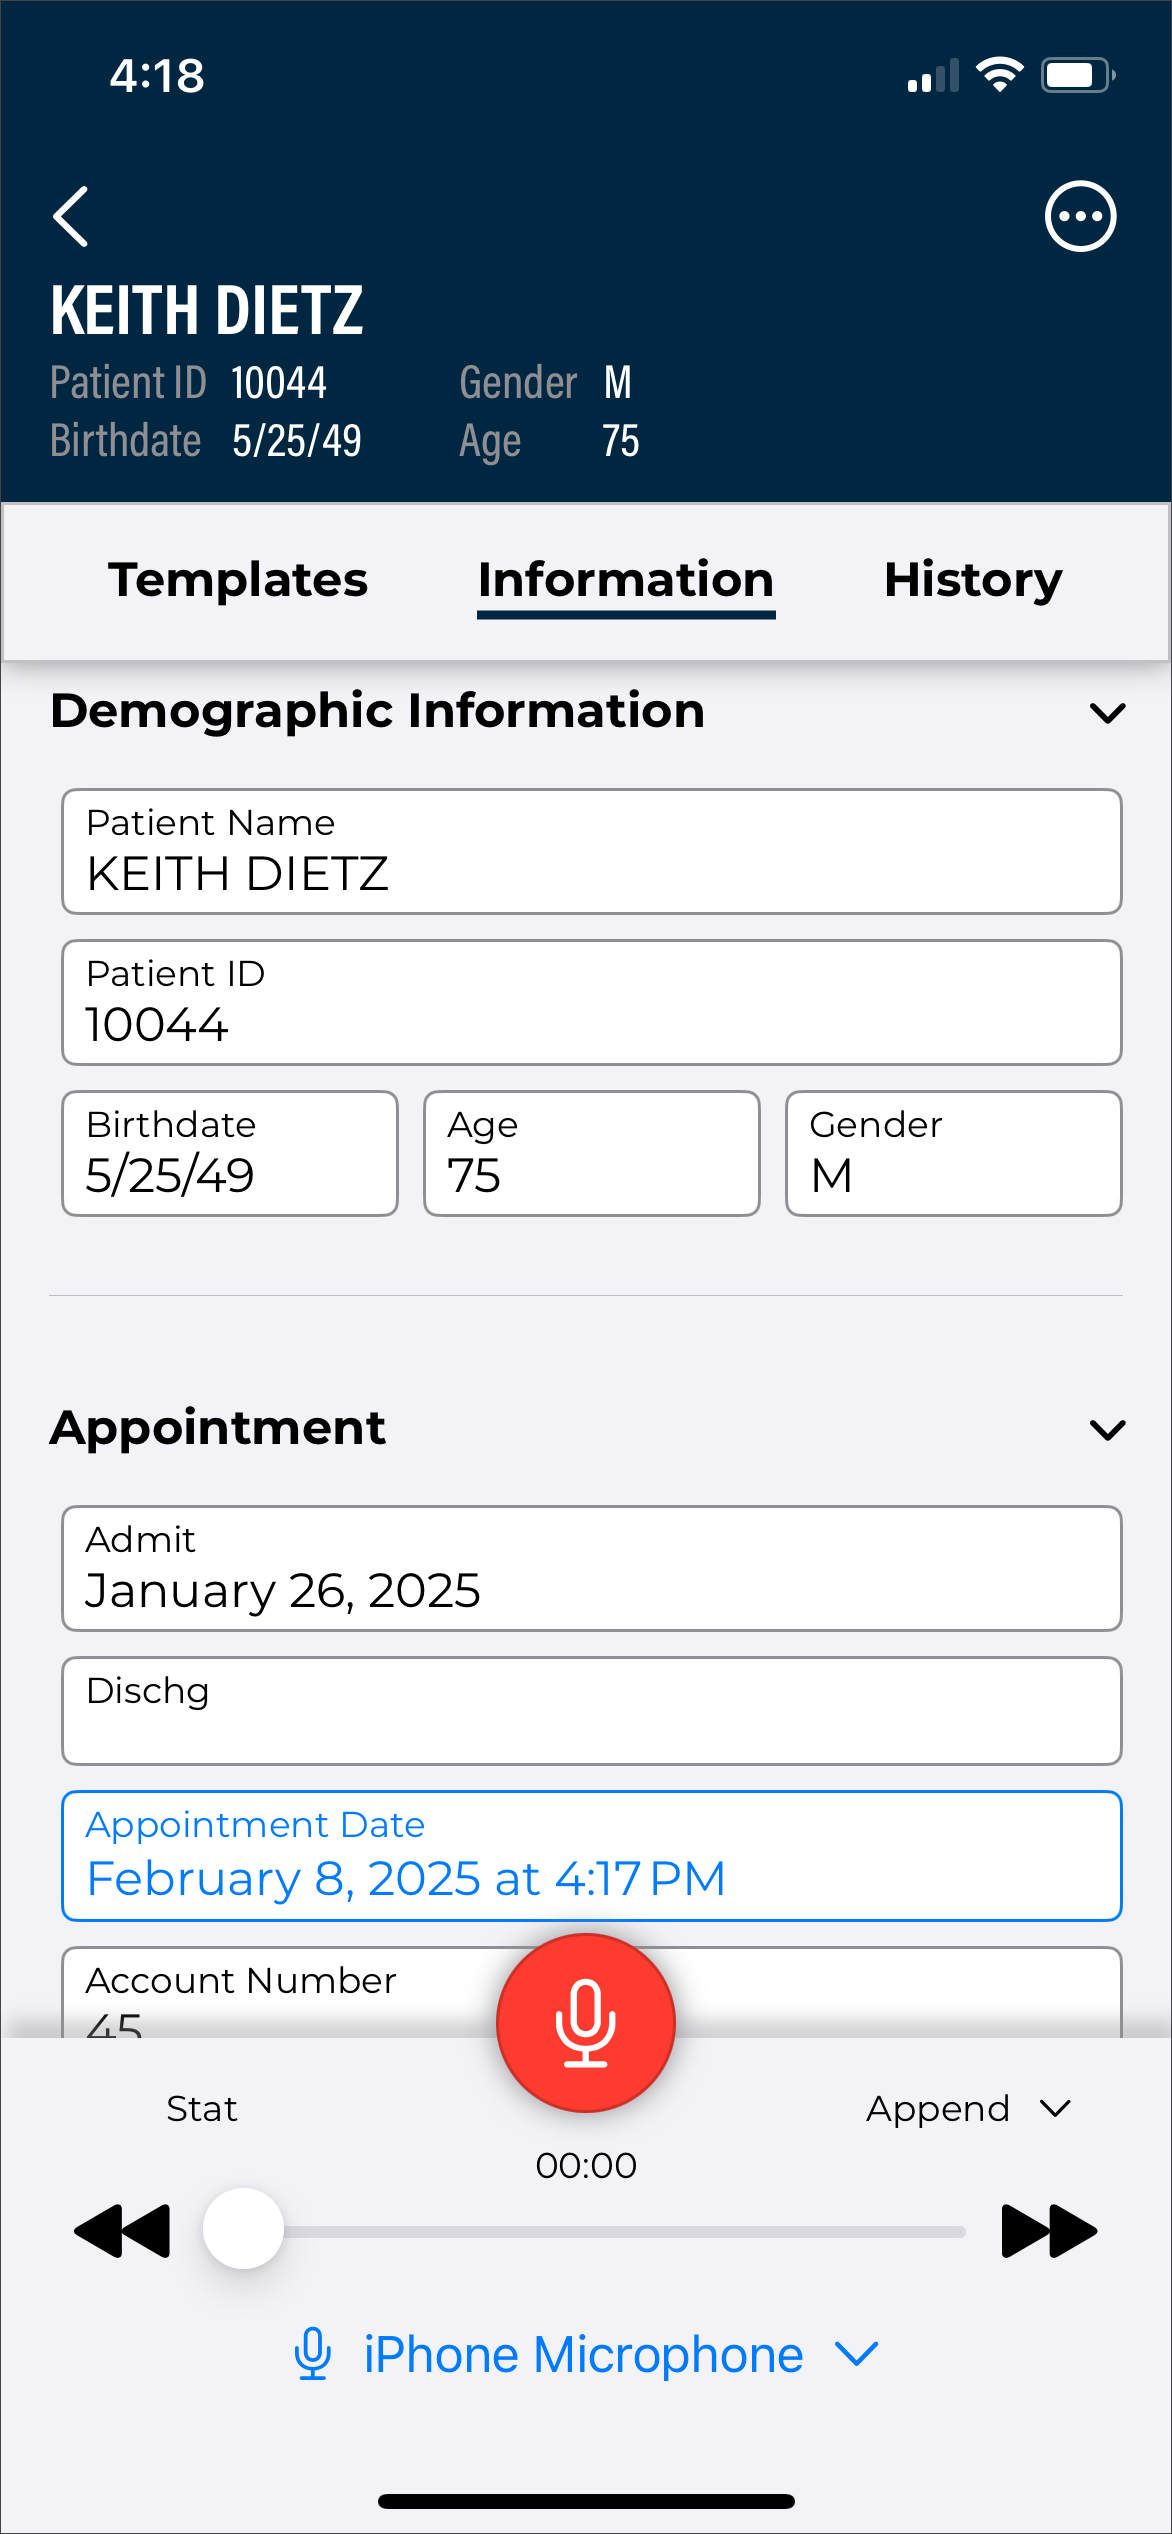
The top header section of the Record screen contains basic patient information, including the patient name, MRN, gender, birth date, and age. When a new dictation is created and a patient identifier has not been entered, the header information will display "New dictation" instead of a patient name. The screen has three tabs: Templates, Information, and History.
Templates Tab
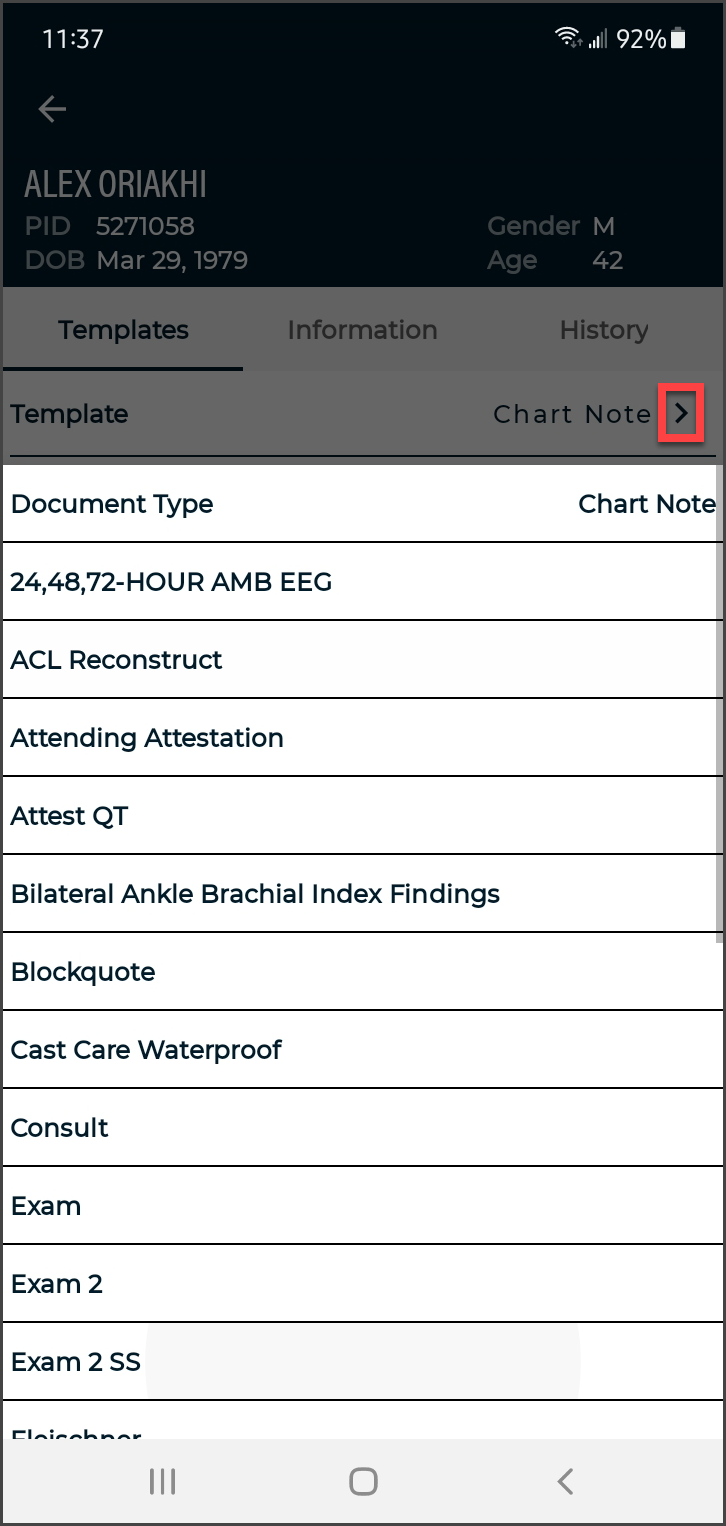
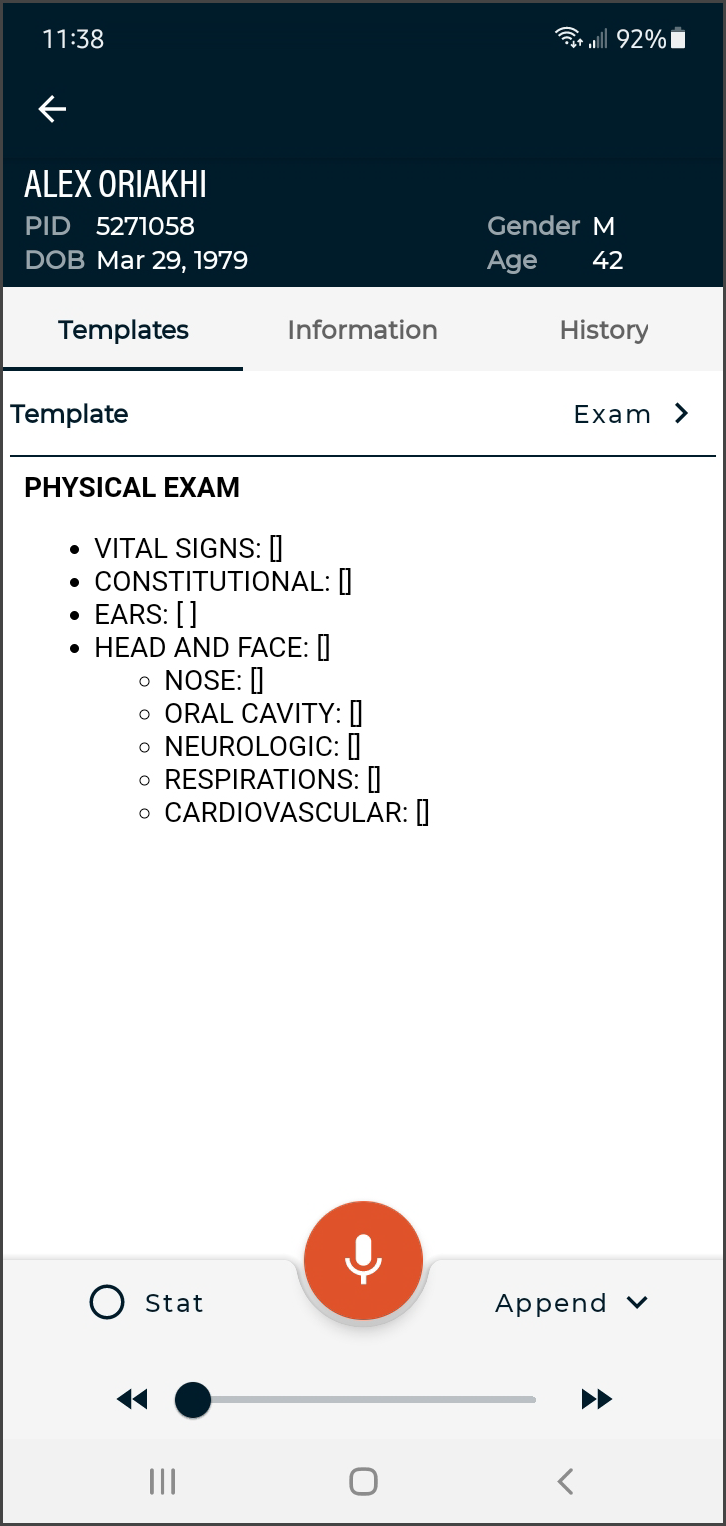
The Templates tab displays Document and Dictation templates to be referenced during dictation. To view the full text of a template, tap the arrow to expand the list of available templates then tap the desired template. A document type must be selected in the Info Tab to view the document template.
Info Tab
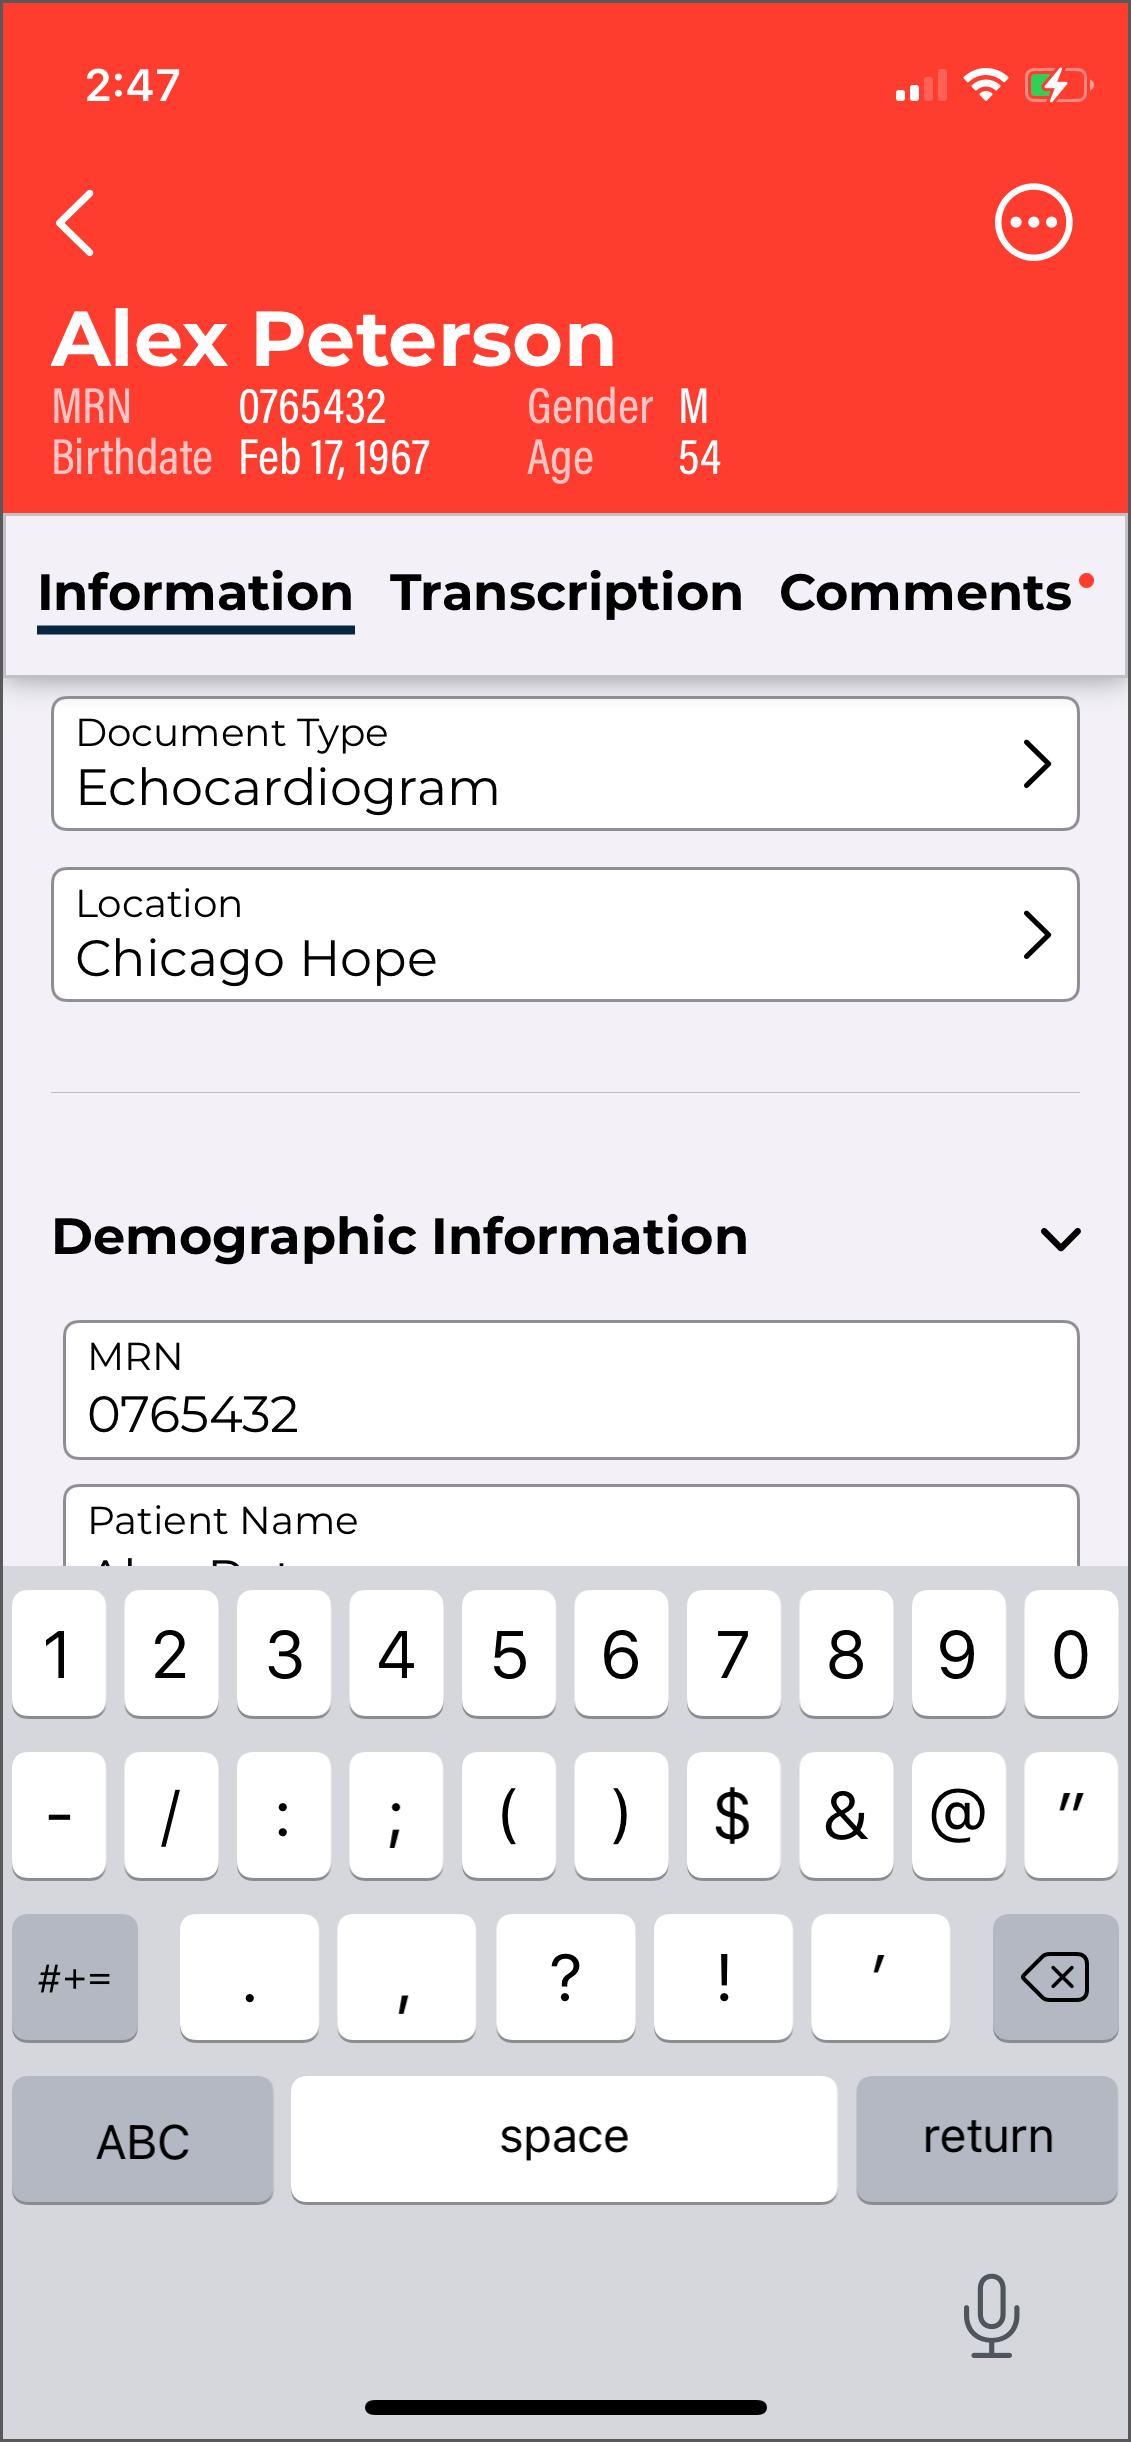
The Info Tab contains information about the patient and appointment, divided into five sections.
Document Type - Allows user to edit the document type associated with this dictation. Tap on the field and make a selection from the provided list to add or change the document type. This field is highlighted in yellow when a selection has not been made and is required prior to uploading the dictation.
Location - Allows user to edit the location associated with this dictation. The facility scheduling software or EMR can also set the location for an appointment. This location will appear by default but can be changed. Tap on the field and make a selection from the provided list to add or change the location. This field is highlighted in yellow when a selection has not been made and is required prior to uploading the dictation.
Only the document type and location can be edited for dictations created from an appointment in the appointment list.
Tip
Use the Settings screen to set a default document type and location, and to set a list of favorite document types and locations. See Settings tab.
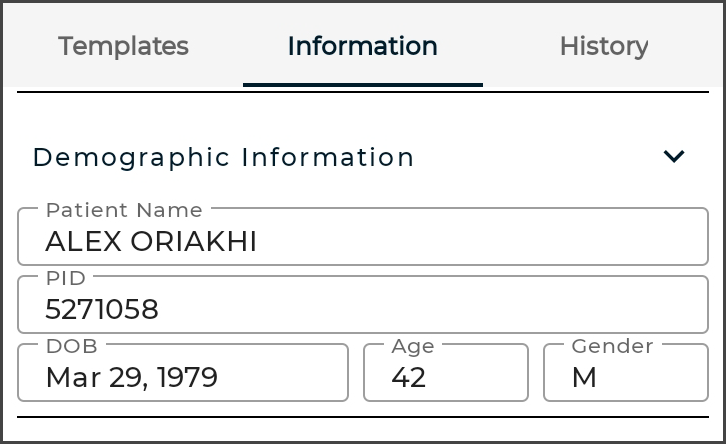
Demographic Information
Displays patient information. The user cannot edit these fields for an existing appointment.
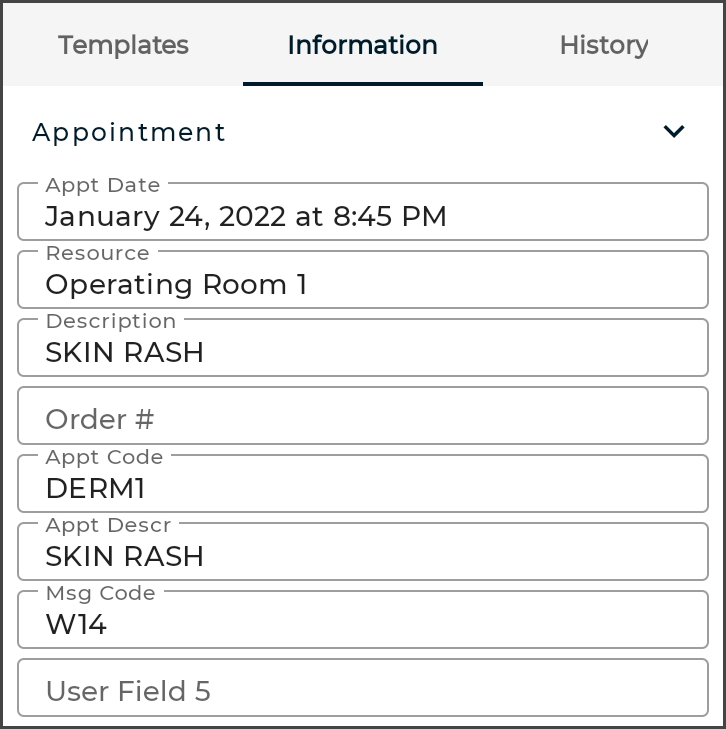
Appointment
Displays any additional information about this appointment. The user can make changes to Appointment Date and Time for new dictations, but not for appointments selected in the Patients tab.
Confirmation Information
Displays the Receipt Code and Transcription ID for this dictation. If more than one dictation has been uploaded for this appointment on this device, the most recent confirmation information will be displayed. eSOne Mobile fills in the Receipt Code and TID fields after uploading the dictation; these fields cannot be changed by the user.
Orders Tab
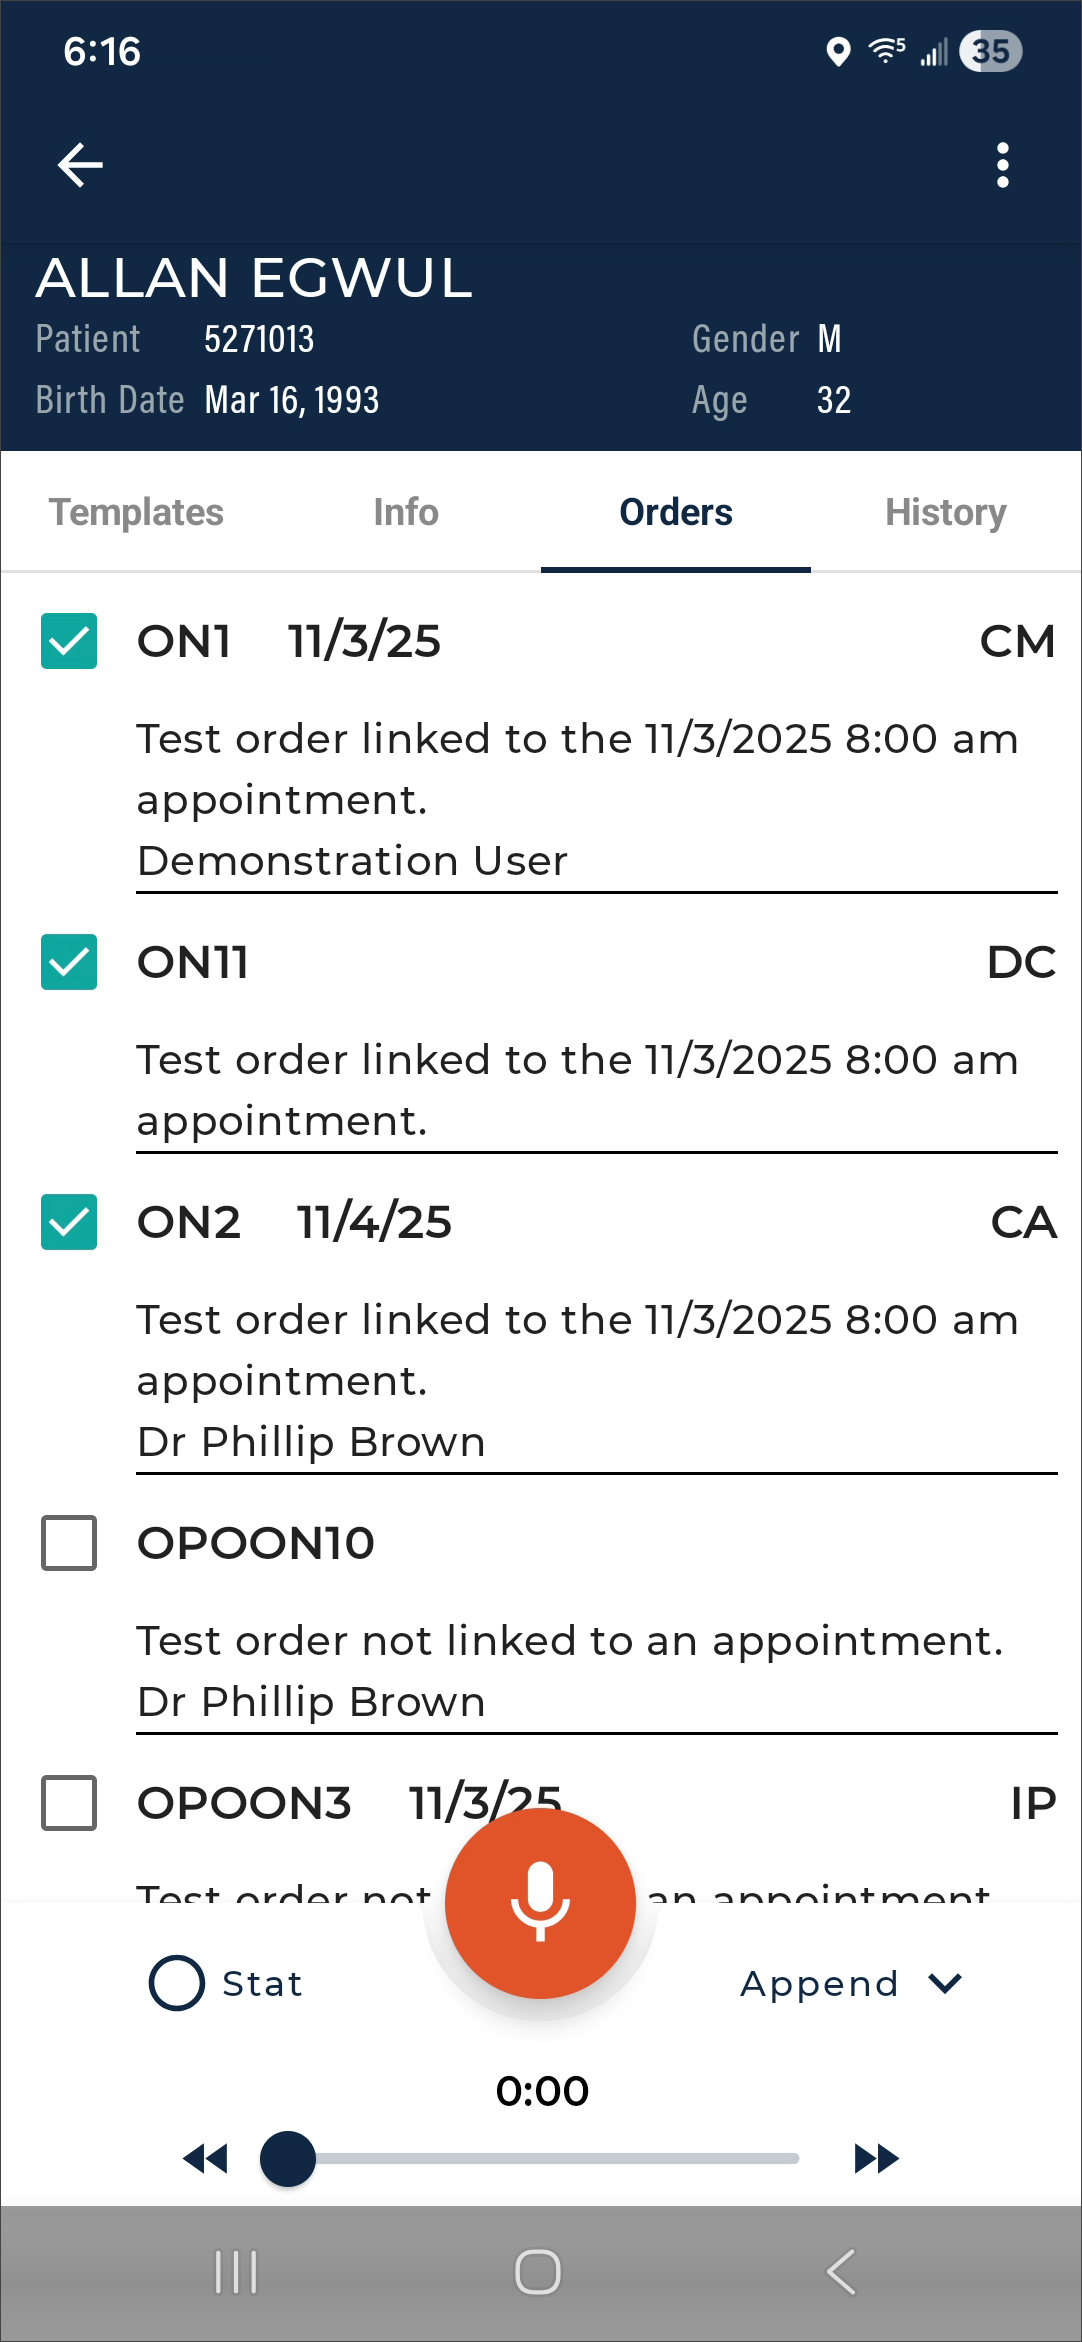
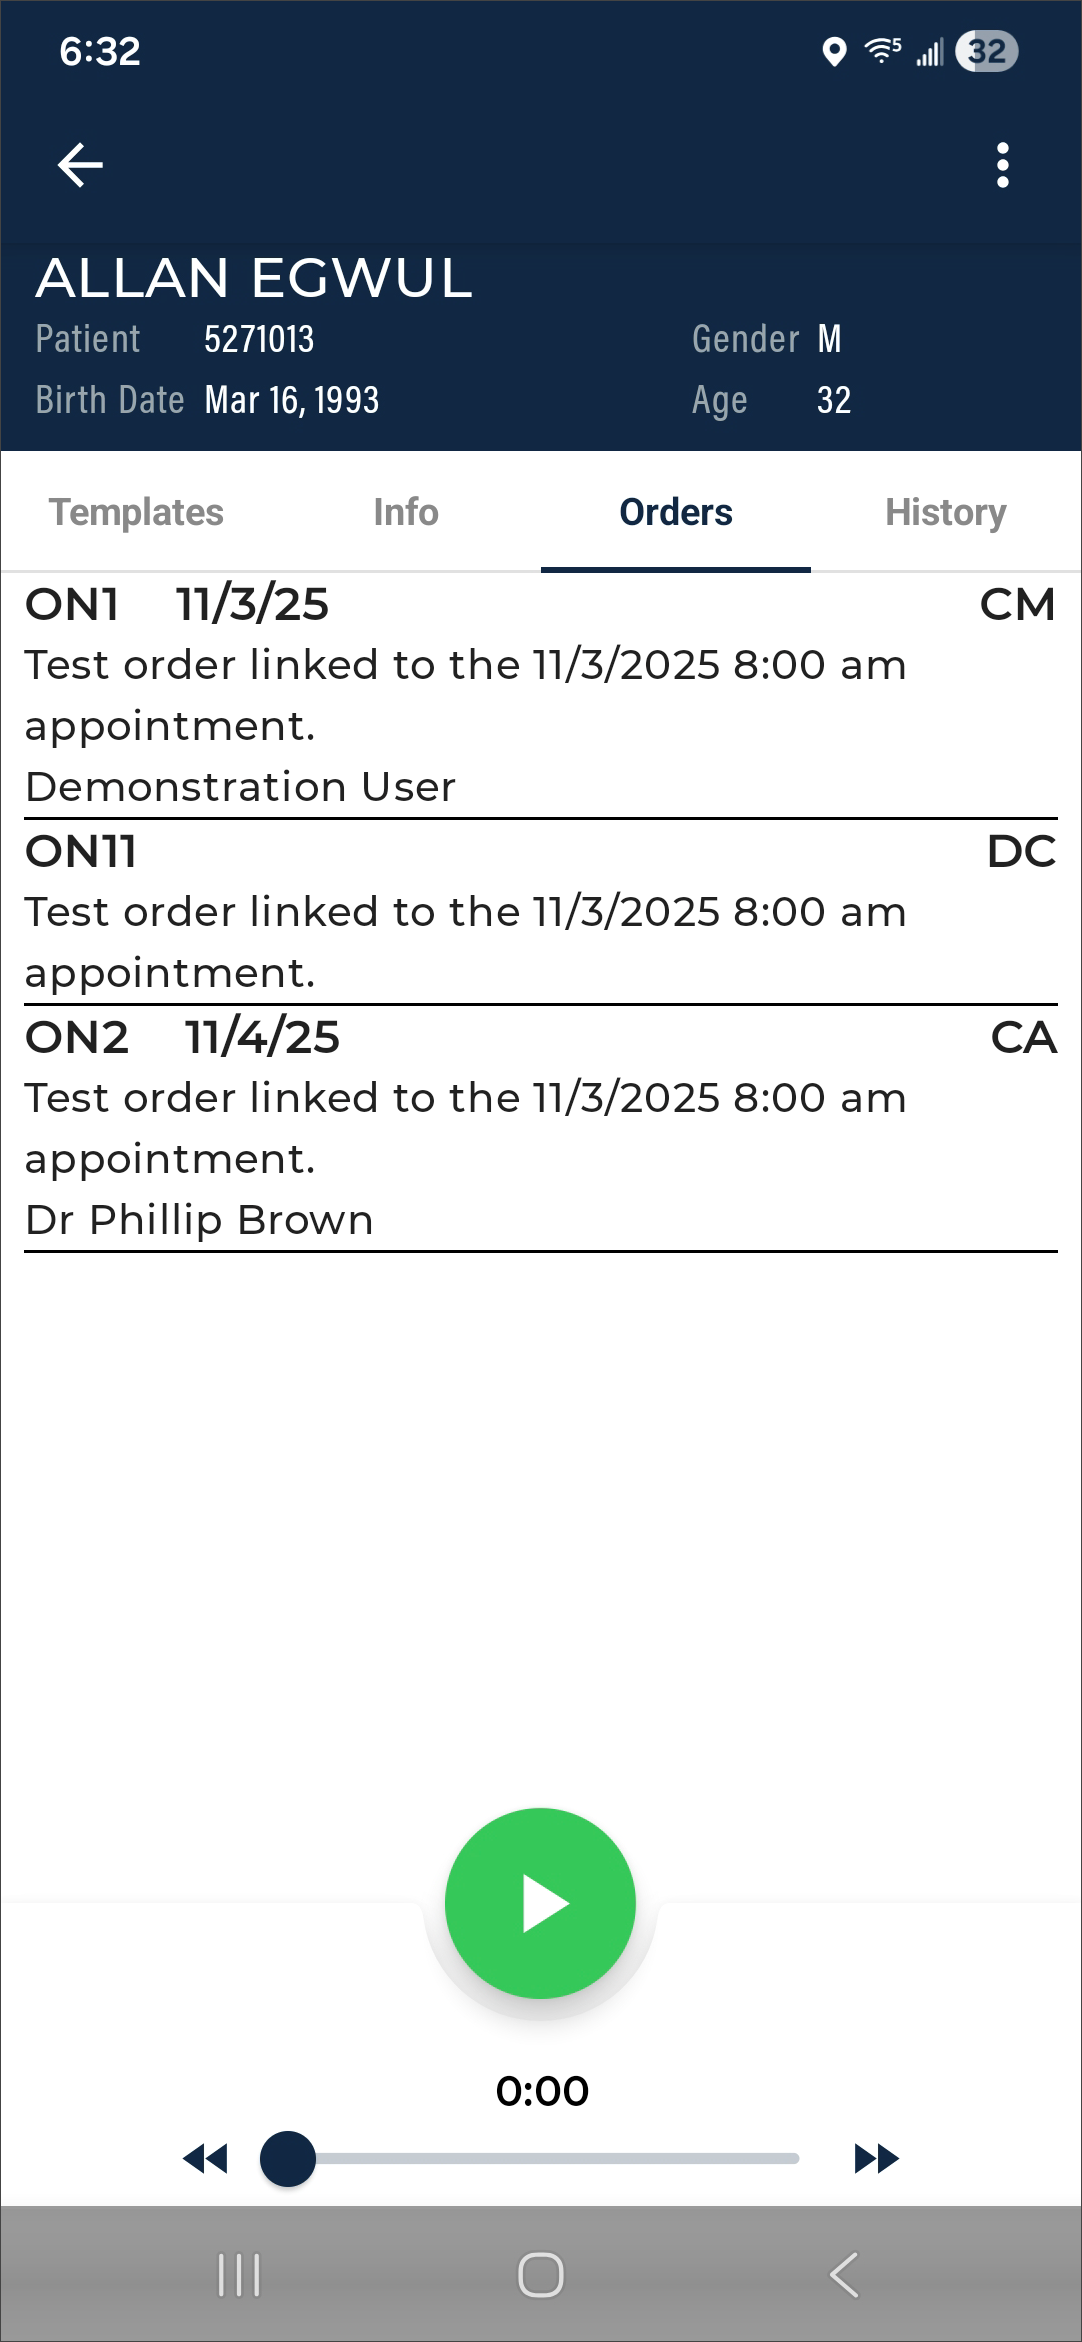
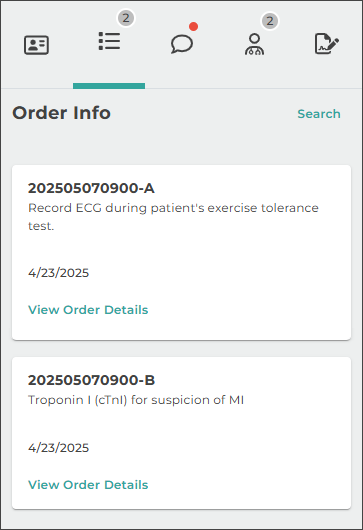
For document types that support the orders workflow, orders can be viewed and selected prior to dictation upload. This functionality ensures orders are associated correctly during dictation and reduces the need to attach orders after upload.
The Orders tab displays a list of available orders with the following information for each order:
- Order Number
- Date Observed
- Order Status
- Order Description
- Ordering Physician
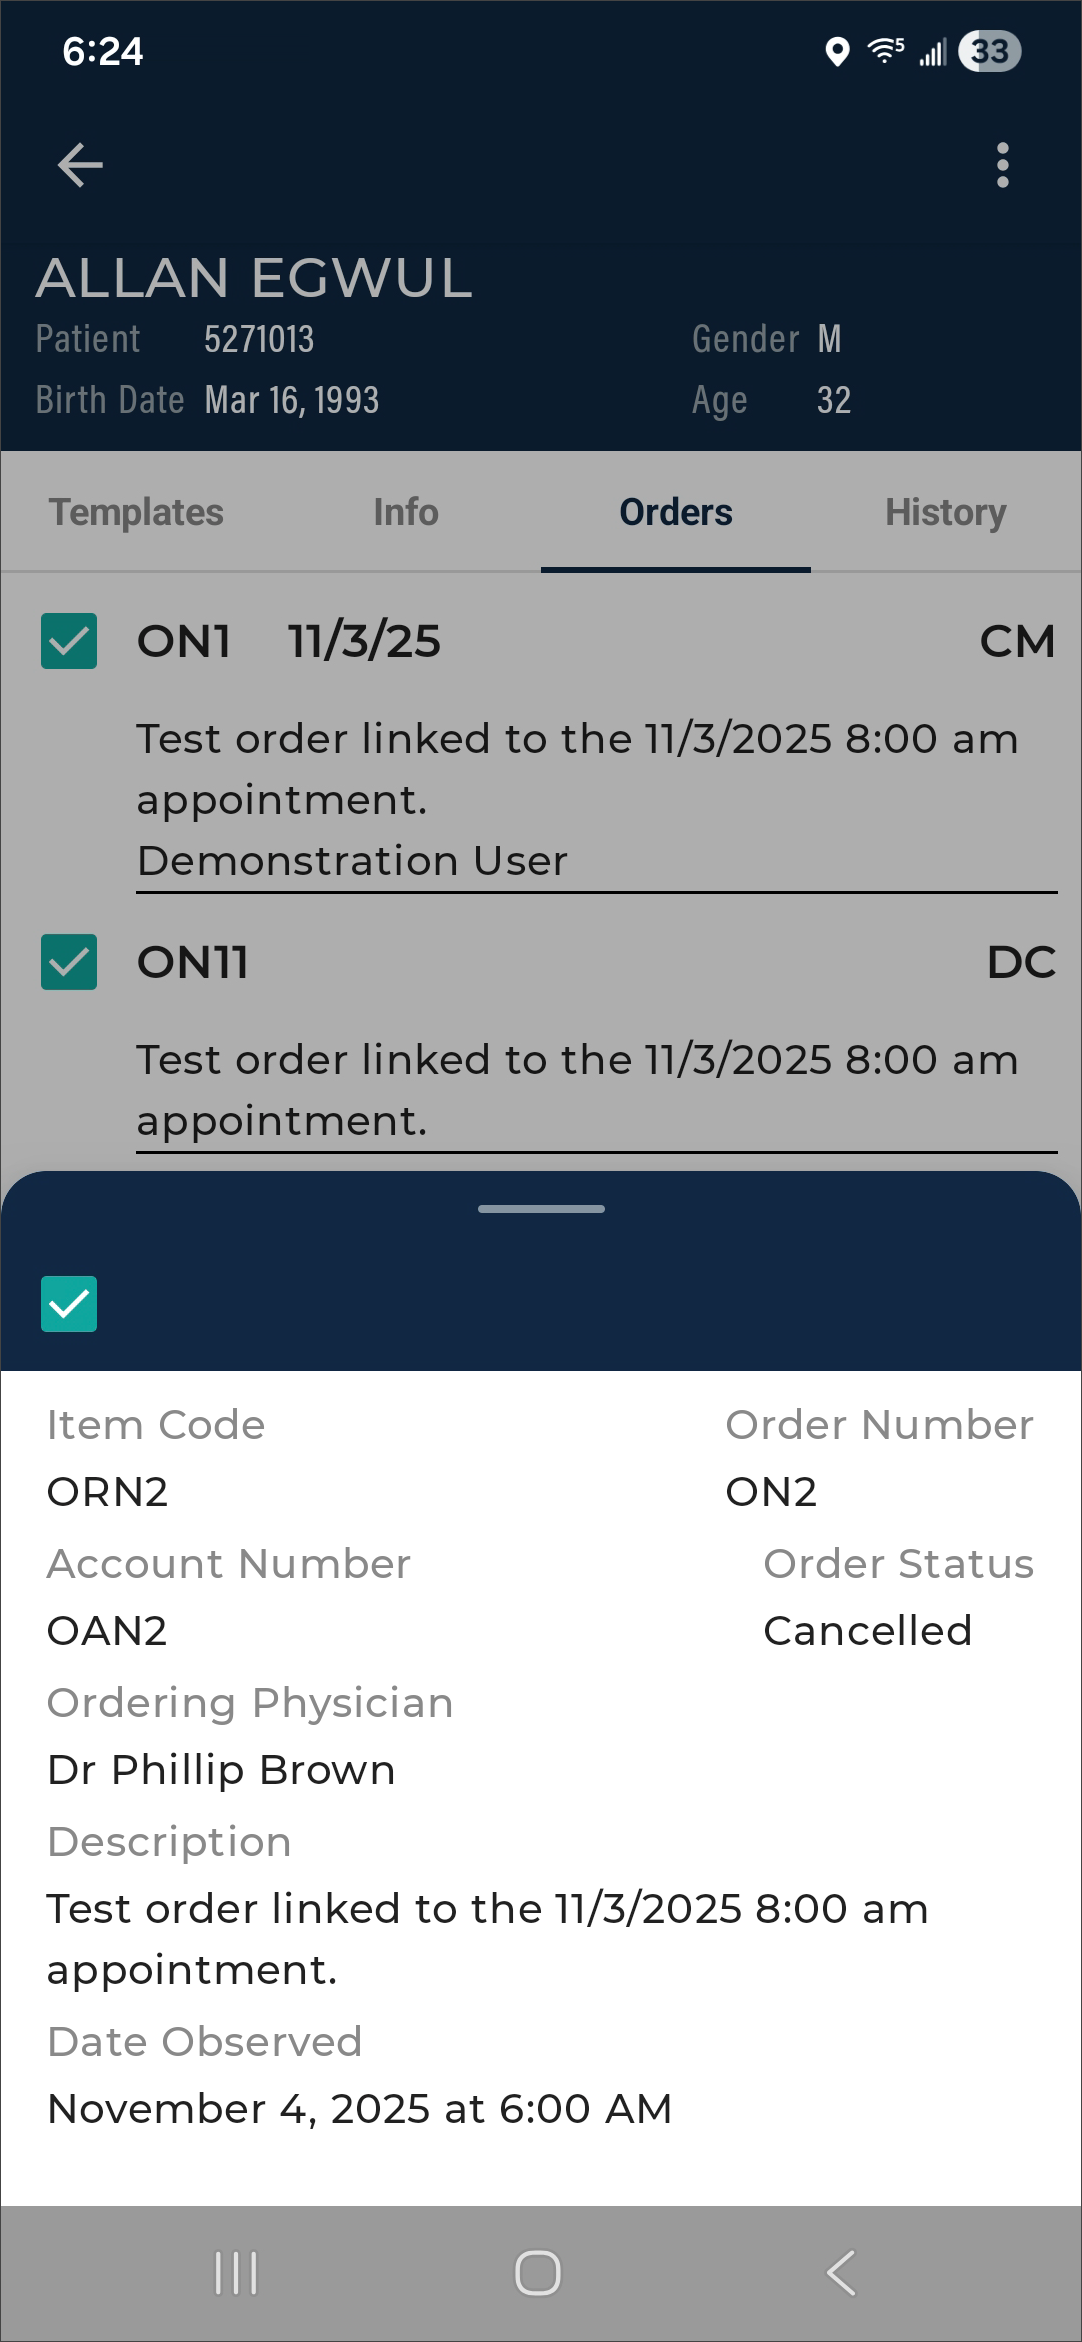
Tapping an order opens additional order details for review:
- Item Code
- Account Number
- Order Status
The orders list and details panel have a checkbox. Tapping the checkbox selects or deselects the order for attachment to the dictation. Orders checked (selected) at the time of upload will be associated with the dictation.
Orders may be preselected based on the method used to create the dictation. See Preselected Orders for more information.
Preselected orders can be deselected, and other available orders can be selected as needed prior to upload. Order selections remain editable until the note is uploaded.
Selecting Multiple Orders
Multiple orders can be selected for a single note. The same selection rules apply as in InQuiry:
- Only orders associated with the same appointment can be selected together, or
- Orders that are not linked to an appointment can be selected together
Orders associated with different appointments cannot be selected on the same dictation. If an order from a different appointment is selected, any previously selected orders will be deselected automatically.
Preselected Orders
When dictating on an appointment from the schedule, orders linked to that appointment will be preselected automatically.
Orders can also be accessed when working outside the schedule, but the available orders and pre-selection will be determined by the method used to create the dictation:
- A patient is selected from the Patients sub-tab after performing a search.
- All orders linked to the patient will be listed.
- No orders will be preselected.
- An appointment is selected from the Appointments sub-tab after performing a search.
- All orders linked to the same appointment or not linked to an appointment will be listed.
- Orders linked to the selected appointment will be preselected.
- An ad-hoc dictation is created using the Add button.
- All orders linked to the patient will be listed.
- The orders preselected will depend on the patient identifier entered (Patient ID, Account Number, or Order Number, depending on document type configuration).
- Patient ID - No orders will be preselected.
- Account Number - All orders linked to the appointment associated with the Account Number will be preselected.
- Order Number - The order matching the entered Order Number will be preselected.
Finalize the order selection by checking the boxes to attach orders or unchecking them to exclude orders.
Viewing Orders After Upload
After uploading the dictation, upon reopening the dictation from the schedule, the Orders tab displays the orders that were selected at the time of upload. Orders cannot be modified after upload.
The History Tab
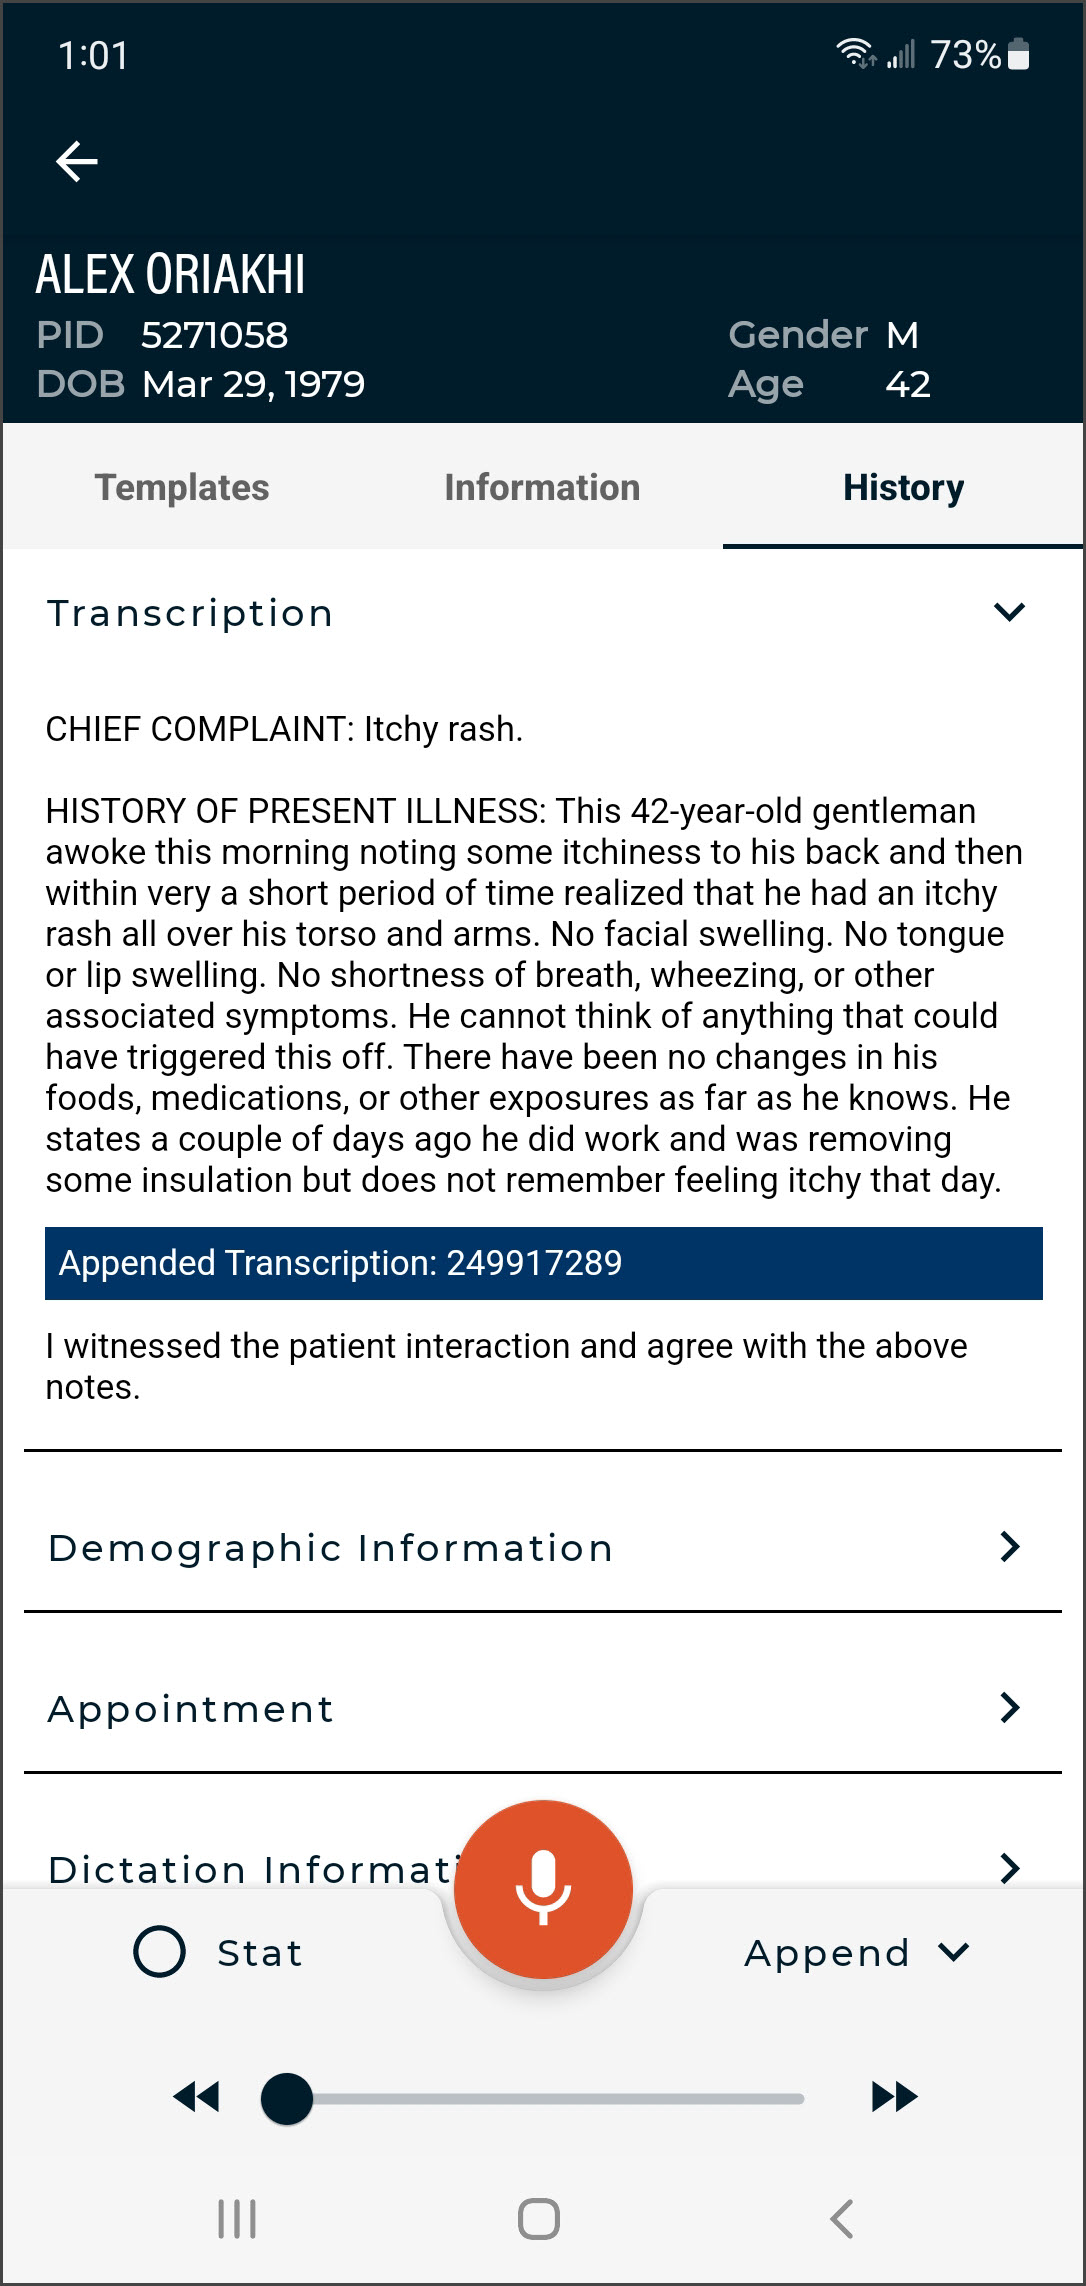
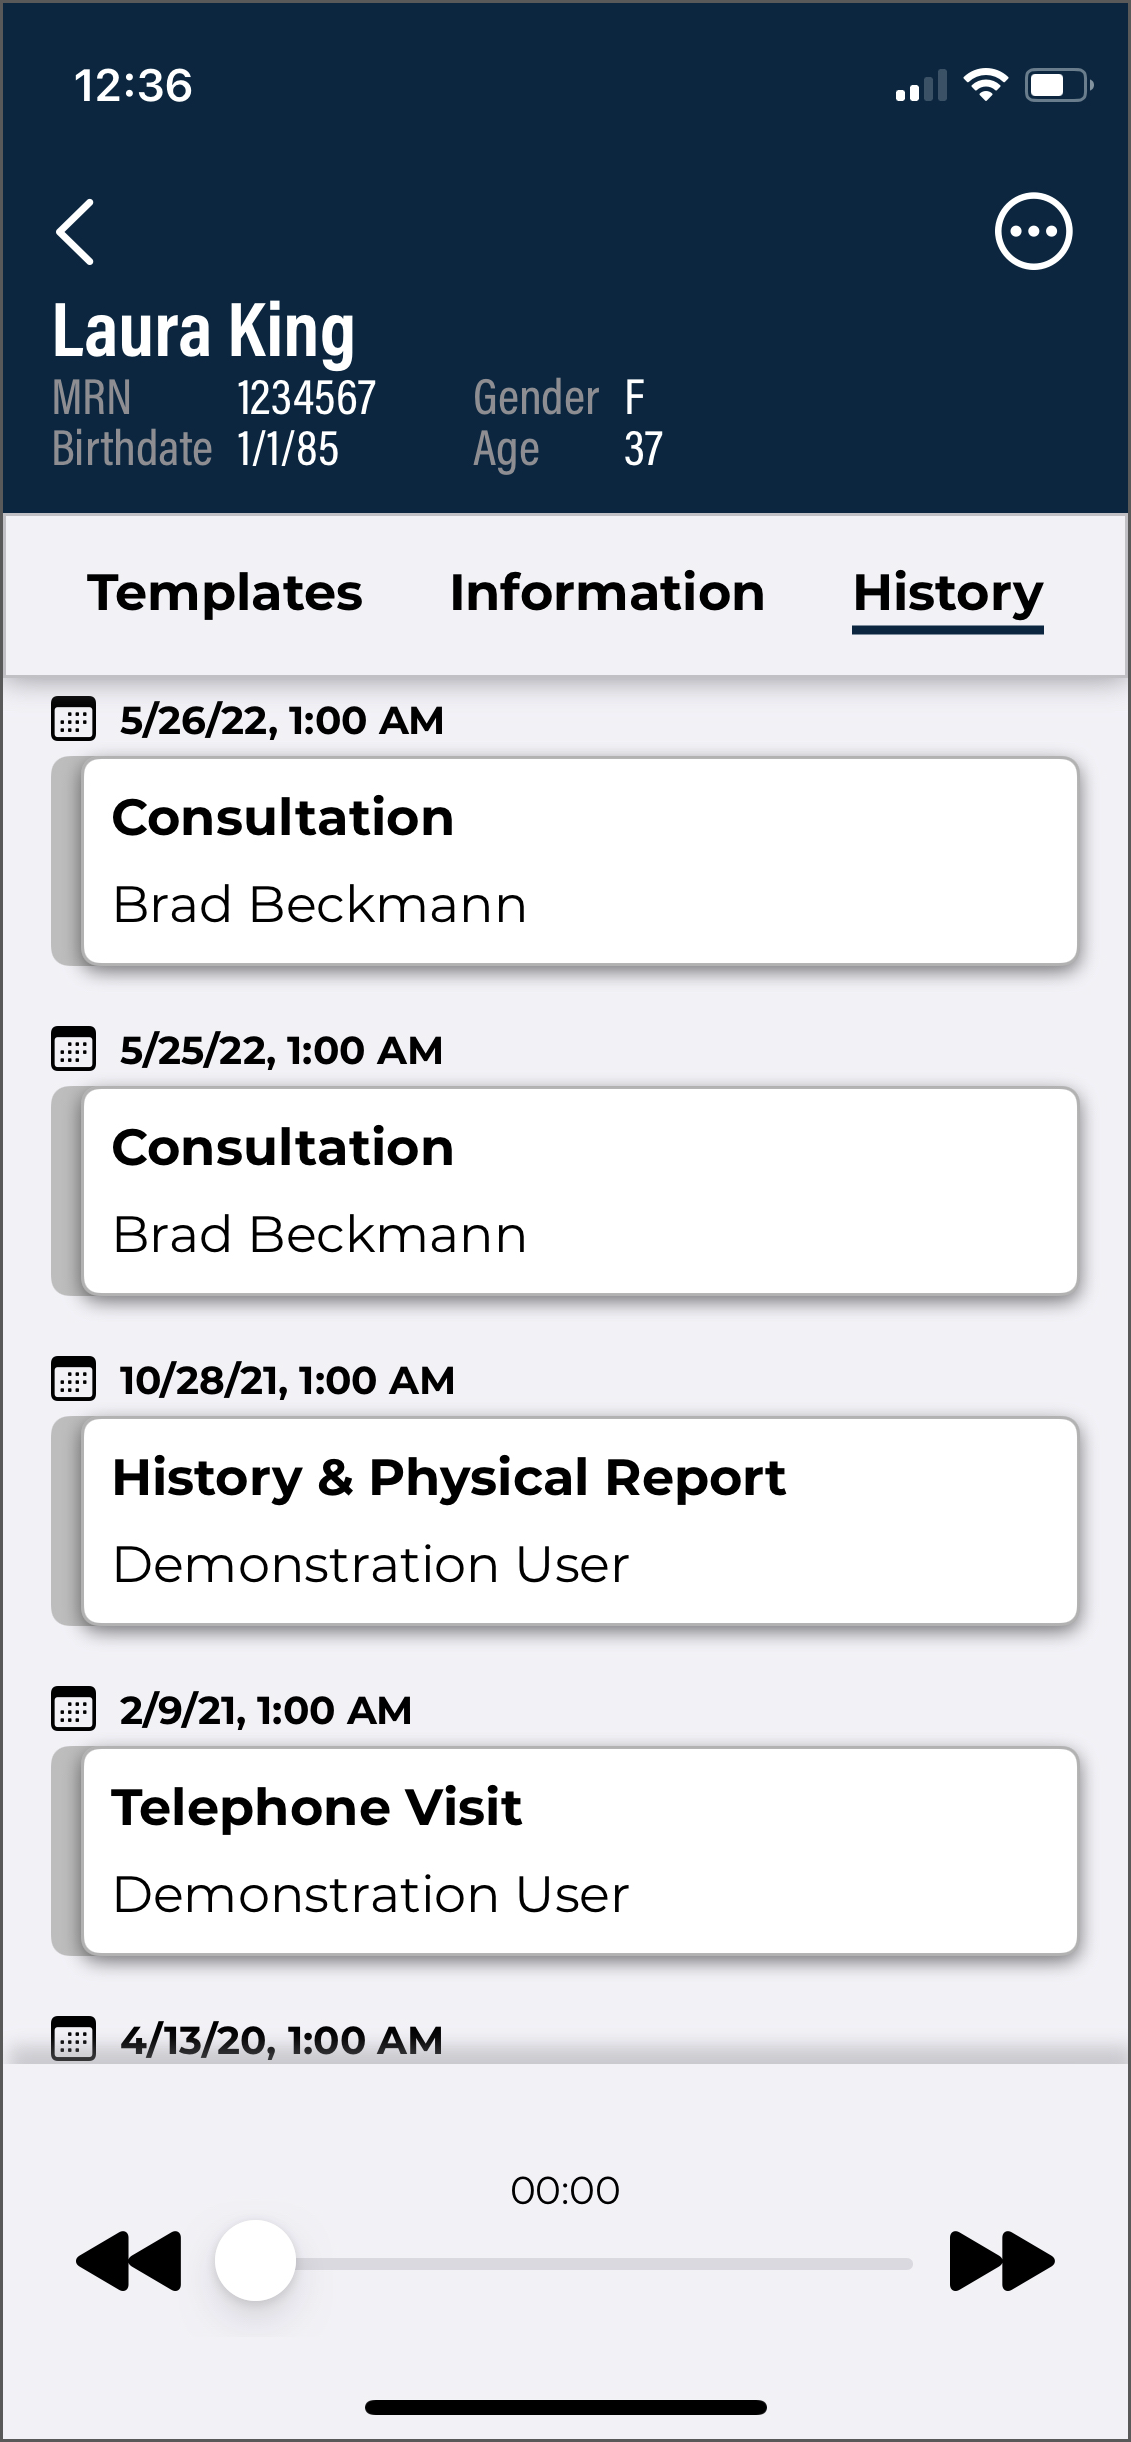
Tap the History tab to display existing transcriptions that have the same Patient ID as the current patient. These transcriptions are available for reference while dictating, but cannot be edited from this screen.
Prior transcriptions are identified by document type, dictating clinician, and appointment date. Tap the desired appointment to view details, which are broken into the following sections:
-
Transcription - Displays the transcription text.
-
Demographic Information - Displays patient information.
-
Appointment - Displays appointment details, including document type and location.
-
Dictation Information - Displays Transcription ID, Date Dictated, and the Clinician.
-
Signatures - Lists signatures on the transcription and date signed (no date appears if the transcription has not yet been signed).
-
Associates - Lists all copied associates on the transcription.
-
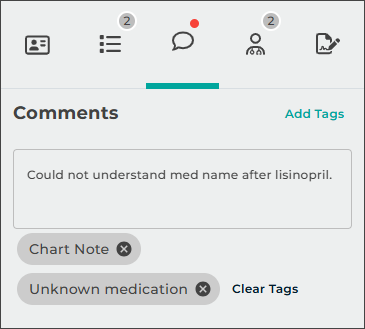
Comments - Displays comments and comment tags on the transcription, if the user is granted permission to view comments.
To return to the list of prior transcriptions, tap the back arrow in the upper left corner of the screen, or the back button on the Android device.
Recording Controls
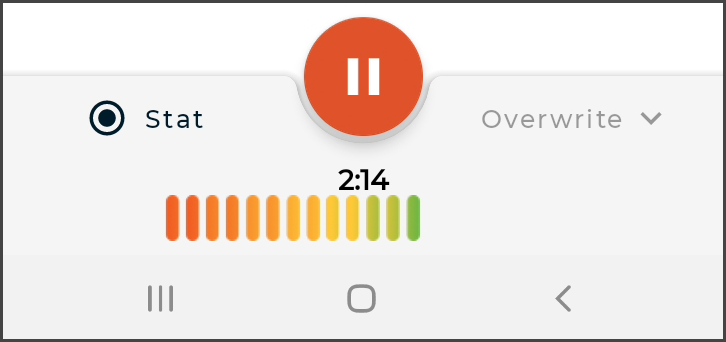
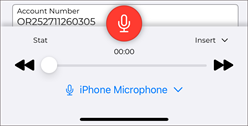
The recording and audio controls appear at the bottom of the Record screen of all three tabs. There is a progress bar and buttons for Record, Play, Rewind, and Fast Forward. Tap the Record button (red microphone) to begin recording; the record button will then become a Pause button. Tap the Pause button to pause recording; recording can be resumed by tapping the record button again.
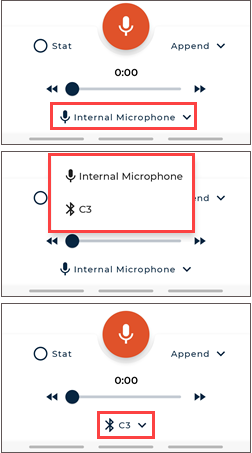
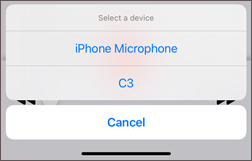
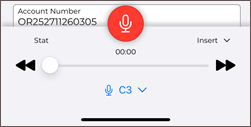
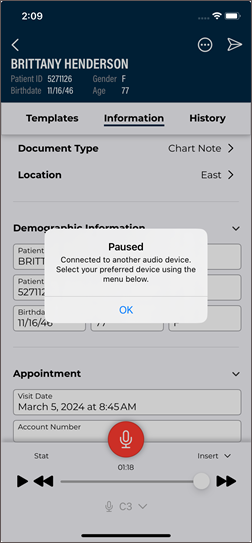
When multiple recording devices are connected the selected device is displayed at the bottom of the screen. The recording device can be changed by tapping the device name to open the list of connected devices, then tap the desired device. The selected device will be remembered as the preferred device and will be used for subsequent dictations, if still connected. If the connection to the selected recording device is lost during dictation, recording will automatically pause and a notification will be displayed. Close the notification, verify the desired device is selected, then press Record to resume dictating.
Tap the Play button to play back the dictation. Use the Rewind and Fast Forward buttons to navigate within the location of the dictation in increments of 5 seconds per button press. Alternatively, you can use the dictation slider to navigate to the desired dictation location.
Underneath the Record button, the Progress Bar shows which part of the dictation is currently playing or being recorded. The slider can be dragged to play different parts of the dictation or to insert or overwrite the dictation where desired.
To the left of the record button is the STAT button. The STAT indicator can be toggled on and off at any time prior to uploading the dictation. If the STAT radio button is black-filled, the dictation is marked STAT.
Note
Marking a dictation as STAT may increase the price for the transcription. Please contact your transcription company for more information.
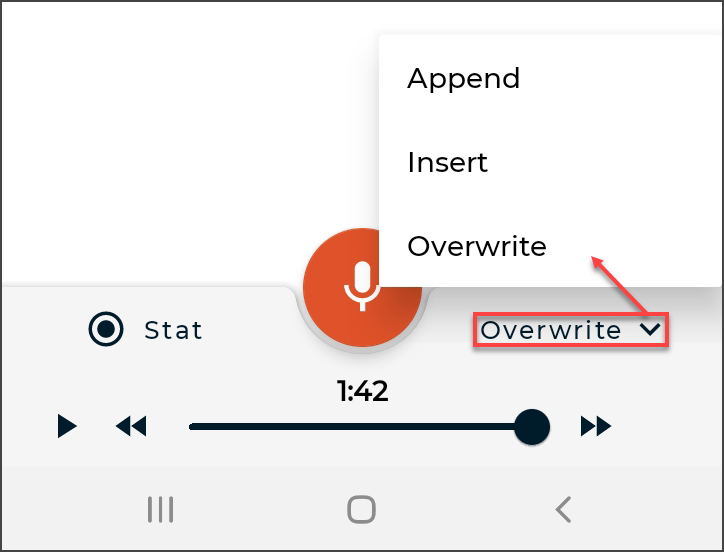
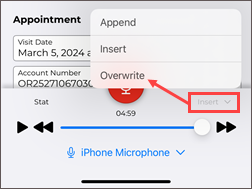
The current Record Mode is displayed to the right of the record button. Tapping the record mode opens a menu and allows the mode to be changed to one of the following options:
- Append (the default mode) - Adds new dictation at the end of the existing dictation regardless of where the dictation playback is.
- Overwrite - Allows the user to replace dictation from the selected playback position with new dictation.
- Insert - Adds additional dictation by inserting new dictation at the playback position.
Recording must be paused to change the record mode. The last used recording mode will be automatically applied to the following dictation.
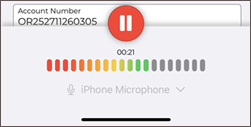
The Voice Detection bar replaces the progress bar while recording, showing the level of sound detected. The higher the volume of the dictation received, the further the colors progress from red to green. The Silence Detection option can be enabled in the Settings tab; recording will automatically be paused if continuous silence is detected for the set number of seconds while recording.
The Upload button submits a dictation for transcription. Uploaded dictations cannot be edited in the eSOne mobile app. This button only appears after a dictation has been started.
The back arrow, located in the top left corner of the record screen, allows the user to Save the dictation and return to the Patients tab without uploading the dictation. The Android device's back arrow also saves dictations. Saved dictations can be reopened, changed, and uploaded. If the user leaves dictations on the device for longer than three days without uploading, eSOne Mobile displays a reminder.
Menu Button
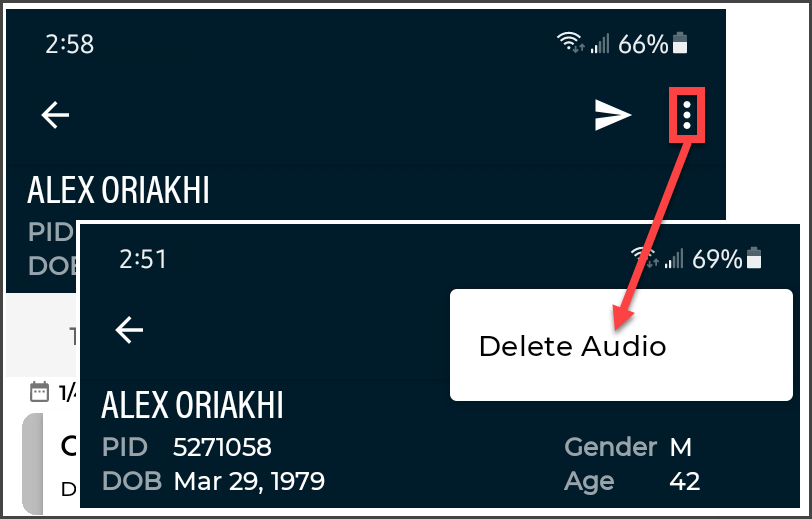
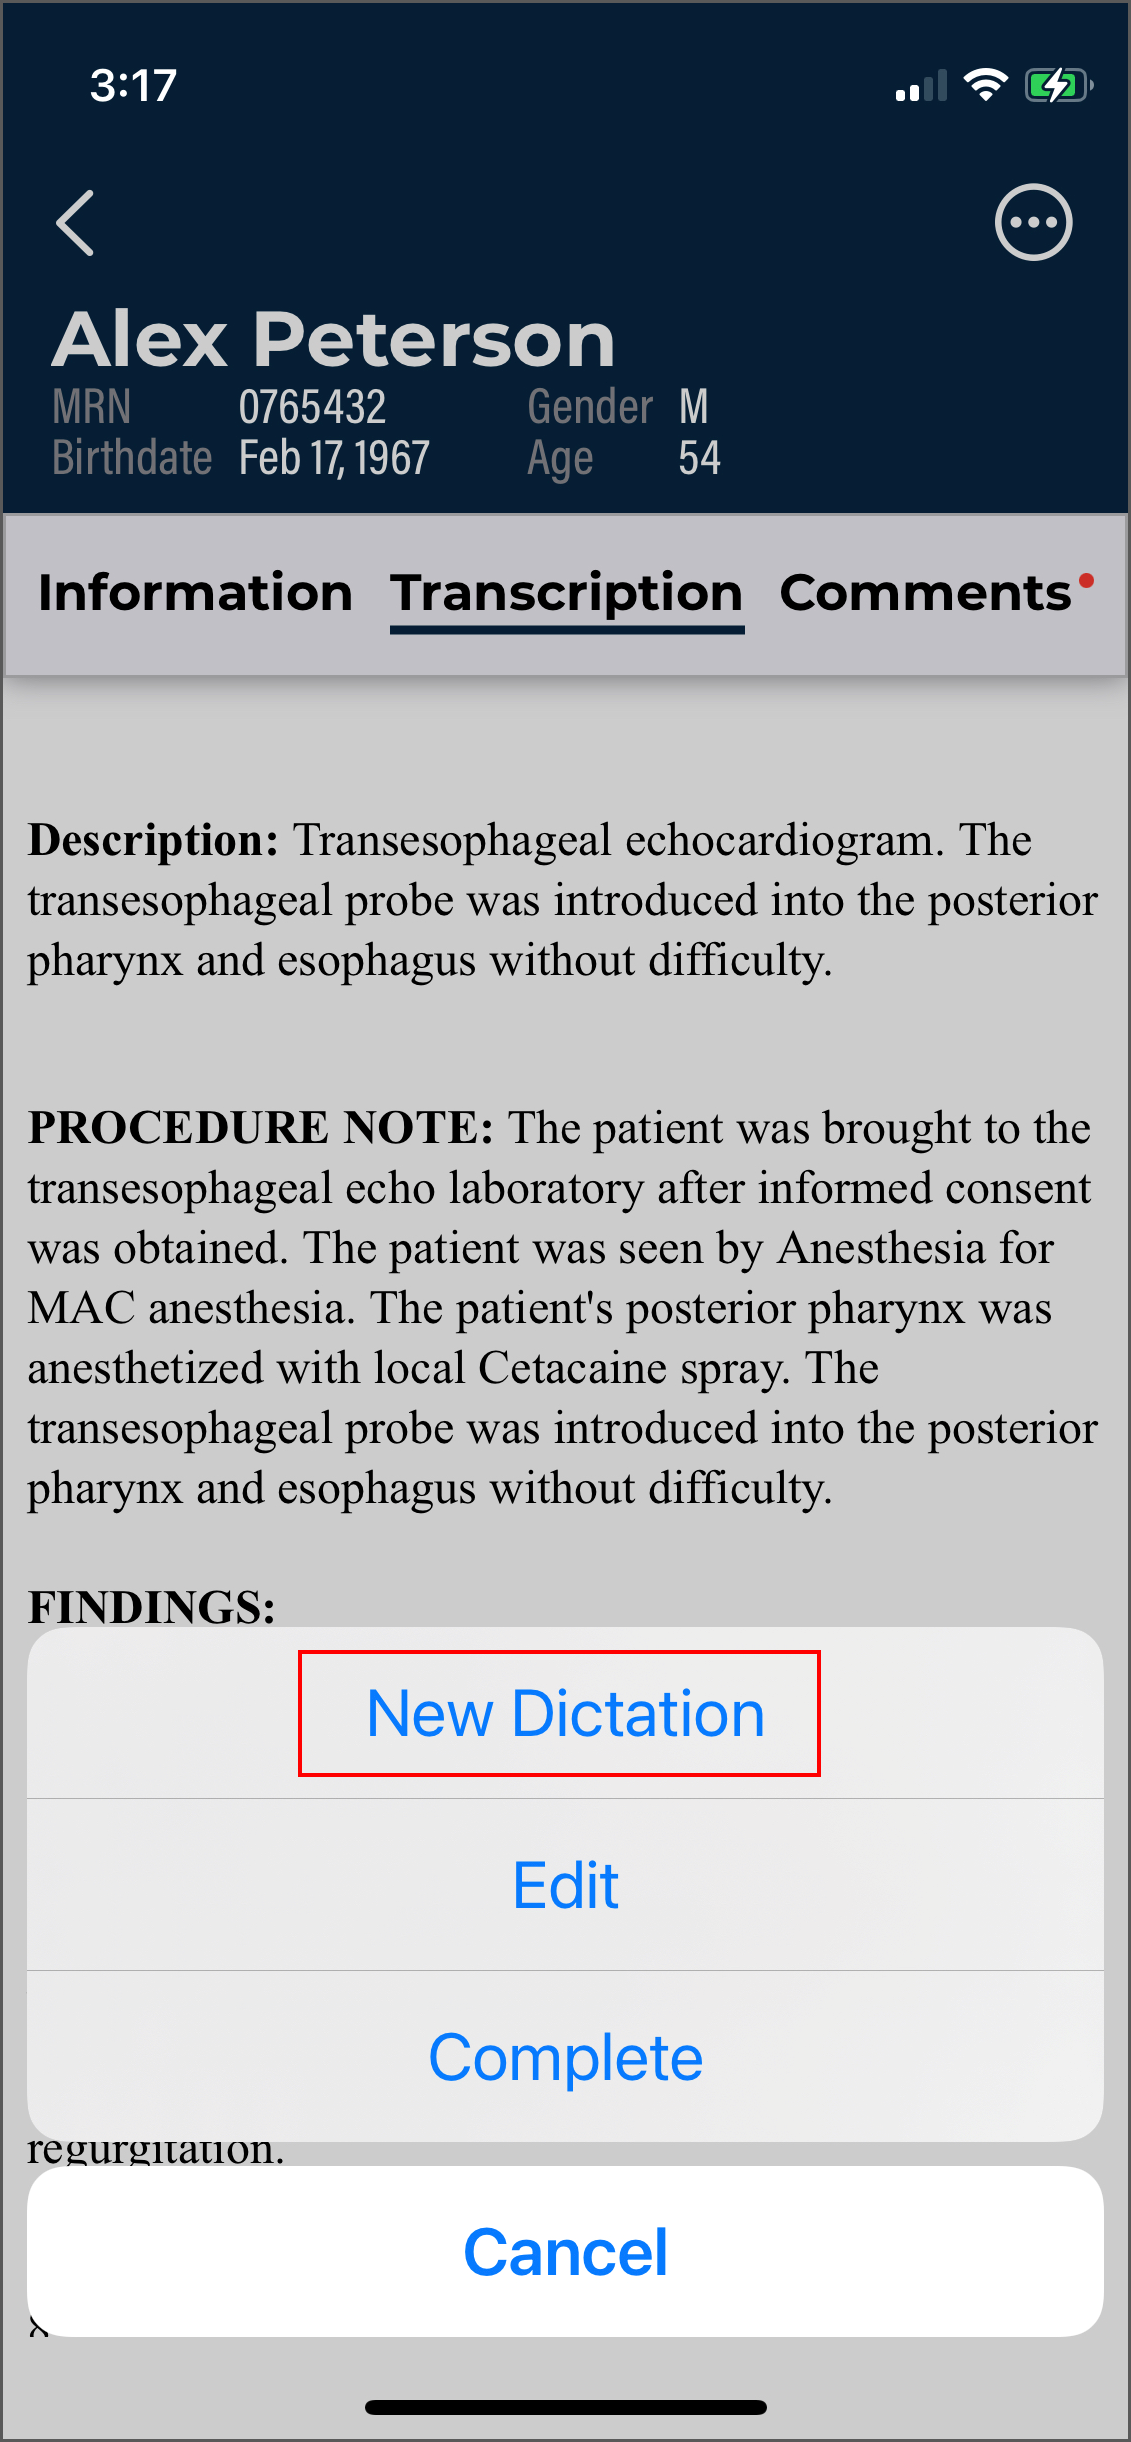
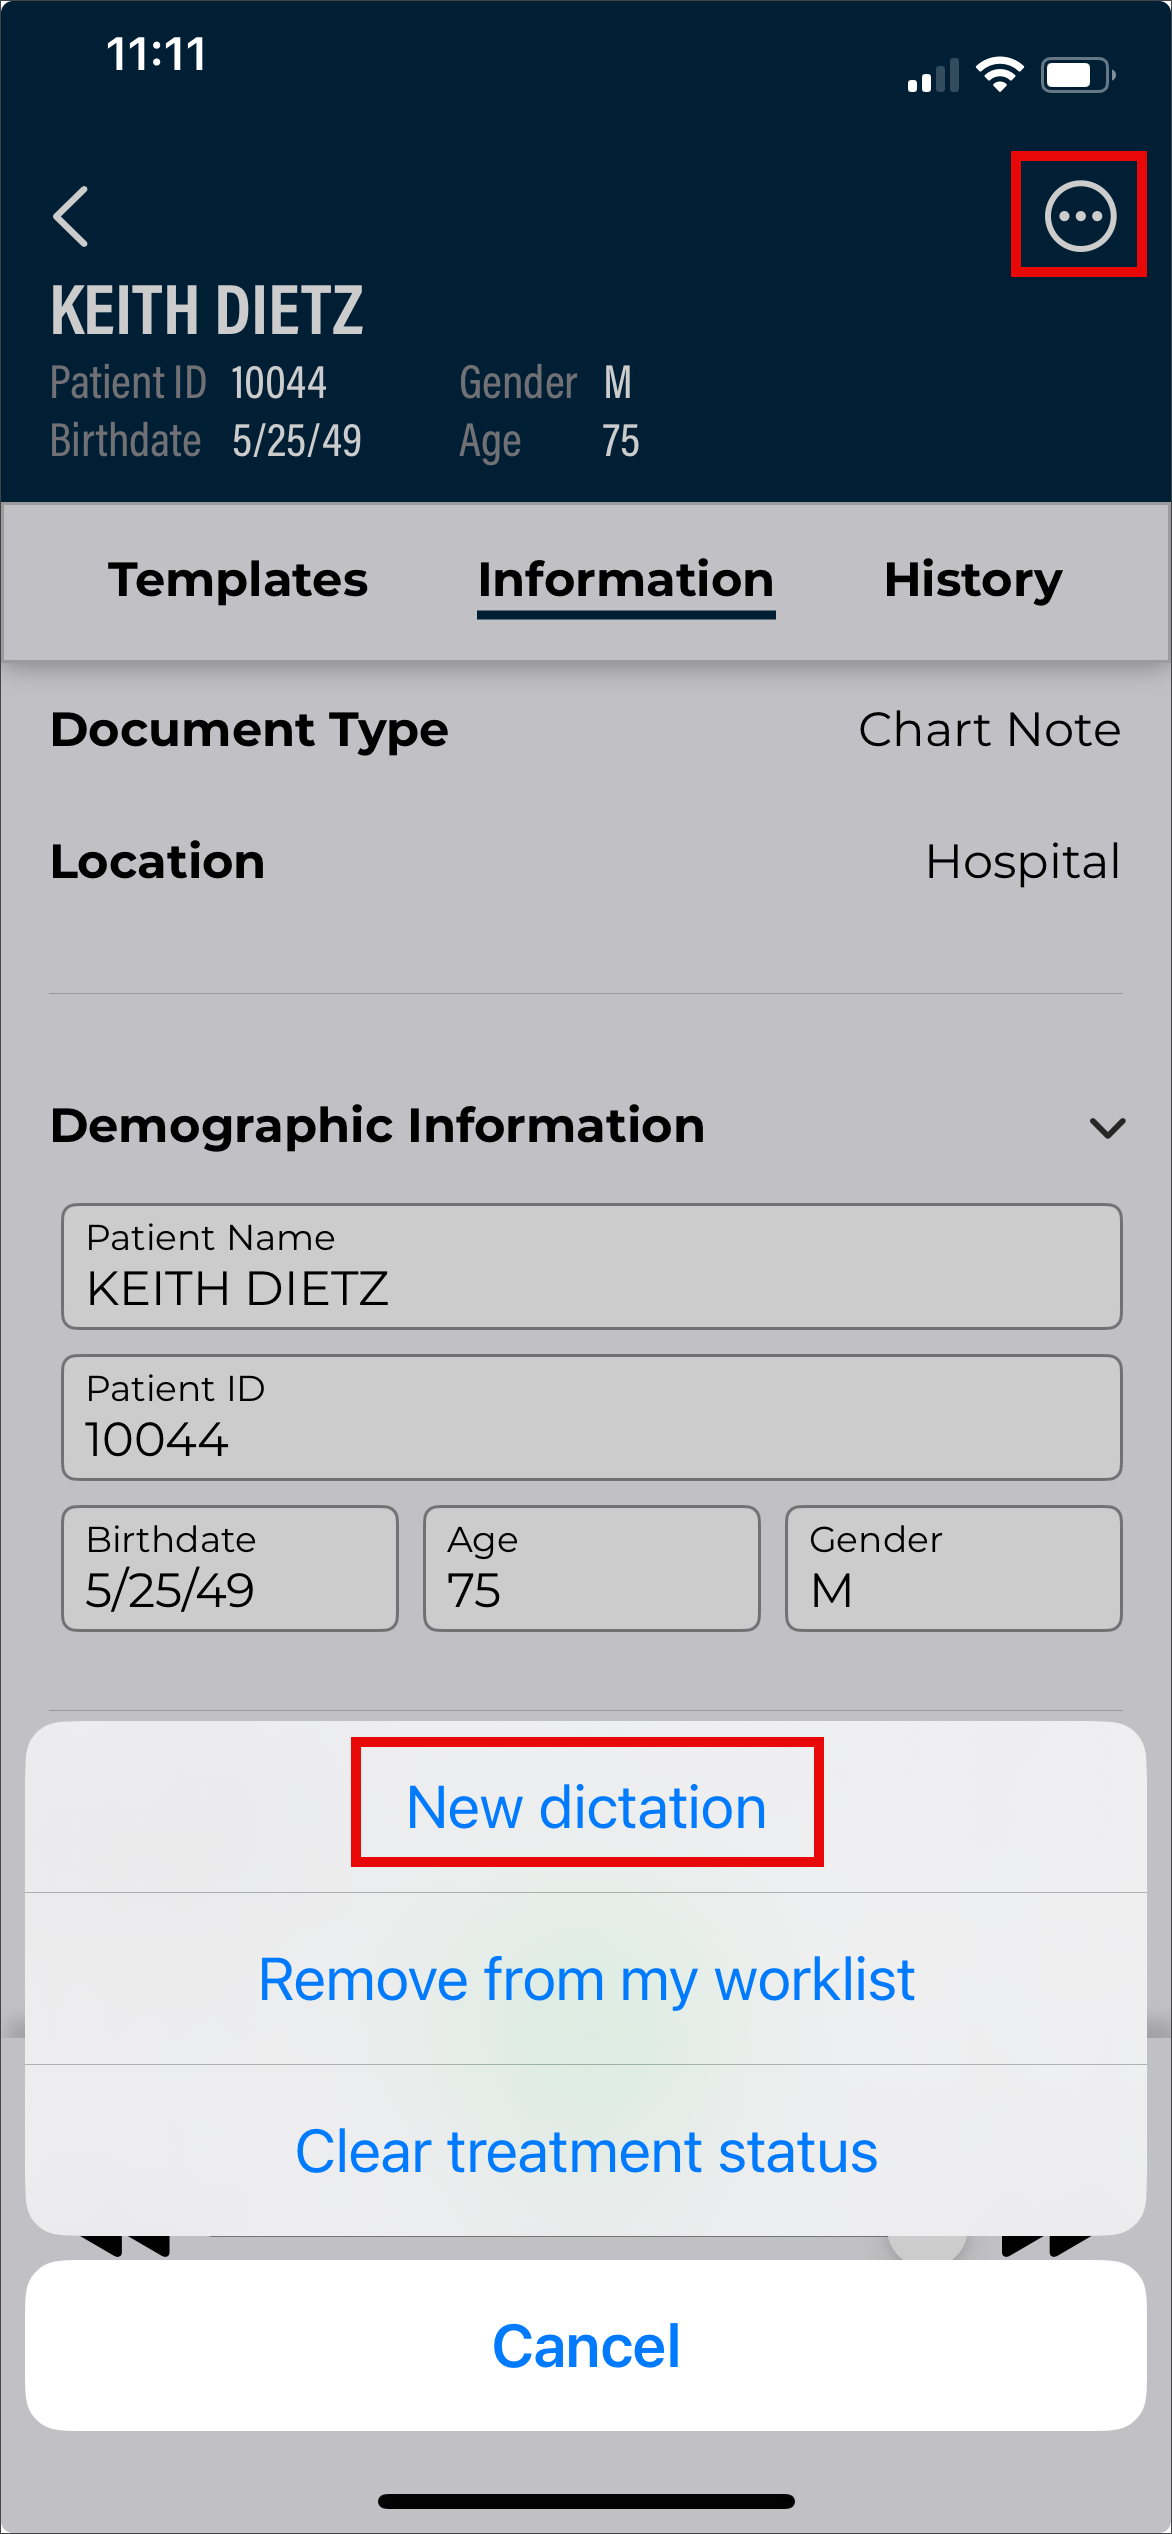
The Menu button appears in the upper right corner after recording has started. Tapping the Menu button opens a menu with the following option:
Delete Audio: Deletes the dictation file. eSOne Mobile displays a warning screen to confirm removal of the dictation. Note that only pending dictations can be deleted. Uploaded dictations will be automatically removed 14 days after upload.
An appointment from an uploaded schedule will remain on the Patients tab after audio has been automatically removed. Deleting audio on a new dictation removes the appointment from the schedule.
New Dictation: If it is necessary to create an additional transcription for an appointment, return to the Patients tab and select the appointment.
Press the Menu button and select 'New Dictation'. Select Document Type and Location, then record normally.
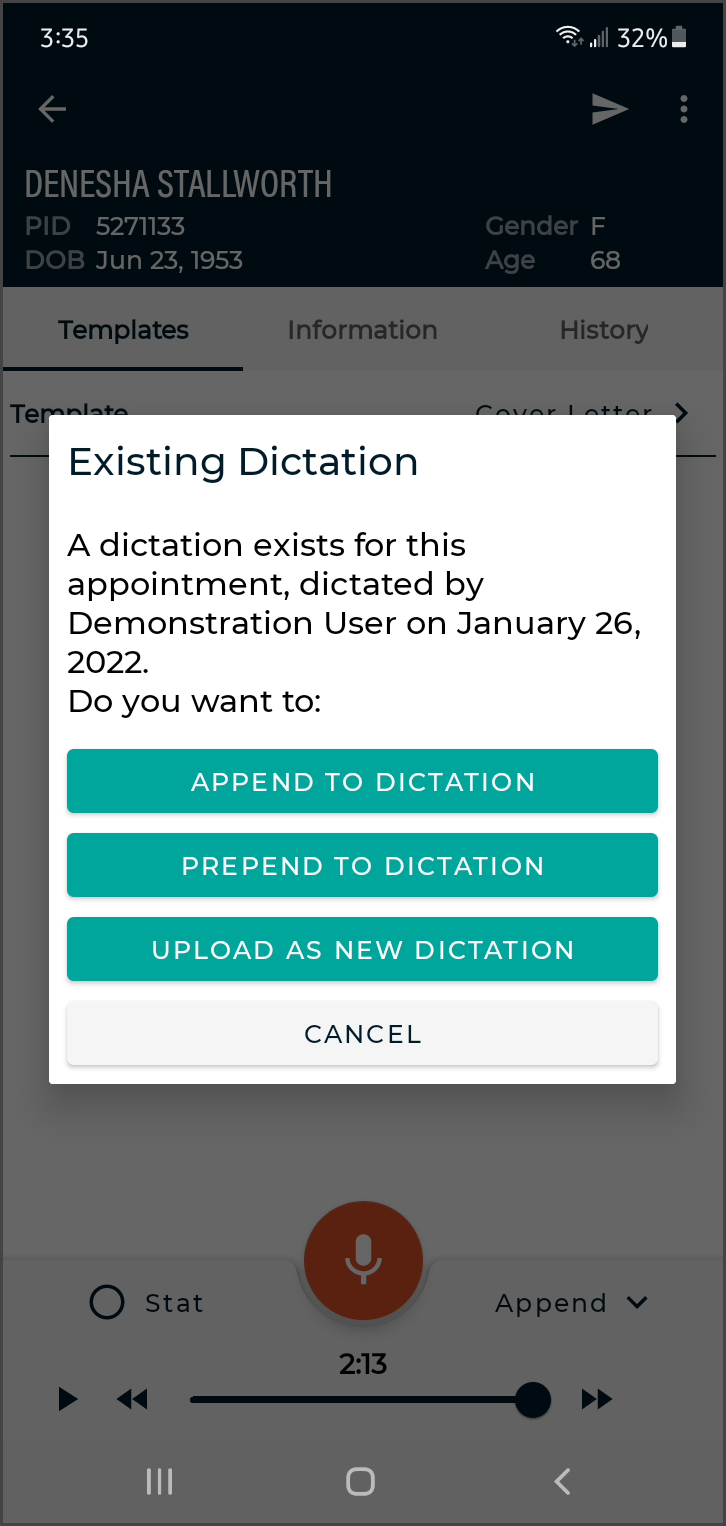
Press the Upload button and eSOne Mobile will prompt for the dictation type:
-
Append: Attach this transcription to the end of the prior transcription.
-
Prepend: Attach the new transcription to the beginning of the prior transcription.
-
Upload as New Dictation: Upload this dictation as a standalone transcription. This transcription will not be attached to any prior transcriptions.
Note
The options available from the Menu button may change depending on the status of the dictation.
Uploading Dictations
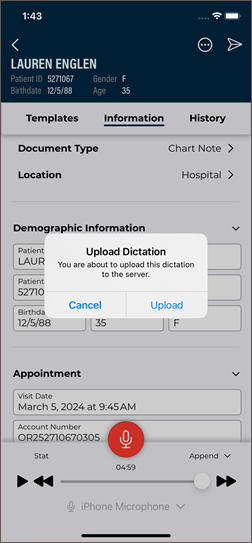
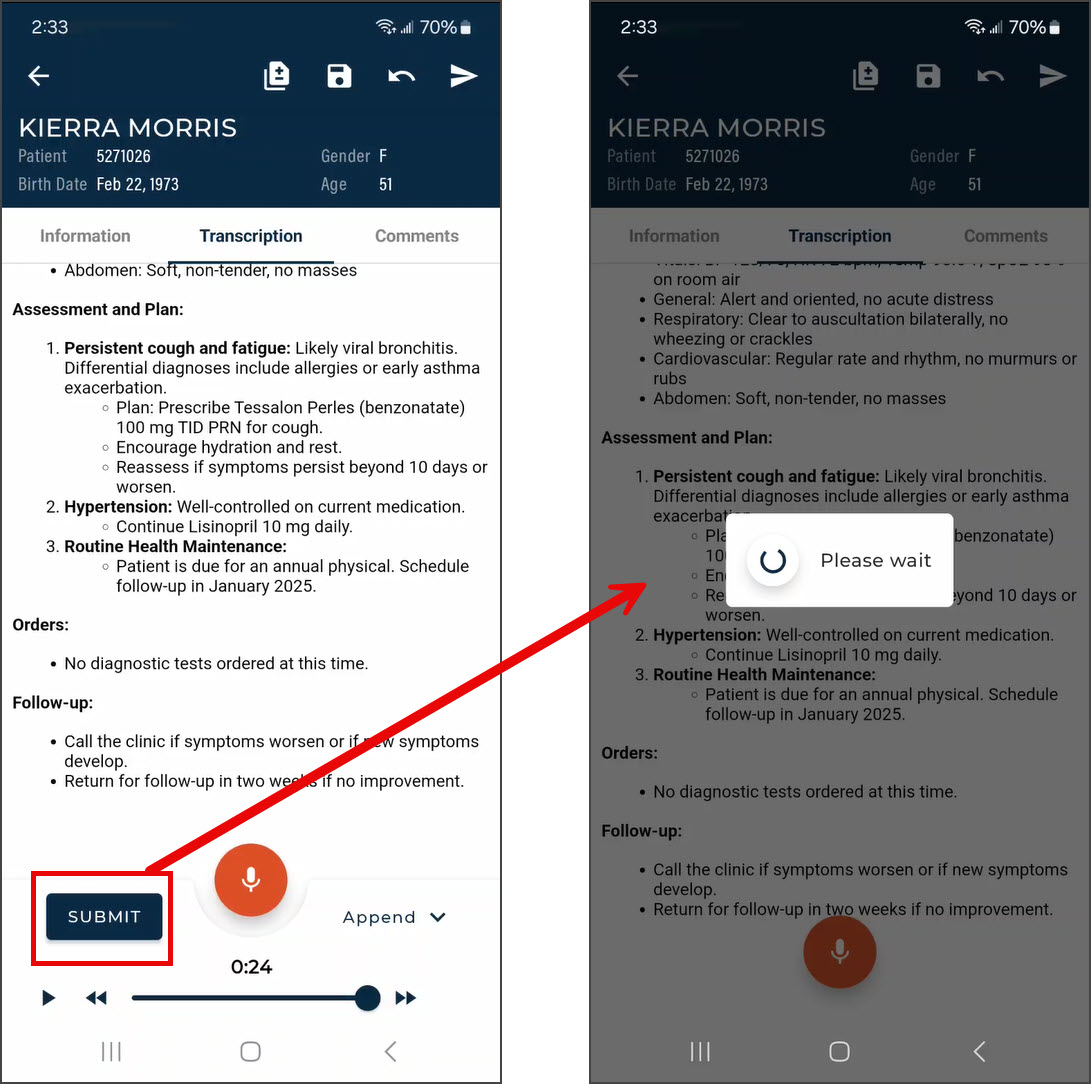
Once a dictation is recorded, it must be uploaded to be processed. To upload a dictation, ensure the device has a stable internet or Wi-Fi connection and tap the ![]() Upload button.
Upload button.
If the network or Wi-Fi connection is lost during the upload process, the upload will pause automatically. Once the connection is restored, the upload will resume from where it left off, ensuring the dictation is successfully delivered without requiring any manual intervention.
For best results, it is recommended to upload dictations when connected to a reliable Wi-Fi network to prevent interruptions and ensure timely processing.
My Notes Tab
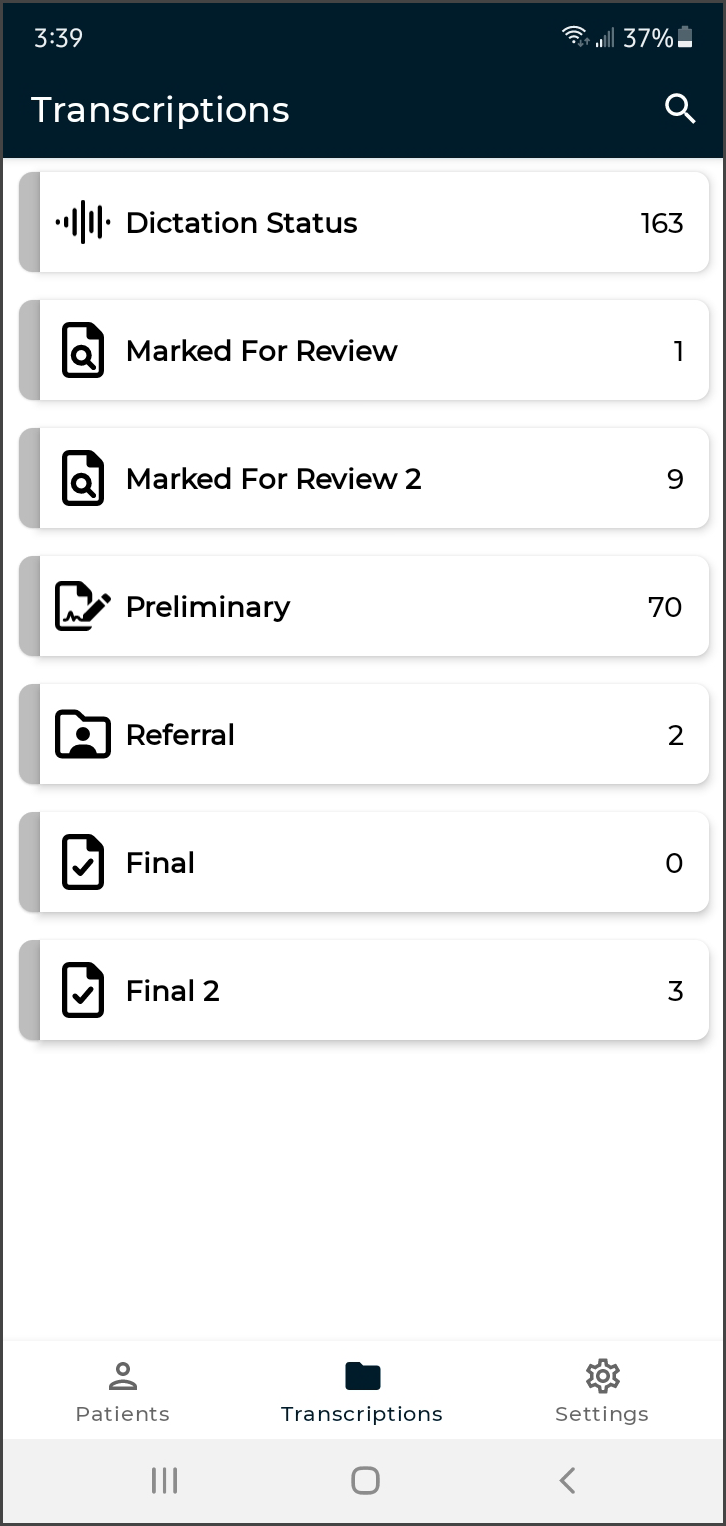 The My Notes tab provides a view similar to the workflow summary in InQuiry. Use this tab to review, complete/sign, or edit notes.
The main screen, the Workflow Overview, gives an overview of how many notes appear in each workflow folder. The workflow folders display the label name assigned by your medical facility. The first folder, here called "Dictation Status", contains dictations that are at the transcription company, but have not yet been transcribed.
Use the Search button in the upper right corner of the Workflow Overview to search for notes in any workflow folder, including notes that have completed the workflow. Tap the back arrow to return to the Workflow Overview screen. See Note Search below for more details on performing a note search.
The Folder View
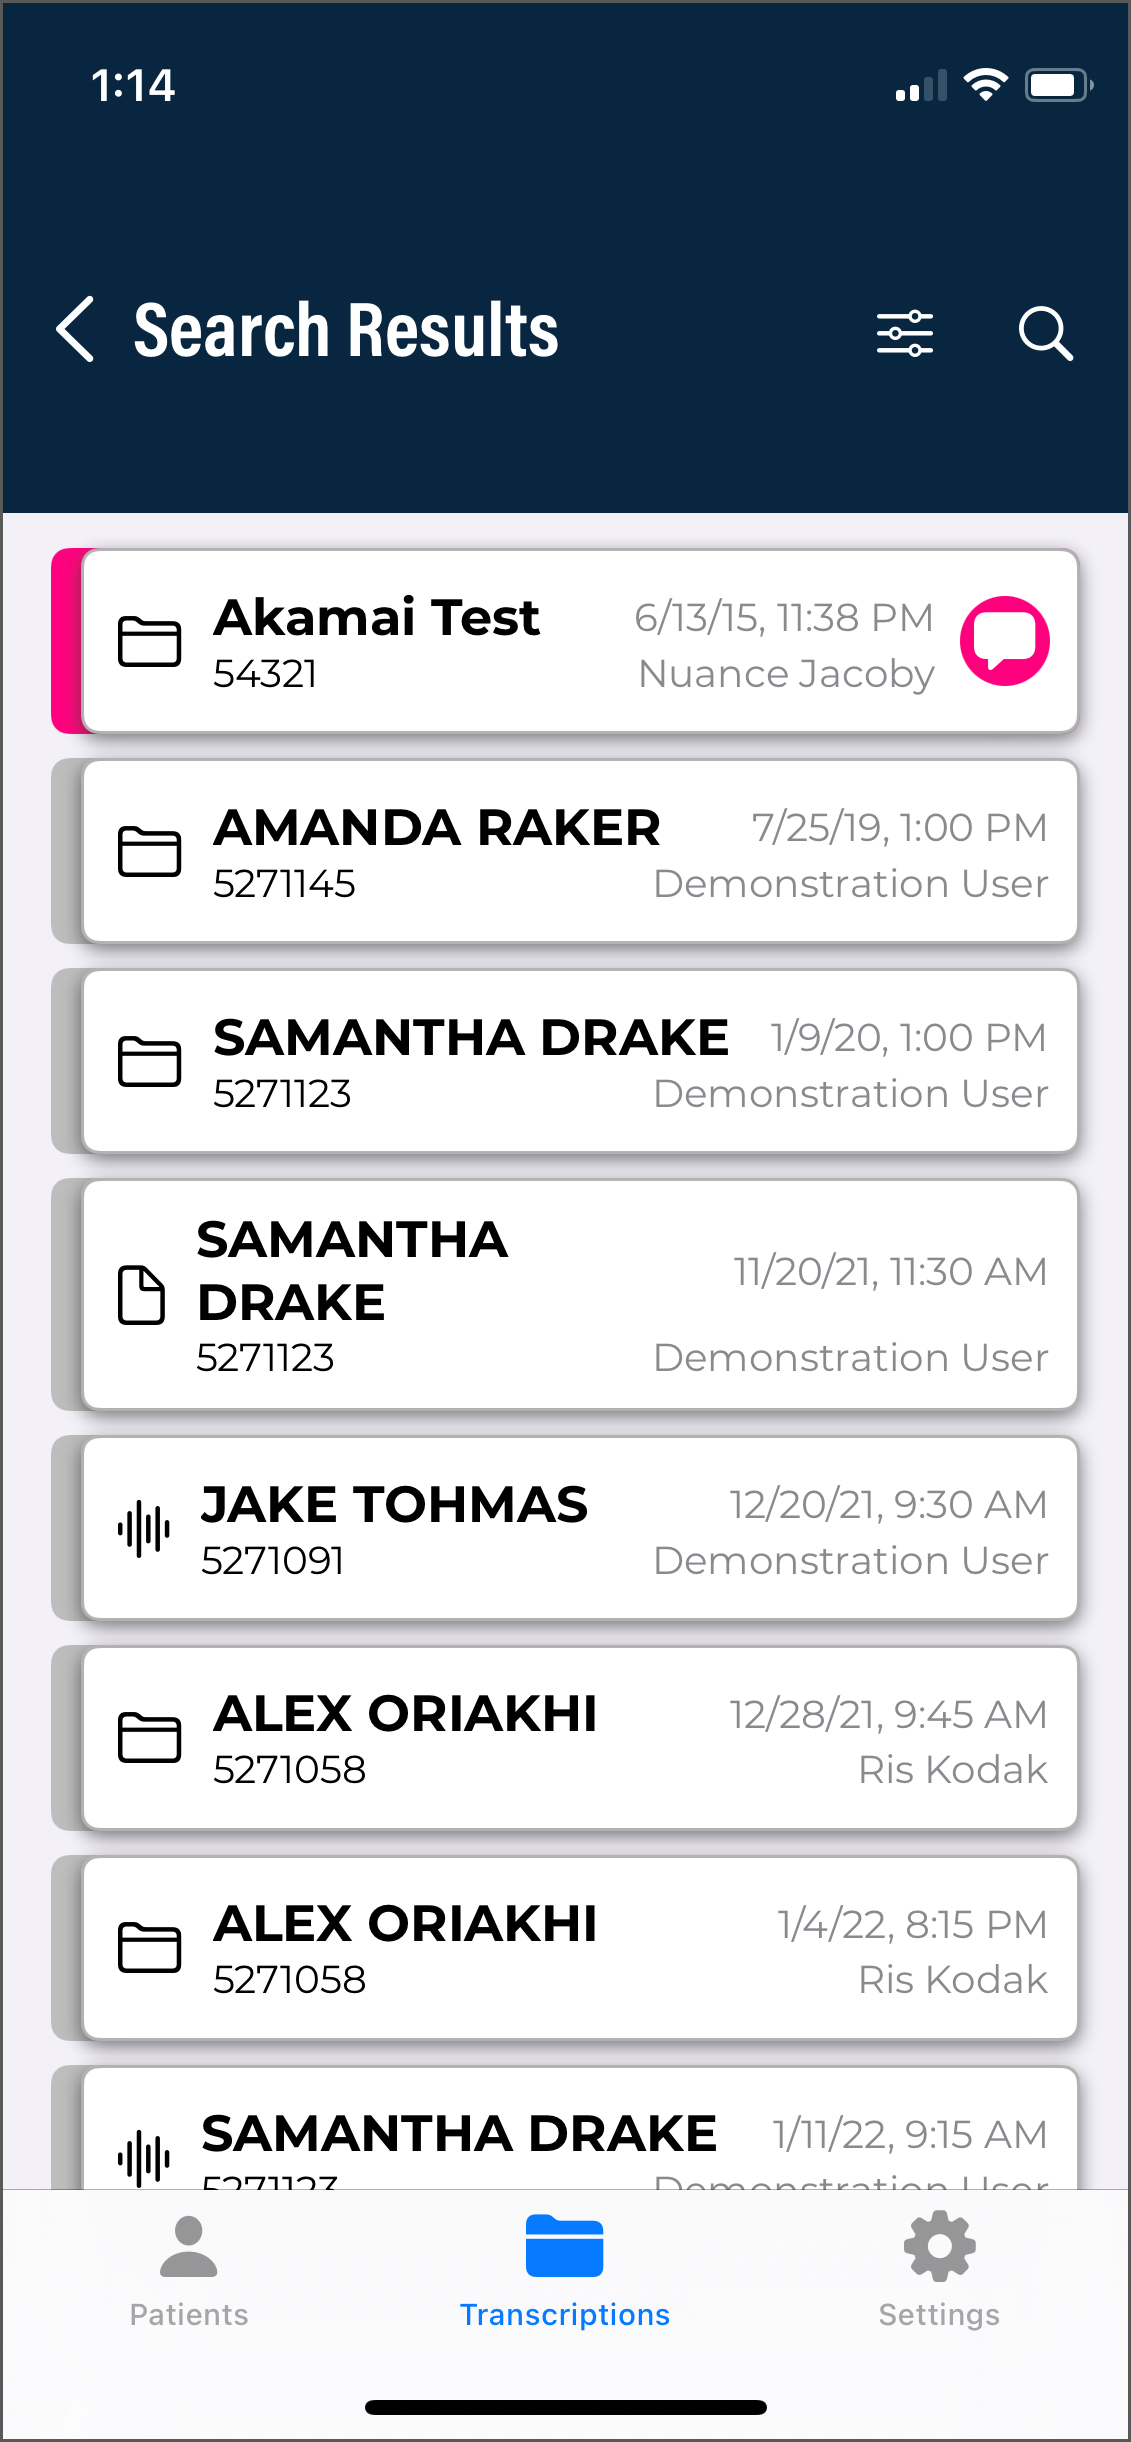
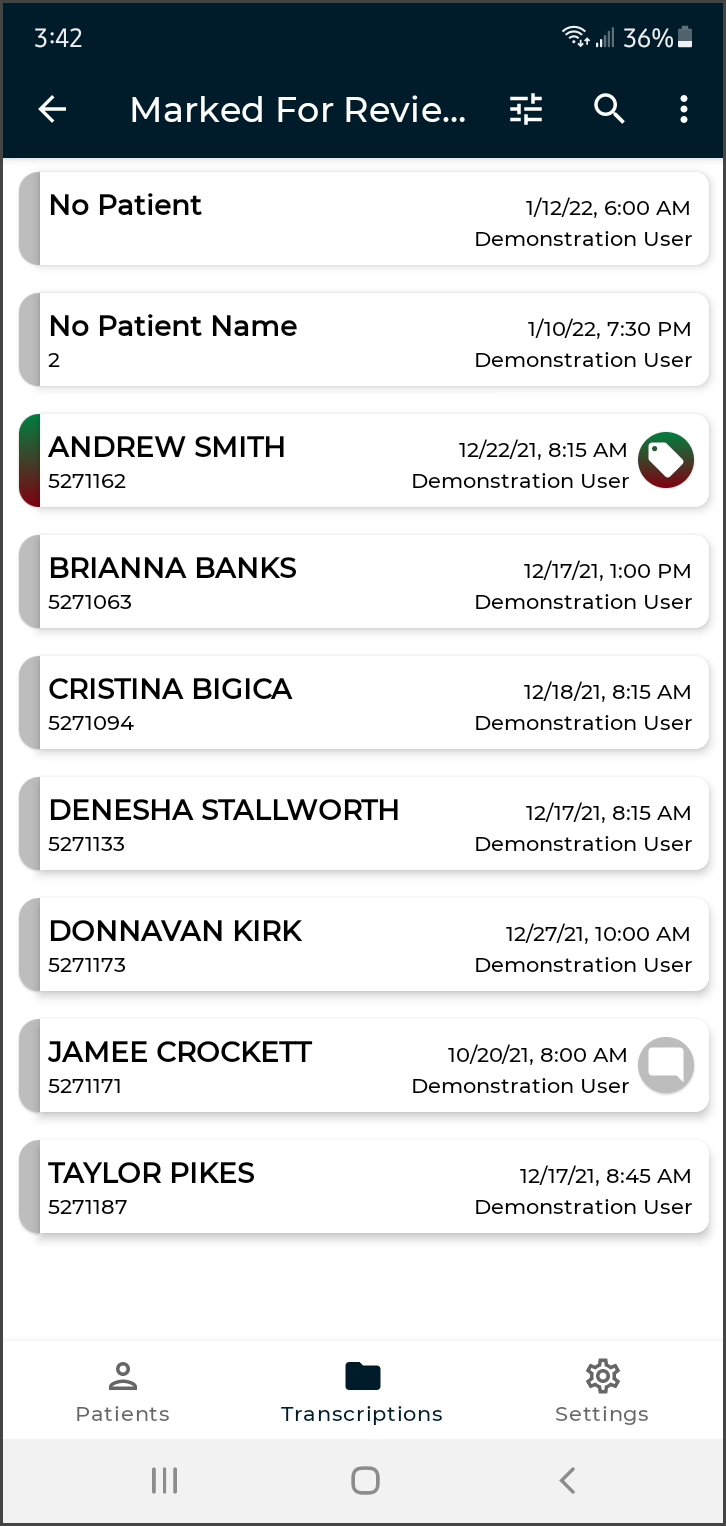 Tap on any of the folders in the Workflow Overview to show a list of the notes that are currently in that stage of the workflow. The workflow folder name is displayed at the top of the screen. To return to the Workflow Overview, tap on the back arrow or name of the current folder.
When a workflow folder is opened, the patient name, patient ID, appointment date and time, and dictating clinician’s name are shown for each note in that folder. An additional user field can be added to the folder view from the Settings Tab. If a patient has not been added to a note, the patient name field will display as "No Patient"; if an MRN has been entered without a linked patient name, the patient name will display as "No Patient Name".
The list of notes can be sorted by Patient Name, Appointment Date, or Date Dictated by tapping the Filter button.
To refresh the workflow folder listing, tap and hold your finger down while swiping down anywhere in the note list. Note that this works when the view is already scrolled to the top.
Comments and Tags
Comments and Comment Tags are notes that can be placed on a note. Comments are free-form text, whereas Comment Tags are predefined notes. Notes with Comments and/or Comment Tags will display an icon on the right side of the note line.
The following icons are used to indicate which type of comment or tag is on the note:
![]() The note has Comments and one Comment Tag.
The note has Comments and one Comment Tag.
![]() The note has one Comment Tag and no Comments.
The note has one Comment Tag and no Comments.
![]() The note has multiple Comment Tags and no Comments.
The note has multiple Comment Tags and no Comments.
![]() The note has multiple Comment Tags and Comments.
The note has multiple Comment Tags and Comments.
If the medical facility has assigned colors to comment tags, those colors appear on the left tab of the note line, as well as in the comment icon. Instead of reading the tags, users can simply look at these visual cues and know which tags have been assigned. If multiple comment tags are on the note, the note tab and icon will be multi-colored.
Comments and Comment Tags cannot be read from the folder view. Open the note viewer to read the comments/tags. Note Comments and Comment Tags can be read in the mobile app, but not edited. Please use InQuiry if edits are needed on those items.
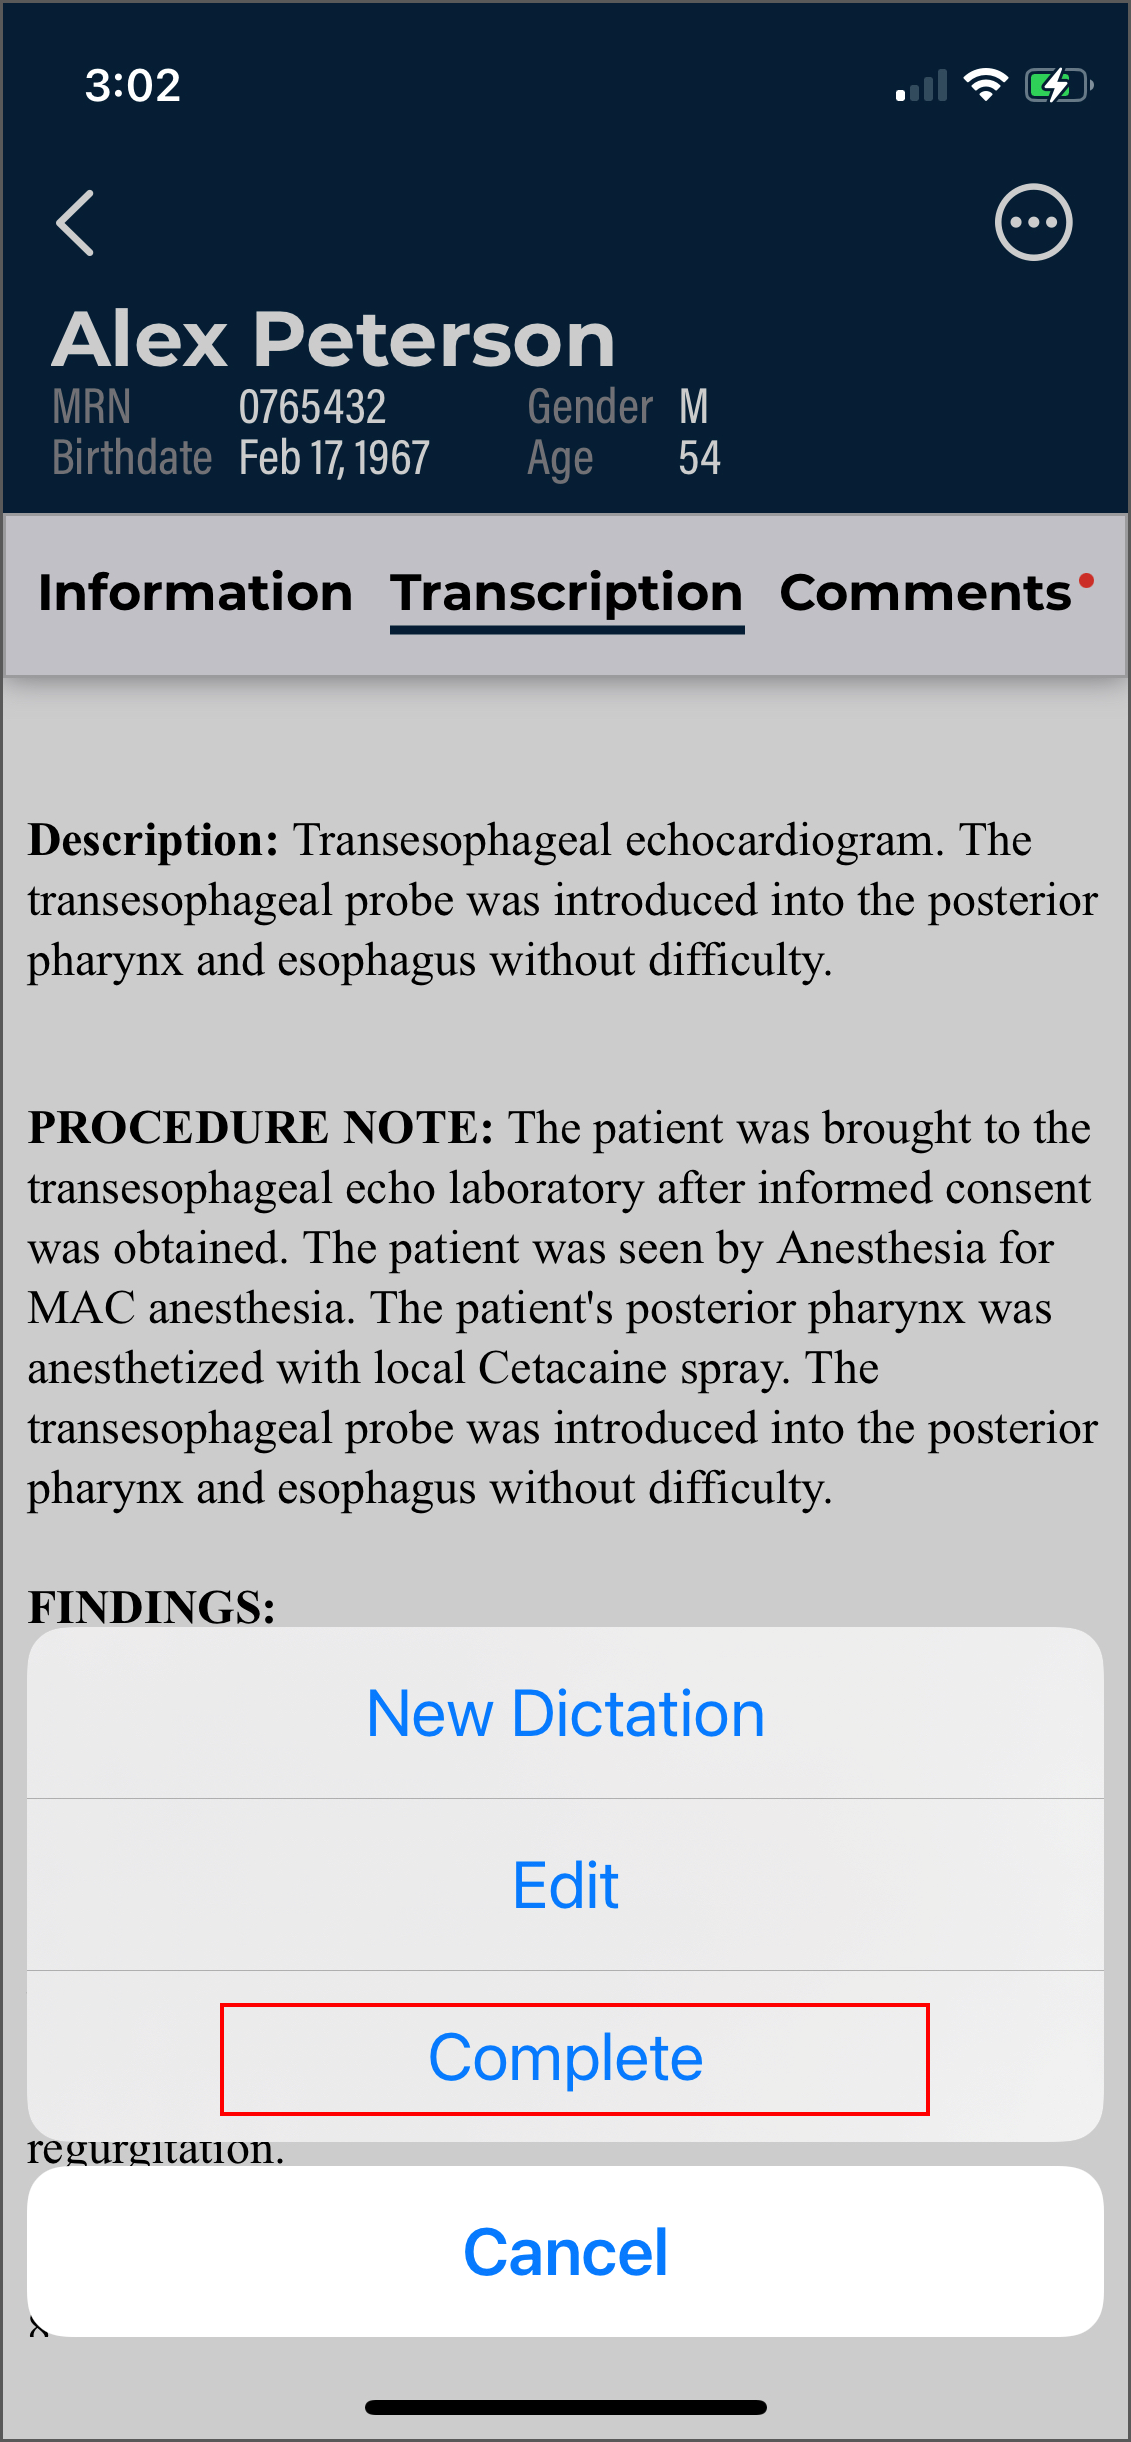
Complete Notes from the Folder View
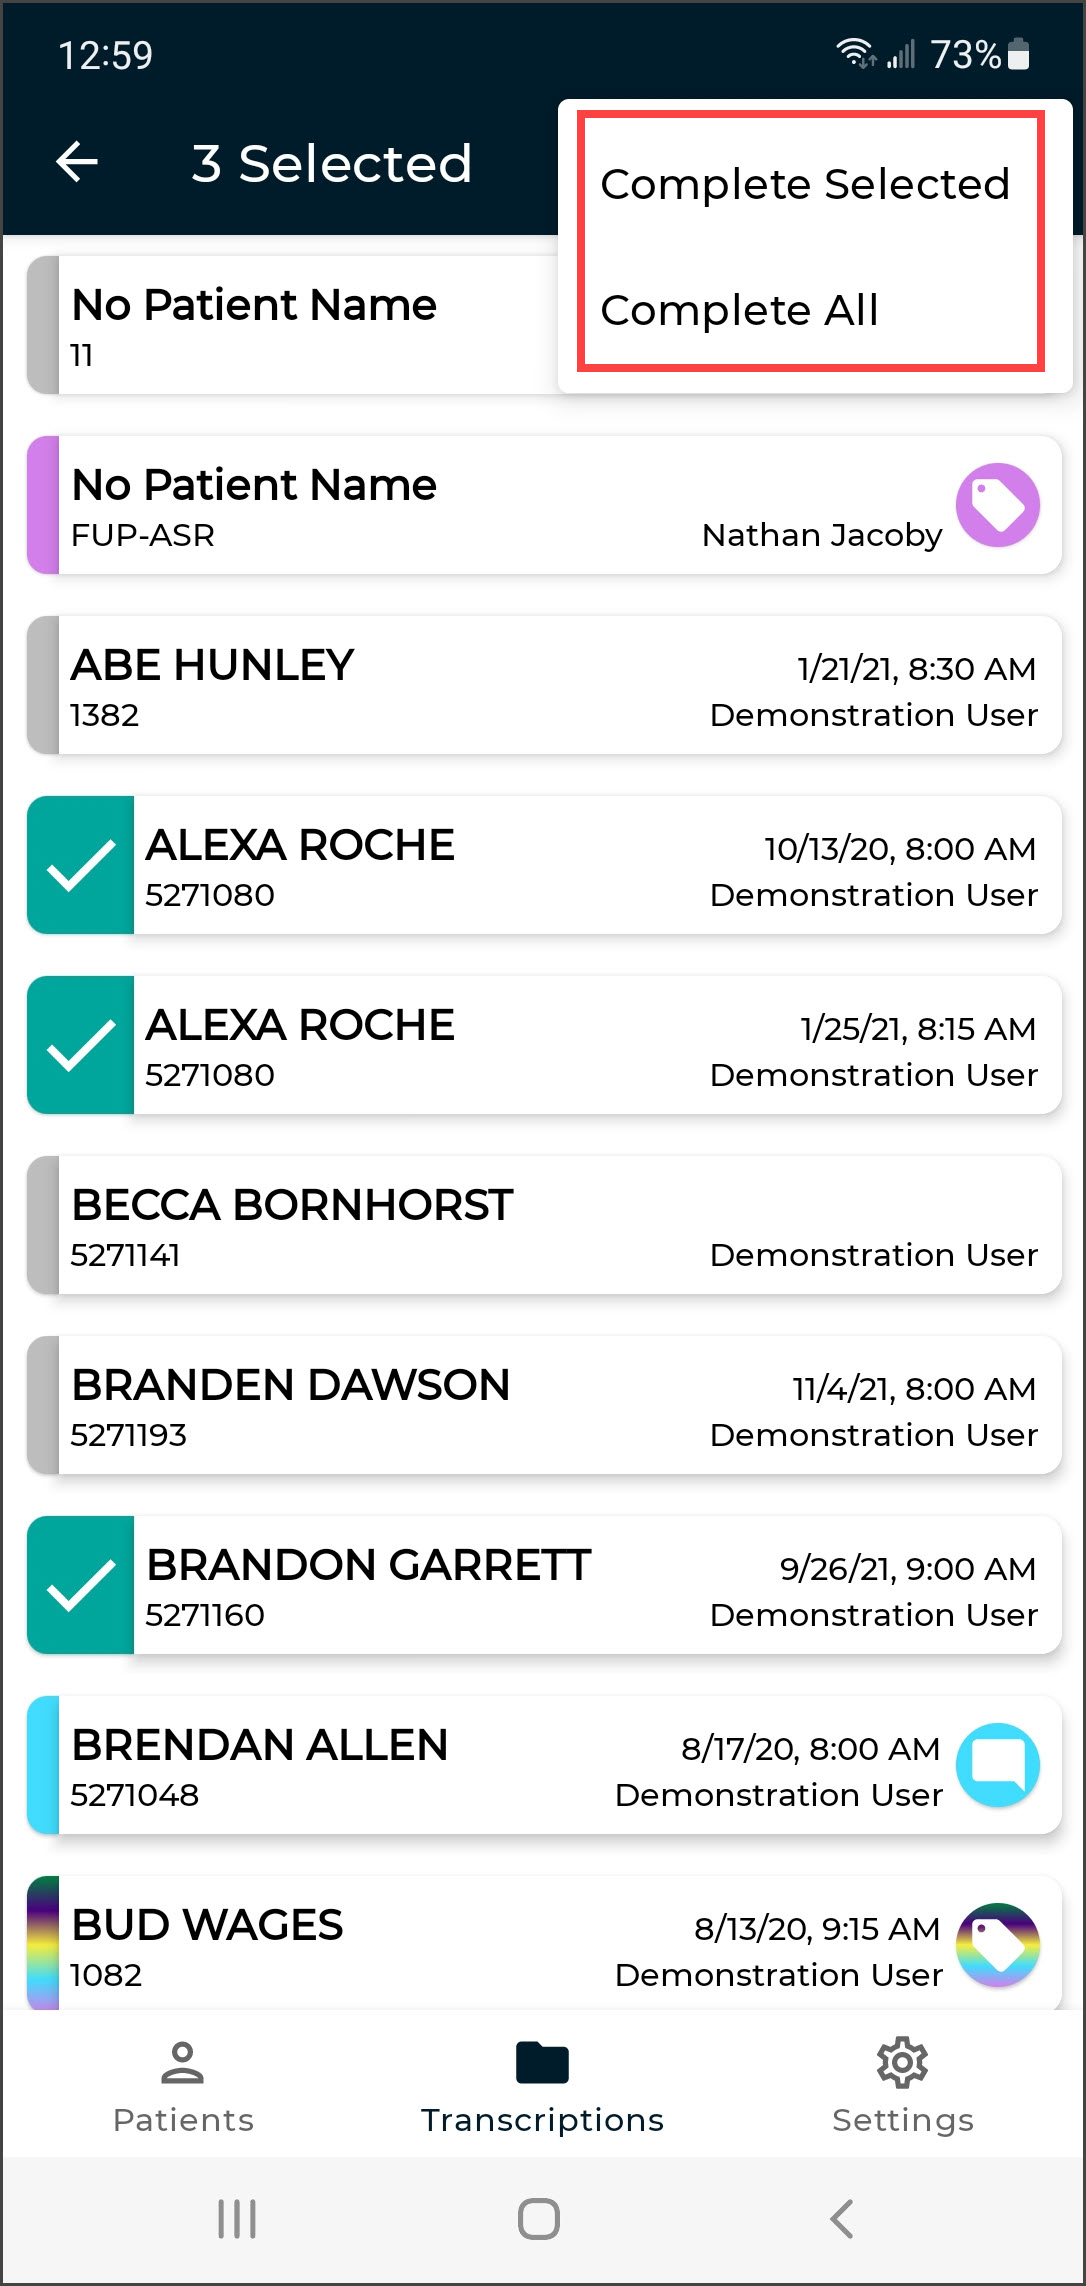 Completing a note from a workflow folder progresses it to the next stage of the workflow. When a note is completed from the Preliminary folder it is considered signed. Notes being completed from the final stage of the workflow will be saved in the repository.
Notes can be completed as a group or individually from the current folder to advance to the next stage of the workflow.
To complete all notes in the folder or search results, go to the folder view. If a note search is needed, run the search first. Tap the Menu button in the upper right corner and select Complete All. If a search was performed prior to the Complete All action, only the notes in the search results will be completed from the workflow folder.
To complete selected notes, long-press each note to be completed until a check mark appears on the left tab of the note line. Tap the Menu button in the upper right corner and select Complete Selected (this button will not appear until at least one note has been selected).
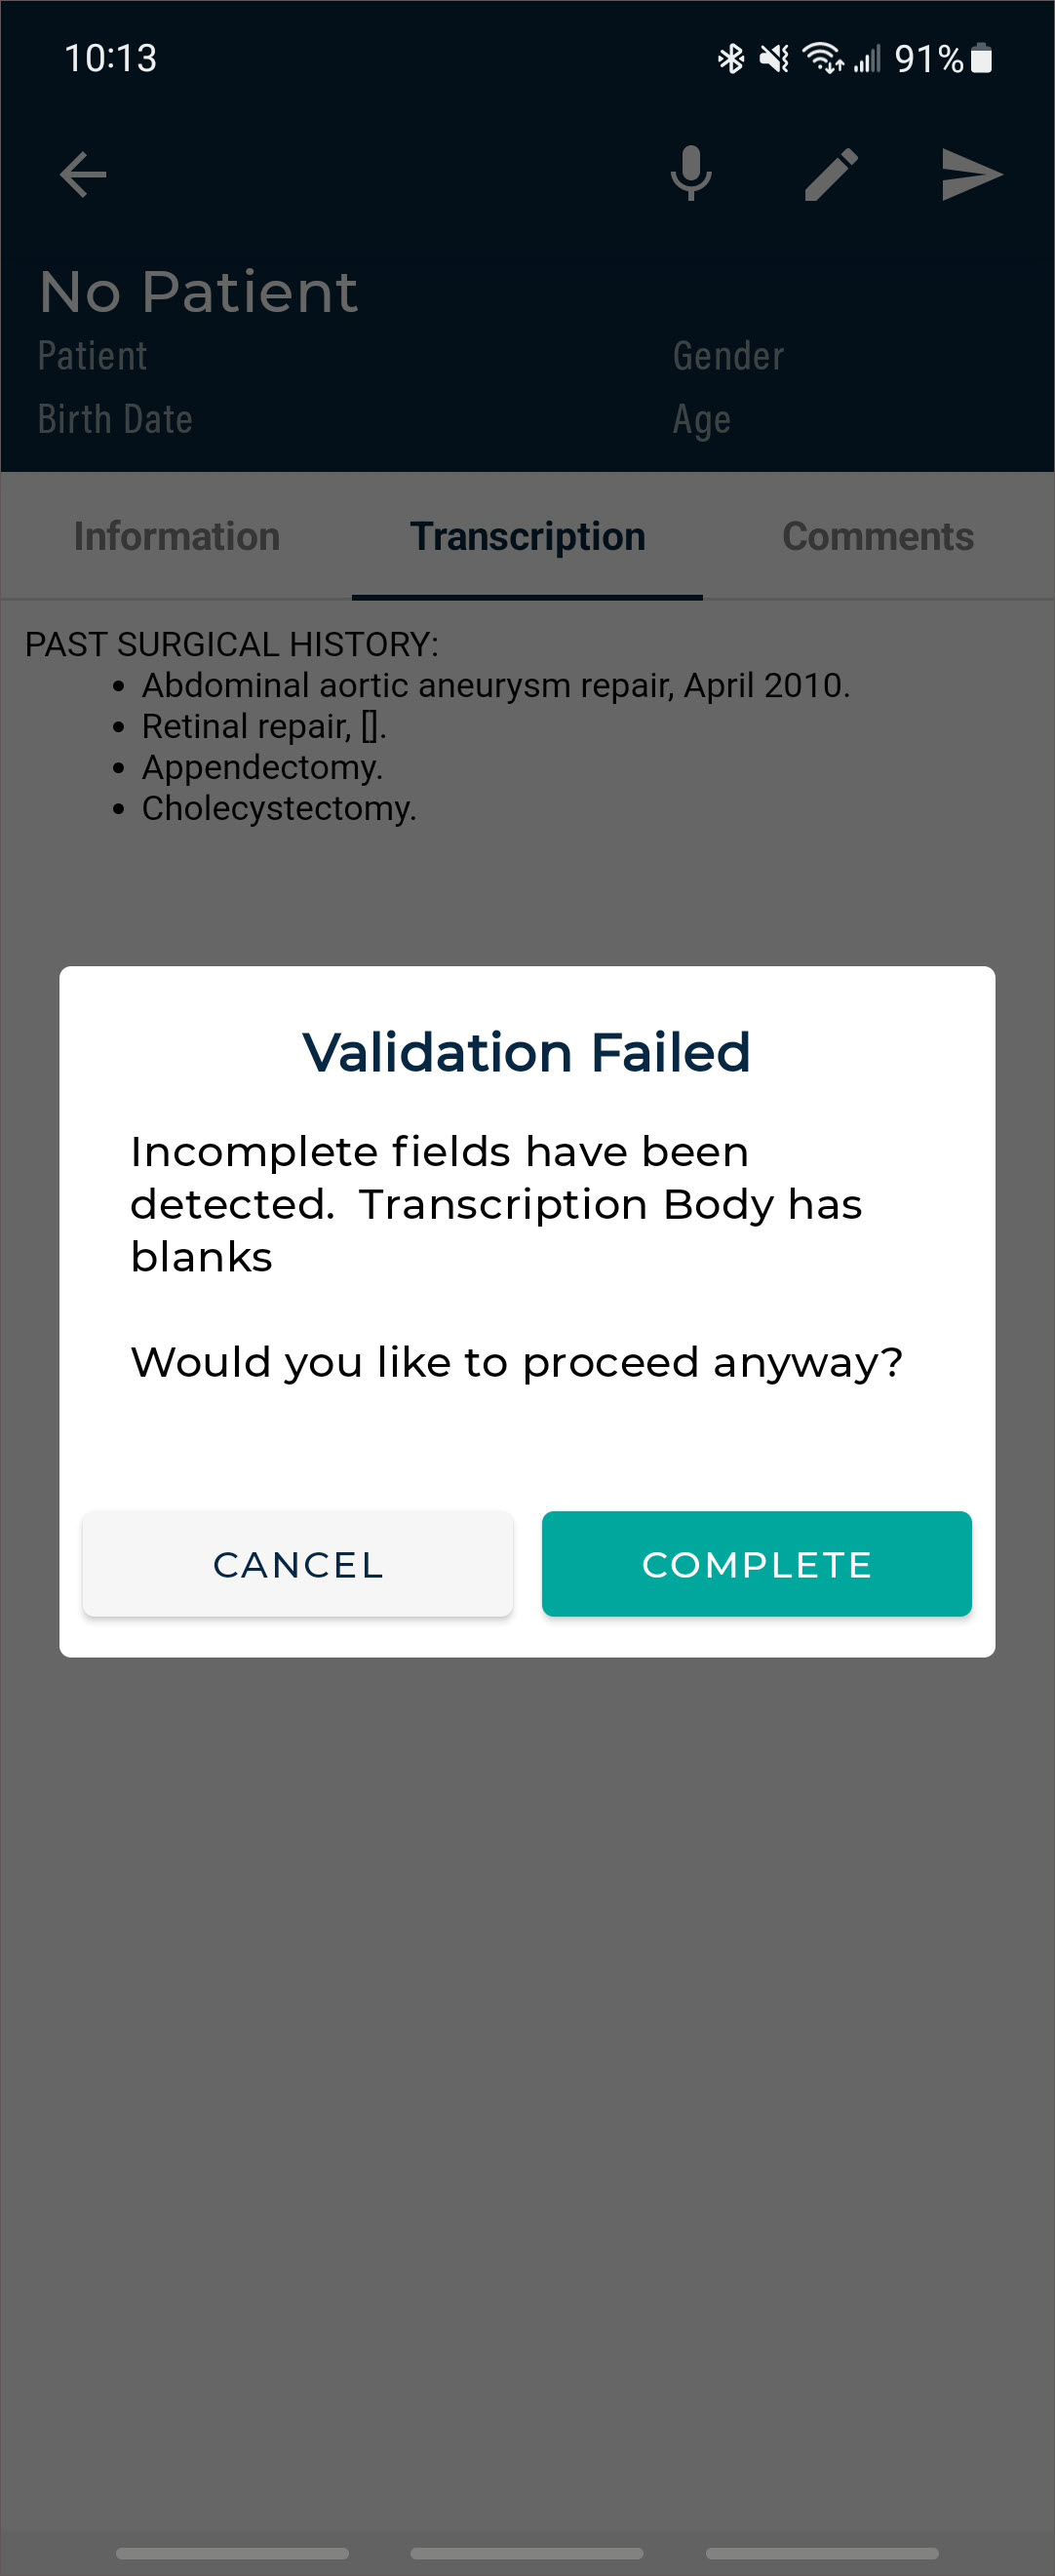
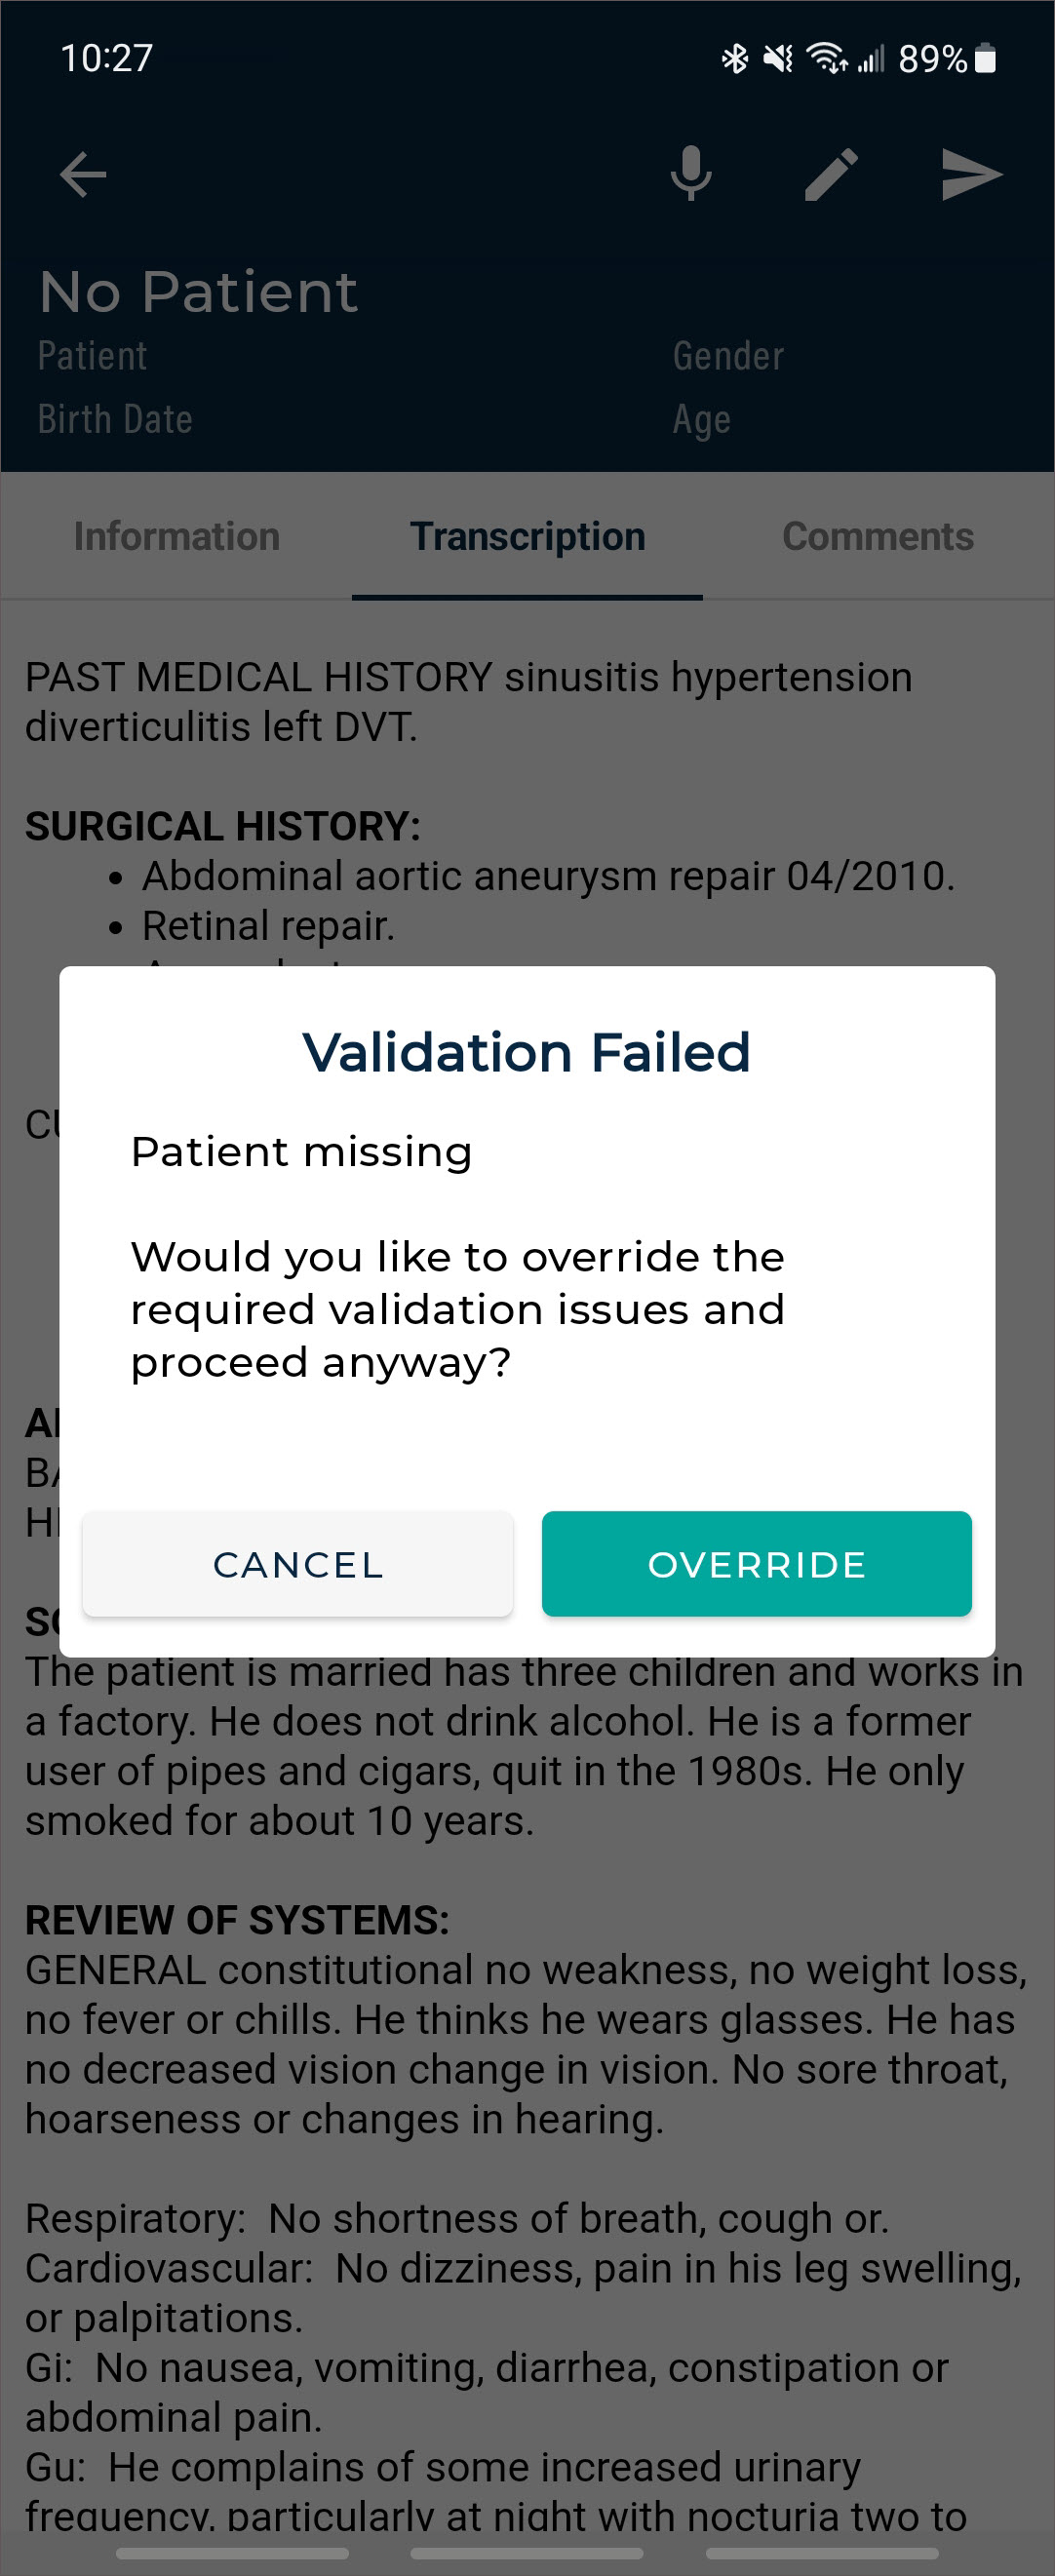
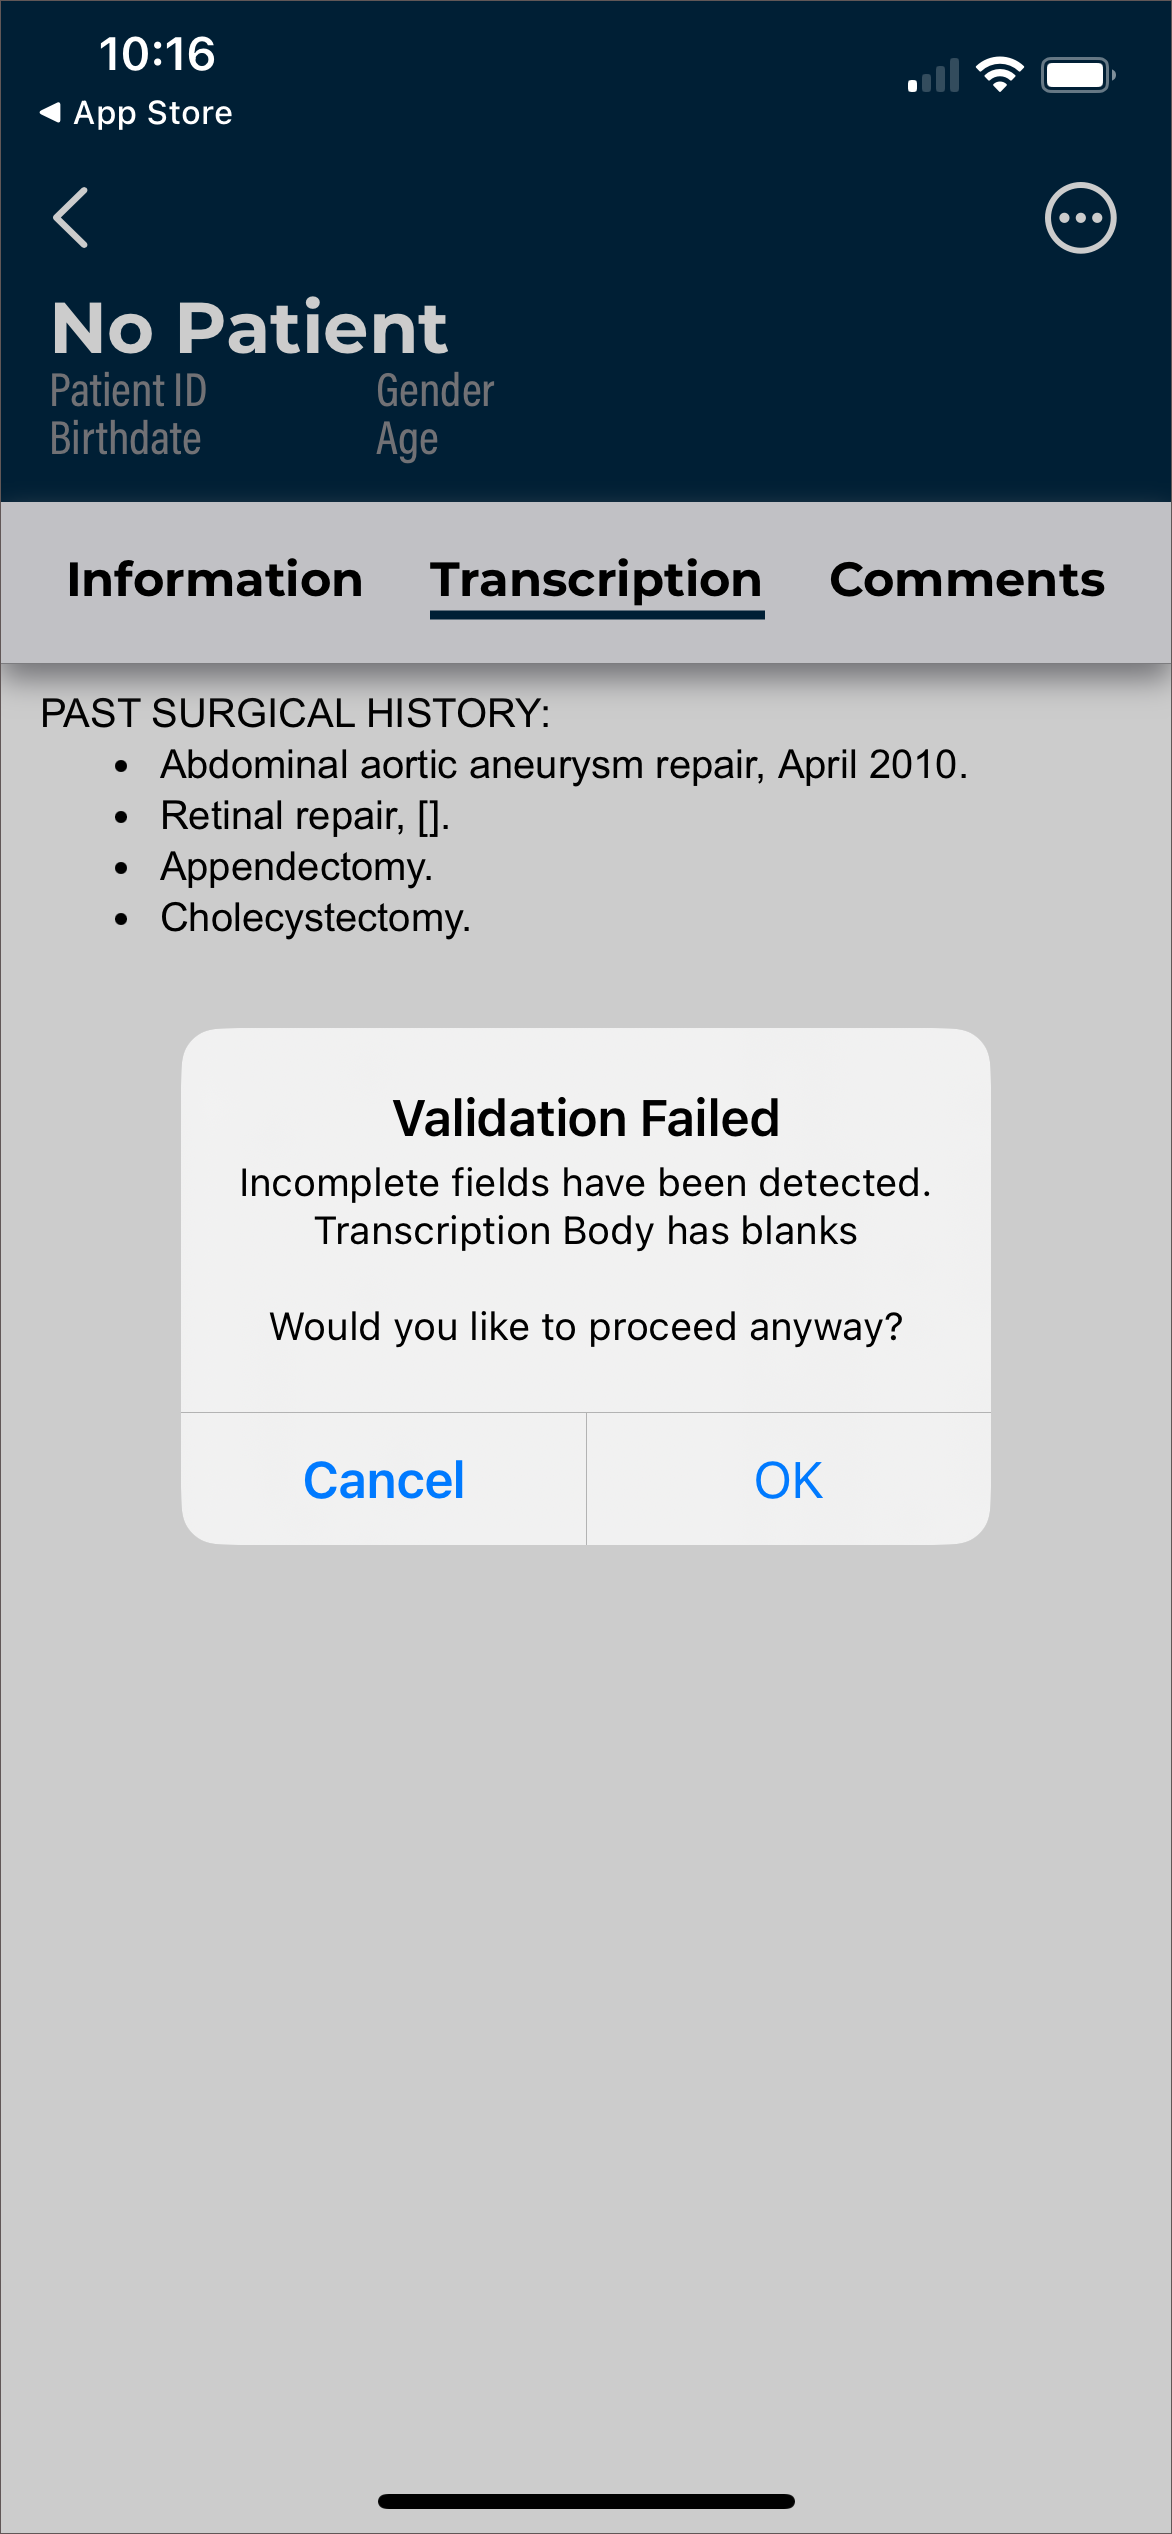
Depending on the setup of the medical facility, some notes cannot be completed with Complete All/Selected, such as jobs with incomplete fields in the note text or failed validation rules. In this case, a message will be presented to the user stating how many notes could not be completed. Those notes will remain in the same workflow folder and will need to be completed from the note viewer, while the other notes will proceed through the workflow.
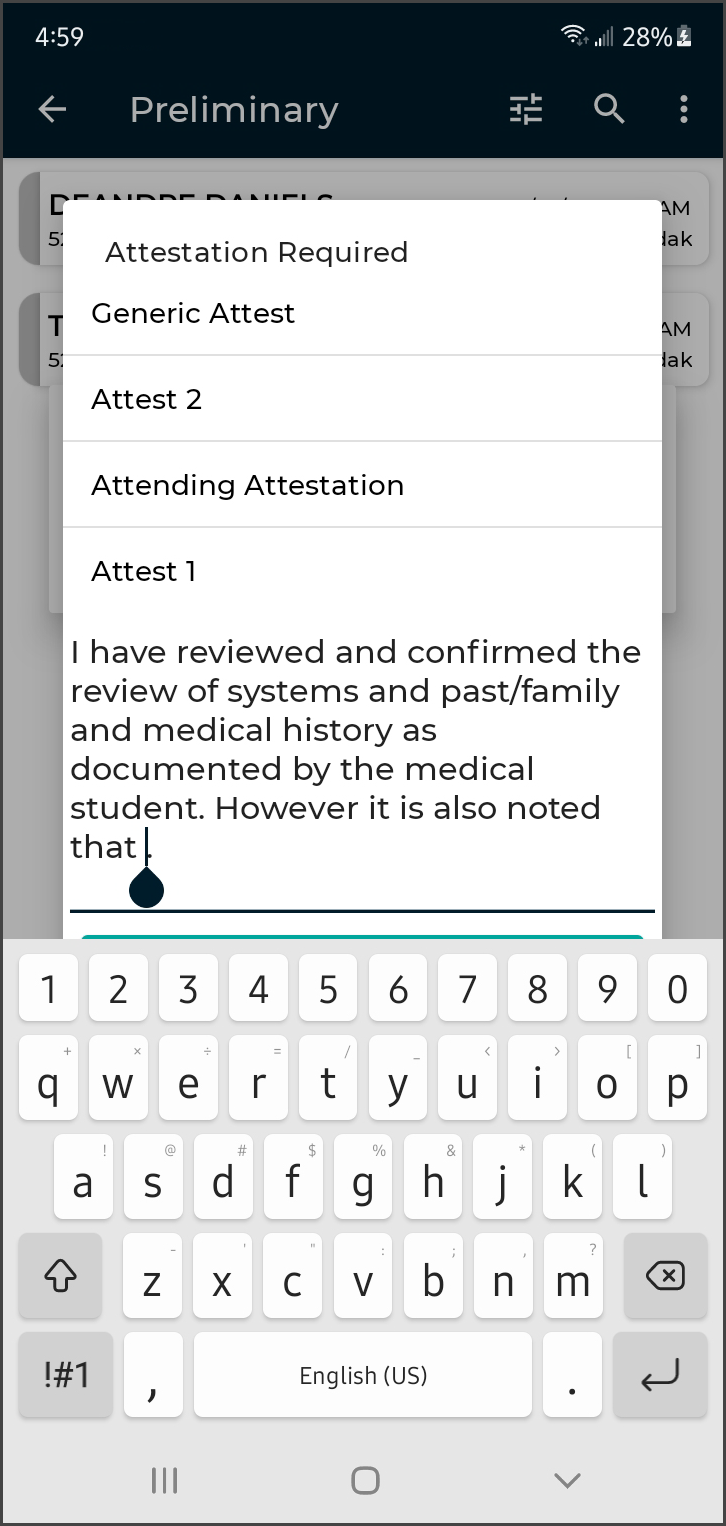 If any notes in the Preliminary folder being completed with the Complete All/Selected action require an attestation statement, a dialog box will be presented to the authenticating signer. The dialog box will list all attestation templates available to the signer, as well as an option to complete the note without an attestation, or to cancel without completing the note. When an attestation template is selected, the template text will load within the dialog box for review. If no changes are needed to the attestation text, tap Complete. If edits are needed, tap within the attestation template text to position the cursor and open the keyboard. Tap Complete to apply the attestation template, along with the edits, and signature to all notes being completed that require an attestation template and advance them in the workflow.
The completion of a note cannot be undone. The Complete All/Selected options will be available to you based on the settings of your facility and user account. eSOne Mobile will present a confirmation prompt before completing the notes with Complete All/Selected; this prompt cannot be disabled.
Note Search
Note searches can be performed within a specific workflow folder or across all workflow stages and can be based on a number of criteria.
Use the Search button in the upper right corner of the Workflow Overview in the My Notes tab to search for notes in any workflow folder (except Referral), including notes that have completed the workflow. This is known as Search All. Select or type in the desired search parameters, then tap the Search button to run the search. A list of results will appear. To return to the Workflow Overview tap the back arrow.
If a note is in the Marked for Review and Marked for Review 2 folders or Final and Final 2 folders it will appear in the search results twice.
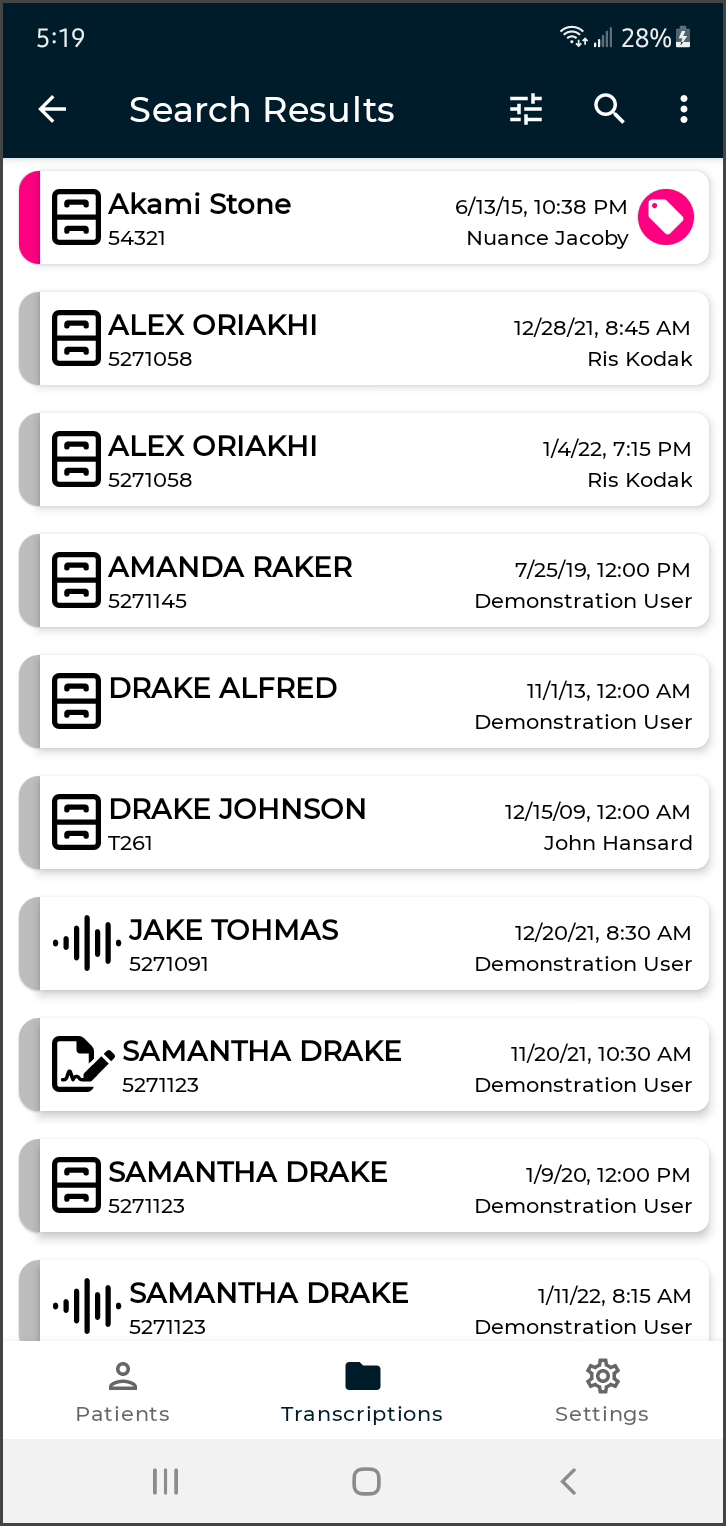
The Search All results will each have an icon on the left side that represents where the job is in the workflow:
![]() Dictation Status - The dictation is still being typed by the transcription company.
Dictation Status - The dictation is still being typed by the transcription company.
![]() Marked for Review/Marked for Review 2 - The note has been delivered to the medical facility and is in one or both Review folders.
Marked for Review/Marked for Review 2 - The note has been delivered to the medical facility and is in one or both Review folders.
![]() Preliminary - The note is ready for clinician review and signature.
Preliminary - The note is ready for clinician review and signature.
![]() Final/Final 2 - The note has been signed and is in one or both Final folders for additional processing (printing, faxing, etc.)
Final/Final 2 - The note has been signed and is in one or both Final folders for additional processing (printing, faxing, etc.)
![]() Repository - The note has completed the workflow. This is also known as Search All.
Repository - The note has completed the workflow. This is also known as Search All.
Note
The facility can customize the workflow and may not use all of the above folders.
To search only a specific workflow folder, tap the desired folder from the Workflow Overview, then tap the Search button. Select or type in the desired search parameters, then tap the Search button to run the search. A list of results will appear.
Search results can be sorted by Date Dictated, Patient Name, or Appointment Date, by tapping the Filter button. All search criteria can be cleared in the search parameters screen by tapping the Clear button.
Tap an item from the search results list to view the note details and text.
Tap the back arrow to return to the workflow folder view without the search criteria applied.
Note Viewer
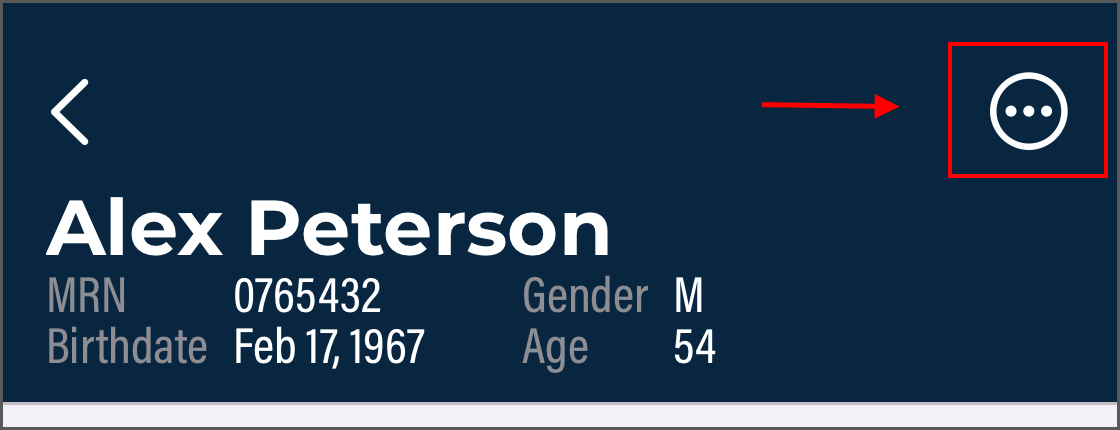
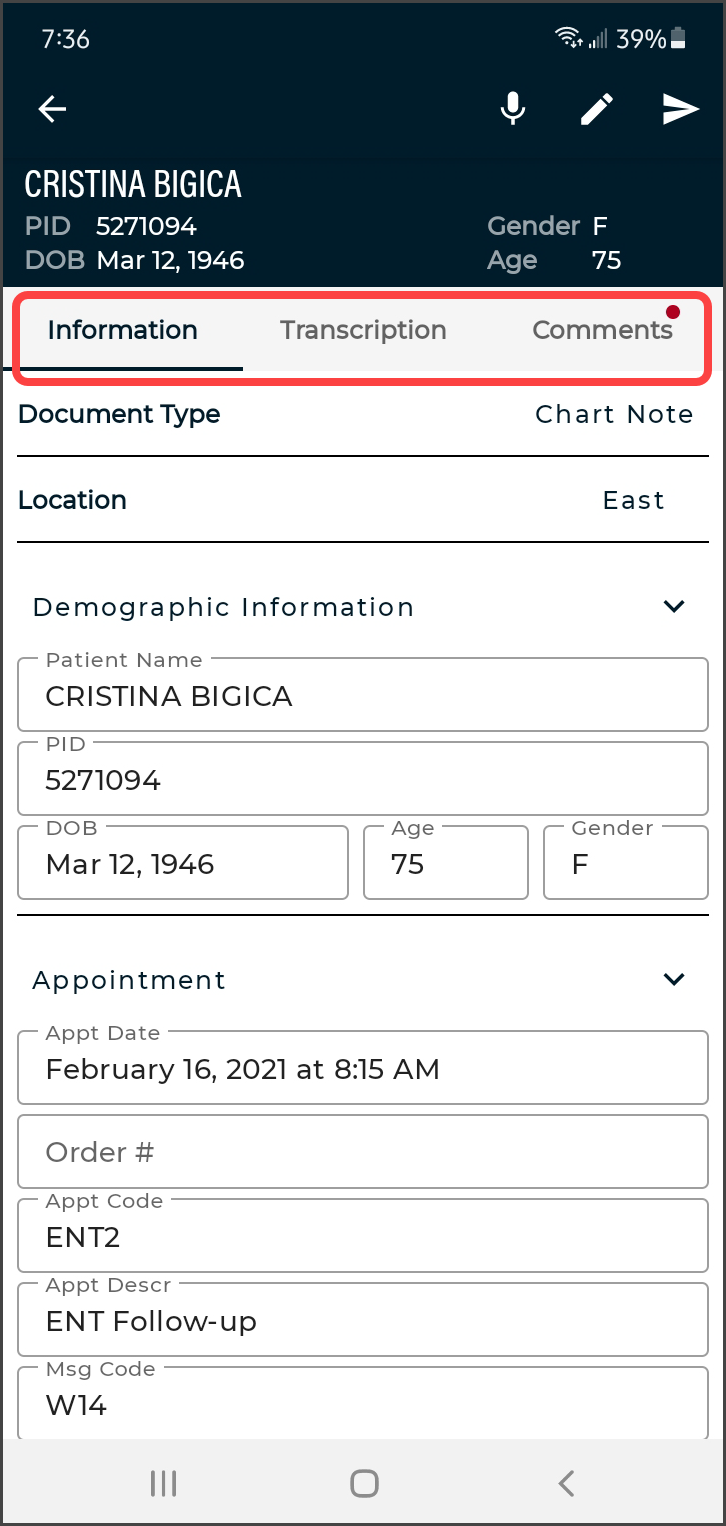 Tap on one of the entries in any workflow folder or search results to view the note text and details. The Patient Name, MRN, Gender, Date of Birth, and Age are displayed in the top. Tap the back arrow above the patient name to return to the folder view or search results. Action buttons appear in the upper right corner.
Recorded dictations are stored on the phone for two weeks after the dictated date, but they cannot be listened to from the note viewer. To listen to a recorded dictation that is still saved on the device, go to its entry in the Patients tab.
The Note Viewer has three tabs: Information, Note, and Comments. Tap on the desired tab to open it, or swipe left or right to switch tabs. By default, the Note Viewer opens to the Note sub-tab for all jobs that are not in Dictation status. Jobs in the Dictation status workflow open to the Information sub-tab and will not have a Note sub-tab. The tab that is being displayed is underlined.
Information Sub-Tab
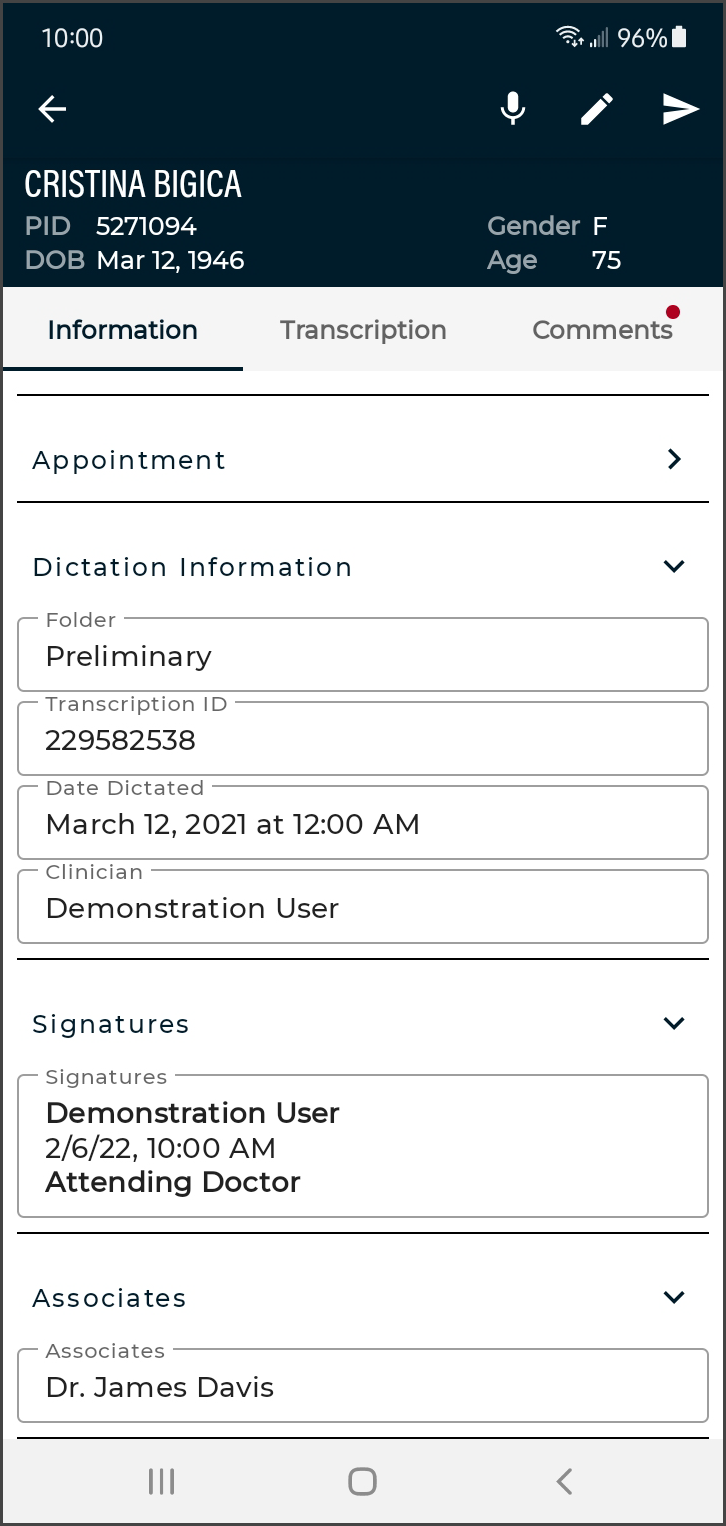 The Information tab contains header information about the note and is broken into sections, similar to the Information tab on the Recording screen.
-
Document Type - Displays the document type of the note.
-
Location - Displays the location of the appointment for the note.
-
Demographic Information - Displays patient name, MRN, birth date, age, and gender.
-
Appointment - Includes details related to the appointment, including the appointment date.
-
Dictation Information - Includes the workflow folder the note is currently in, note ID, date dictated, and the dictating clinician.
-
Signatures - Lists all clinicians who will sign the note. The date signed will appear next to or below the signing clinician's name after it has been signed.
-
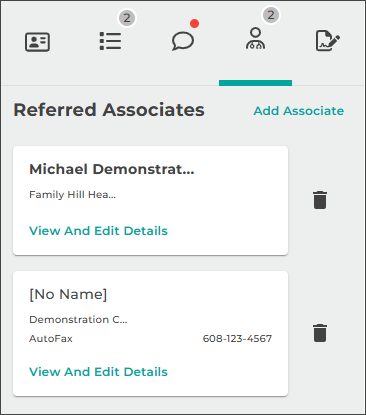
Associates - Lists all associates to receive a copy of the note.
Note Sub-Tab
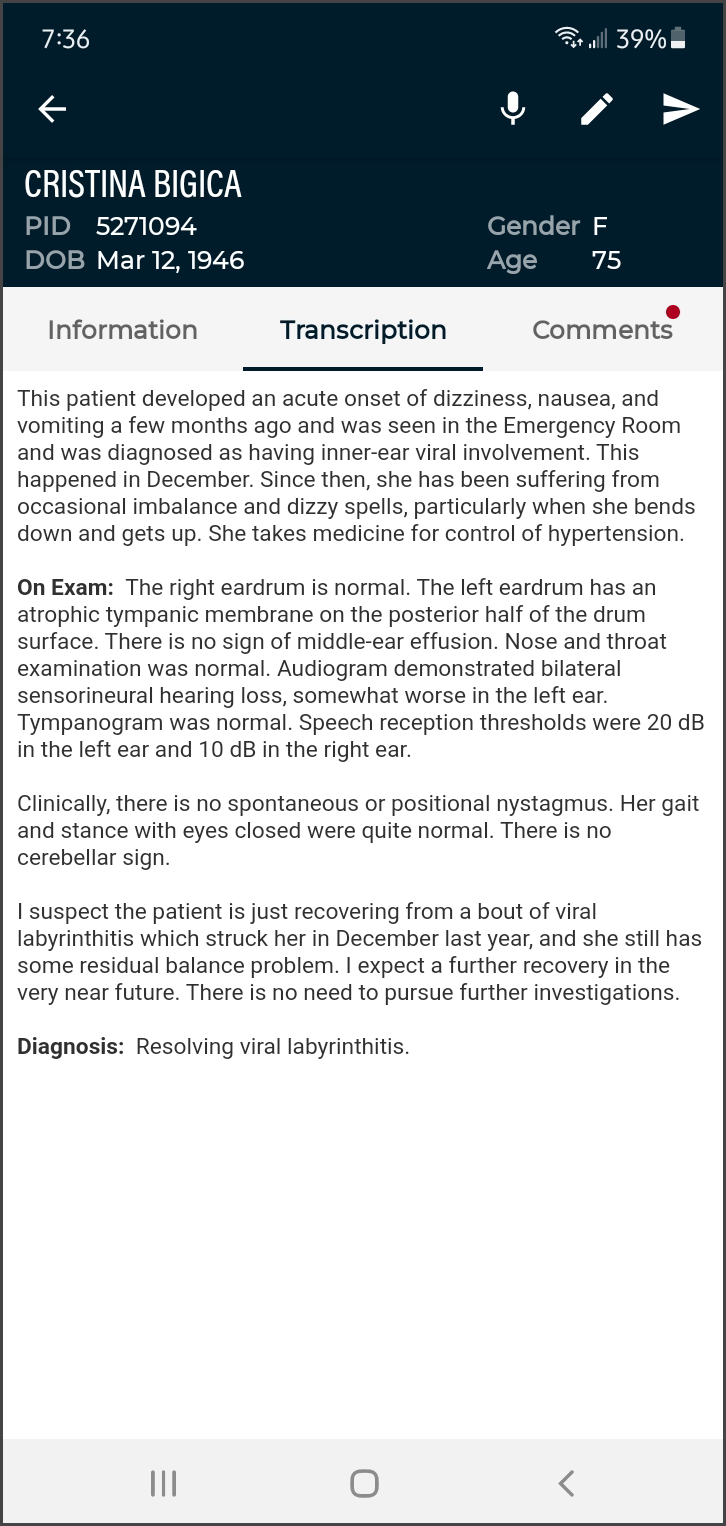 The Note tab within the Note Viewer displays the text of the note.
Comments Sub-Tab
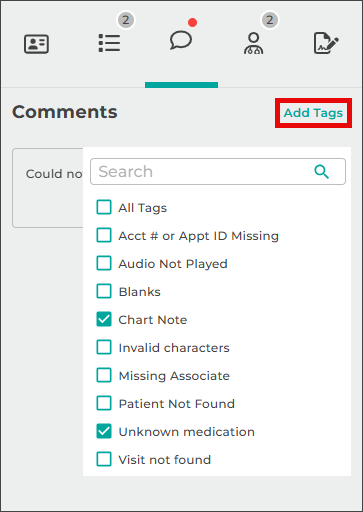
 The Comments tab displays comments and comment tags on the note. The Comments tab will not appear if the managing transcription company or facility has not granted access to the user.
A red dot will appear on the Comments tab if the note has at least one comment or comment tag.
Actions
The Action buttons in the upper right corner are used to create a new dictation, edit, or complete a note.
New Dictation
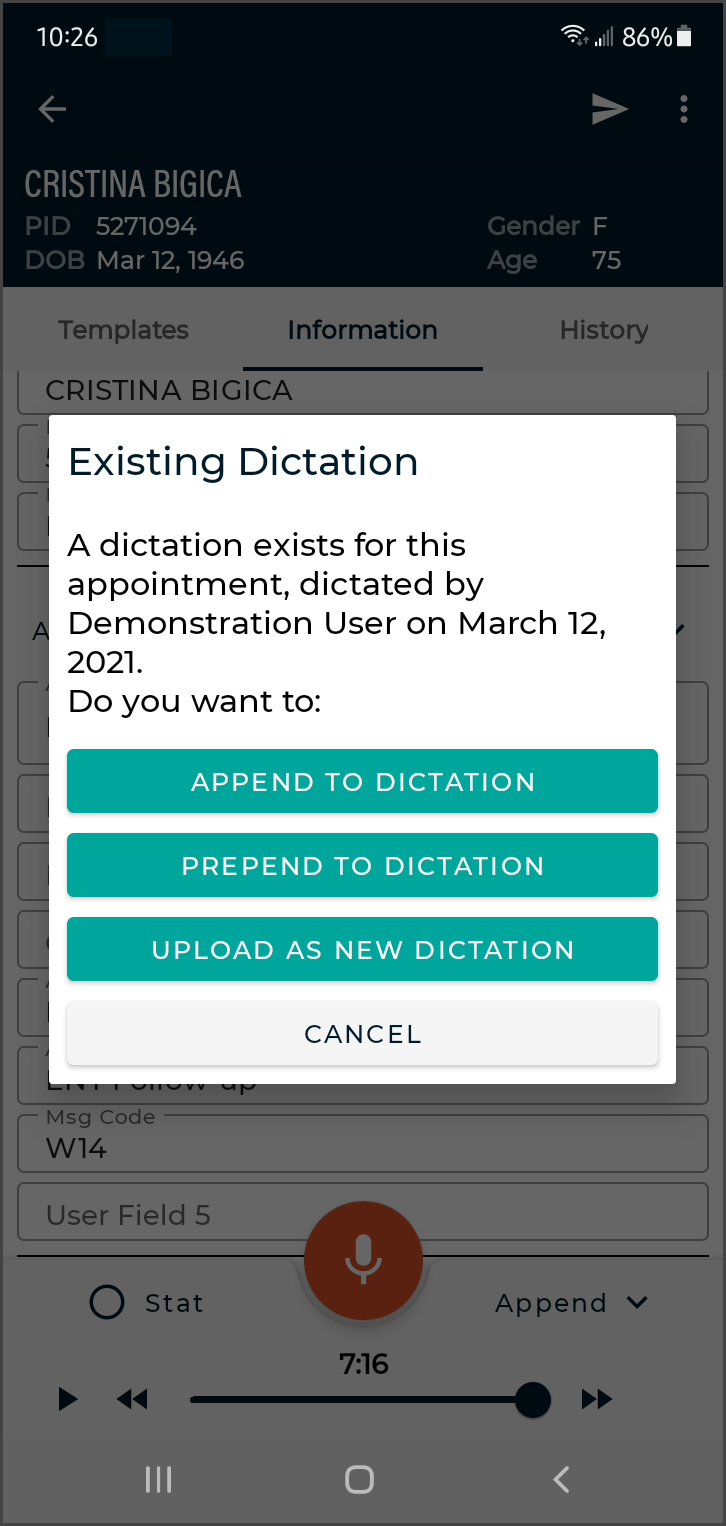
![]() Tap the New Dictation icon to start a new dictation with the same patient and appointment information as the original document. The Recording screen will open with the patient and demographics populated and the appointment date can be edited by tapping the appointment date. Record the dictation as normal (see Dictating with eSOne Mobile for Android).
Tap the New Dictation icon to start a new dictation with the same patient and appointment information as the original document. The Recording screen will open with the patient and demographics populated and the appointment date can be edited by tapping the appointment date. Record the dictation as normal (see Dictating with eSOne Mobile for Android).
When the new dictation is uploaded, a prompt will be presented to determine how or if the new dictation should be linked to the original note. The options are:
-
Append to Dictation - The note text from the new dictation will be added to the end of the original note.
-
Prepend to Dictation - The note from the new dictation will be inserted before the original note text.
-
Upload as a New Dictation - The note text from the new dictation will not be linked to the note text from the original note; they will both appear as separate notes.
The new dictation will create a separate note and note ID when appended or prepended, but will be linked to the original note. The two notes will appear as one when viewed (after the new dictation has been typed and delivered by the transcription company).
Edit
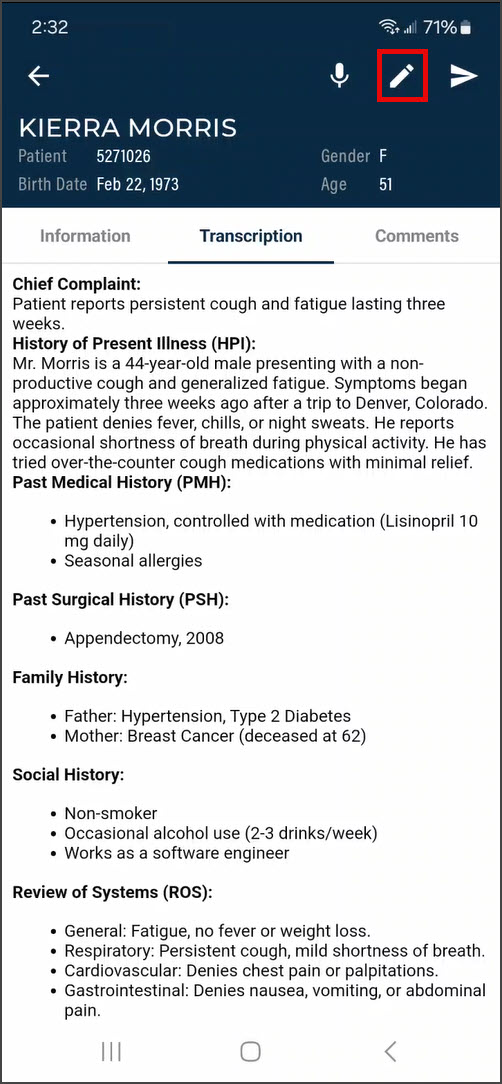
The note text and demographics can be edited to correct mistakes or add additional information. By default, only documents that are in the Marked for Review and Preliminary Folders can be edited. The Edit option in the eSOne mobile app is intended for small or minor edits. If more extensive editing and formatting is needed, consider using InQuiry on a desktop computer.
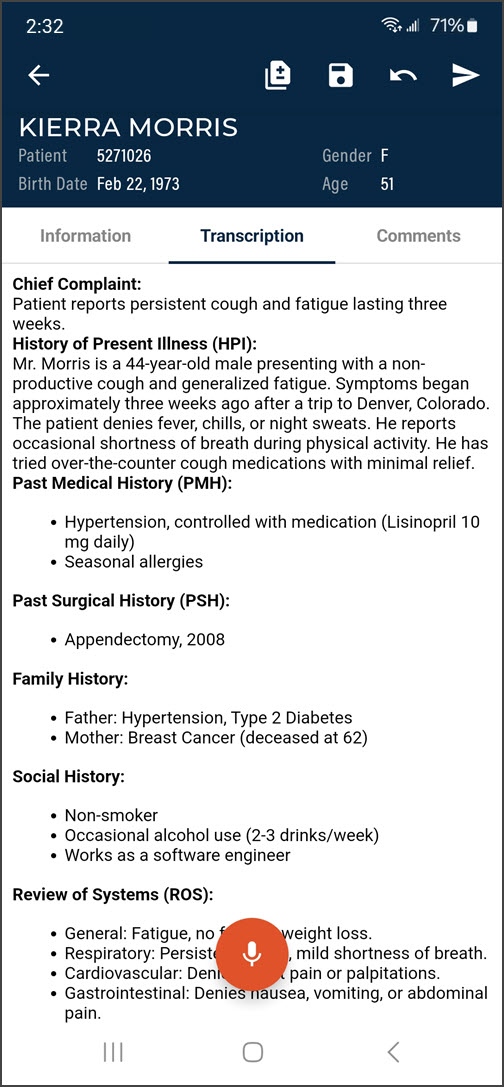
![]() Tap the Edit icon to open the Note Editor from any of the three tabs in the Note Viewer. The note text and demographic fields will be editable.
Tap the Edit icon to open the Note Editor from any of the three tabs in the Note Viewer. The note text and demographic fields will be editable.
To edit demographic fields, tap the Information tab while in edit mode. Tap on an editable field to open the keyboard or selection list, depending on the field type selected.
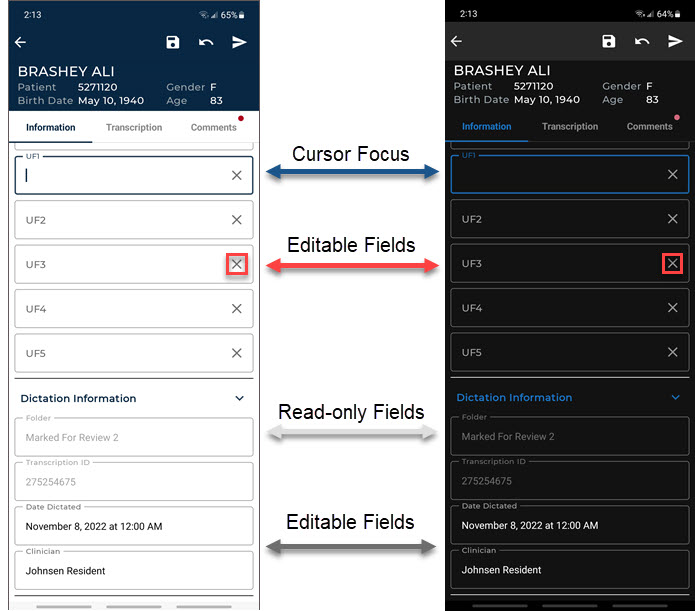
Read-only fields have light gray text, editable fields have darker text (white text in dark mode) or a Clear button (indicated by an ![]() at the end of the text field). The field with cursor focus will have a dark border (blue border in dark mode). The signatures, associates, comments, and comment tags cannot be edited in the eSOne mobile app; please use InQuiry to make those changes. See examples of editable and read-only fields in both light and dark modes below.
at the end of the text field). The field with cursor focus will have a dark border (blue border in dark mode). The signatures, associates, comments, and comment tags cannot be edited in the eSOne mobile app; please use InQuiry to make those changes. See examples of editable and read-only fields in both light and dark modes below.
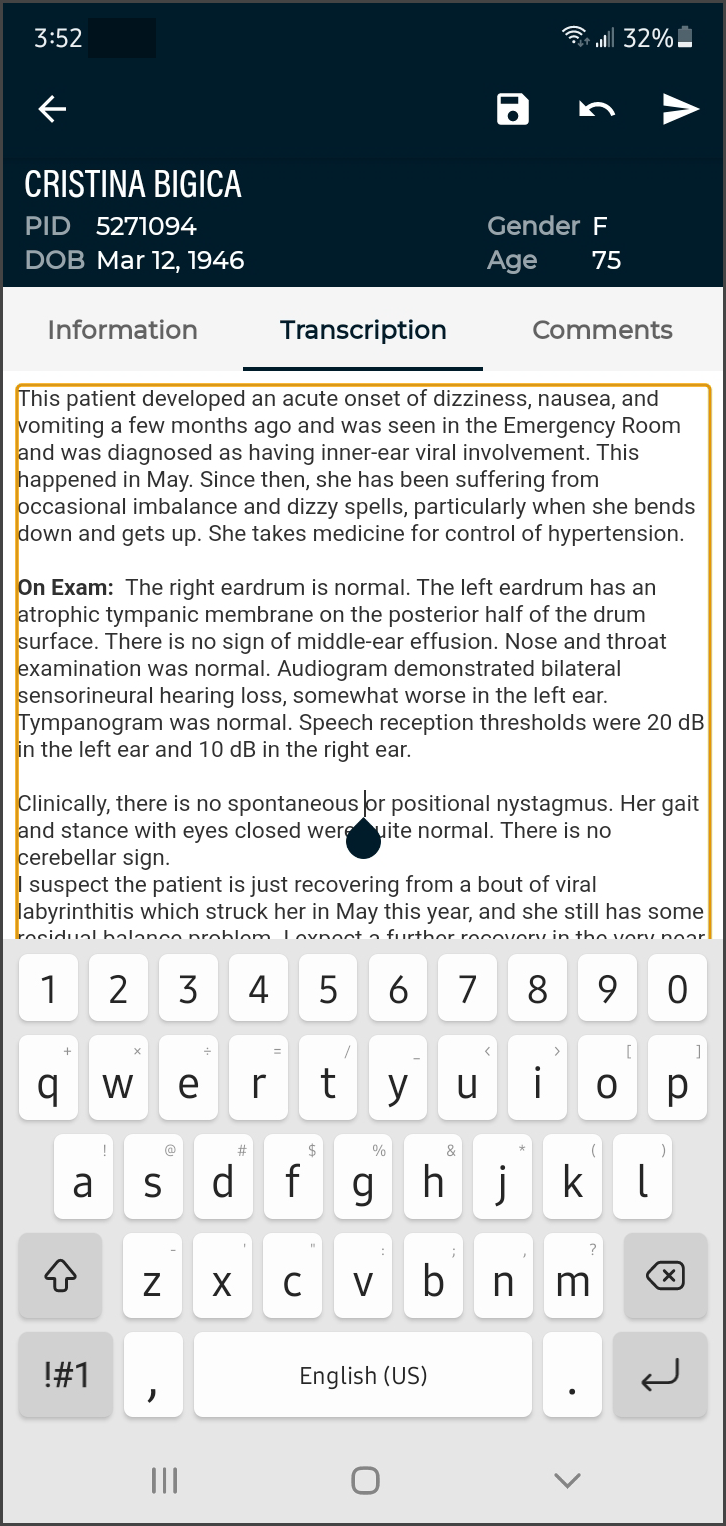 To edit the note text, tap the Note tab while in edit mode, then tap the note text to position the cursor and open the keyboard. A blinking cursor and blue cursor pointer will mark the cursor position.
![]() Tap the Undo button to cancel all unsaved changes made to the demographics and note text and return to the note viewer.
Tap the Undo button to cancel all unsaved changes made to the demographics and note text and return to the note viewer.
Switching between the Information and Note tabs in edit mode will not lose unsaved changes to either tab, but it is recommended to save often.
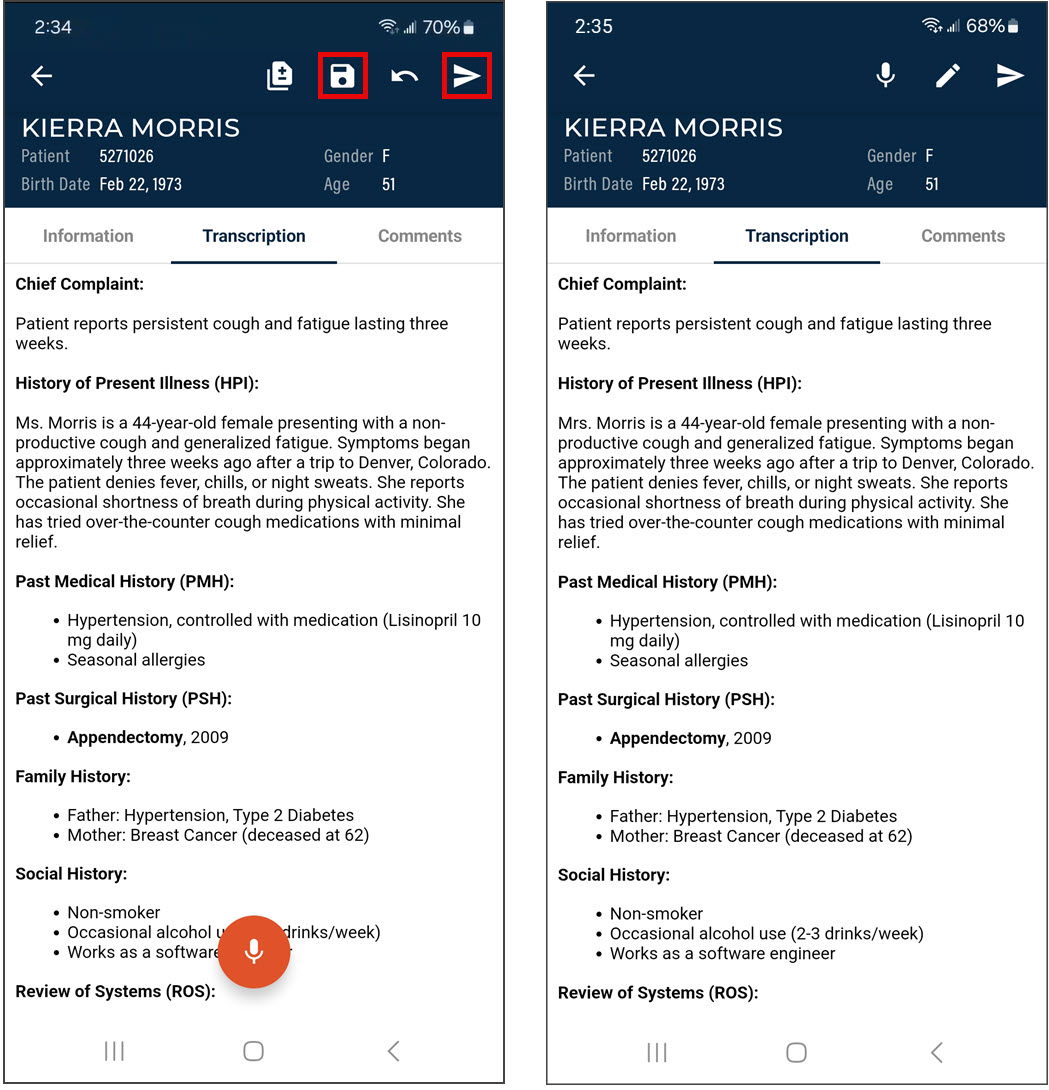
![]() Use the Save button to save changes to the demographics and note text and return to the note viewer. Tapping the Complete button while editing will save changes and complete the job from the workflow folder.
Use the Save button to save changes to the demographics and note text and return to the note viewer. Tapping the Complete button while editing will save changes and complete the job from the workflow folder.
If navigation back to the workflow folder is attempted prior to saving changes, a confirmation dialog box will be presented with the options to Cancel or Discard. To return to the editor to make additional changes and/or save changes, tap Cancel. To return to the workflow folder list without saving changes, tap Discard.
Note
Changes are not saved automatically.
Complete
![]() Tap the Complete button to progress the note to the next stage of the workflow. When the document is Completed from the Preliminary folder by the dictating clinician or additional authenticator, the electronic signature is also applied, if the provider is using that feature. If the document is completed from the final workflow folder it will be saved in the repository (also known as Search All).
Tap the Complete button to progress the note to the next stage of the workflow. When the document is Completed from the Preliminary folder by the dictating clinician or additional authenticator, the electronic signature is also applied, if the provider is using that feature. If the document is completed from the final workflow folder it will be saved in the repository (also known as Search All).
When the note cannot be completed due to incomplete fields within the note text, a notification will appear. The completion action will be canceled. The user can then enter edit mode to make the necessary adjustments then complete the note.
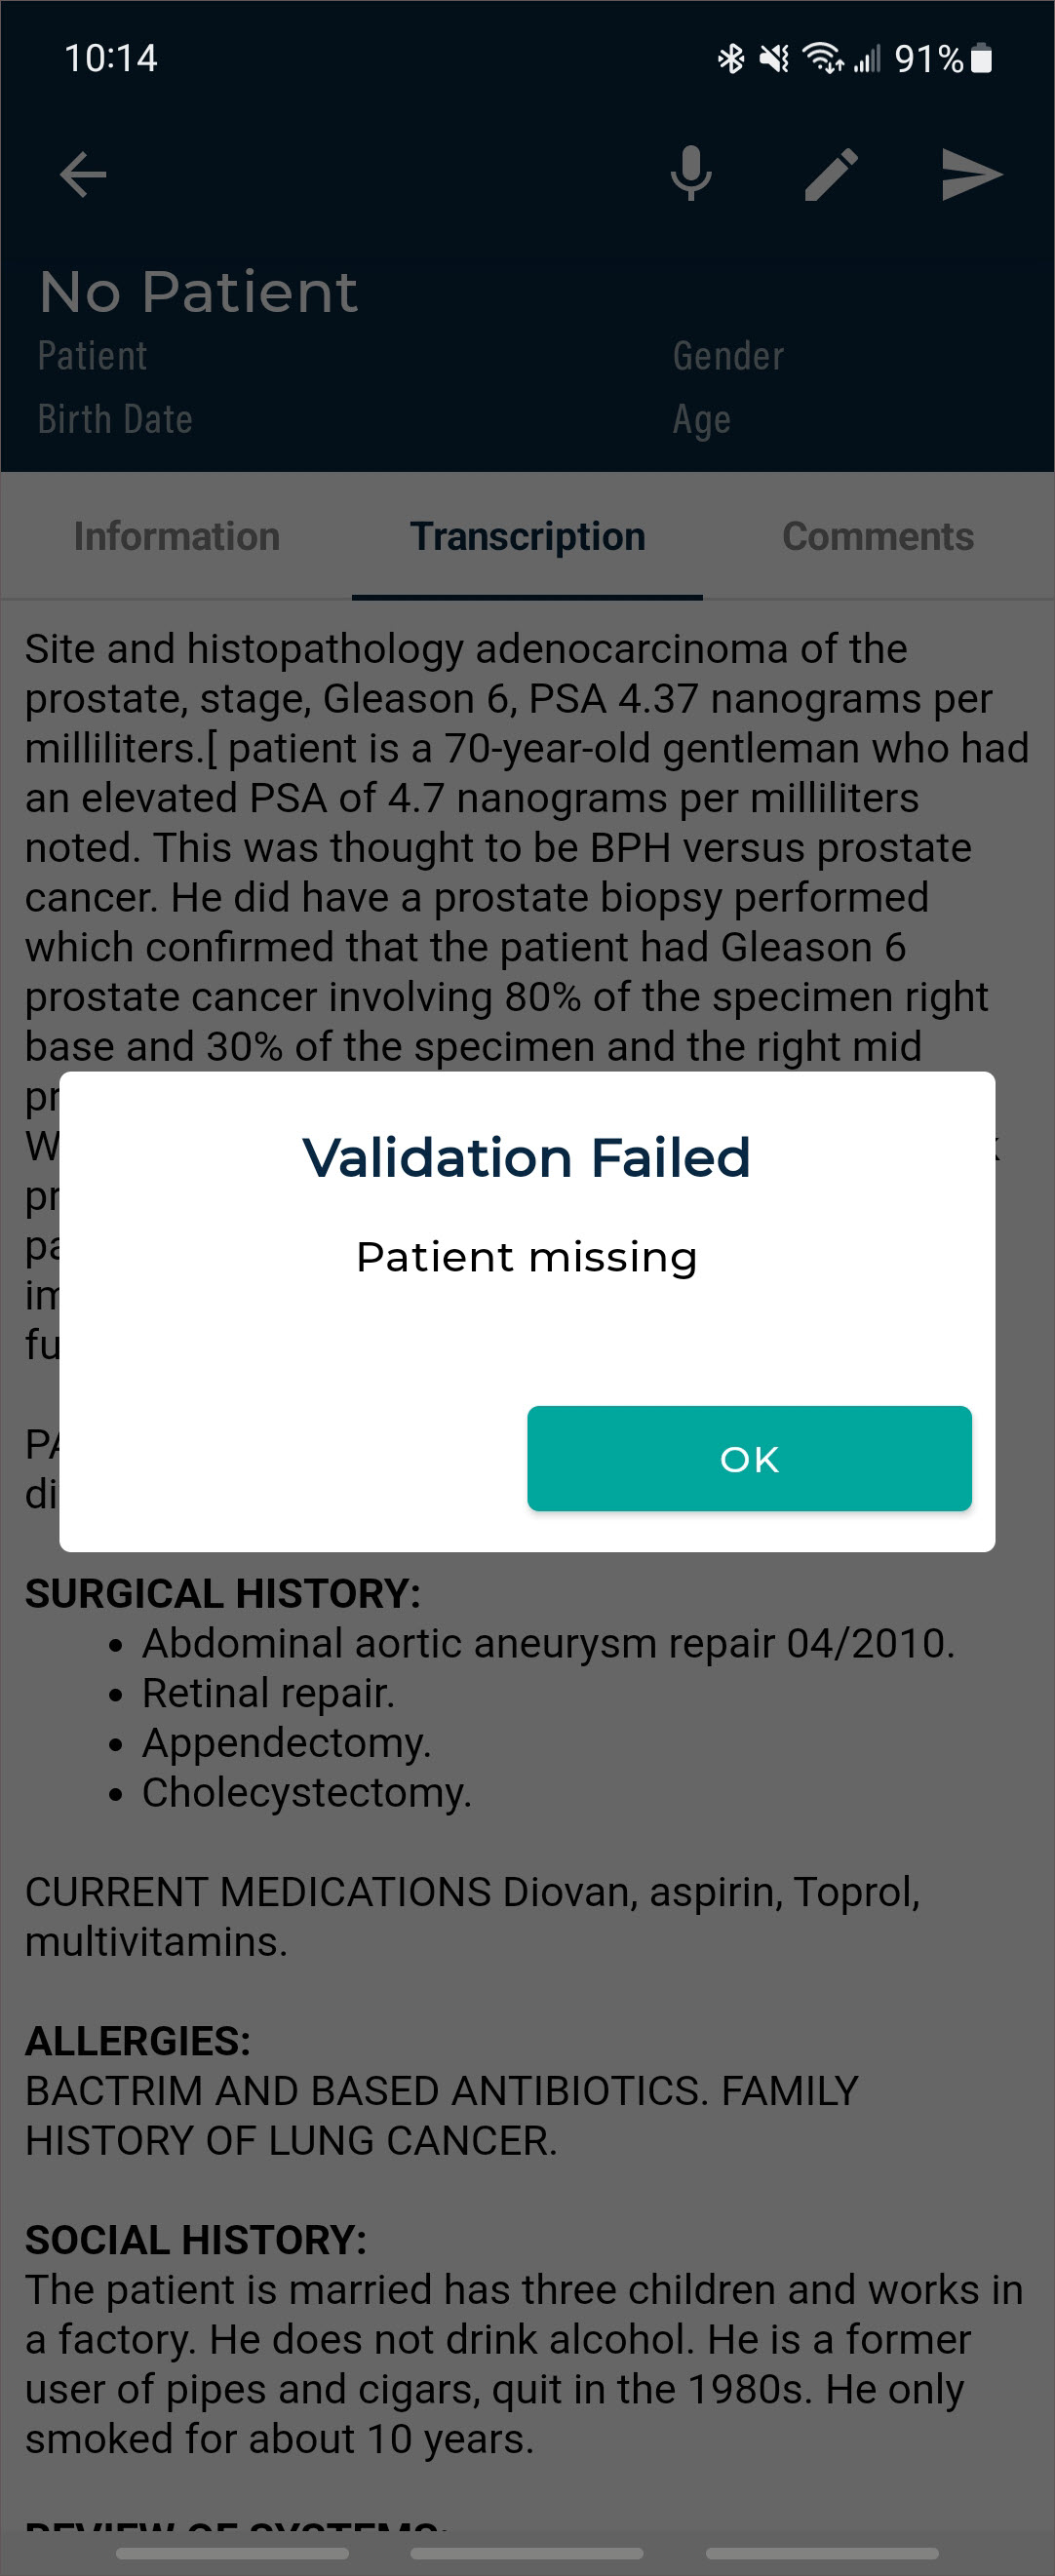
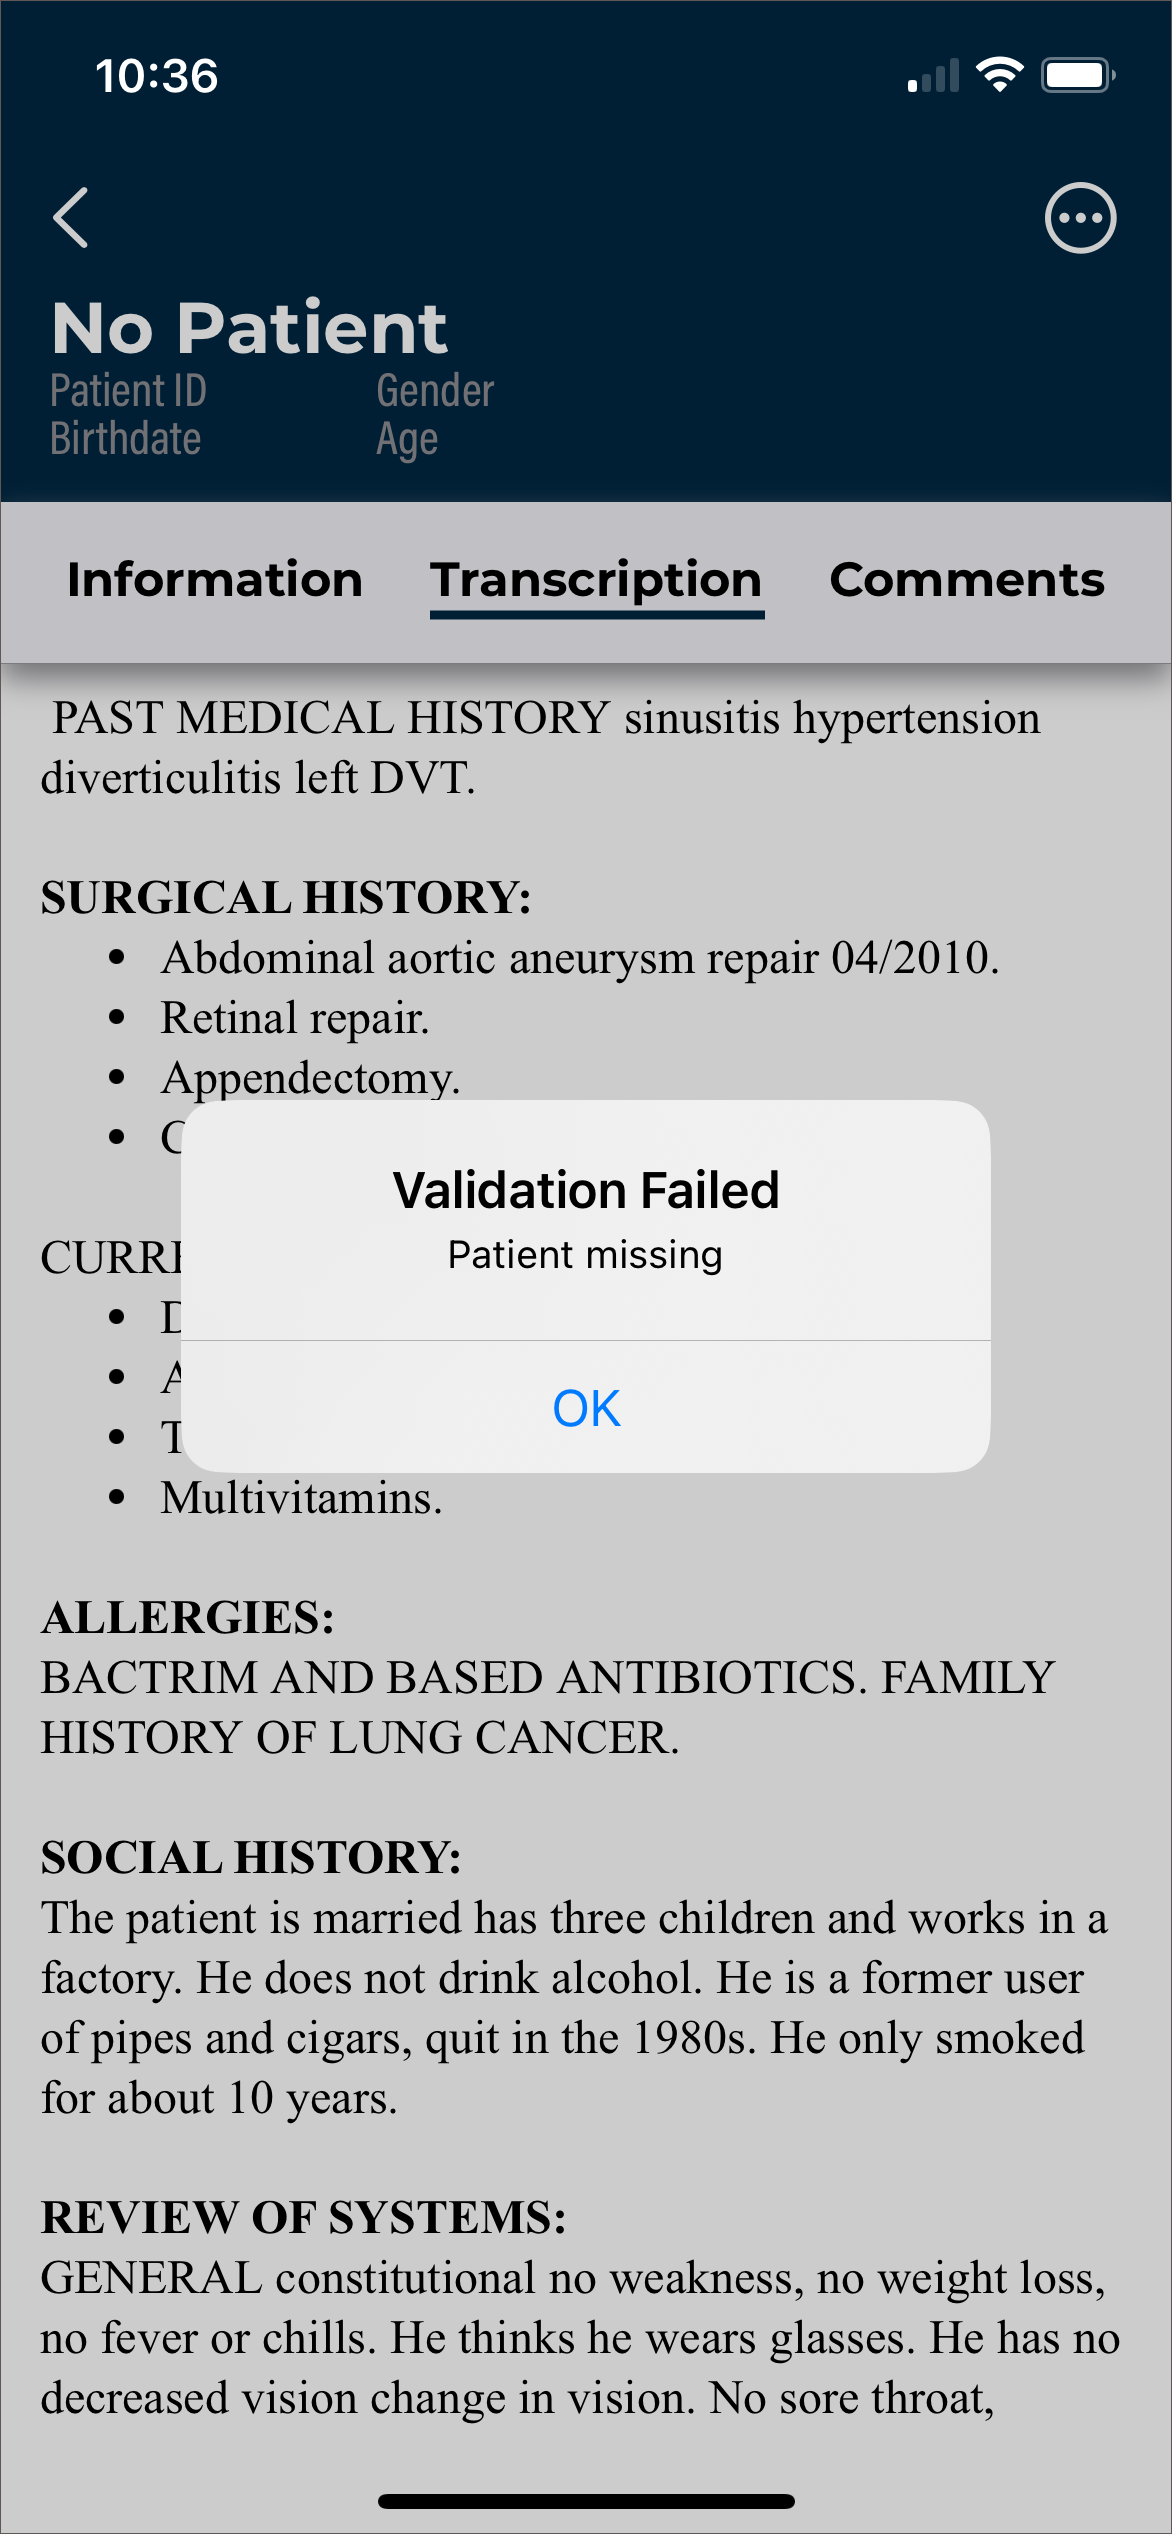
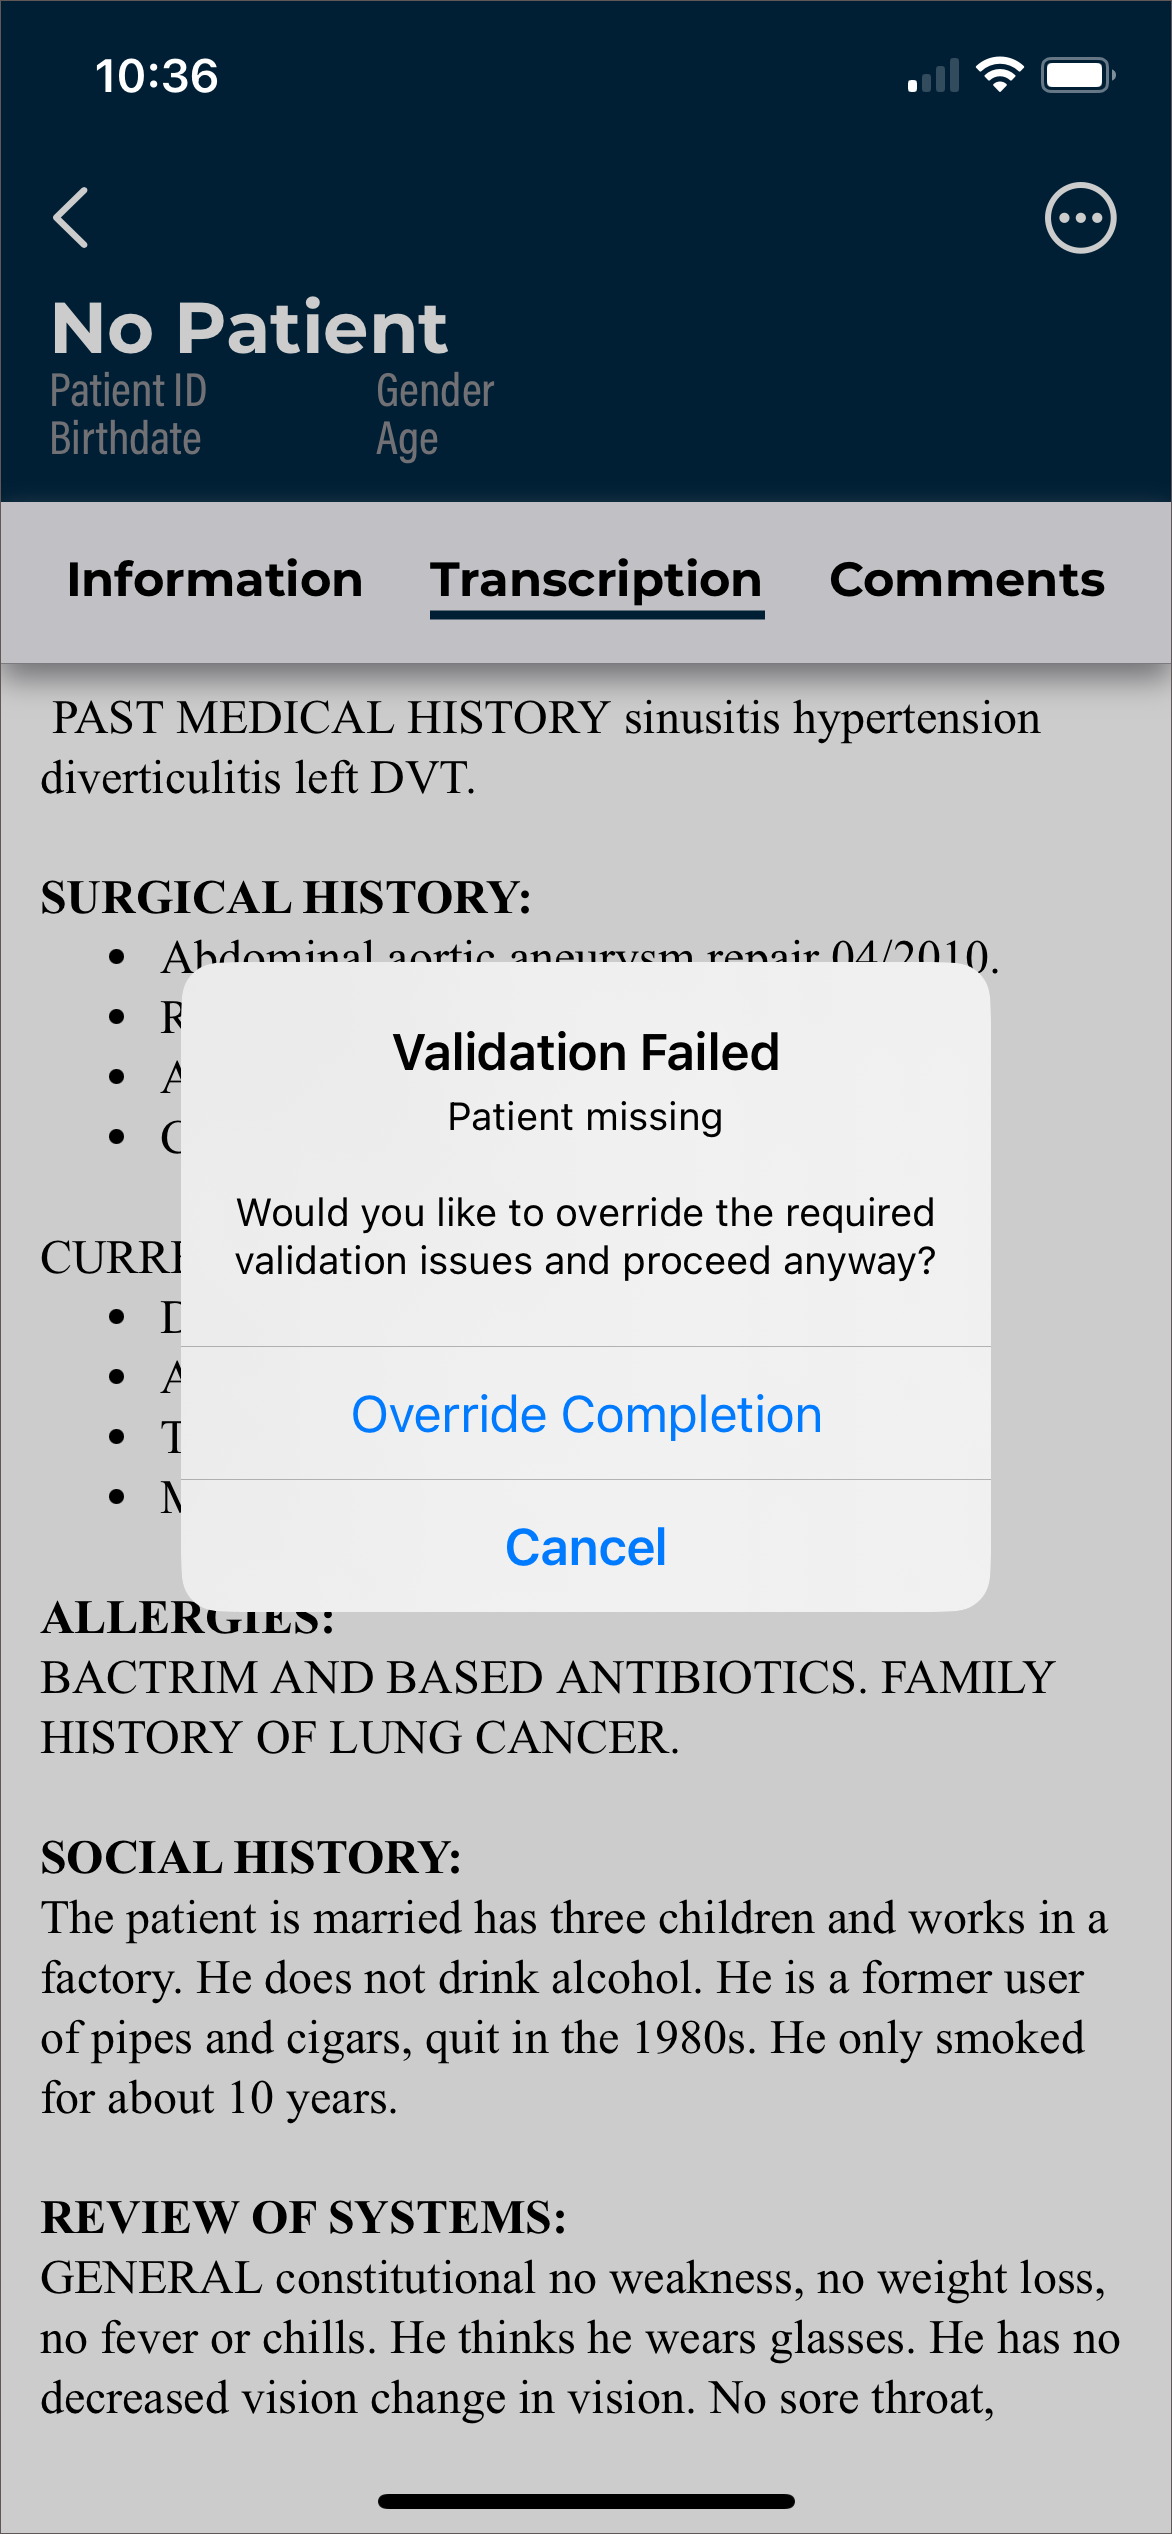
If the client is using workflow validation rules and the job fails validation, a message will appear upon completion, stating which validation rule failed. Depending on the setup of the validation rule, a warning may be given, which allows the user to cancel the complete action to edit the note or continue with the complete action and leave the note as-is; if the validation rule prevents completion the user must edit the note to meet validation requirements, unless the user has the rights to override the prevention.
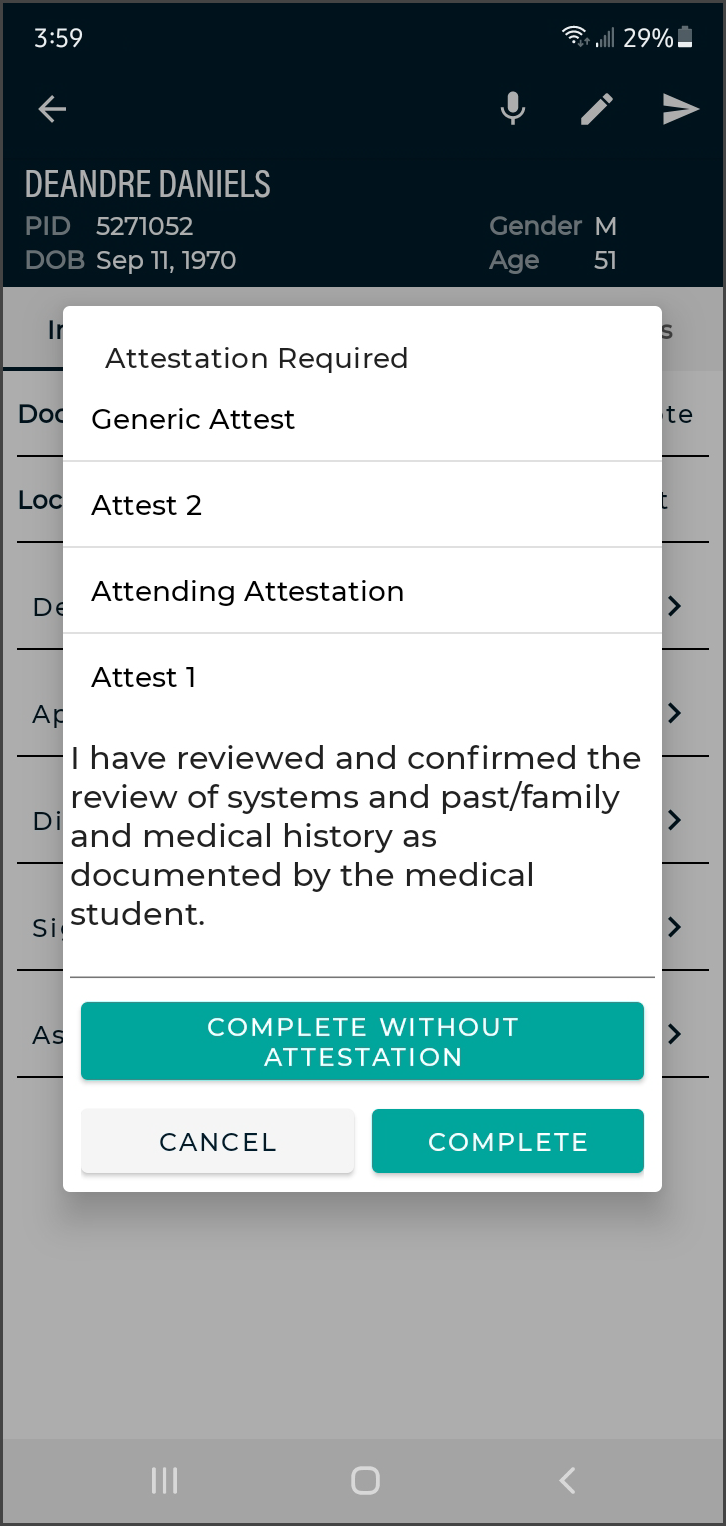
When the note being completed requires an attestation statement from an additional authenticator, a dialog box will be presented to the authenticating signer. The dialog box will list all attestation templates available to the signer, as well as an option to complete the note without an attestation, or to cancel without completing the note. When an attestation template is selected, the template text will load within the dialog box for review. If no changes are needed to the attestation text, tap Complete. If edits are needed, tap within the attestation template text to position the cursor and open the keyboard. Tap Complete to apply the attestation template and signature and advance the note in the workflow. To sign the note without applying an attestation statement, tap **Complete Without Attestation".
The completion of a note cannot be undone. By default, eSOne Mobile will present a confirmation prompt before completing the note. This prompt can be disabled in the Settings tab.
Dual Resident Attending Workflow
If the facility uses the dual resident/attending workflow, attending physicians (authenticators) will be allowed to complete documents in the workflow even if the dictating resident has not yet reviewed or approved the document. With this option, documentation can be completed more quickly if needed.
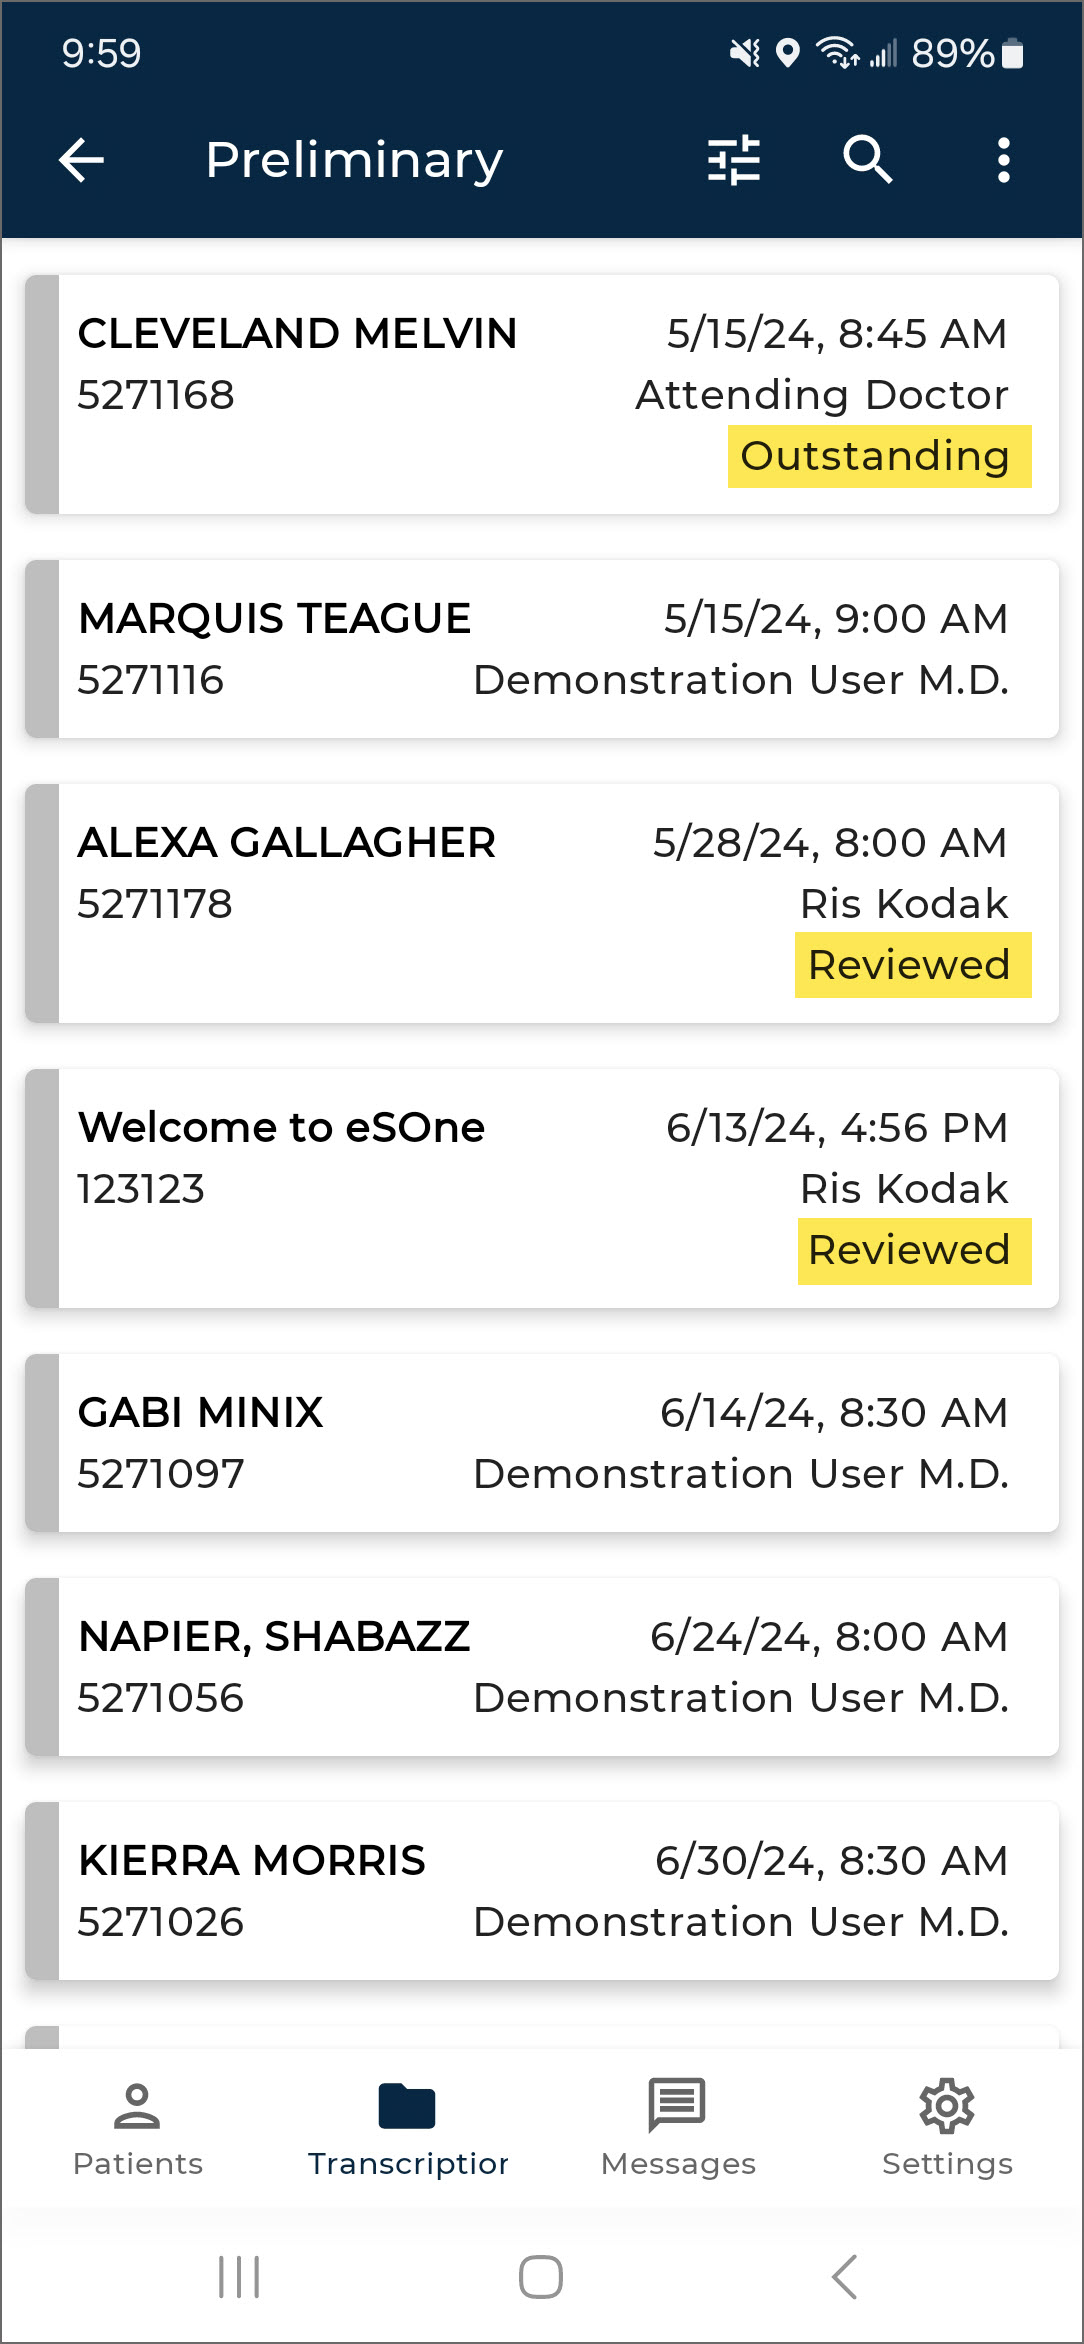 In this workflow, a note requiring an extra signature(s) will appear in the resident's and attending's Preliminary folders at the same time. Either the dictating resident or attending physician can review and edit the document (provided they have proper rights to location and document type). A review status will appear in the note list of the Preliminary folder to indicate if the job has been reviewed by the dictating resident, as shown highlighted in the image. Notes not requiring an additional signature will not display a status.
There are two paths this workflow can follow:
-
Resident reviews/approves an outstanding note, then the attending completes.
- The resident can see the note in the Preliminary folder with an "Outstanding" status and can review and approve the note. After the resident completes the job, it is removed from their Preliminary folder.
- The attending will see the "Reviewed" status from the Preliminary note list and can complete the note. It will move on to the next workflow folder.
-
Attending Completes an Unreviewed Note
- The attending will see the note in the Preliminary folder with an "Outstanding" status prior to the resident reviewing/approving the note.
- Once the attending completes the job, the note moves on in the workflow and out of their Preliminary folders. The next time the resident searches or refreshes their Preliminary folder, the note will not be available.
If the facility does not use the dual resident/attending workflow, notes will not appear in the attending physician's (authenticator) Preliminary folder until after the dictating resident has approved the note and the review status will not appear.
The Settings Tab
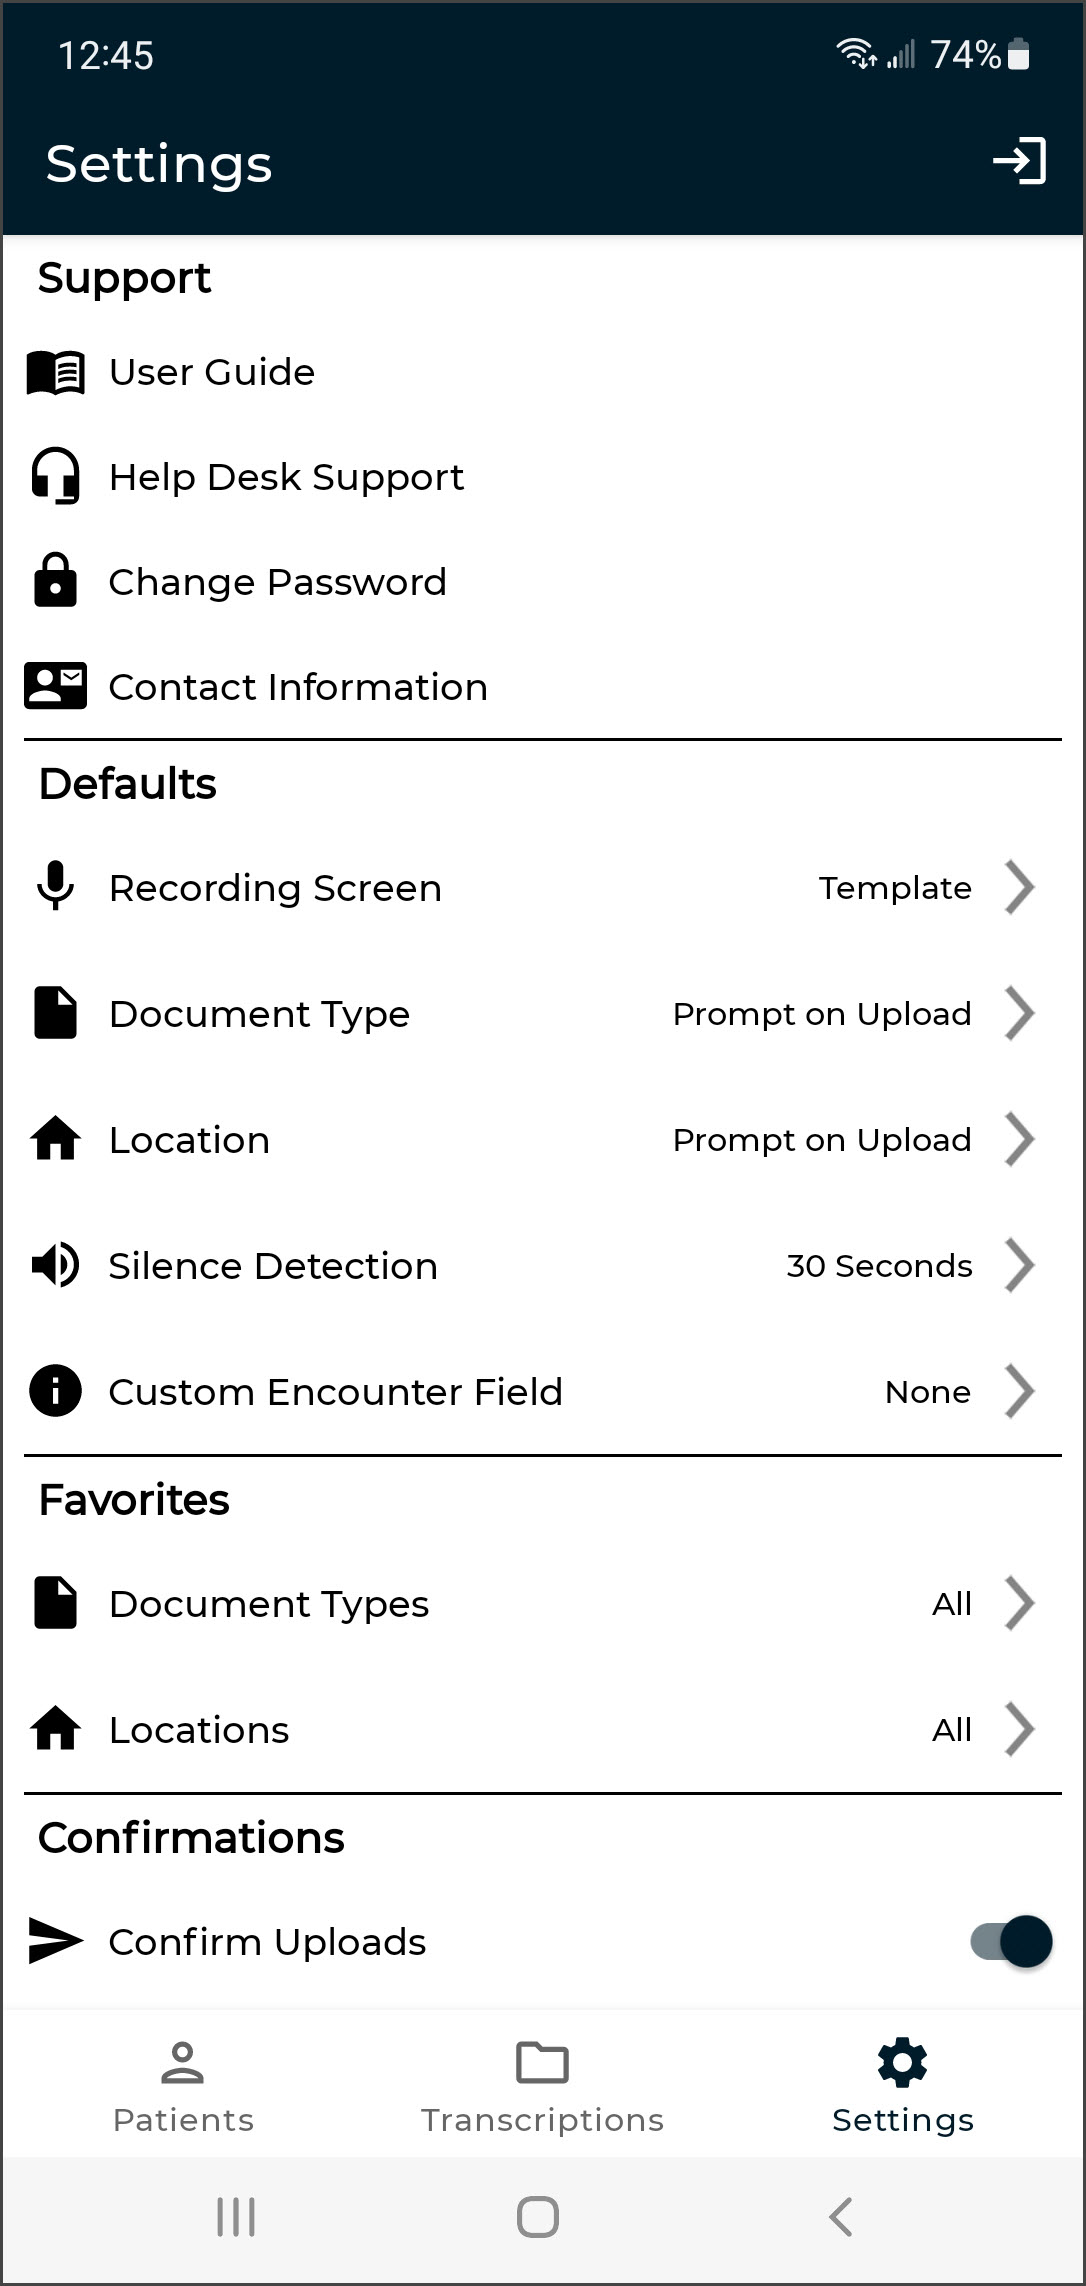 Use the Settings tab to set default screens and behavior for the eSOne Mobile application.
Tap the Log out button in the upper right corner or the bottom of the Settings tab to log out of the eSOne app entirely.
Support
- User Guide - Contains a link to the online user documentation. Click ‘User Guide’ to open the documentation in a browser window.
Note
If an organization does not allow users to remain logged in when they navigate away from the app, those users will need to log in again after viewing the guide.
-
Help Desk Support - Contains contact details for support, along with the version number of the mobile app. The Upload Database feature should only be used when directed to by support staff.
-
Change Password - If the password does not meet the password requirements set for the client, the screen will display which ones have not been met after the user presses the Change button. Remember that InQuiry, InSync, and eSOne Mobile all use the same password.
-
Contact Information - Change and verify the user's email address. After the address is changed an email will be sent to verify the new email address. Follow the instructions in the email to complete the verification process. Tap the Resend button to resend the verification email; this button will only appear when the email address is in an unverified state. If the user does not have a verified email address the Settings tab will have a red dot and "Email is not verified" will appear next to the Contact Information menu option.
Defaults
-
Recording Screen - Choose which tab is selected when opening a patient appointment: Templates, Information, or History. Template is selected by default until changed here. Jobs will open to the History tab if there is an uploaded dictation from the same device.
-
Document Type - Select a default document type to be preselected on the record screen. The document type can be changed on each dictation if needed. If "Prompt on Upload" is selected, eSOne Mobile will prompt you to select a document type when uploading a dictation that does not have one selected. "Prompt on Upload" is the default setting.
-
Location - Select a default Location for all dictations. The Location can be changed on each dictation if needed. If "Prompt on Upload" is selected, eSOne Mobile will prompt you to select a Location when uploading a dictation that does not have one selected. "Prompt on Upload" is the default setting.
-
Silence Detection - Select the length of time silence can be recorded before eSOne Mobile pauses the recording. The default value is "30 Seconds" and recording will automatically pause when 30 consecutive seconds of silence is detected.
-
Custom Encounter Field - Select an additional data field to be displayed to the right of the patient name on the appointment listing.
Favorites
-
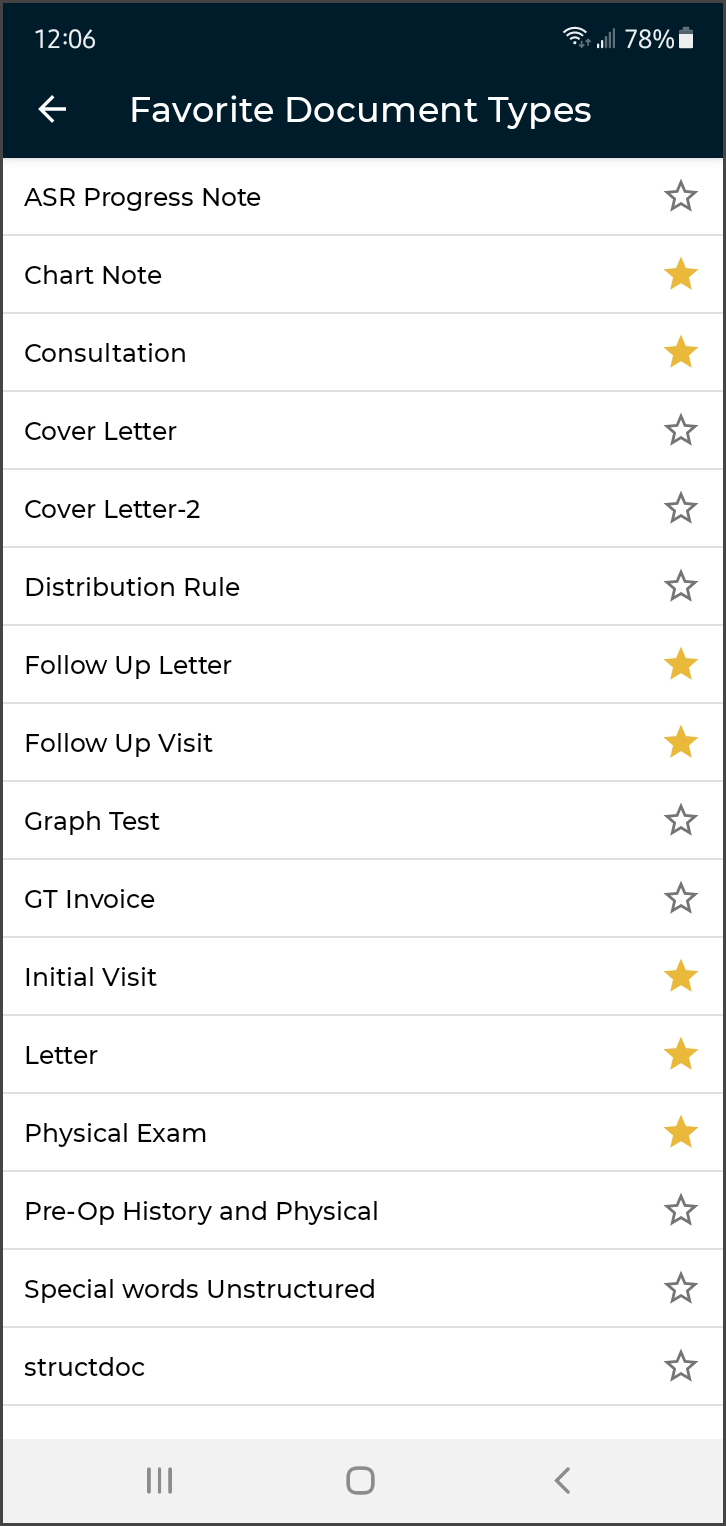
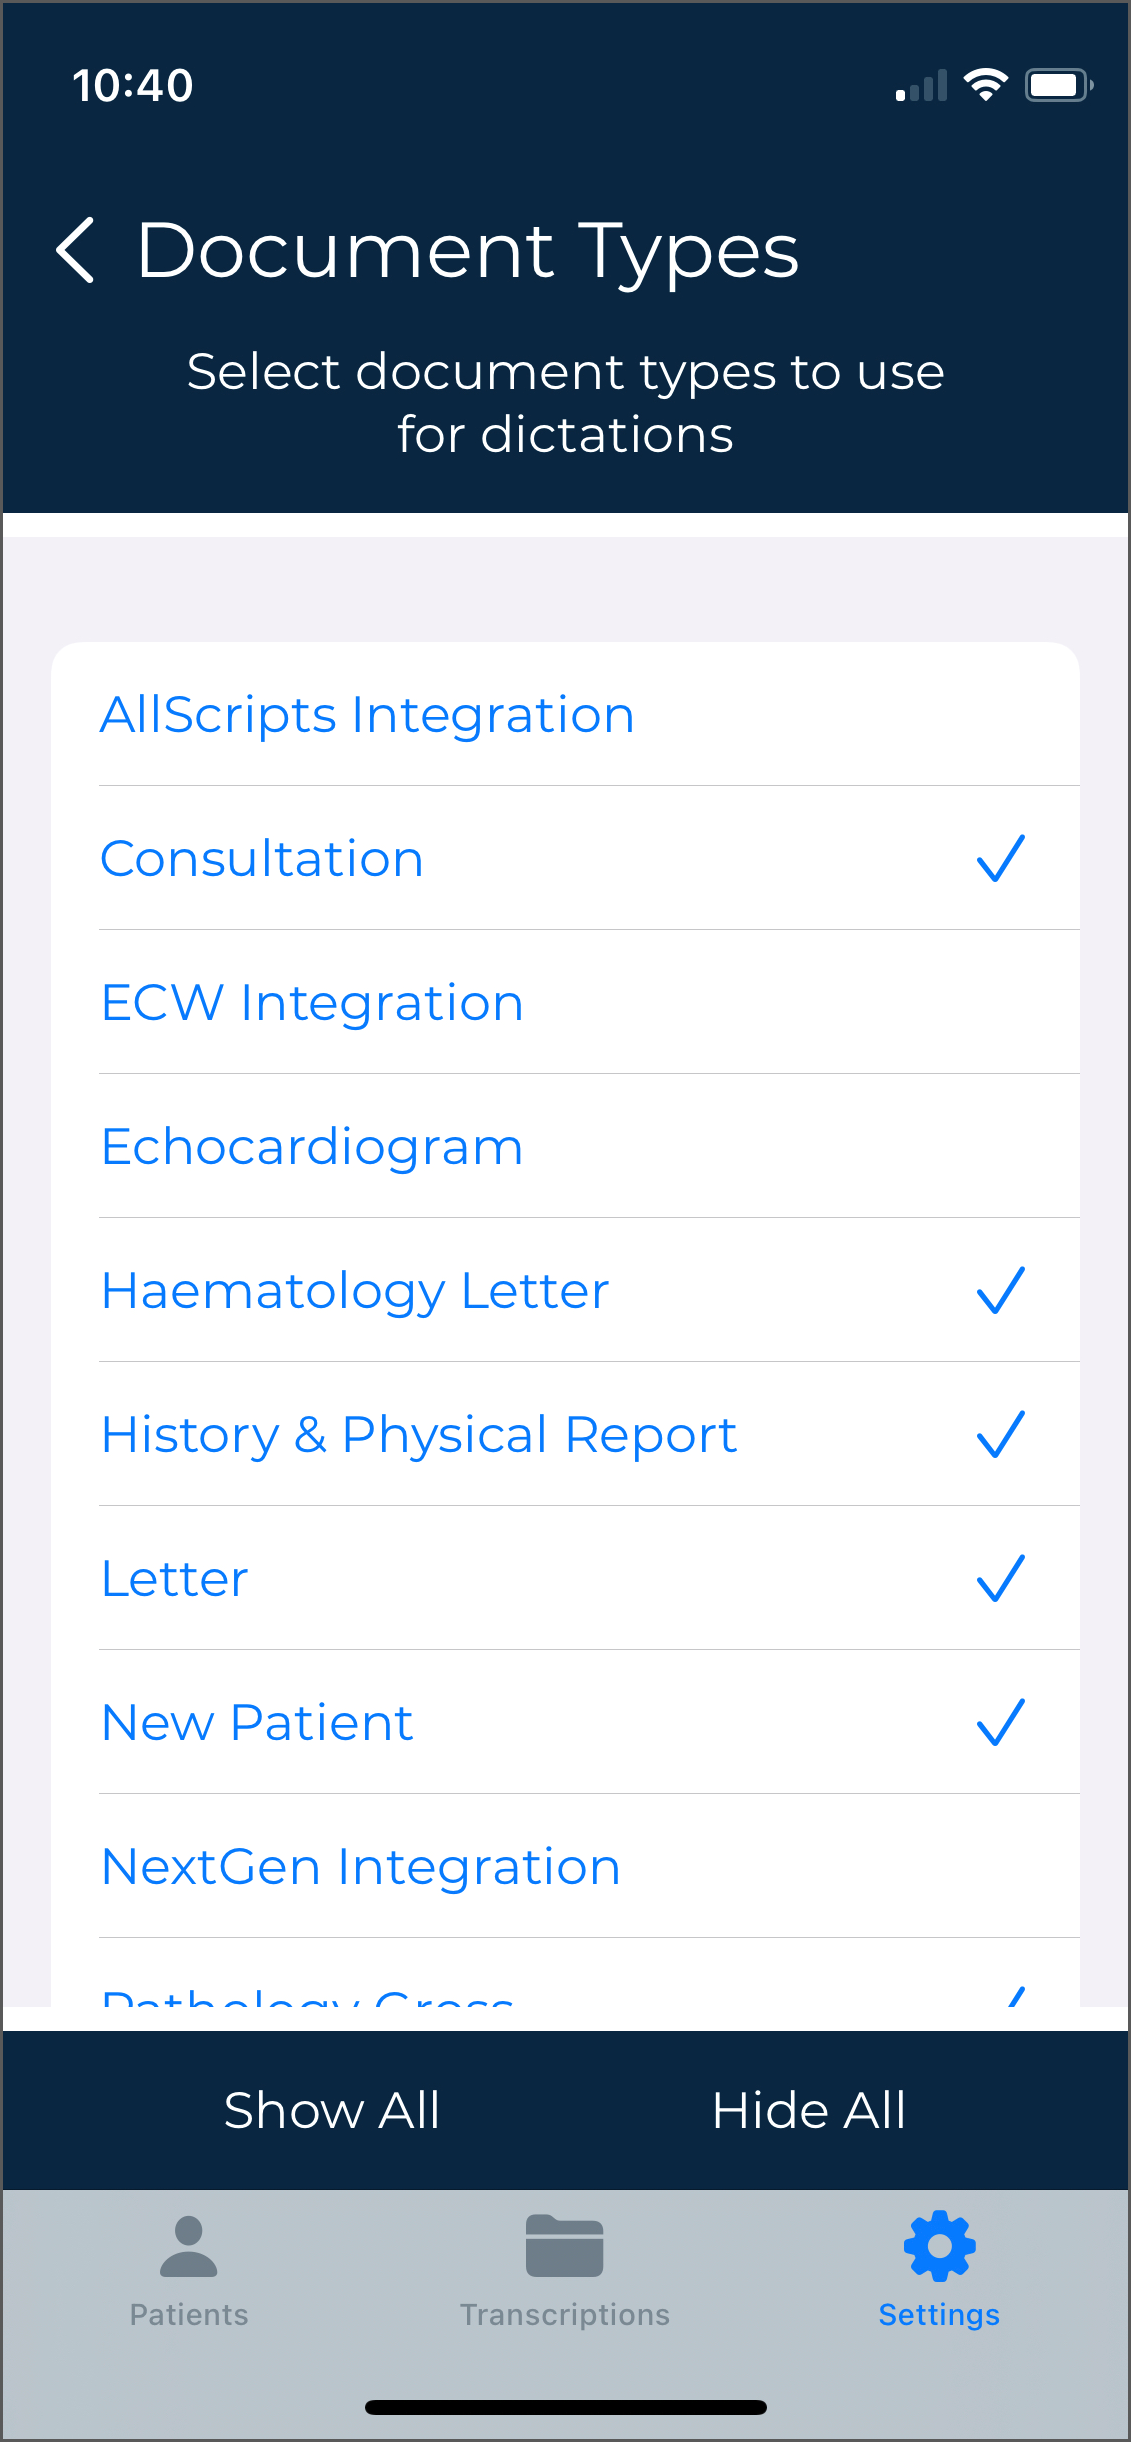
Document Types - Filter the document types that are available when choosing a document type for a dictation. If a facility has thirty document types, but a dictator only needs five of those document types, this setting is used to remove the other twenty-five from the list of document types. Tap the document name to toggle the favorite setting on (yellow star) and off (white star).
-
Locations - Filter the locations that are available when choosing a location for a dictation. If a facility has fifteen locations and a dictator only works at three of them, this setting is used to remove the other twelve from the list of possible locations. Tap the location name to toggle the favorite setting on (yellow star) and off (white star).
Confirmations
- Confirm Uploads and Confirm Log out - Turn the confirmation pop-up for those actions on or off.
Security
-
Save Login - Save the username to avoid having to enter it at each log in.
-
Save Password - Save the password to avoid having to enter it at each log in. This option will be disabled if the client does not allow password saving.
Warning
When 'Save Password' is enabled, anyone with access to the device can access the eSOne account and the confidential medical records in it.
Accounts
 eSOne Mobile can access user accounts across multiple medical facilities by linking accounts. The Accounts list includes all Linked accounts and allows the user to quickly switch between user profiles.
Tap Add Account to link a new user account. eSOne Mobile will prompt for the username, password and client for the initial setup. The new linked account will appear in the Accounts list with the full client name, followed by the user's first and last name.
To switch to a linked account, tap on the desired account profile; the password is required unless the medical facility has enabled password saving. A black radio button indicates the current logged-in account. Patients and transcriptions in those respective tabs will now show data for the current logged-in account only.
To remove a linked account, tap the X button next to the user account to be deleted.
Inpatient Workflow
The inpatient workflow is an alternative scheduling method that lists patients based on inpatient encounters, rather than listing patients by appointment. This workflow feature is only available when enabled by the client, and is not available for all users.
For example, a physician is required to make regular rounds to all patients admitted to Critical Care. The inpatient workflow allows the physician to easily track which patients are on his ward, and if he has dictated on them today, or if he still needs to visit them. Inpatient also allows the physician to clear his schedule manually when he needs to see patients more frequently.
To switch between the outpatient appointment screen and the inpatient workflow, tap the ![]() Filters button on the upper right corner of the Patients screen, then tap Inpatient in the Mode section. To change back to the outpatient appointments view, tap the
Filters button on the upper right corner of the Patients screen, then tap Inpatient in the Mode section. To change back to the outpatient appointments view, tap the ![]() Filters button then tap Schedule (Outpatient).
Filters button then tap Schedule (Outpatient).
Patient List
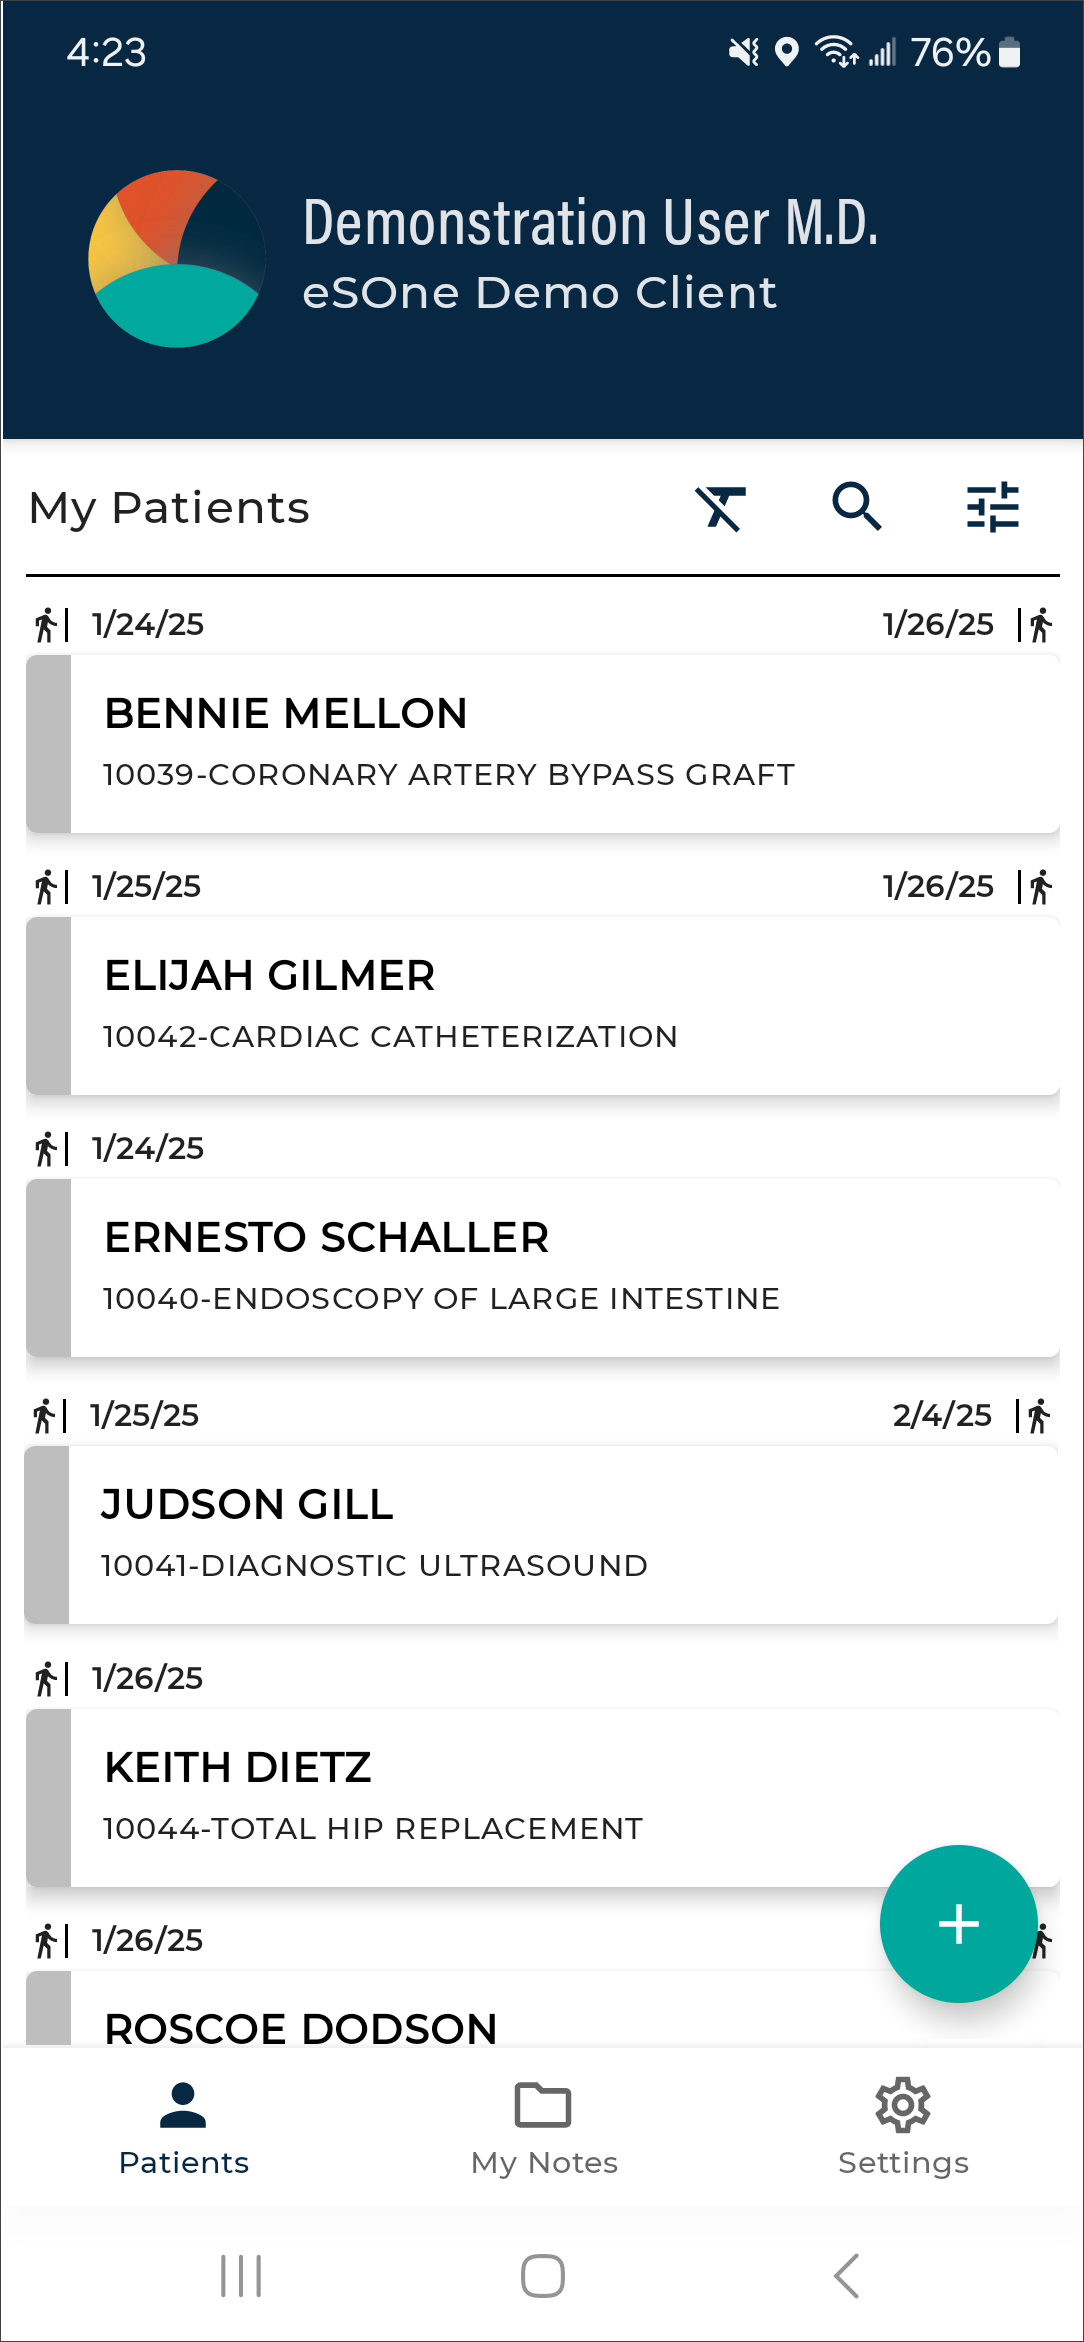
The Patient List on the Patients tab provides a comprehensive overview of patients based on the filters and sorting criteria set by the provider. This list offers valuable information at a glance, allowing providers to quickly identify and select the correct patient for dictation, streamlining the workflow and enhancing efficiency in managing inpatient care.
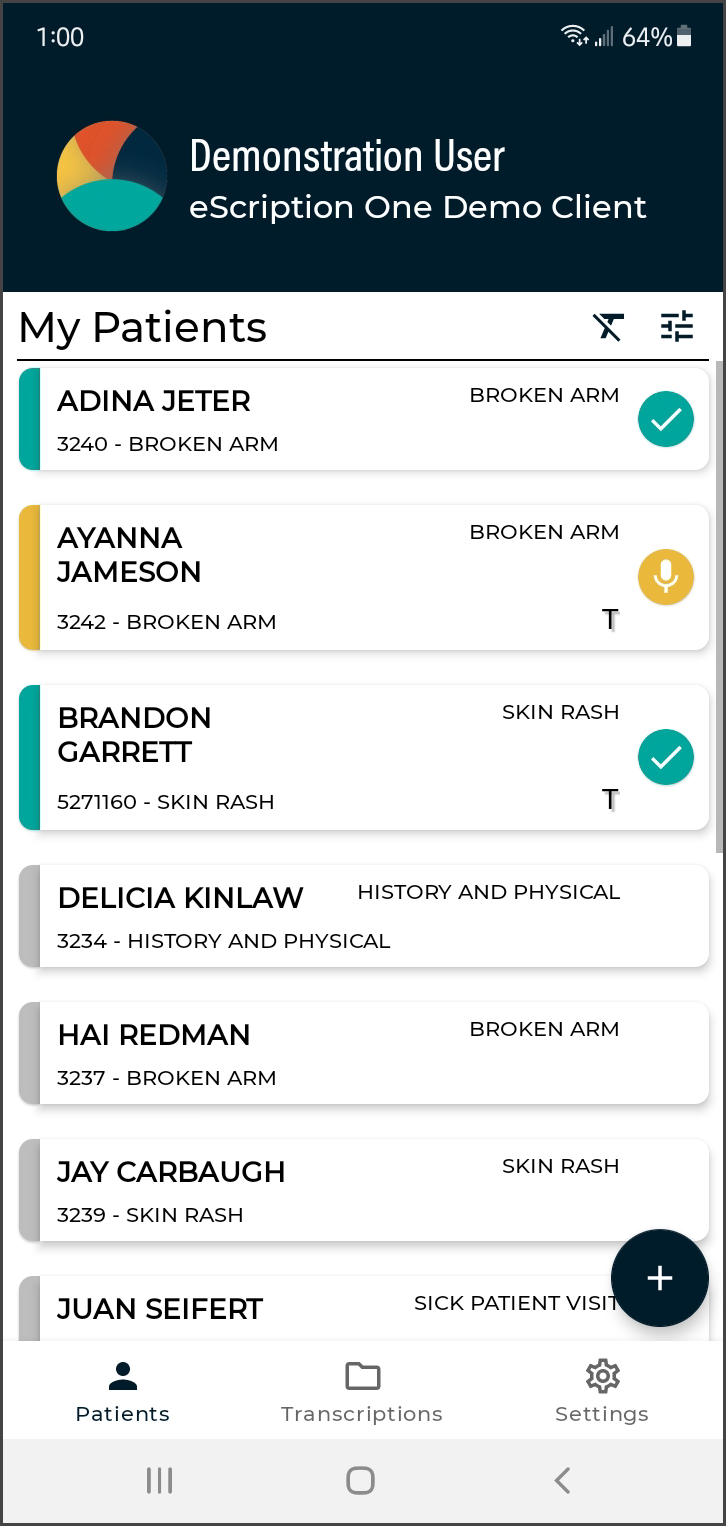 Each patient encounter card includes essential identification details:
 Admit Date - When available, the admit date will be displayed above the patient card on the left.
 Discharge Date - When available, the discharged date will be displayed above the patient card on the right.
- Patient Name
- Patient ID
- Account Number
- Encounter Data Field - The contents of the encounter data field varies based on client configuration. It will appear next to the Patient ID.
- Custom Encounter Field - An additional data field can be added to the patient card by navigating to the Settings tab, tapping Custom Encounter Field, and selecting the desired field. The data will then appear to the right of the patient's name.
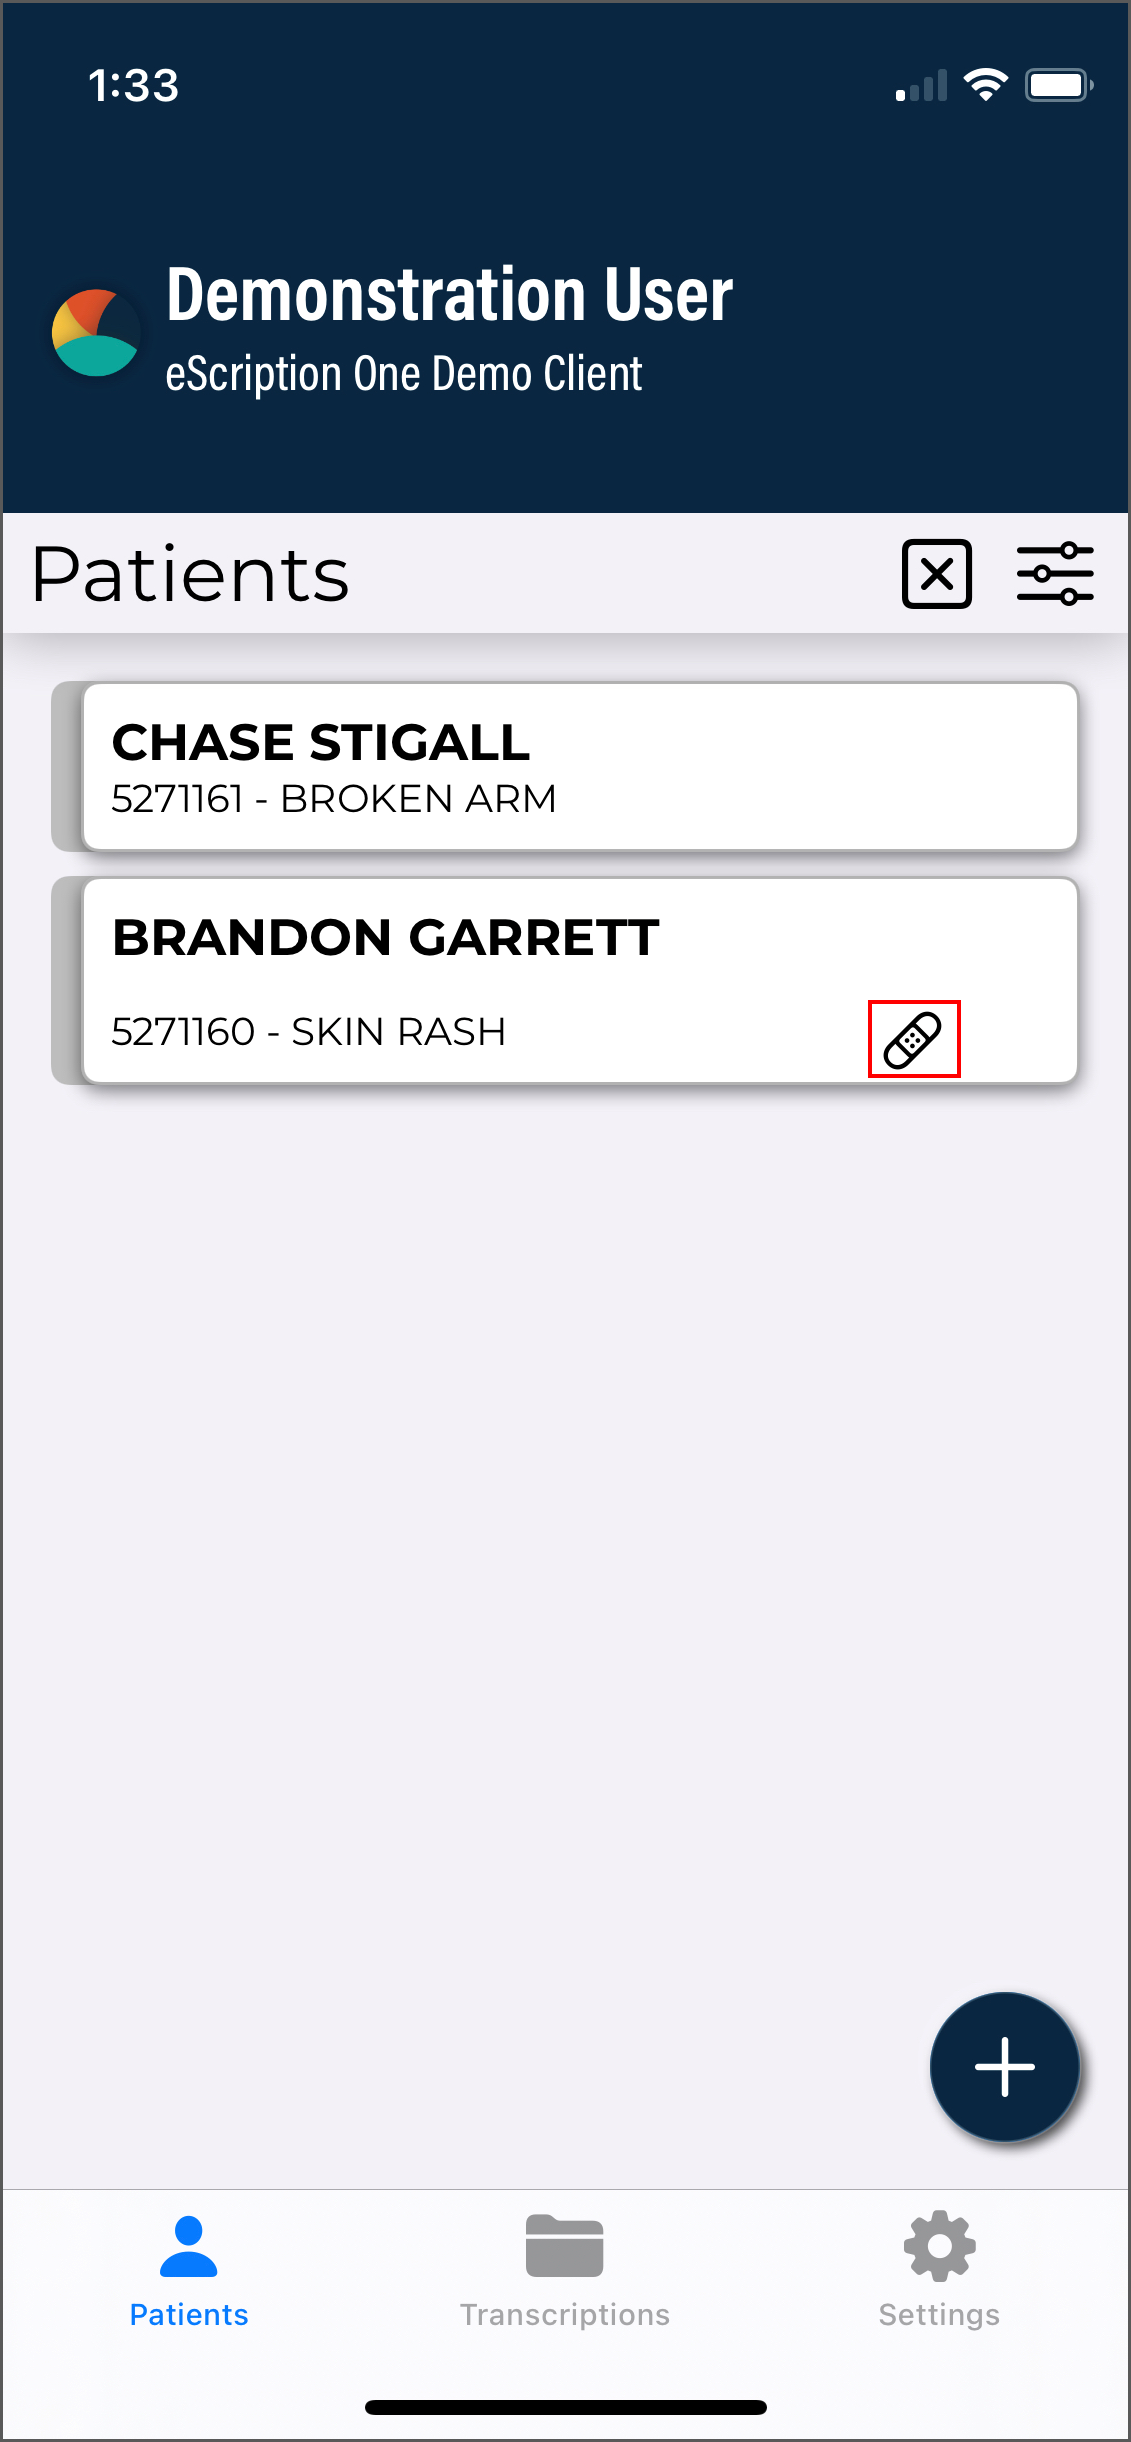
 Treatment Status - Indicates whether the patient has been treated, marked by a bandage icon. This status can be reset to help track which patients still need to be visited during each round of care.
- Dictation Status - Icons and color coding indicate if a dictation has been started, is uploading, or is completed. If no icon exists, a dictation has not been started on this device.
 Dictation on Hold - The patient has a started dictation that has not yet been uploaded.
 Uploading - The patient has a dictation that is currently uploading.
 Complete - The patient has a recorded dictation and has been successfully uploaded.
 Dictation Not on Device - A dictation that is not stored locally on this device has been uploaded for this appointment. The dictation may have come from a different device or dictation method, or was uploaded from this device and has since been removed from local storage.
Additional buttons available on the Patients tab include:
![]() Add - Add a new dictation without searching for a patient.
Add - Add a new dictation without searching for a patient.
![]() Patient Search - Performs a patient and encounter search and attaches the associated data to the dictation.
Patient Search - Performs a patient and encounter search and attaches the associated data to the dictation.
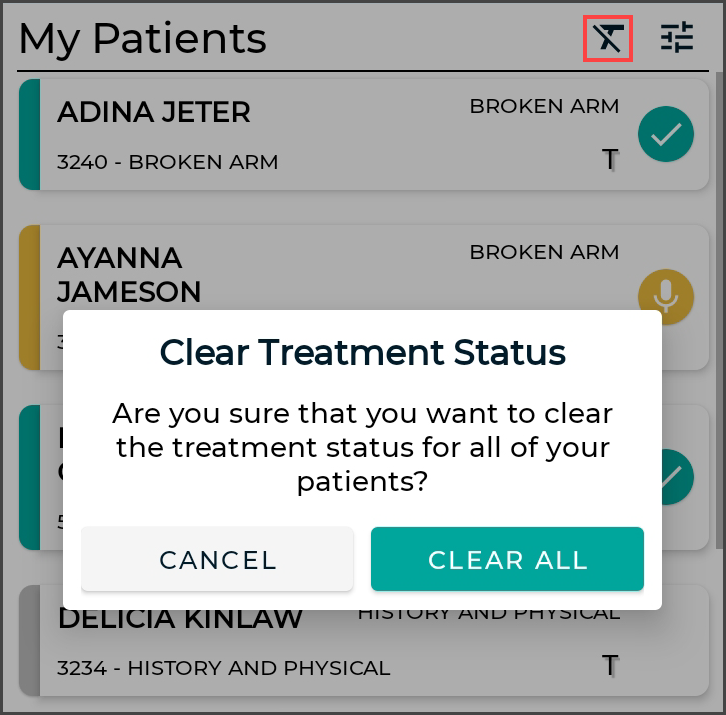
![]() Clear Treatment Status - Reset the treatment status for all patients, marking them as untreated.
Clear Treatment Status - Reset the treatment status for all patients, marking them as untreated.
![]() Filters - Switch between Inpatient and Outpatient workflows, and select filers based on Status, Resource Codes, Author Groups, and Location Resources.
Filters - Switch between Inpatient and Outpatient workflows, and select filers based on Status, Resource Codes, Author Groups, and Location Resources.
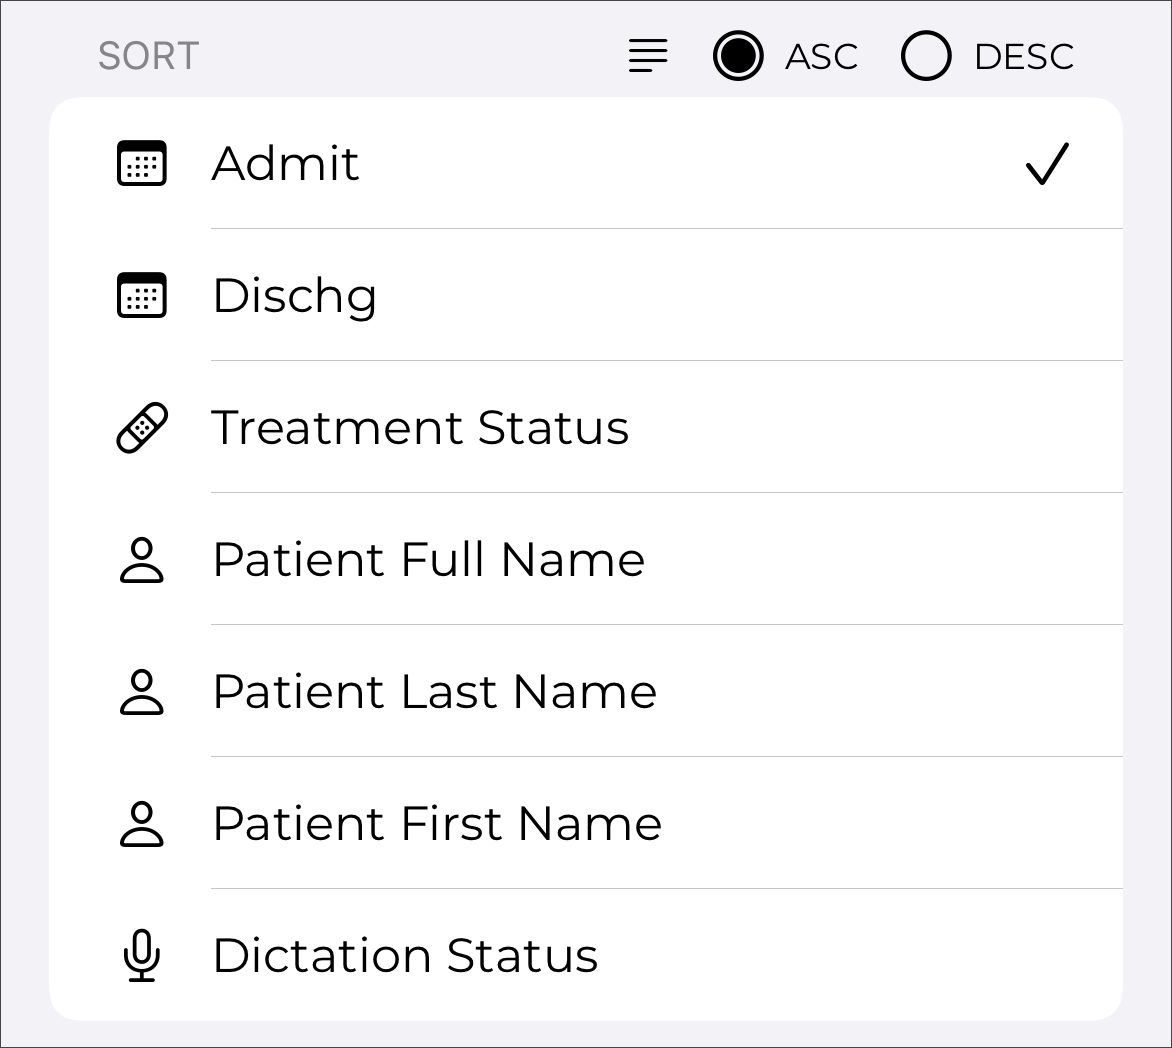
![]() Sorting - Sort the patient list ascending or descending by treatment status, name, admit date, discharge date, or dictation status.
Sorting - Sort the patient list ascending or descending by treatment status, name, admit date, discharge date, or dictation status.
Inpatient Filters
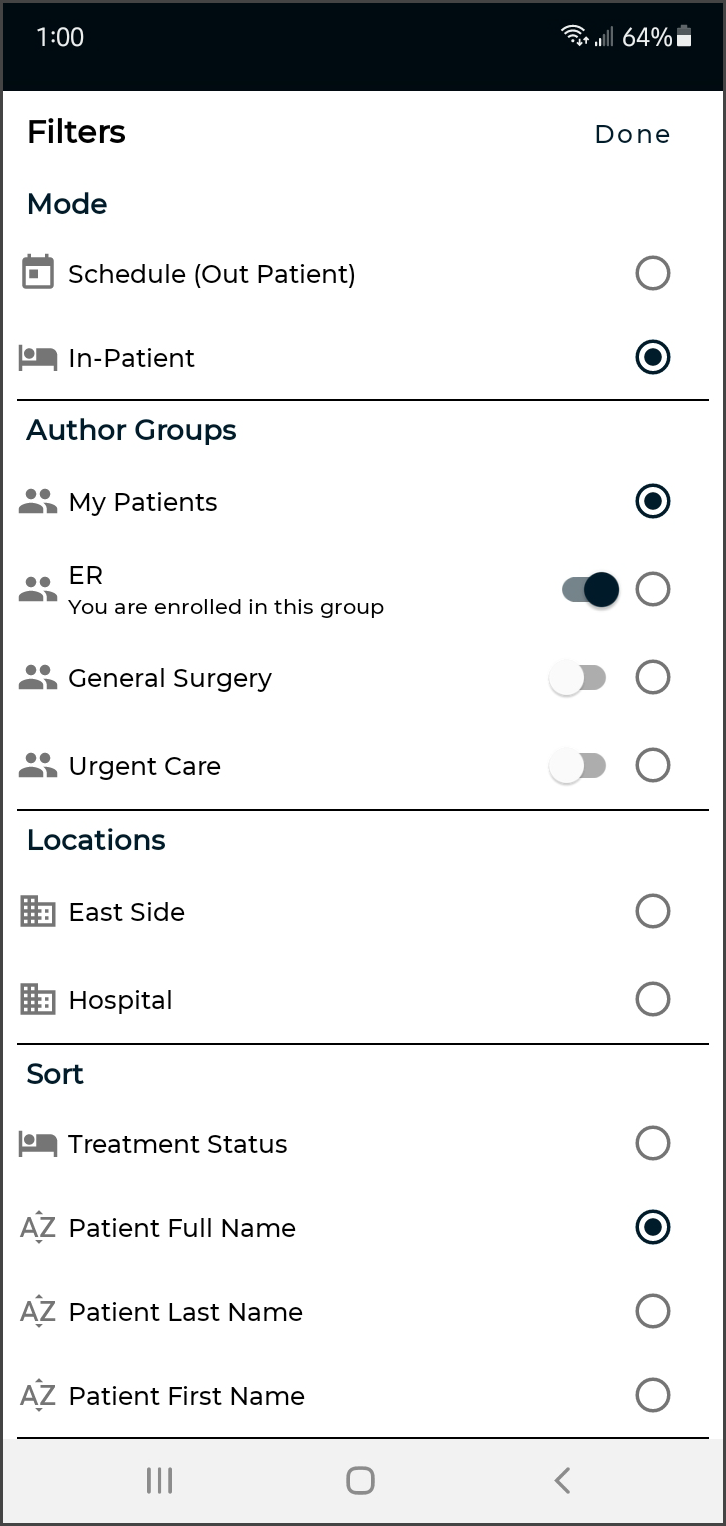
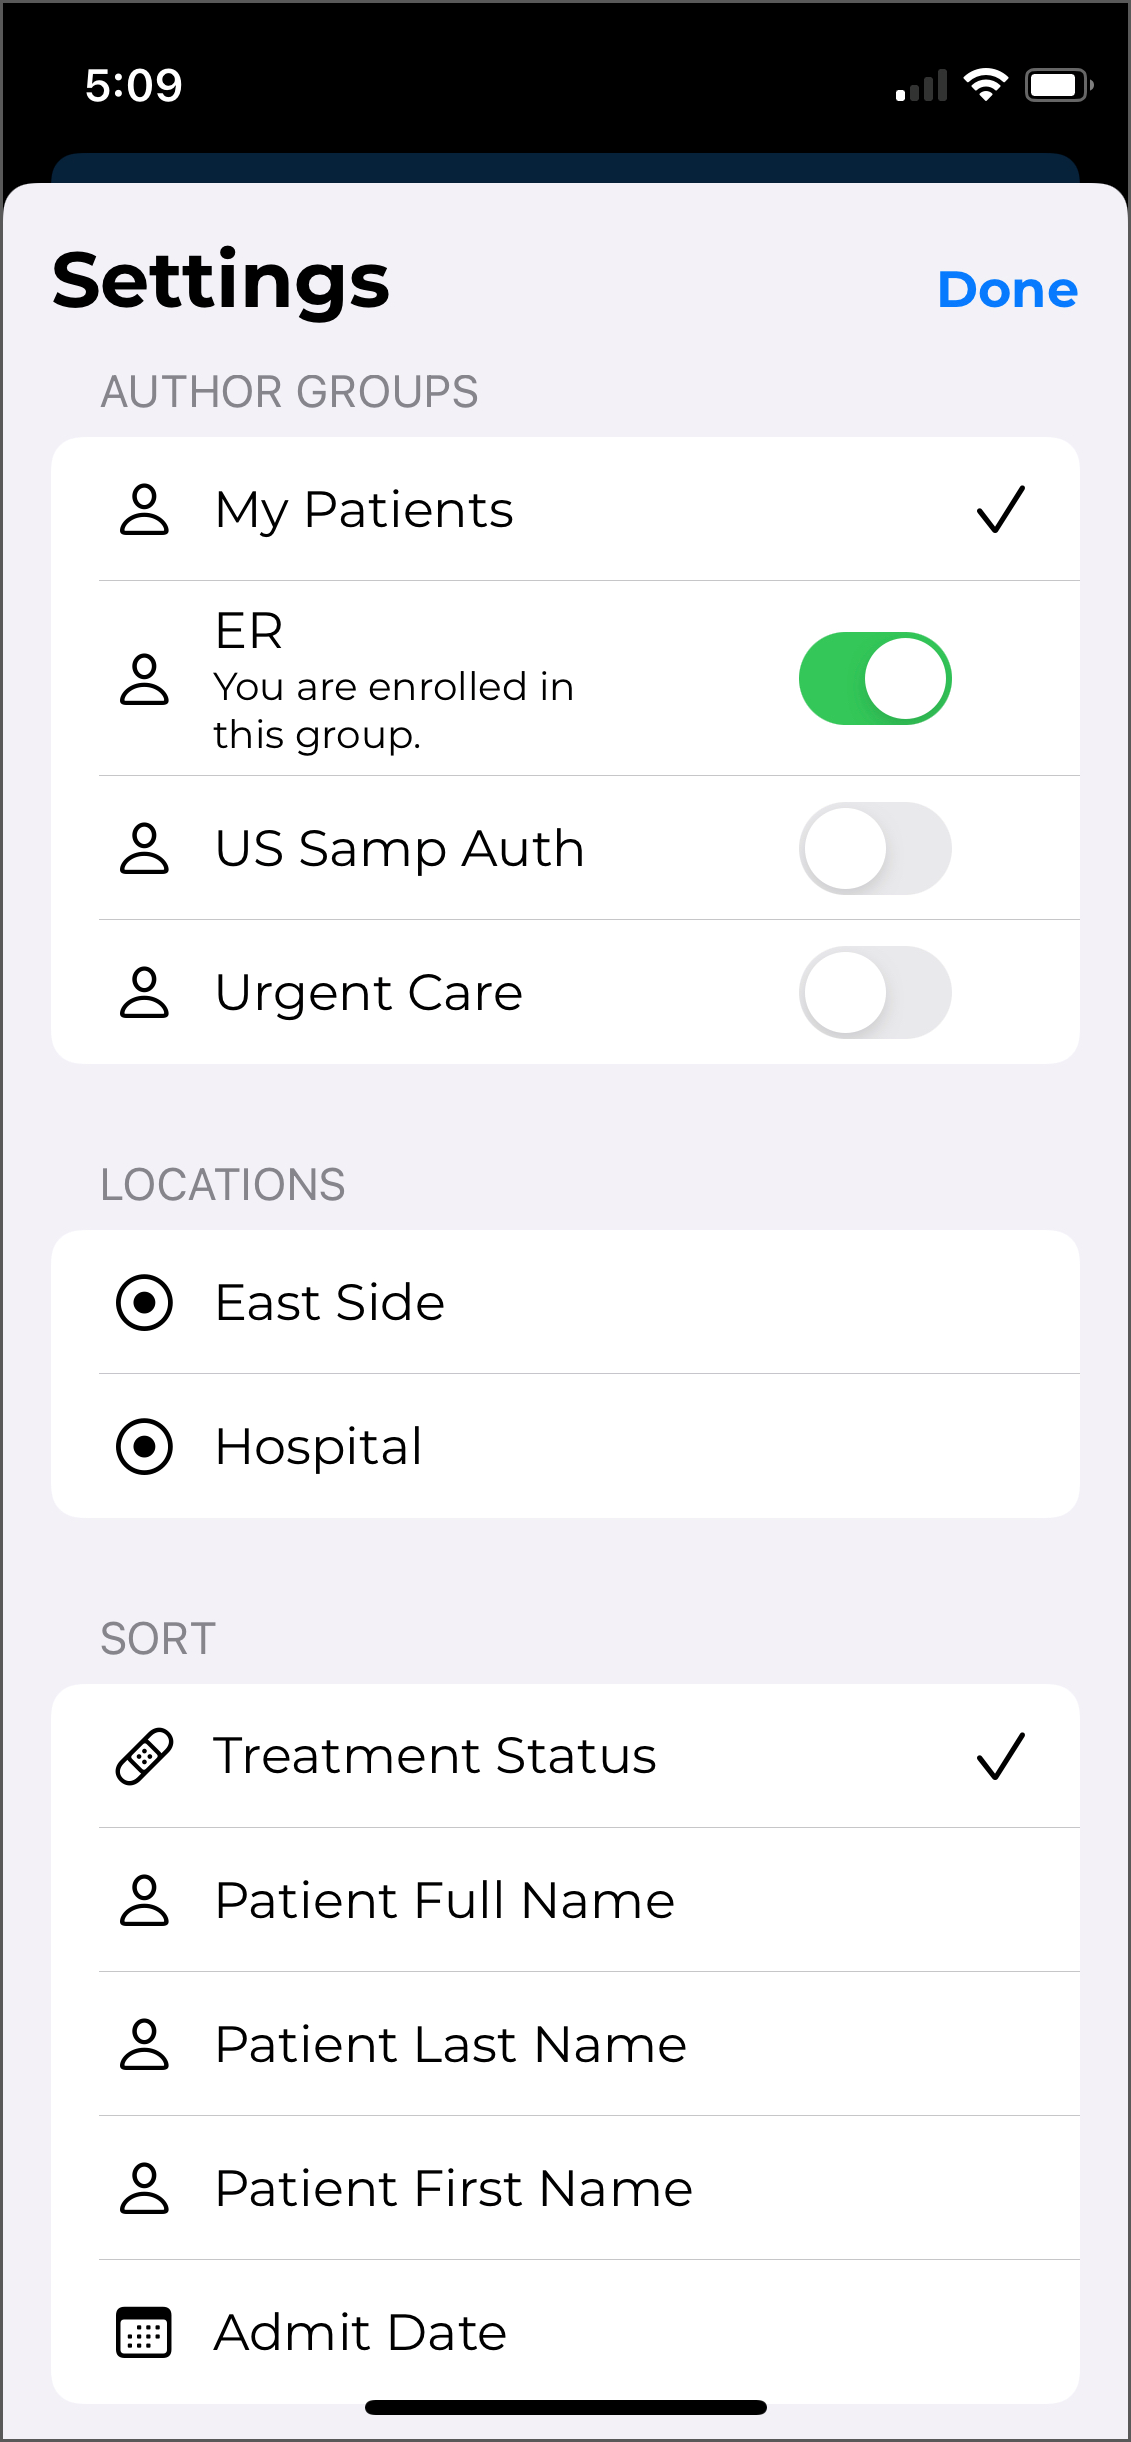
The default inpatient view is "My Patients" which lists all patients whose inpatient encounter uses the Work List Scheduling Resource assigned to the logged-in user. eSOne Mobile also groups inpatient encounters by additional scheduling resources assigned to the user, Author Groups or Location Resource. To change views between My Patients, additional scheduling resources, Author Groups and Locations, tap the ![]() Filters button. The Resources section will first list My Patients, followed by additional scheduling resources. Author Groups setup for the client and Locations sections follow, listing all each Author Group and Location Resource respectively. Tap on a filter to add it to the Patients tab; a check-mark will appear next to enabled filters. Multiple filters can be applied to combine different resources and groups into one list.
Filters button. The Resources section will first list My Patients, followed by additional scheduling resources. Author Groups setup for the client and Locations sections follow, listing all each Author Group and Location Resource respectively. Tap on a filter to add it to the Patients tab; a check-mark will appear next to enabled filters. Multiple filters can be applied to combine different resources and groups into one list.
-
My Patients - Displays all patient encounters linked to the Work List Scheduling Resource of the logged-in user. This is the default view in inpatient mode.
-
Additional Resources - Secondary scheduling resource codes assigned to the user will appear below My Patients in the filters list.
-
Author Groups - The Author Group View allows you to see all patients associated with any users enrolled in a specific group. By tapping on an Author Group name, you can view the full list of patients for that group, regardless of whether you are enrolled in the group yourself. Enrolling in a group enables other users within the group to view your patients as well. To enroll or disenroll from a group, simply tap the slider button
-
Location Resources - Use Locations to show all inpatient encounters based on the location resource, regardless of the associated schedule resource.
Sort Options
One sort option can be applied to reorder the list based on user preference. The list can be sorted ascending (oldest to newest dates or A to Z) or descending (newest to oldest or Z to A). Tap the desired sort order (ascending or descending), then tap the sort option to sort the list based on:
-
Treatment Status - Patients not marked as Treated will appear at the top of the list and treated patients will appear at the bottom when sorted ascending. Untreated patients will appear at the bottom of the list and treated patients will appear at the top when sorted descending.
-
Patient Full Name - Patients will be ordered alphabetically by the patients' full names (if the first names match then the middle initial and/or last names will be used to further order them).
-
Patient Last Name - Patients will be ordered alphabetically by the patients' last names, but will still appear in "First name Last name" format in the schedule list.
-
Patient First Name - Patients will be ordered alphabetically by the patients' first names.
-
Admit Date - Patients will be ordered by admission date. Patients without an admit date will appear at the top of the list when sorted ascending, followed by the oldest admit date going down to the newest. When sorting descending, the newest admit dates will appear at the top of the list, followed by the oldest dates, then patients without an admit date. The secondary sort order for matching dates or no admit date is the full patient name.
-
Discharge Date - Patients will be ordered by discharge date. Patients without a discharge date will appear at the top of the list when sorted ascending, followed by the oldest discharge date going down to the newest. When sorting descending, the newest discharge dates will appear at the top of the list, followed by the oldest dates, then patients without a discharge date. The secondary sort order for matching dates or no discharge date is the full patient name.
-
Dictation Status - When sorted ascending, patients will be sorted first by dictation status (Dictation on Hold, Upload Complete, Dictation Not on Device).
Treatment Status
Patients who have received treatment are marked with a treated ![]() icon. The check mark still indicates a completed dictation; the microphone indicates a dictation on hold.
icon. The check mark still indicates a completed dictation; the microphone indicates a dictation on hold.
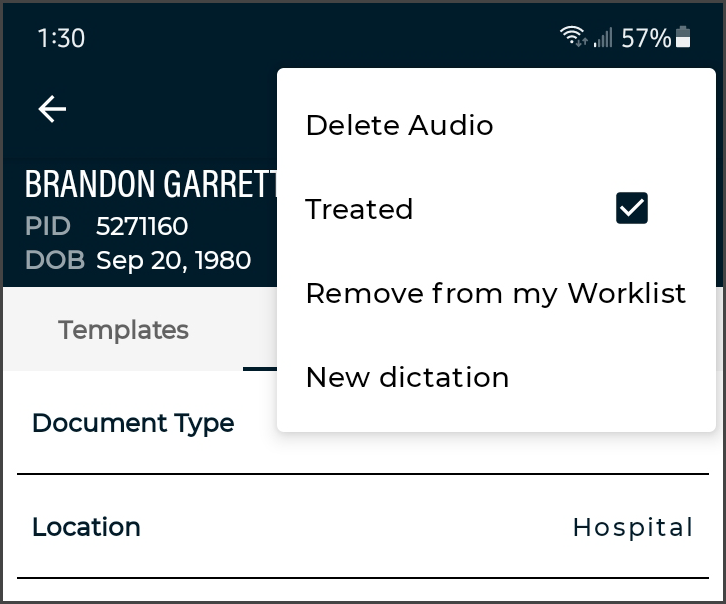
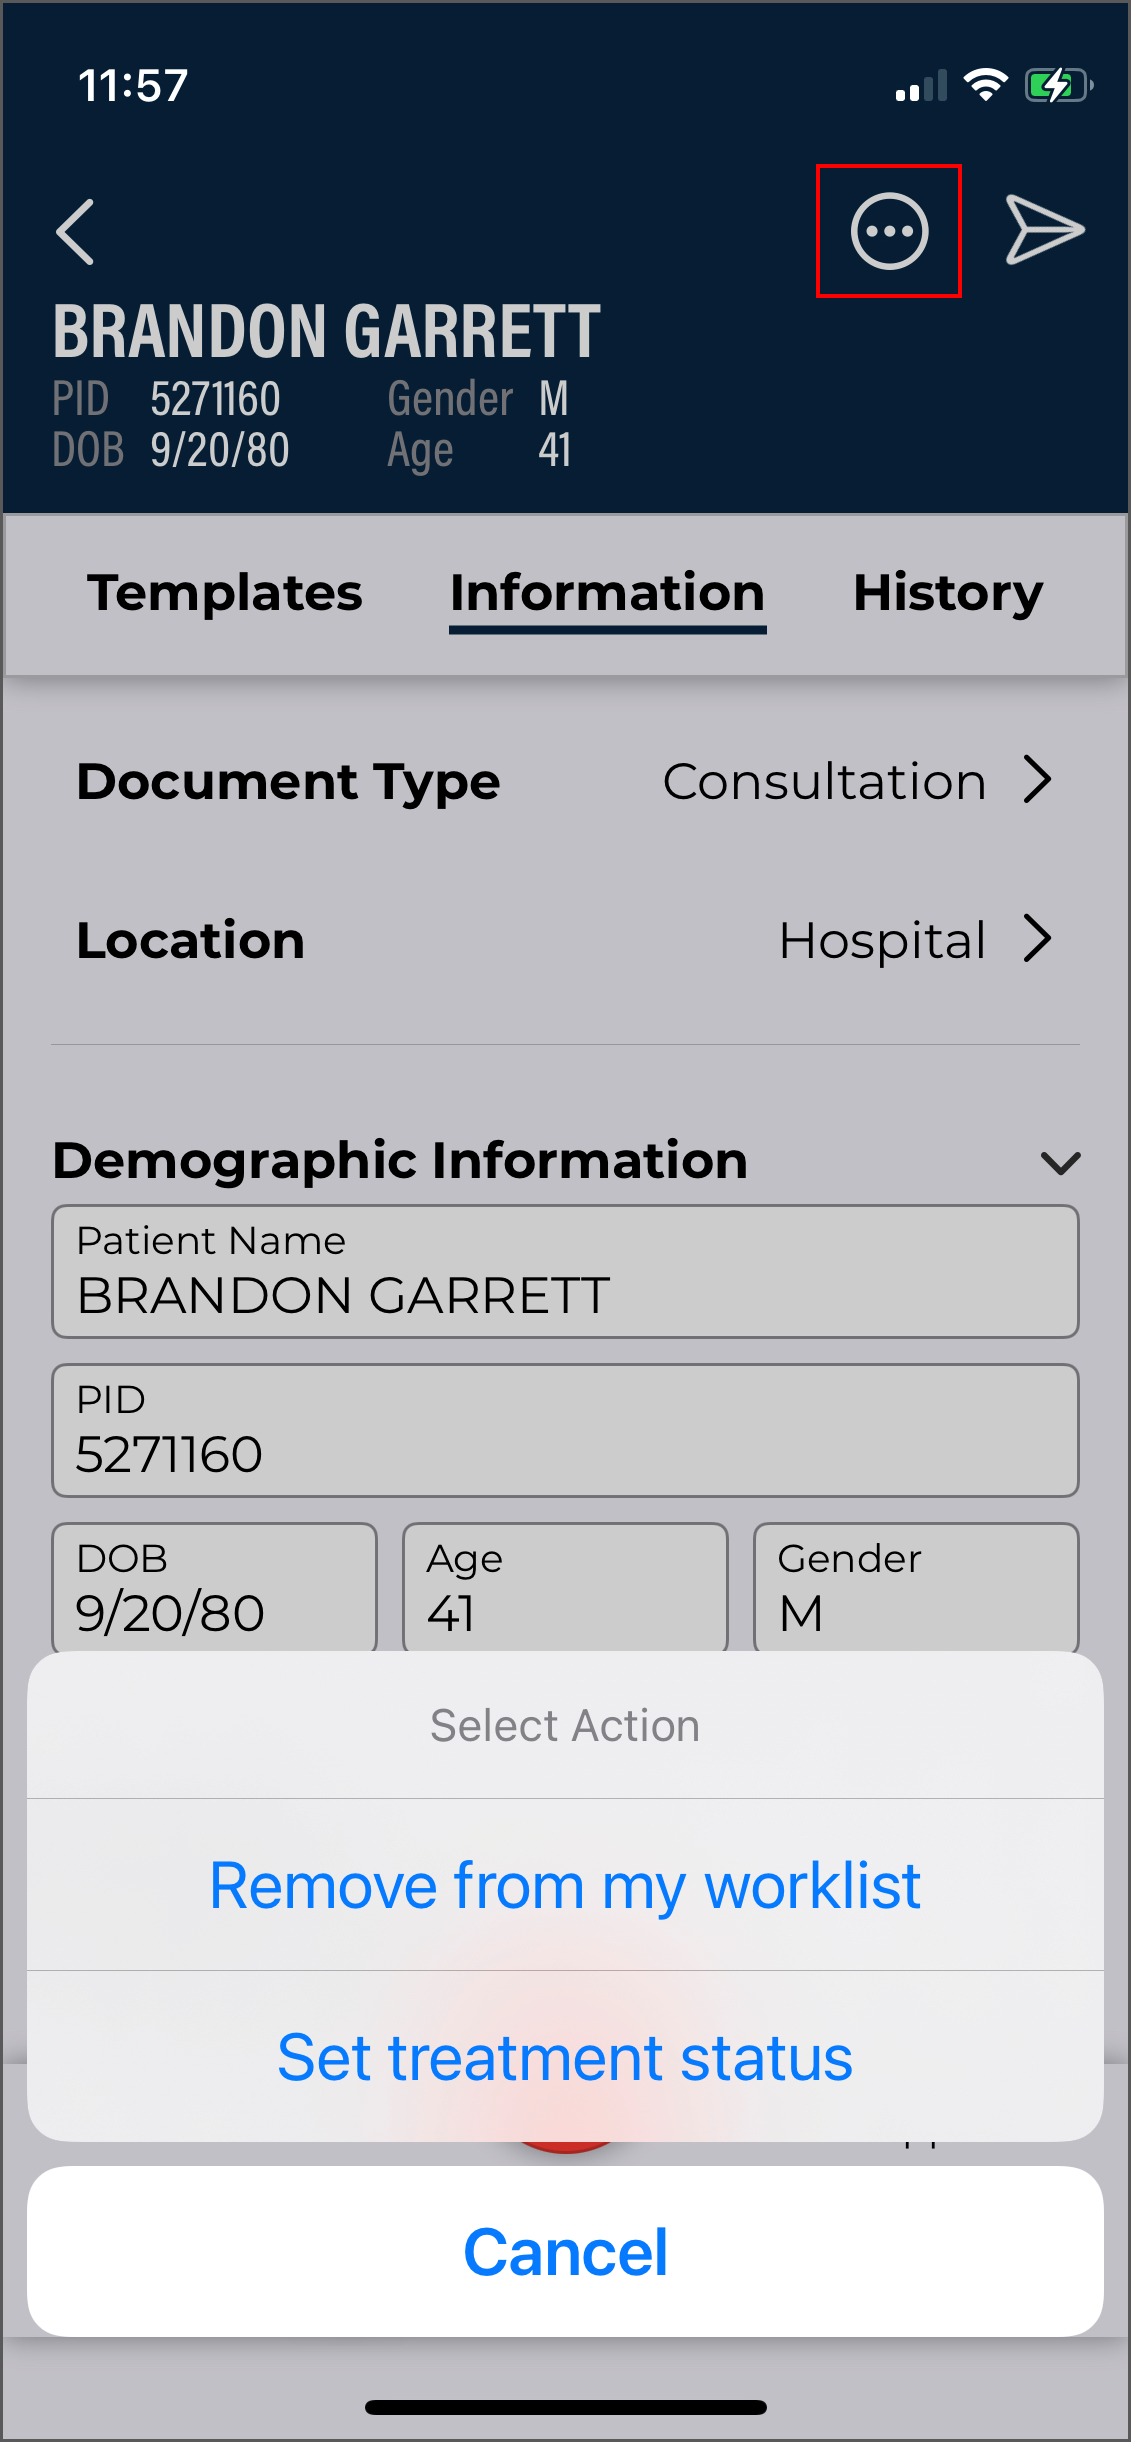
Patients are automatically marked as treated when a dictation has been started. The treatment status can be toggled on and off using the Treated option in the Action menu of the Recording screen.
To remove the Treatment Status icon from all patients, press the Clear Treatment Status icon from the patient list.
Add and Remove Patients
Patients can be added to the patient list by tapping the Search or Add button.
Patient Search
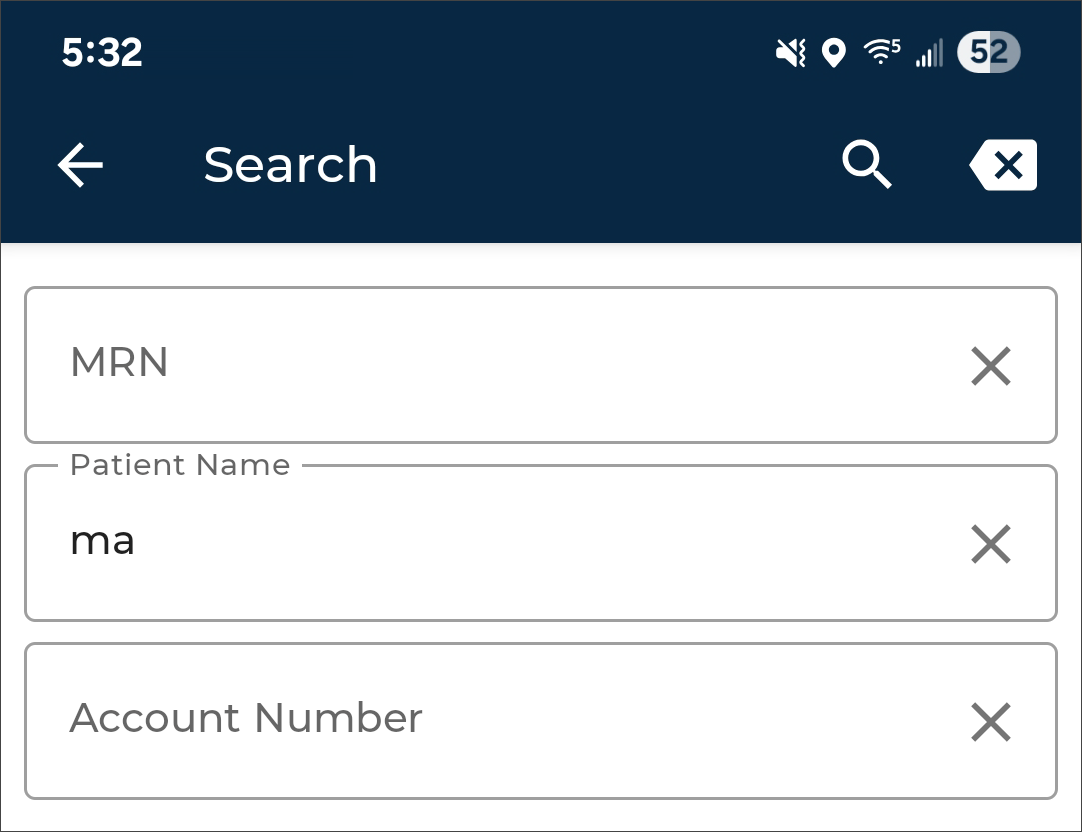
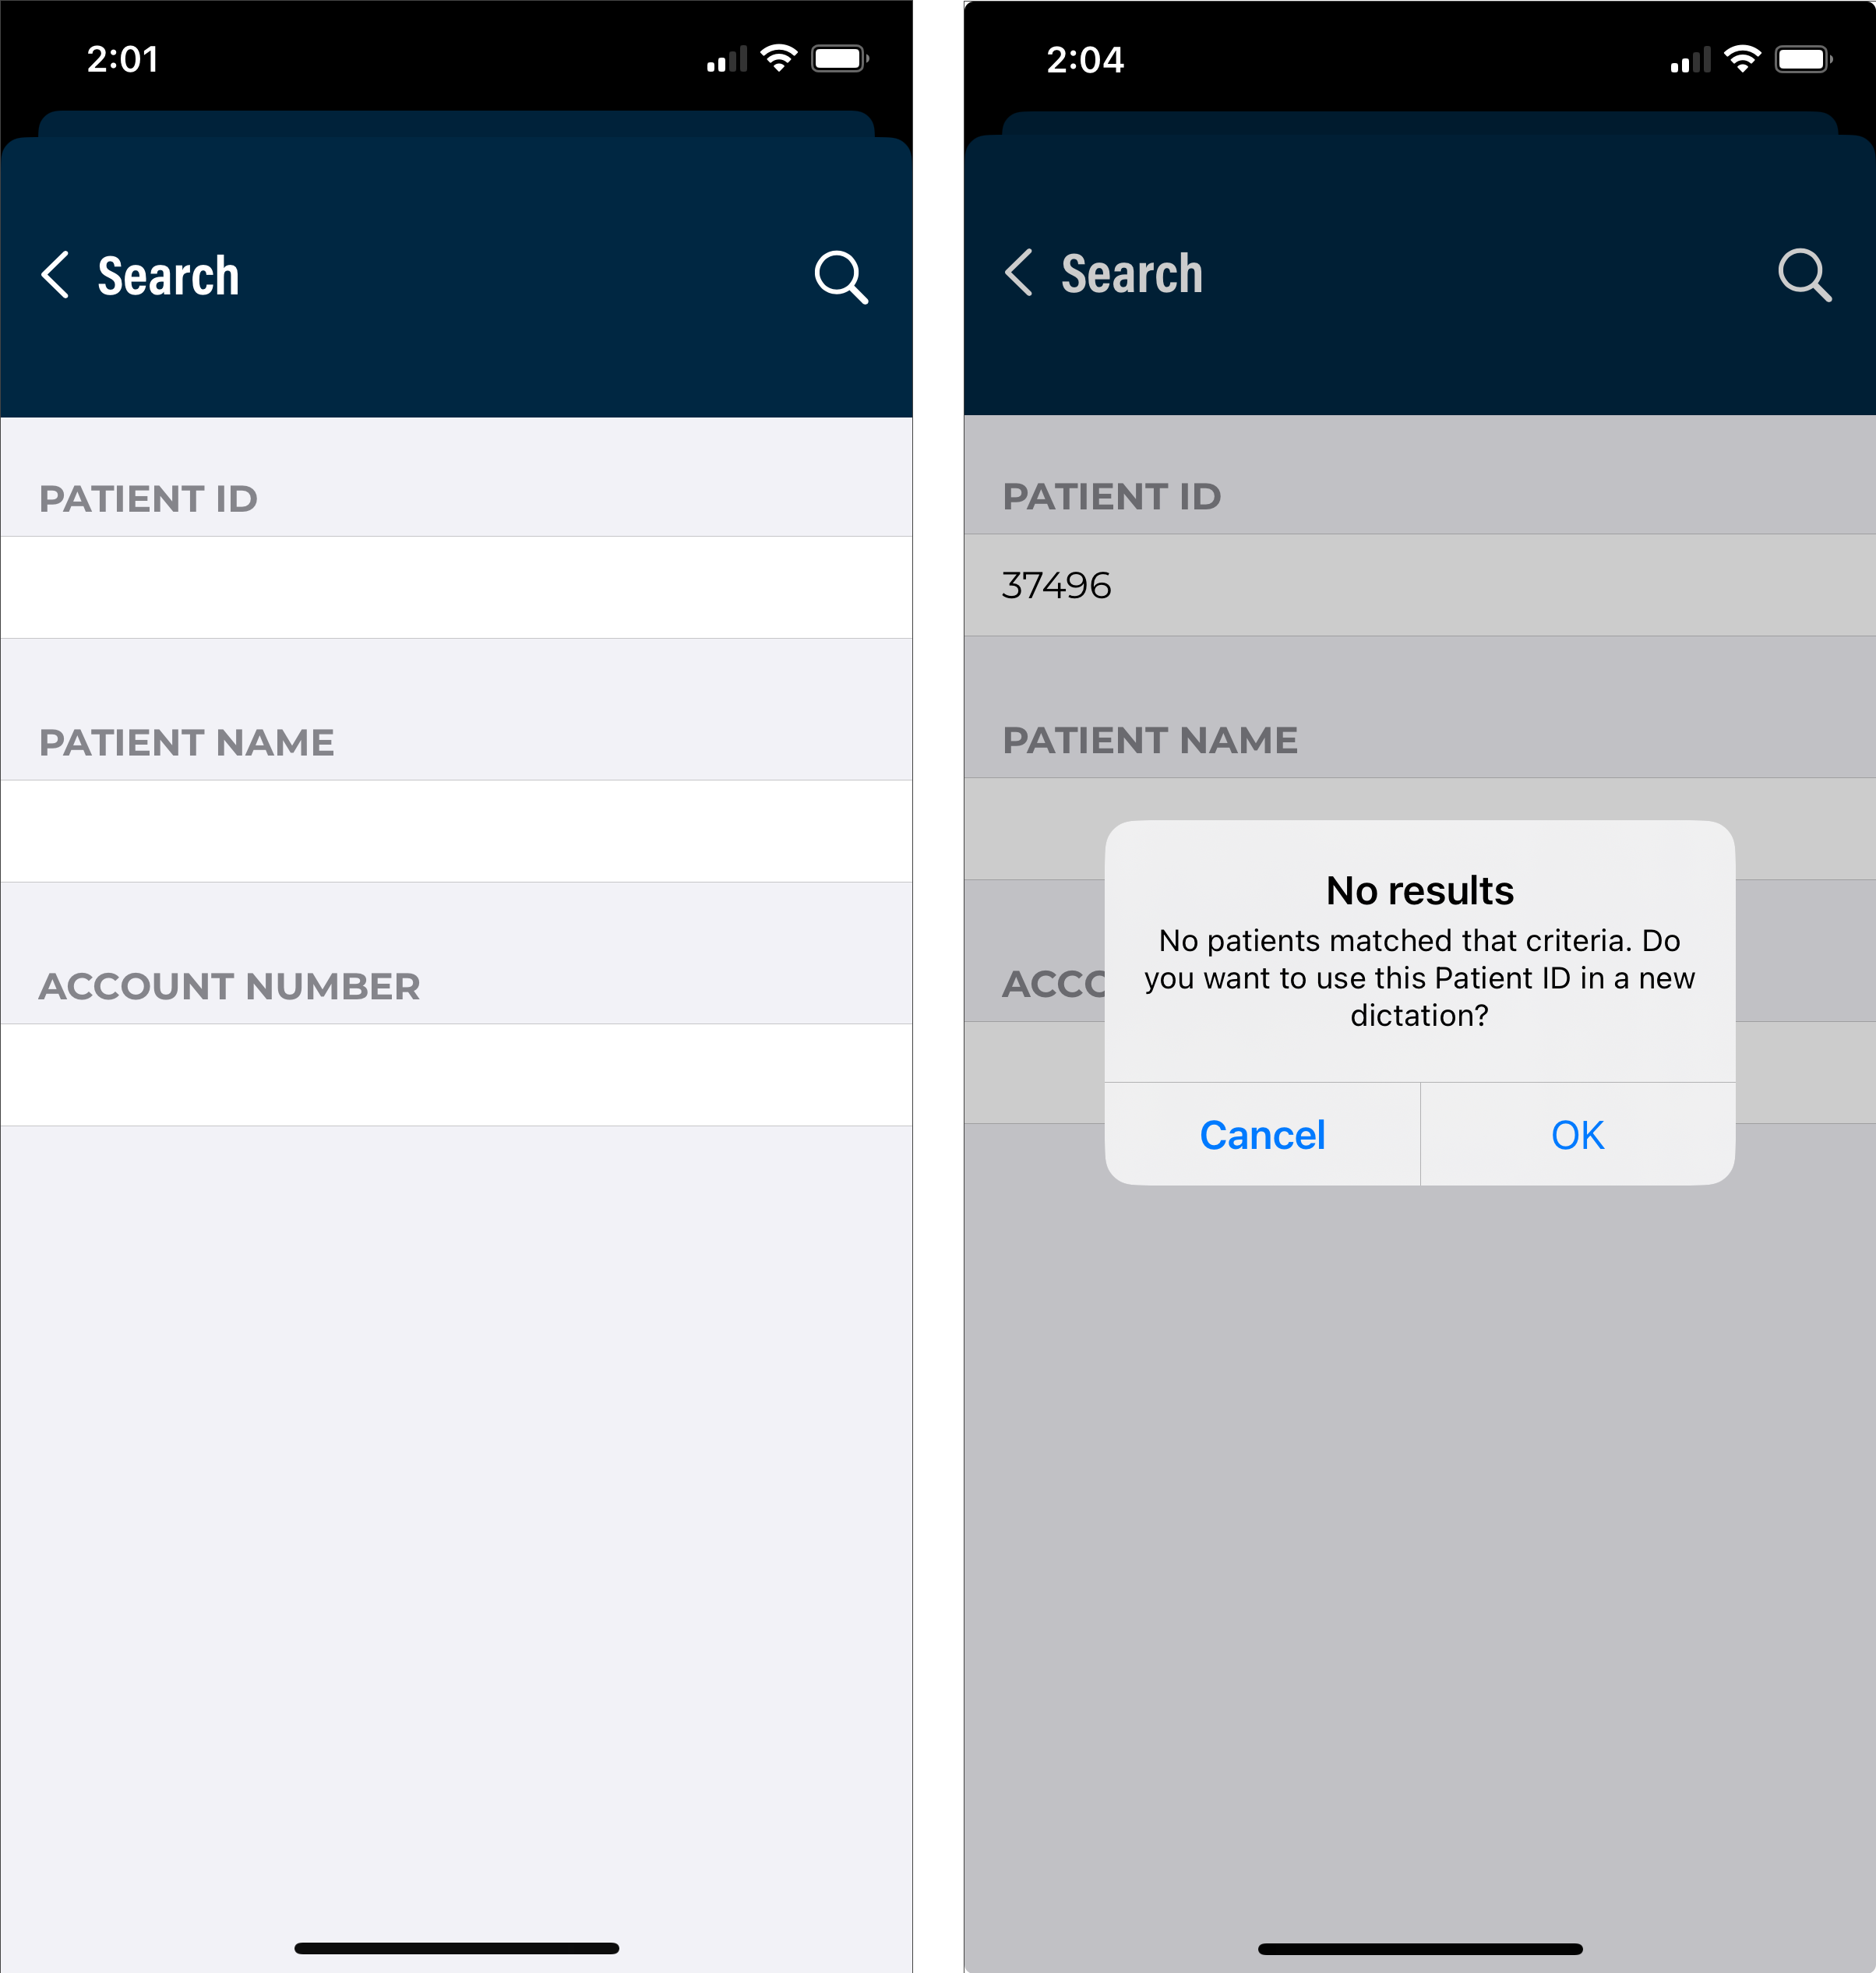
 Search for an existing patient or encounter by tapping the Patient Search button. Enter the Patient ID, Patient Name, and/or Order Number. Tap the Search button to run the search and view matches.
Search results are divided into two tabs: Appointments and Patients (these labels can be customized by the client).
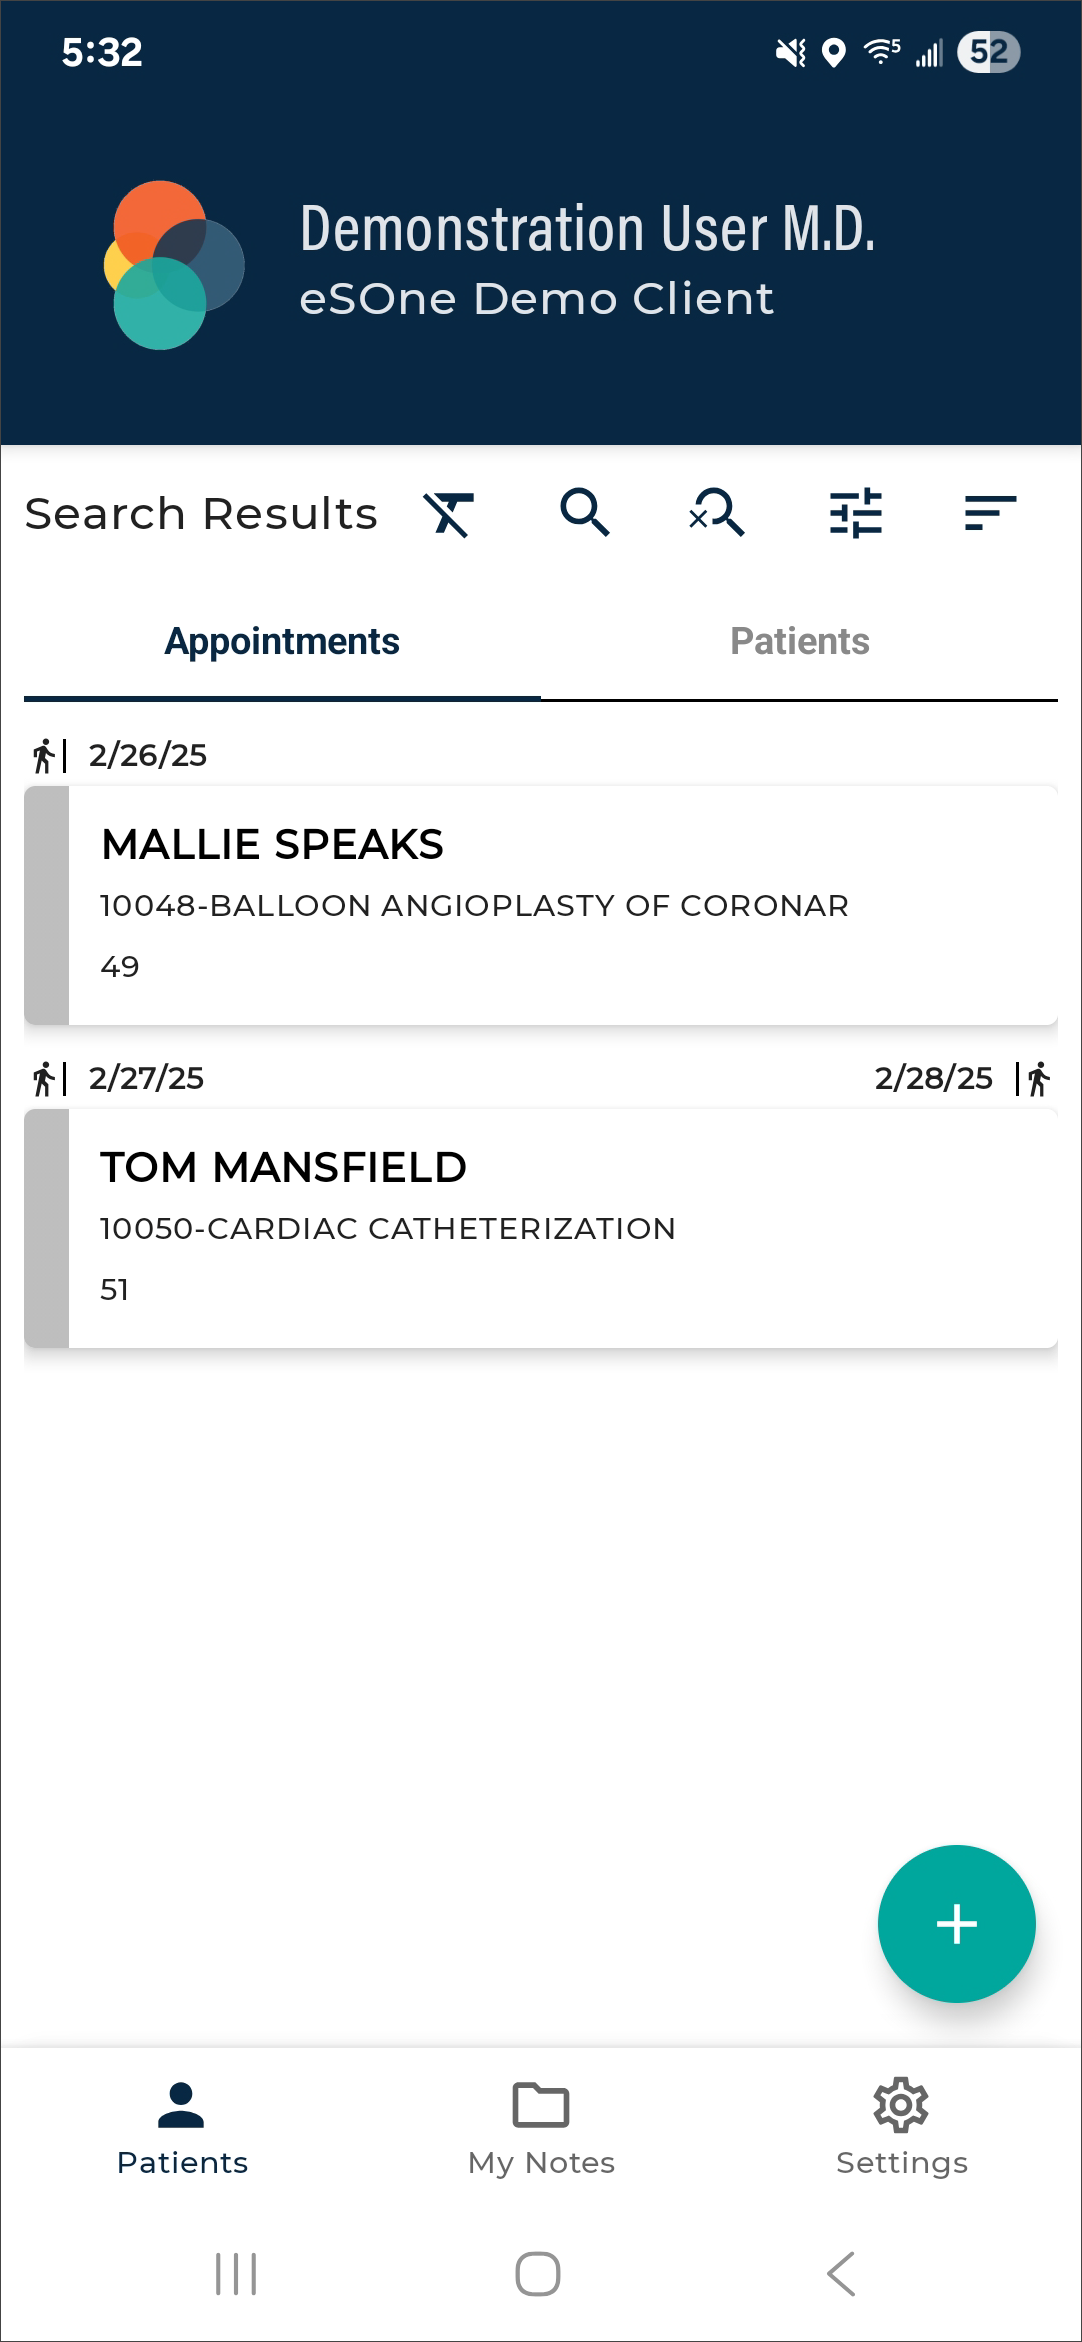
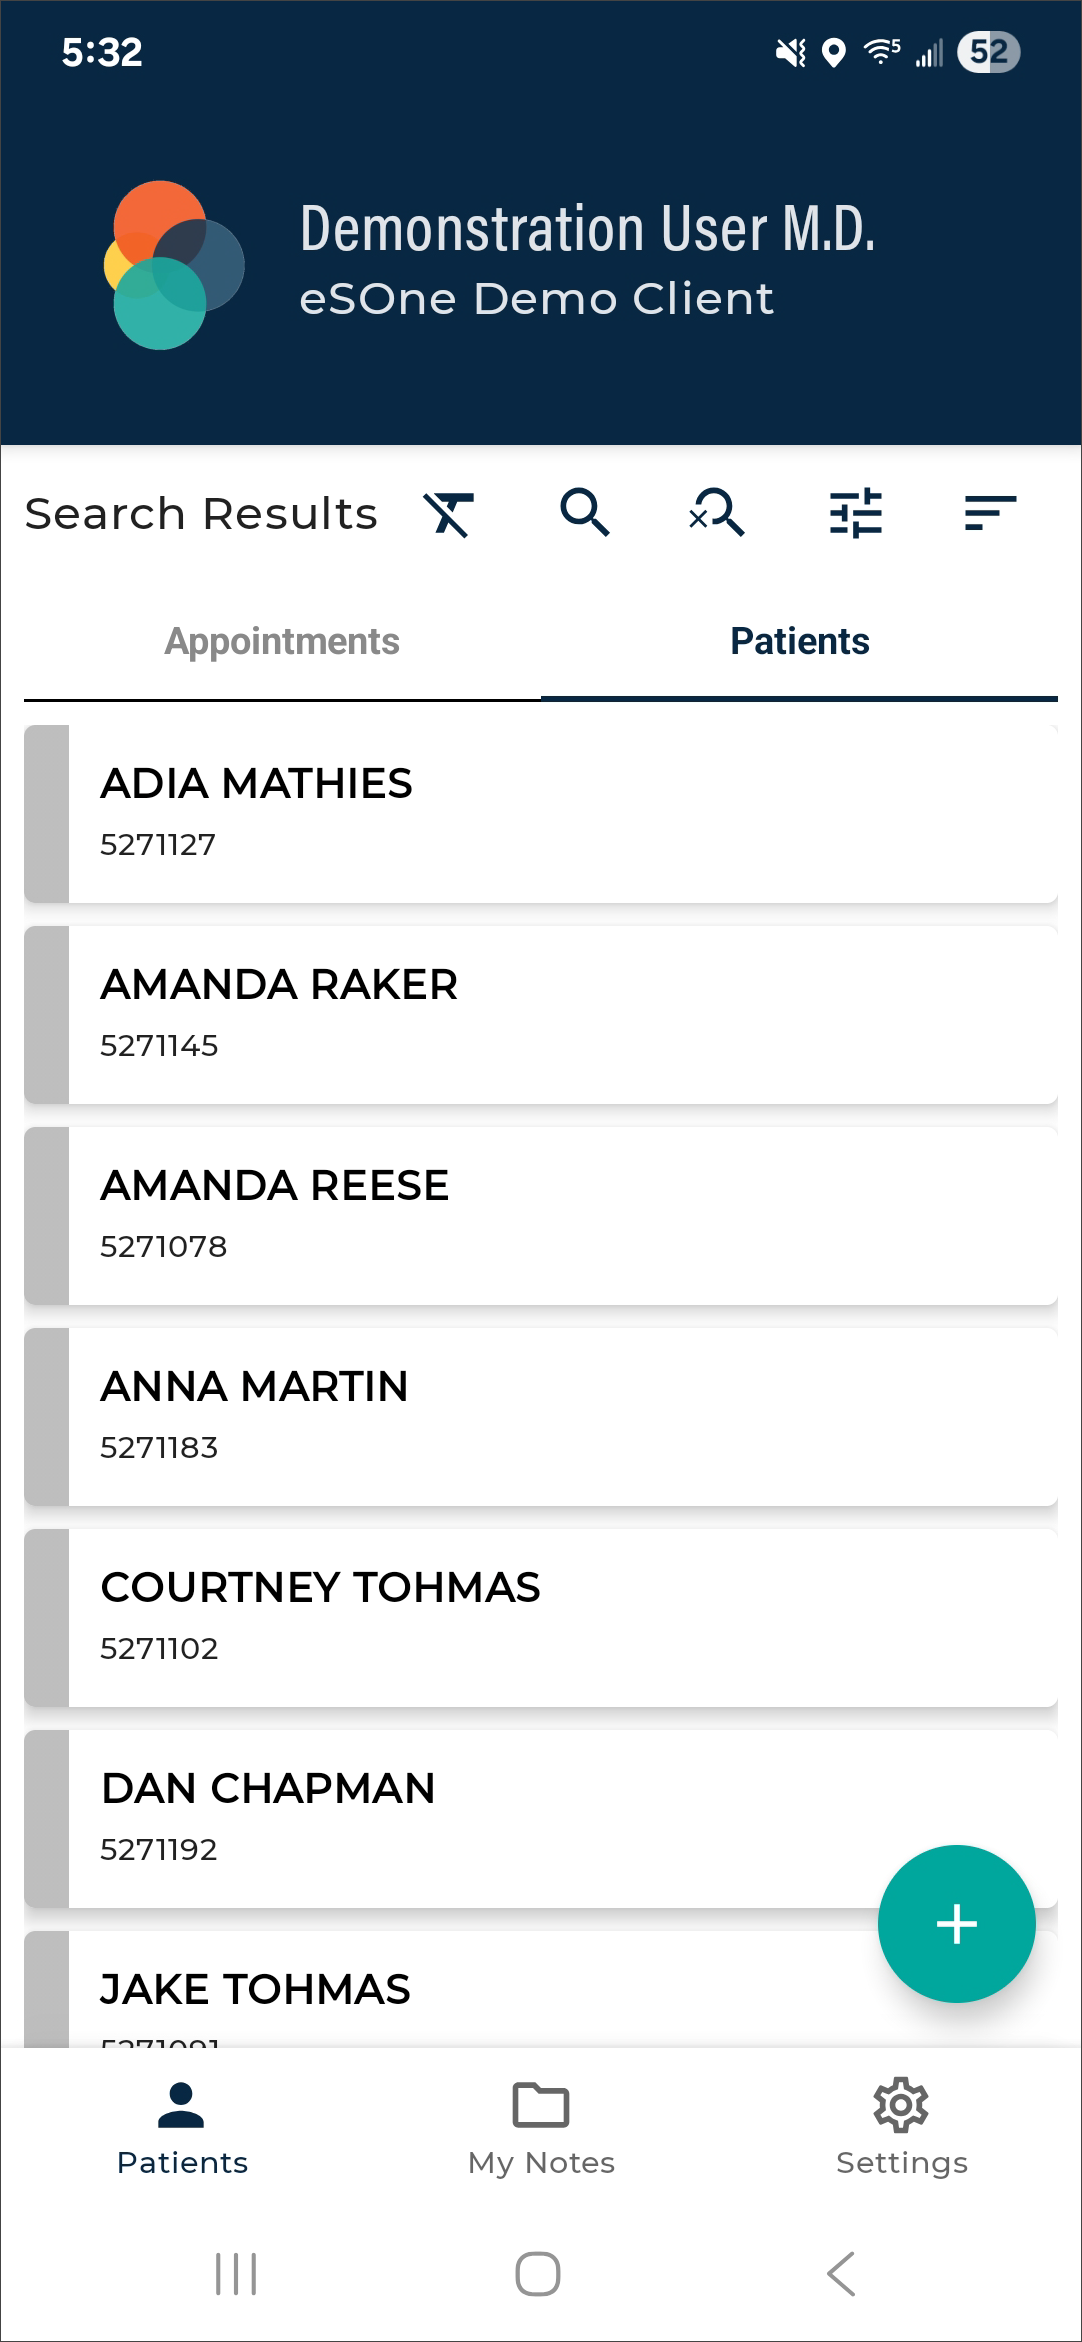
The Appointments tab will display inpatient encounters matching the search criteria. The Patients tab will display patients matching the search criteria that may have an inpatient, outpatient, or patient data record.
Tap on the patient or encounter to add it to the "My Patients" list and begin a new dictation with the patient information populated.
Tap ![]() Patient Search to return to the search criteria and make modifications, if needed.
Patient Search to return to the search criteria and make modifications, if needed.
Tap ![]() Clear Search to clear the patient search and return to the patient list.
Clear Search to clear the patient search and return to the patient list.
New Dictation
 Tap the New Dictation button to begin a new dictation without searching for a patient or encounter. A patient identifier (Patient ID, Order Number, or Account Number) can be manually entered, depending on the selected document type.
Remove from Work List
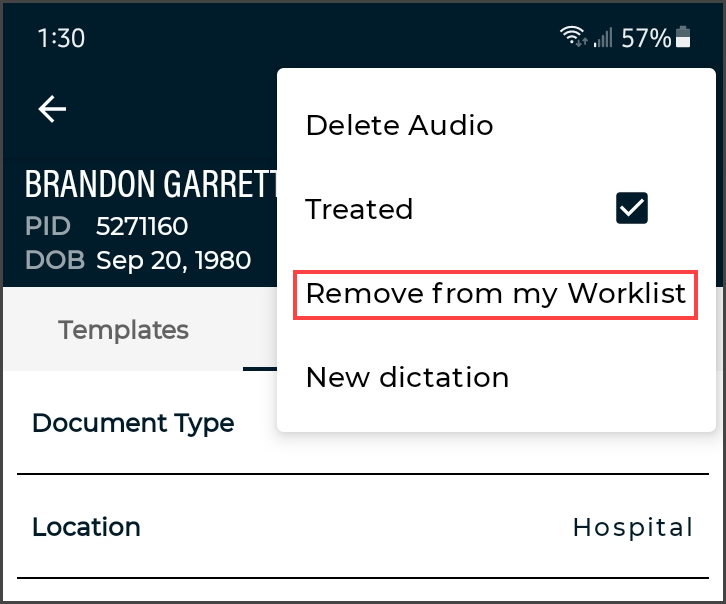 To remove patients from the work list, choose Remove from my work list in the Action menu of the Recording screen.
Record Screen
To view encounter details and record a dictation, select the desired patient from the patient list.
The record screen is similar to that of an outpatient appointment, with a minor difference in the appointment date. The appointment date can be set in an inpatient encounter to reflect the date and time the patient was visited while admitted. This date may be manually edited by tapping on the field or auto-populated by enabling the Set Inpatient Appointment Date to Dictation Date option in the Settings tab. When enabled, the Appointment Date will automatically populate with the current date and time when recording starts.
Please note the client configuration settings to determine which fields are visible and editable.
Please see Record Screen for additional details on the record screen.
Messages Tab
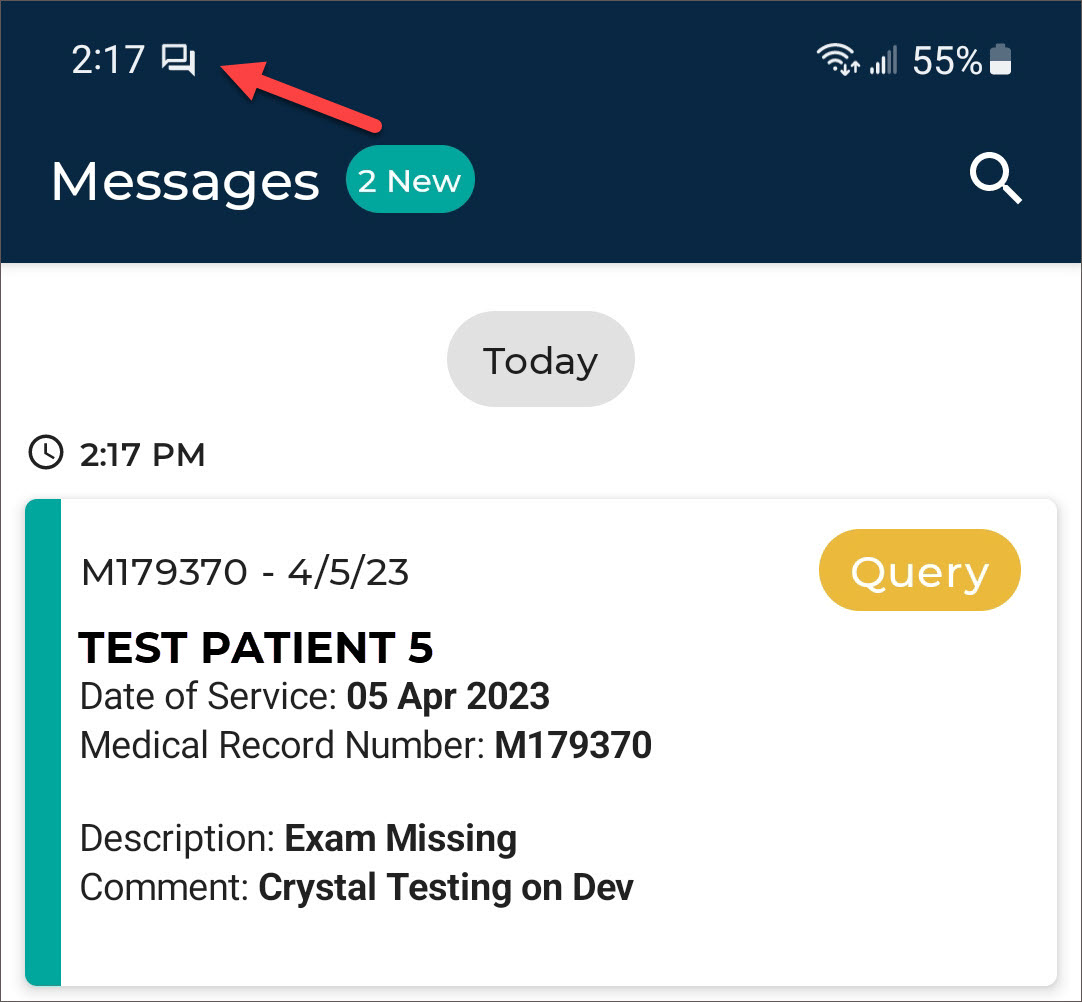
Clients who use DeliverHealth for medical coding can enable a Messages tab in the eSOne mobile app. This tab allows providers to receive messages from medical coders and send replies, shortening the turnaround time for coder queries and finalizing billing sooner.
The top of the Messages tab contains a count of message threads that have not been replied to. When the provider sends a reply to a message the message count will decrease. When a new message is received from a coder the message count will increase.
Tap the Search icon  to filter messages by patient ID, patient name, or account number. The search is performed as characters are typed. Press the clear icon
  in the text box to clear the filter criteria, or the close icon
  to close the search box.
Worksheet List
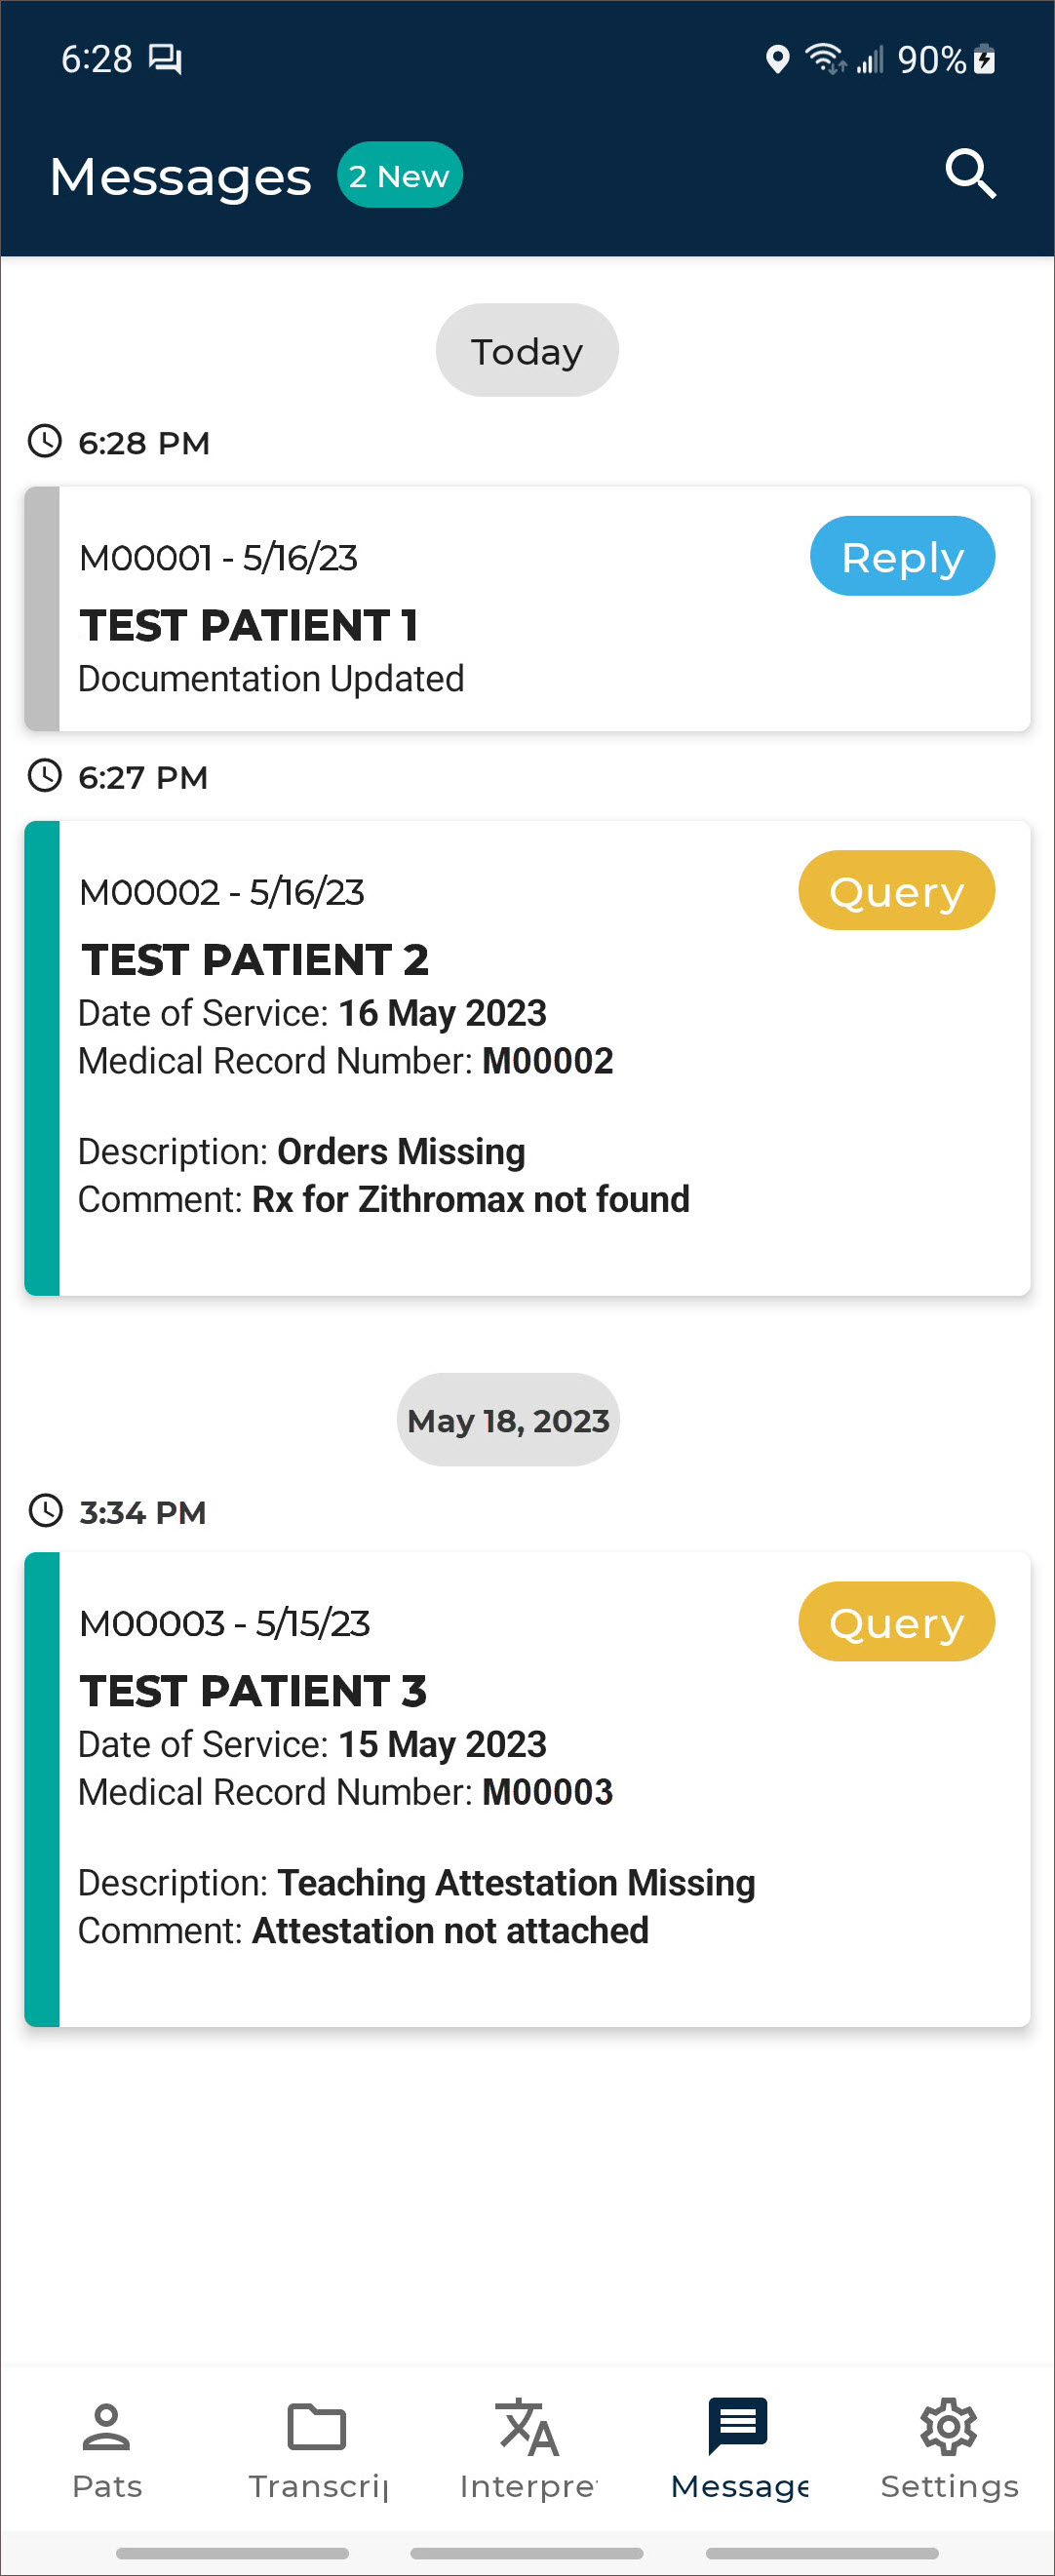 Messages received for the same patient and account number are grouped together in one thread, referred to as a "worksheet". The worksheet list is grouped and sorted descending by the date of the last sent or received message, then sorted by the time the message was sent/received, then by full patient name.
Worksheets are color-coded in the worksheet list.
- Teal - The last message was an incoming message from a coder and has not been replied to.
- Gray - The last message was an outgoing reply to the coder.
Worksheet Contents
Each worksheet in the list displays details about the patient, visit, and the type of message.
- Patient MRN, Visit date, and Name: The patient ID and visit/appointment date.
- Message type: The last incoming or outgoing message type; "Query" for an incoming message from a coder and "Reply" for an outgoing message to a coder.
- Message text: The contents of the last message received or sent.
Worksheet Message Thread
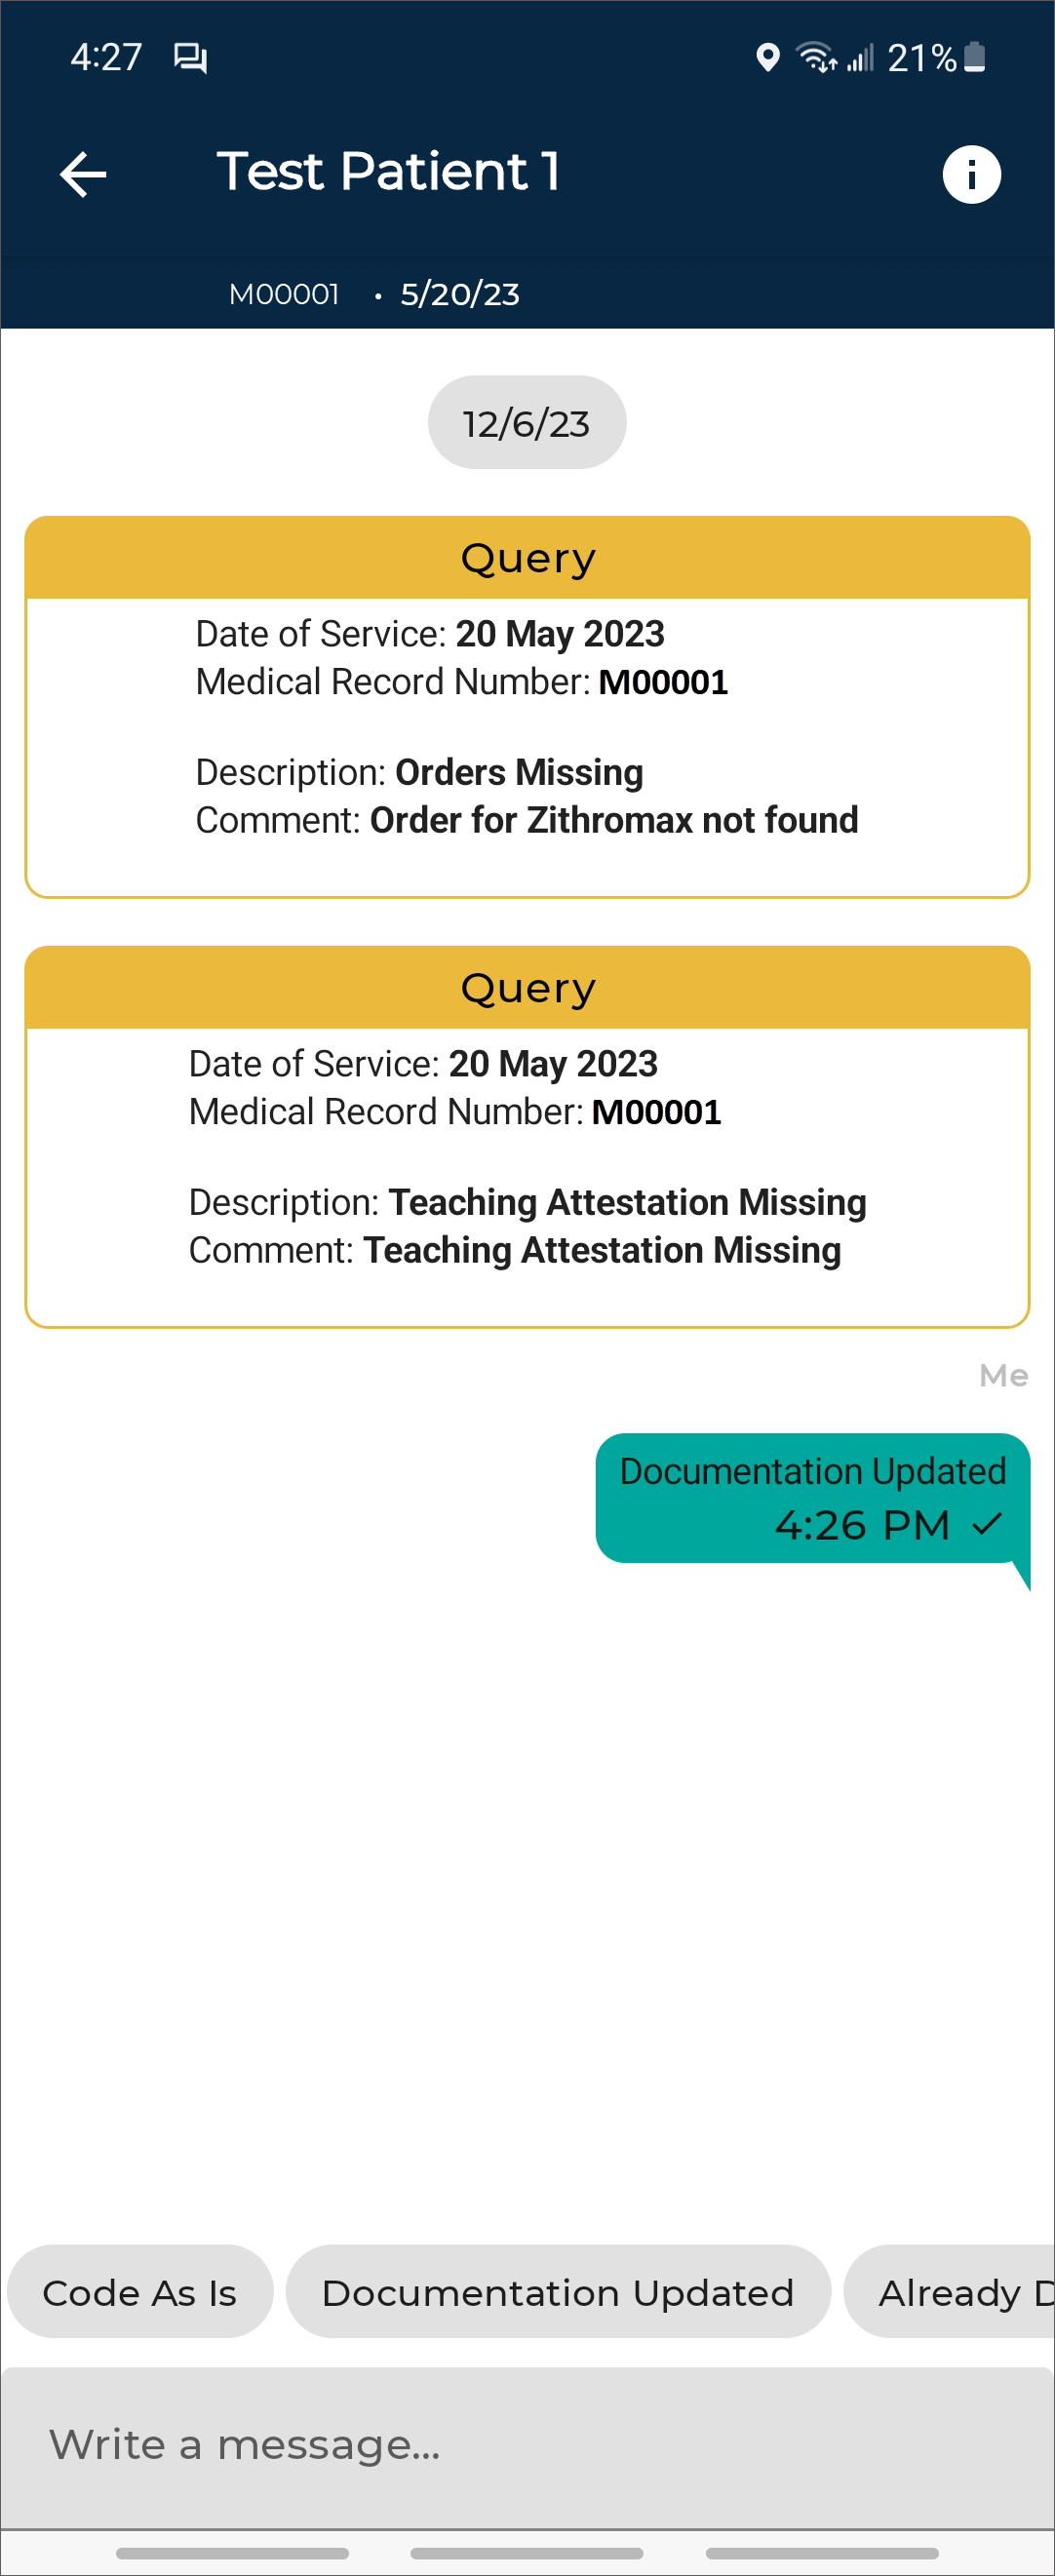 Tap on a worksheet to read all associated messages and find additional patient and visit information.
The patient name, MRN and visit date are displayed above the message thread. Tap the information icon ![]() to view additional patient demographic information.
to view additional patient demographic information.
To return to the Worksheet List, tap the back arrow in the upper left corner.
Message Contents
Messages are grouped in ascending order by the date sent/received, then ordered ascending by time. The message thread will automatically scroll to the bottom to display the most recent message.
Each incoming and outgoing message is color-coded. - Yellow - An incoming query from a coder. - Teal - A reply from the provider to the coder.
If the coder has multiple queries, a new message will be sent for each query.
Replying to the Coder
Underneath the message thread are quick-reply options; scroll left and right to see all options. Tap a quick-reply to send the message to the coder. The quick-reply text cannot be edited and will be sent immediately.
Alternately, custom text can be typed. Tap the "Write a message..." text box to open the on-screen keyboard. Tap the Send button to send the message to the coder.
Once the coder's query has been resolved or the message has timed-out (duration determined by the client), the worksheet will no longer appear in the message list. It is important to reply promptly to ensure coding is completed efficiently.
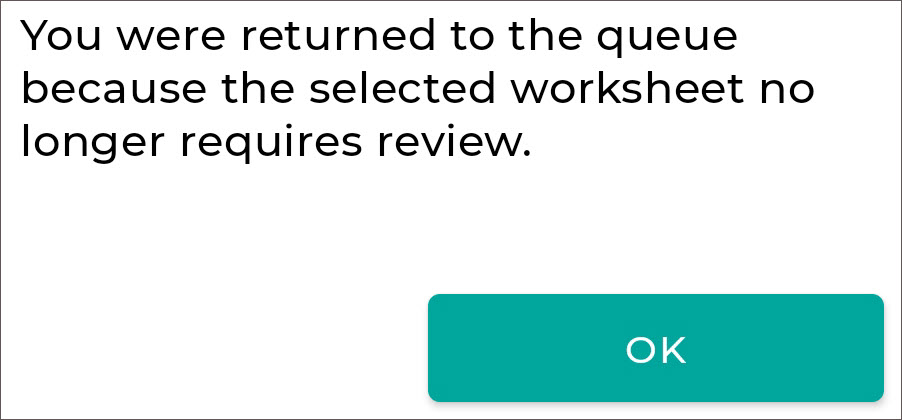 If a worksheet message thread is open when the query is resolved or coding is completed, you will be returned to the worksheet list and a message will be given explaining the selected worksheet no longer needs review.
Reminder Messages
If the client is configured to send reminder messages, the coder query messages will be resent to the provider in configured intervals until the worksheet no longer requires review.
Notifications
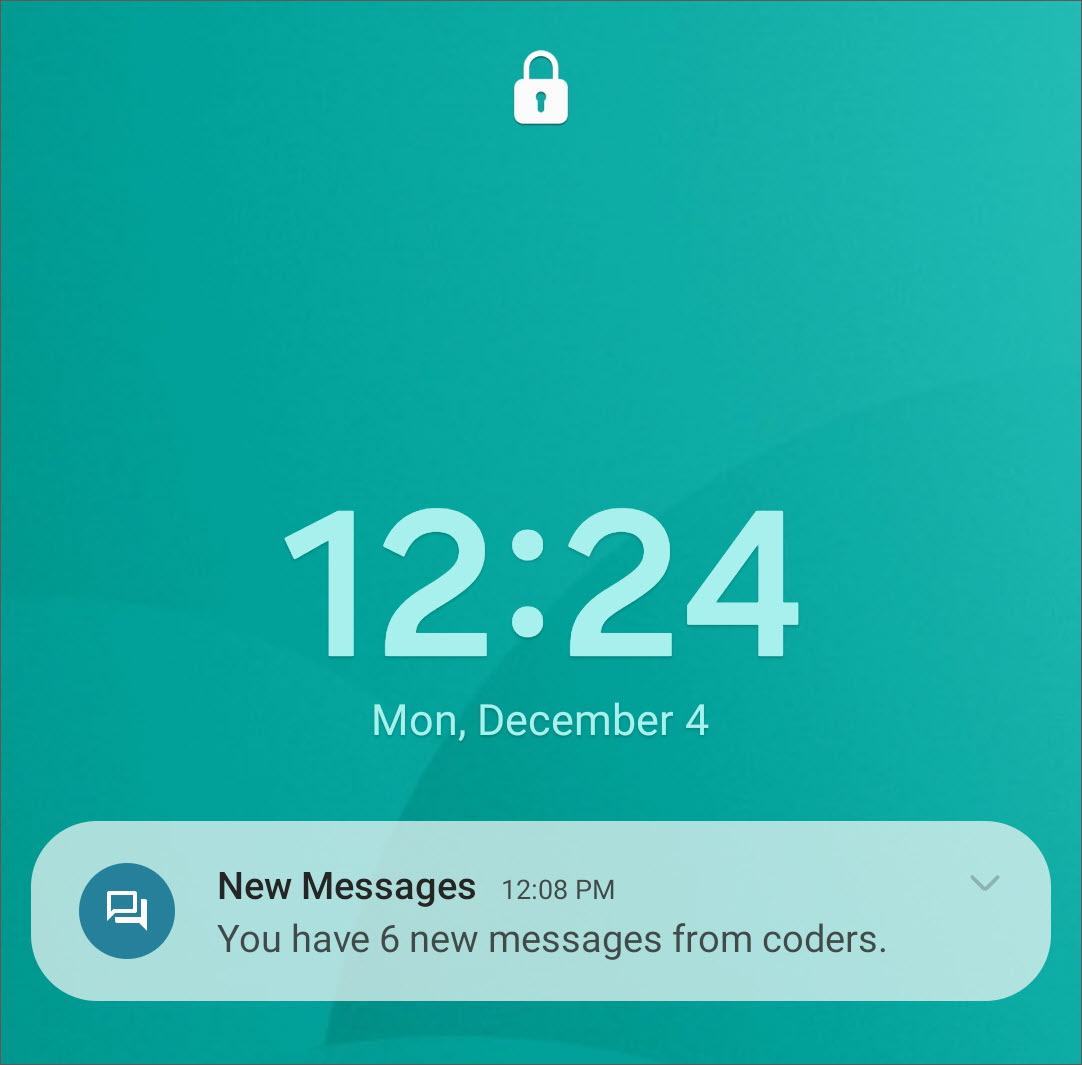
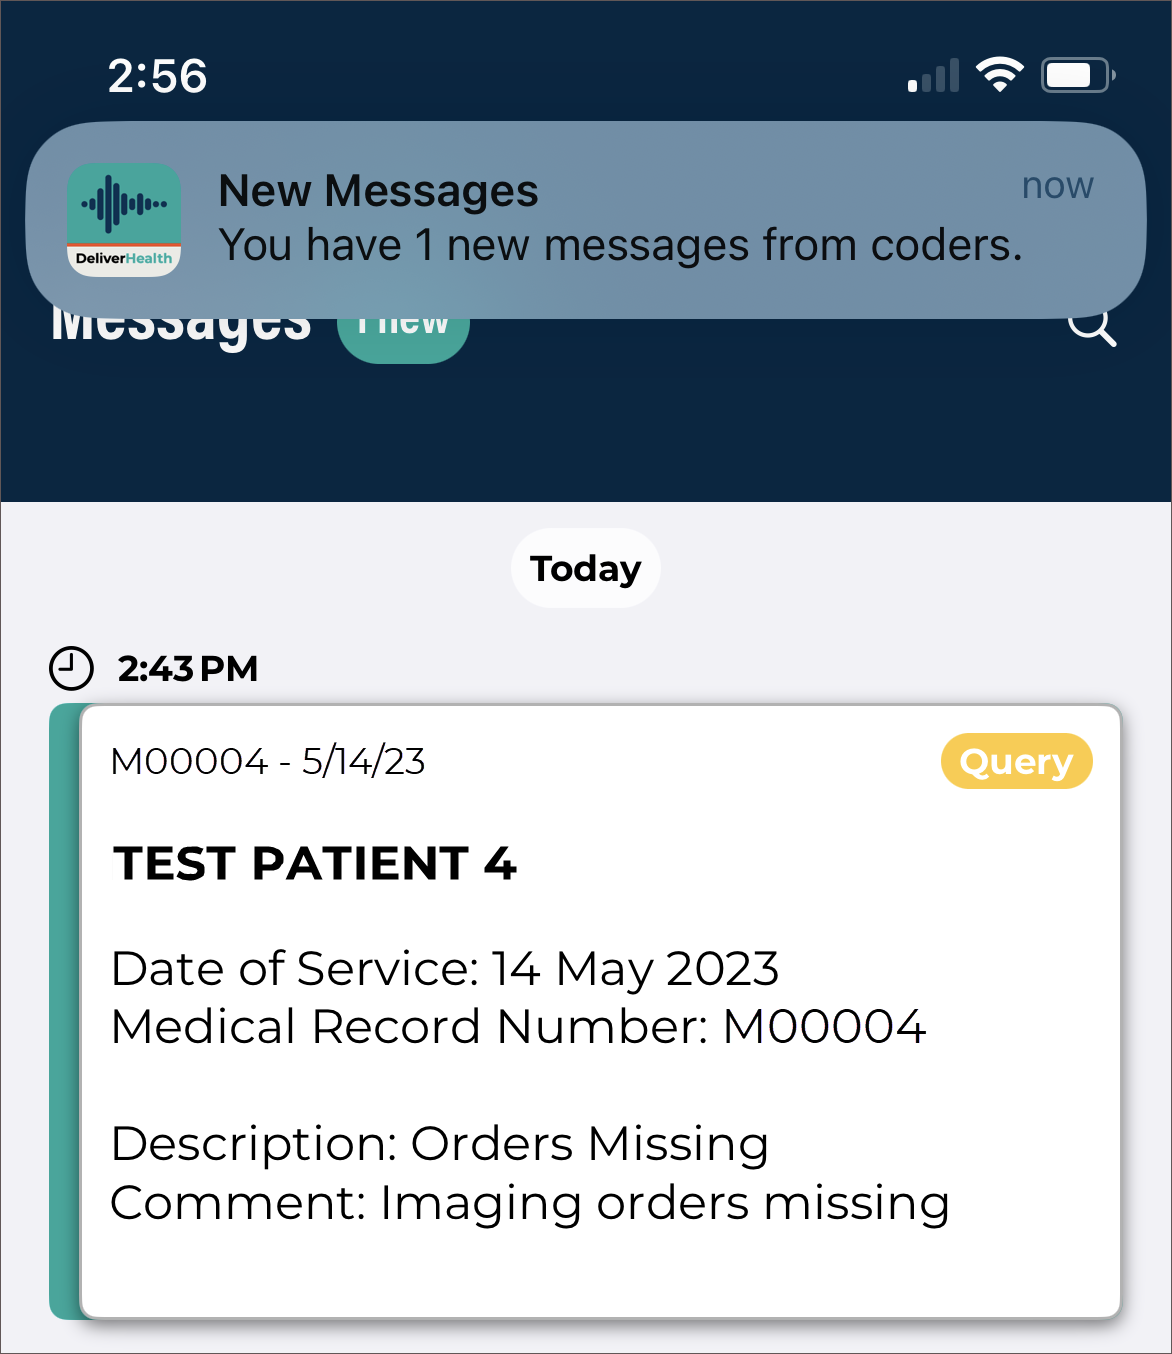
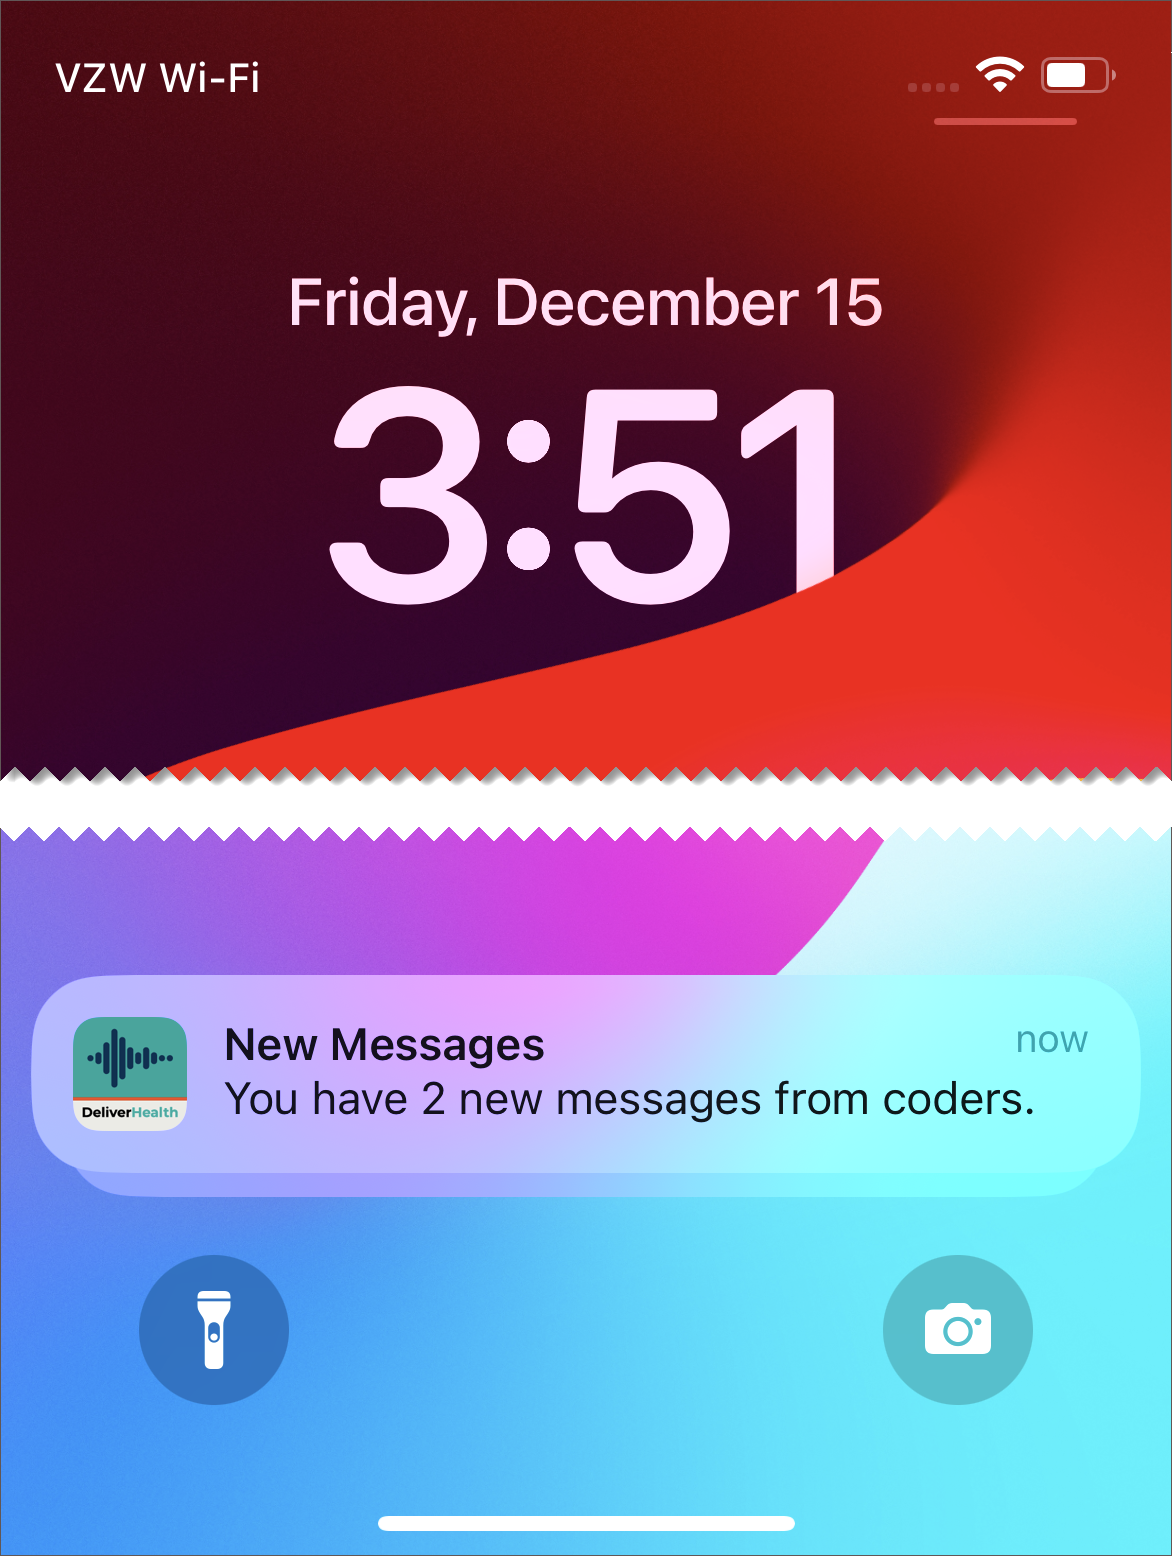
The eSOne mobile app can send notifications, alerting users when new messages are received from coders.
Note
The user must have the esOne mobile app running and be logged in to receive notifications.
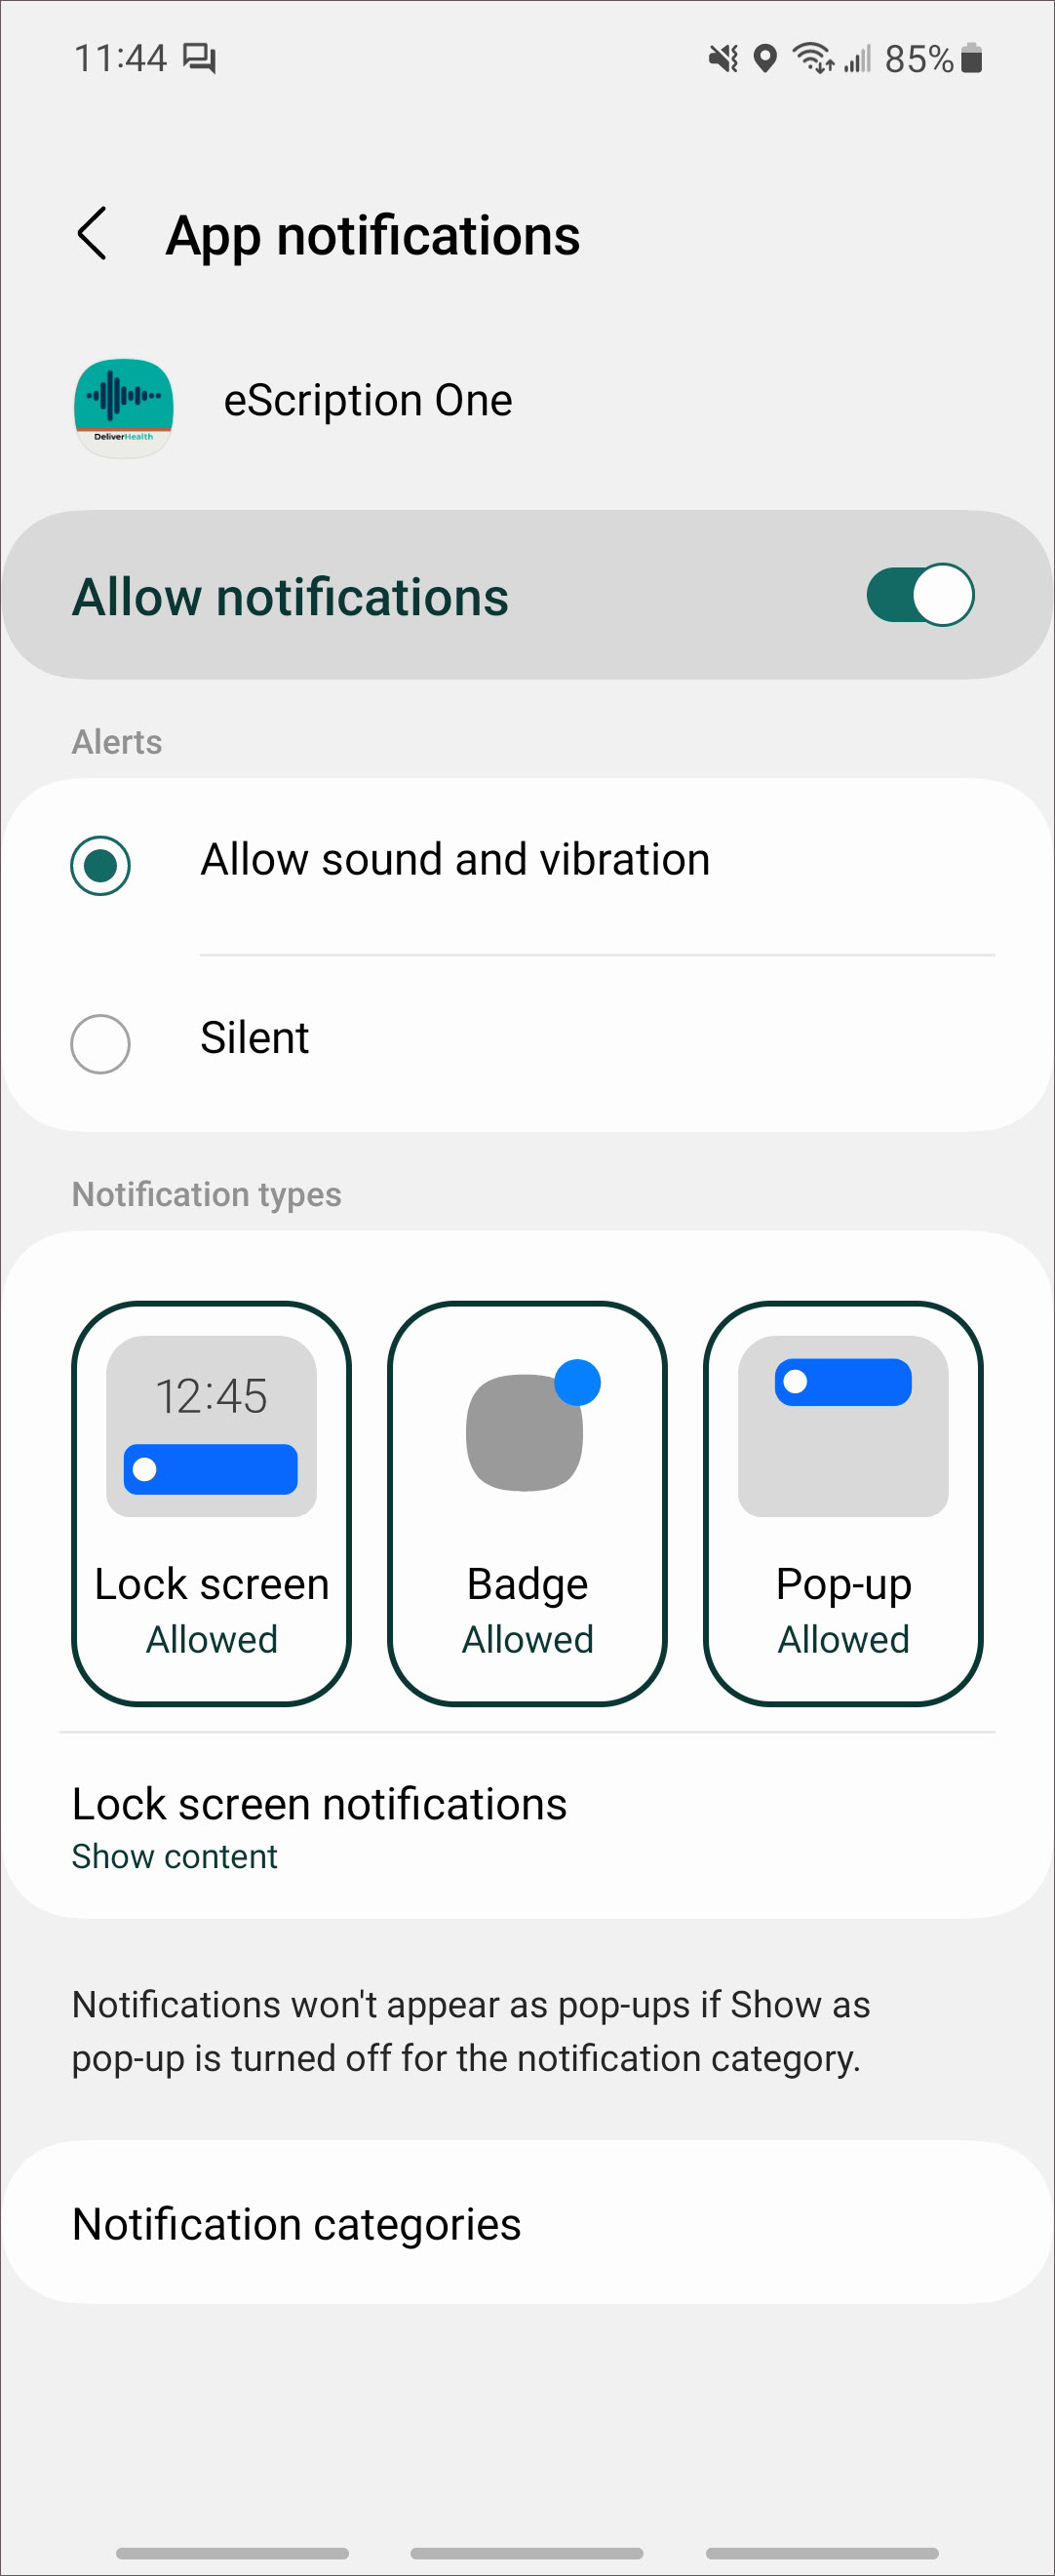
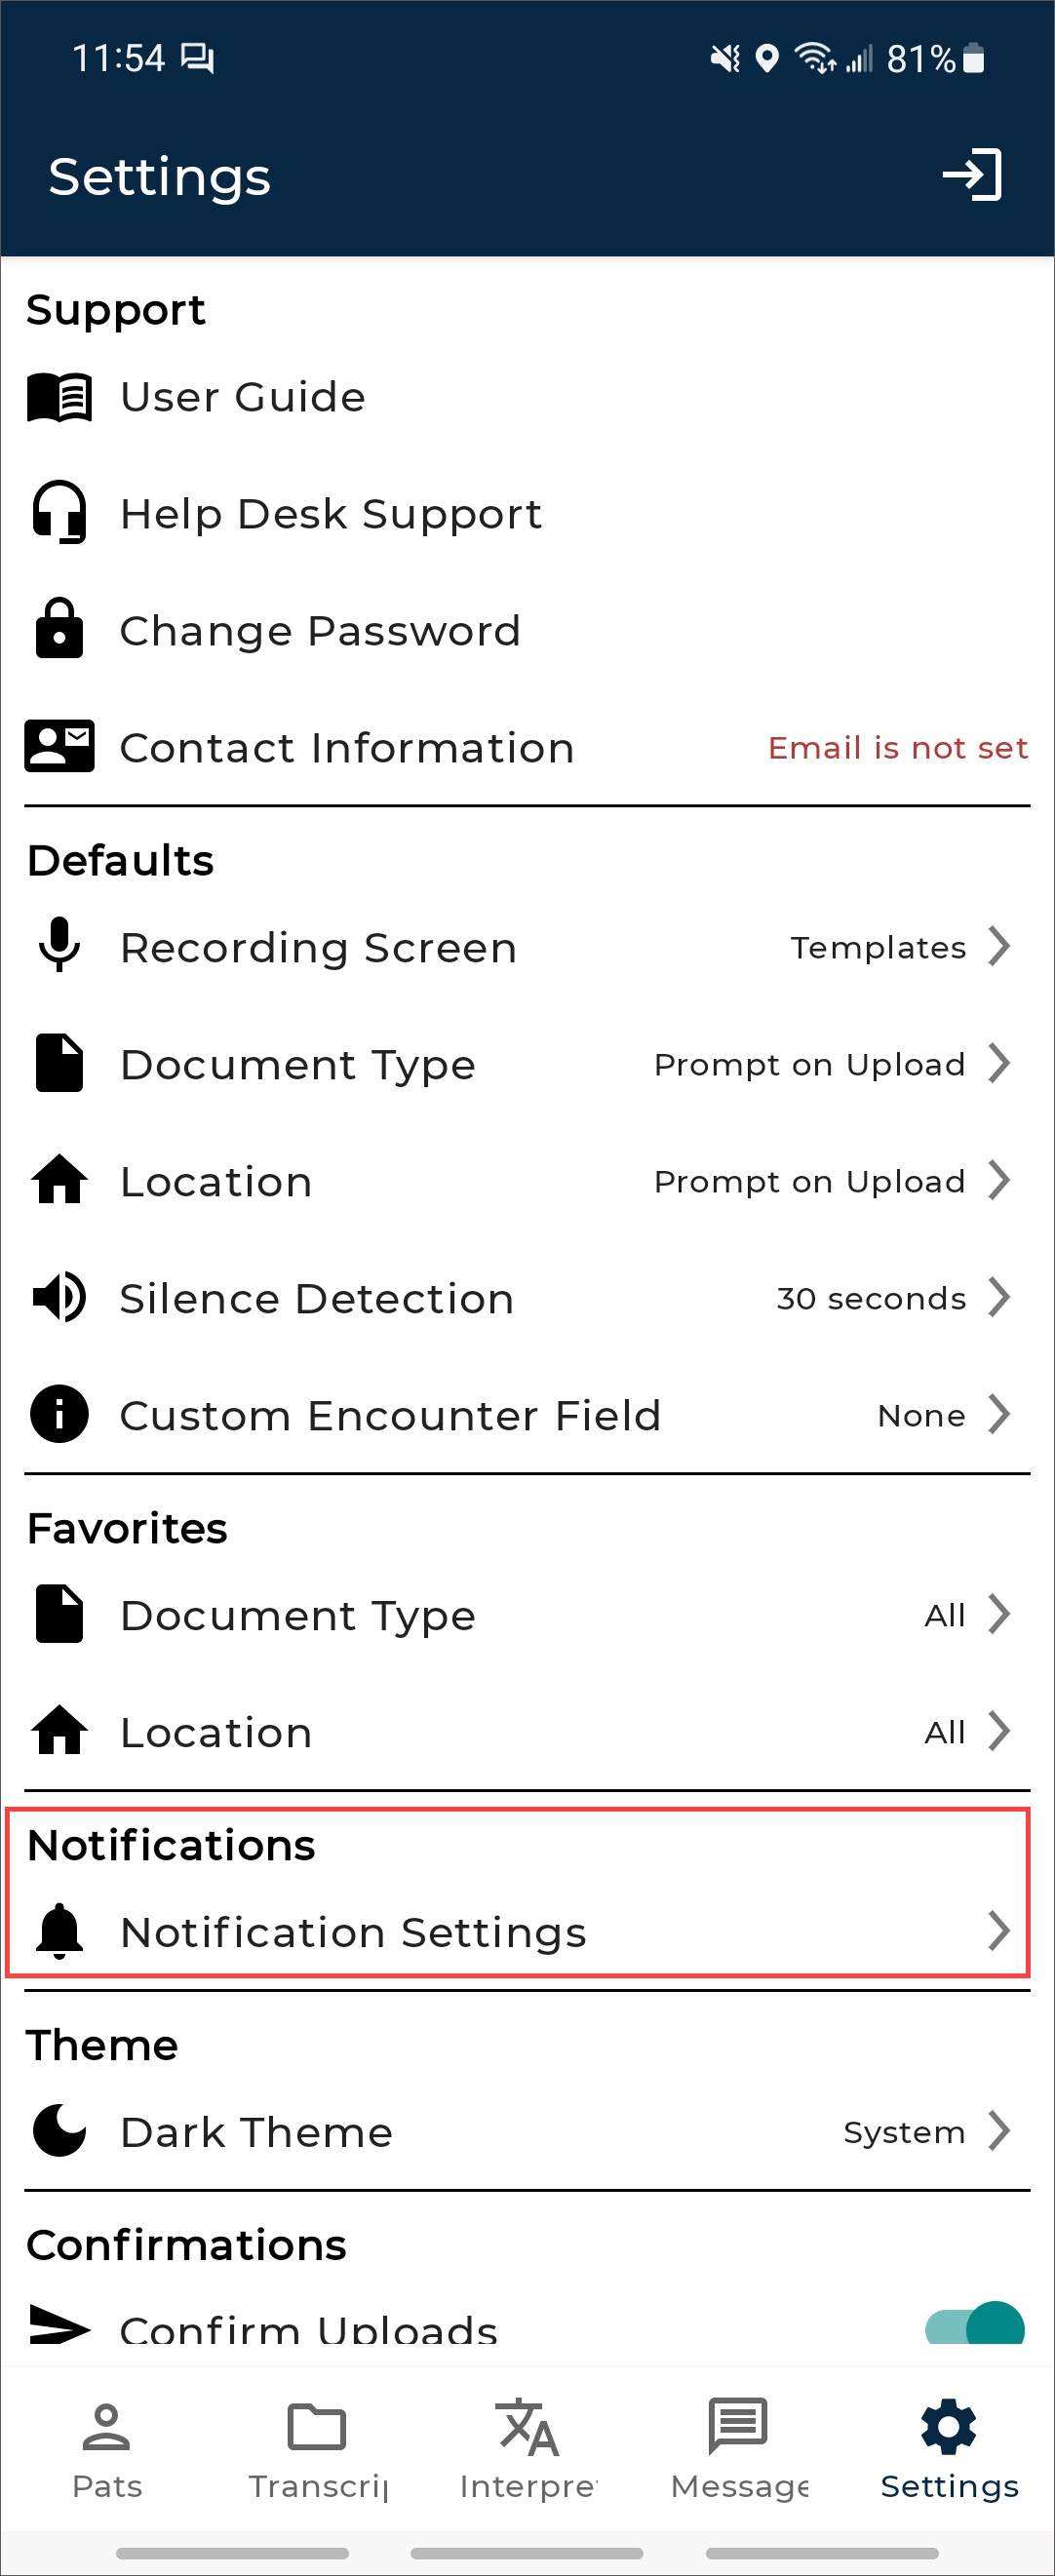
Tap on Notification Settings in the Settings tab to open the system app notifications settings for the eSOne mobile app. Each time a new message or reminder message is received the enabled notification(s) will apply.
Tap the notification to open the Messages tab. If you are not currently logged in to the eSOne mobile app, you will be prompted for login credentials.
Updating eSOne Mobile
To update eSOne Mobile to the newest version, open the Play Store application from your device, tap the profile menu button, then select Manage apps and devices. The Play Store will show a list of apps with available updates in the "Updates available" section. Tap "See details" to view a list of installed apps with available updates. If eSOne Mobile is in the list tap the Update button. If you would like the application to auto-update, mark the check box to enable auto update from the eSOne Mobile store page menu.
Beta Testing the eSOne Mobile App
If you are interested in receiving pre-released versions of the app, we encourage you to sign up for the beta testing program. This gives you the opportunity to preview upcoming releases and provide feedback.
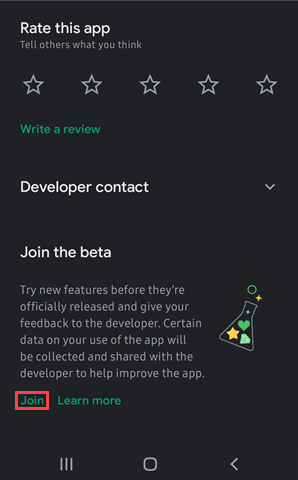
You can register as a beta tester in the Google Play Store by following these steps:
1. Launch the Google Play Store on your mobile device.
2. Search for the eSOne Mobile App and click on the app (not the Open button) to view the app details.
3. Scroll down to Join the beta.
4. Click Join.
As beta versions of the app become available you will be able to download them from the Google Play Store. You can submit feedback, including what you like/dislike about the app, new features you would like to see, usability comments, etc., by leaving developer feedback in the Google Play Store or emailing beta@deliverhealth.com.
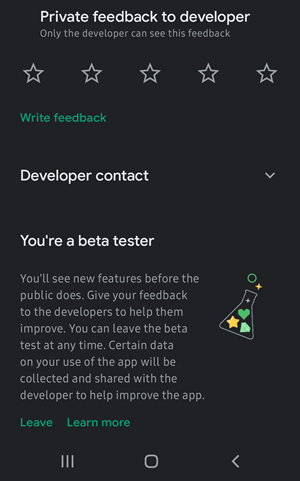
Versions of the app released to beta testers are still in the development stages and may not fully represent the version to be released to the public. You can leave the beta testing program at any time by clicking the Leave button in the eSOne Mobile App page of the Google Play Store.
Removing eSOne Mobile
Remove eSOne Mobile the same way as any other application on your Android device. From the Settings screen, open your Apps list, choose the eSOne Mobile application, and then select Uninstall. Alternatively, find the app icon on the home or app screen, long press the icon, tap Uninstall.
Frequently Asked Questions
Q: How do I get a list of my appointments to show up on my device?
A: Your transcription company can do this manually, or we can set up an export from the software your facility uses for scheduling. ShadowLink, an eSOne application, can import information delivered to us by your facility into our system.
Q: How long is a dictation that I have put on hold and not uploaded kept on the device?
A: An On-hold dictation stays on the device until you complete it. There is no expiration on saved dictations. However, if the app is uninstalled from the device, any on-hold dictations will be permanently deleted.
Q: How long are the audio files saved on my device after I dictate and upload them?
A: eSOne Mobile keeps dictations for two weeks.
Q: My device stopped recording and is preventing me from making any more recordings. What is happening?
A: Your device does not have enough storage space to save the audio files. Remove files or programs from the device until there is enough memory to save additional dictations.
Q: I pressed the Record button but nothing is being recorded and the dictation playback buttons do not appear. Why?
A: The eSOne Mobile app must have permission to use the microphone. To ensure it is enabled, go to your device’s Settings menu, then tap Apps. Find and tap on the eSOne Mobile application, then tap Permissions. Make sure permissions for all three settings (Microphone, Phone, and Storage) are enabled.
Q: Every time I switch to a different app then return to the eSOne app I am logged out. Why?
A: For security reasons, the application will log you out when switching apps or minimizing the app. We do offer a feature that allows users to remain logged in during other mobile activity as long as the eSOne app is still running. The managing MTSO or client must enable this feature.
Q: My appointments are gone or are not appearing as they should.
A: There are two common causes of this problem. The most frequent is that the filter view has been changed. Please see Appointment Filters for filtering information. There could also be an issue with the way appointments have been uploaded to our system from your facility’s scheduling software or EHR. Please call our Help Desk at 1-800-858-0080 to help resolve this issue.
Q: What happens to my dictation if I lose my network and Wi-Fi connection while recording or uploading?
A: If the internet or network connection is lost while recording a dictation in eSOne Mobile, the recording continues without interruption, as it is stored locally on the device. However, if a phone call is received during recording, the dictation pauses until manually resumed. If the connection is lost while uploading a dictation, the upload pauses automatically. Once the network connection is restored, the upload resumes from where it left off, ensuring the dictation is successfully delivered without requiring a restart.
eSOne Mobile for iOS
Introduction to eSOne Mobile for iOS
eSOne Mobile for iOS offers a convenient, portable, end-to-end documentation process. Clinicians can easily review, edit and complete documentation on their mobile device, as well as submit dictations for transcription.
eSOne Mobile is a safe, secure application that supports HIPAA compliance.
Dictations are retained for 14 days after the appointment date. All data that is stored on the mobile device is protected by Apple's AES 256-bit crypto engine. Additionally, all the data that is transferred over the Internet is encrypted by a TLS connection. Both mechanisms ensure that data-at-rest and data-in-motion are always secure when you use eSOne Mobile.
System Requirements
-
Any iOS device with iOS 18 or greater (the latest iOS version is recommended).
-
Internet Access through a wireless Local Area Network (LAN) connection or through a phone service provider. It is strongly recommended to use a Wi-Fi LAN connection when uploading dictations. Minimum bandwidth: LTE/4G data connection; recommended is stable Wi-Fi.
-
Communicates over port 443 to https://mobile.escription-one.com using TLS 1.2.
Important: Receiving Calls While Dictating
The eSOne mobile application cannot block incoming phone calls. Apple Inc. makes it impossible for eSOne Mobile, or any application, to block phone calls. If you have concerns about receiving calls while making a dictation, switch your phone to 'Do Not Disturb' or 'Airplane Mode' while dictating. To continue using the application while in Airplane Mode, please enable Wi-Fi.
If a phone call is received while dictating, eSOne Mobile will pause the recording. Dictation that was made prior to the incoming call will not be lost; to resume dictating after finishing the call, tap the record button again and continue to dictate.
Installing eSOne Mobile for iOS
To install the eSOne Mobile app, first go to the Apple App Store and search 'eSOne Mobile'. Choose the eSOne Mobile application, then tap the Get button to download.
Starting eSOne Mobile
![]() To start eSOne Mobile, tap the application icon on the home screen. Use your InQuiry login credentials to log in. Both dictating users and non-dictating staff can log into eSOne Mobile.
To start eSOne Mobile, tap the application icon on the home screen. Use your InQuiry login credentials to log in. Both dictating users and non-dictating staff can log into eSOne Mobile.
Select a Region
 The first time you open the application, you will be prompted to select a region. This allows the app to connect to the proper servers for your client. Choose the region that applies to your location or client.
In the unlikely event that you need to change your region, you will need to uninstall and reinstall the application.
Note
Uninstalling the app will permanently delete any incomplete (on-hold) dictations; please verify all started dictations have been uploaded prior to uninstalling the app. You will be prompted to choose your region upon the first login after reinstalling the app.
Logging in
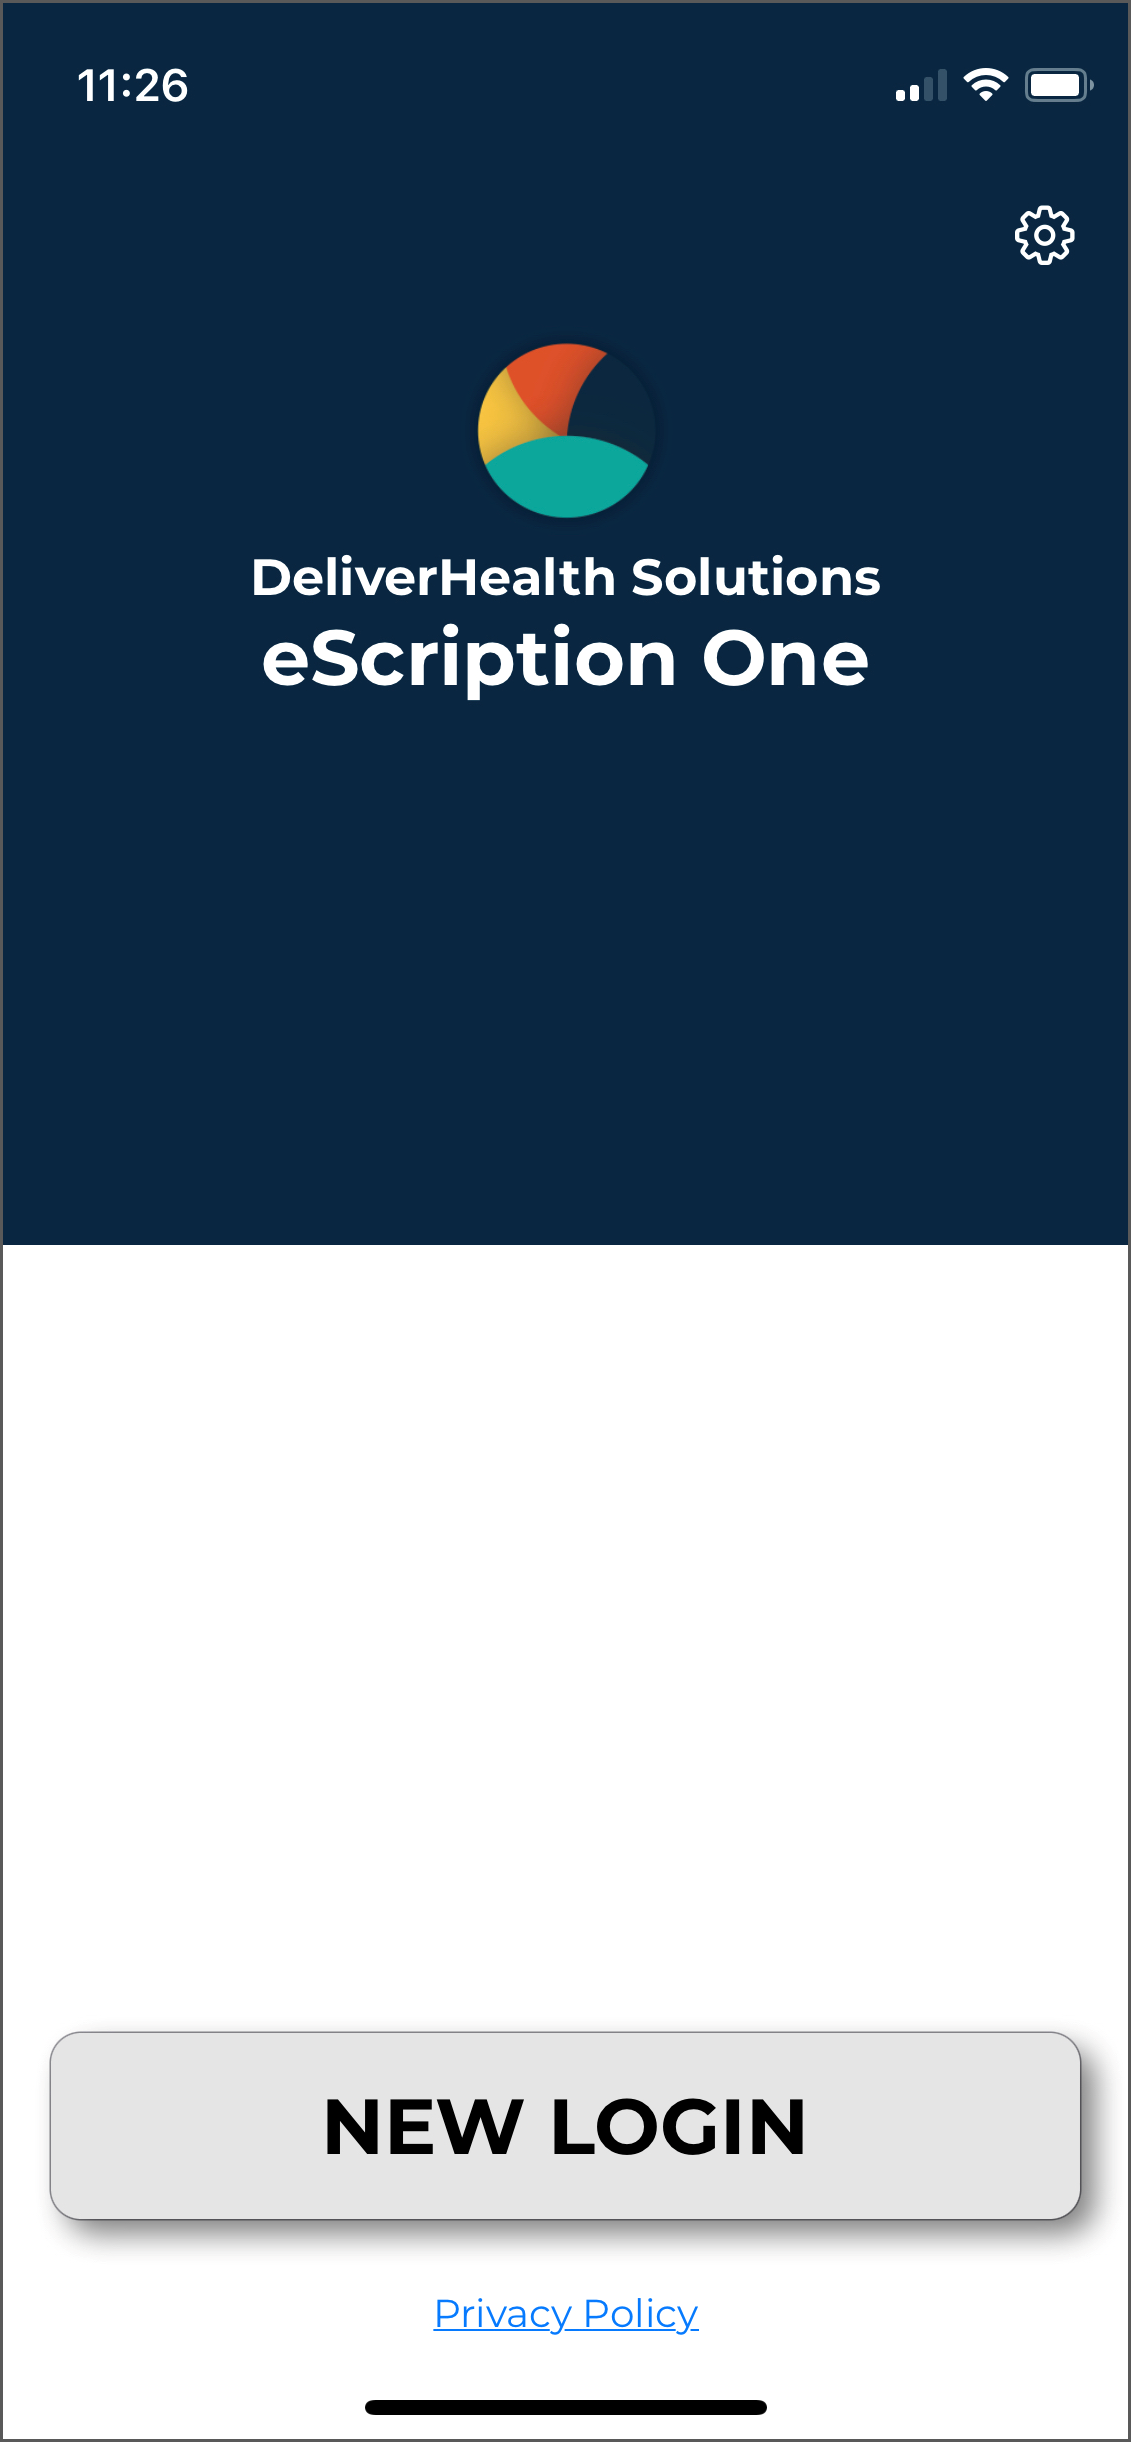 To log in, press the NEW LOGIN button at the bottom of the screen.
Enter your login credentials: username, password, and client information, then press Log In.
The "Forgot Password?" link next to the Login button allows users who have saved a valid email address to receive password reset instructions by email if it is lost or forgotten. For more information, go to Email Verification and Resetting your Password.
Note
If multi-factor authentication (MFA) has been enabled for your company, please see Setting up Multi-Factor Authentication.
If your password is expired, you are prompted to change it. Enter your username, client code, current password, and new password. After verifying it, click Change Password.
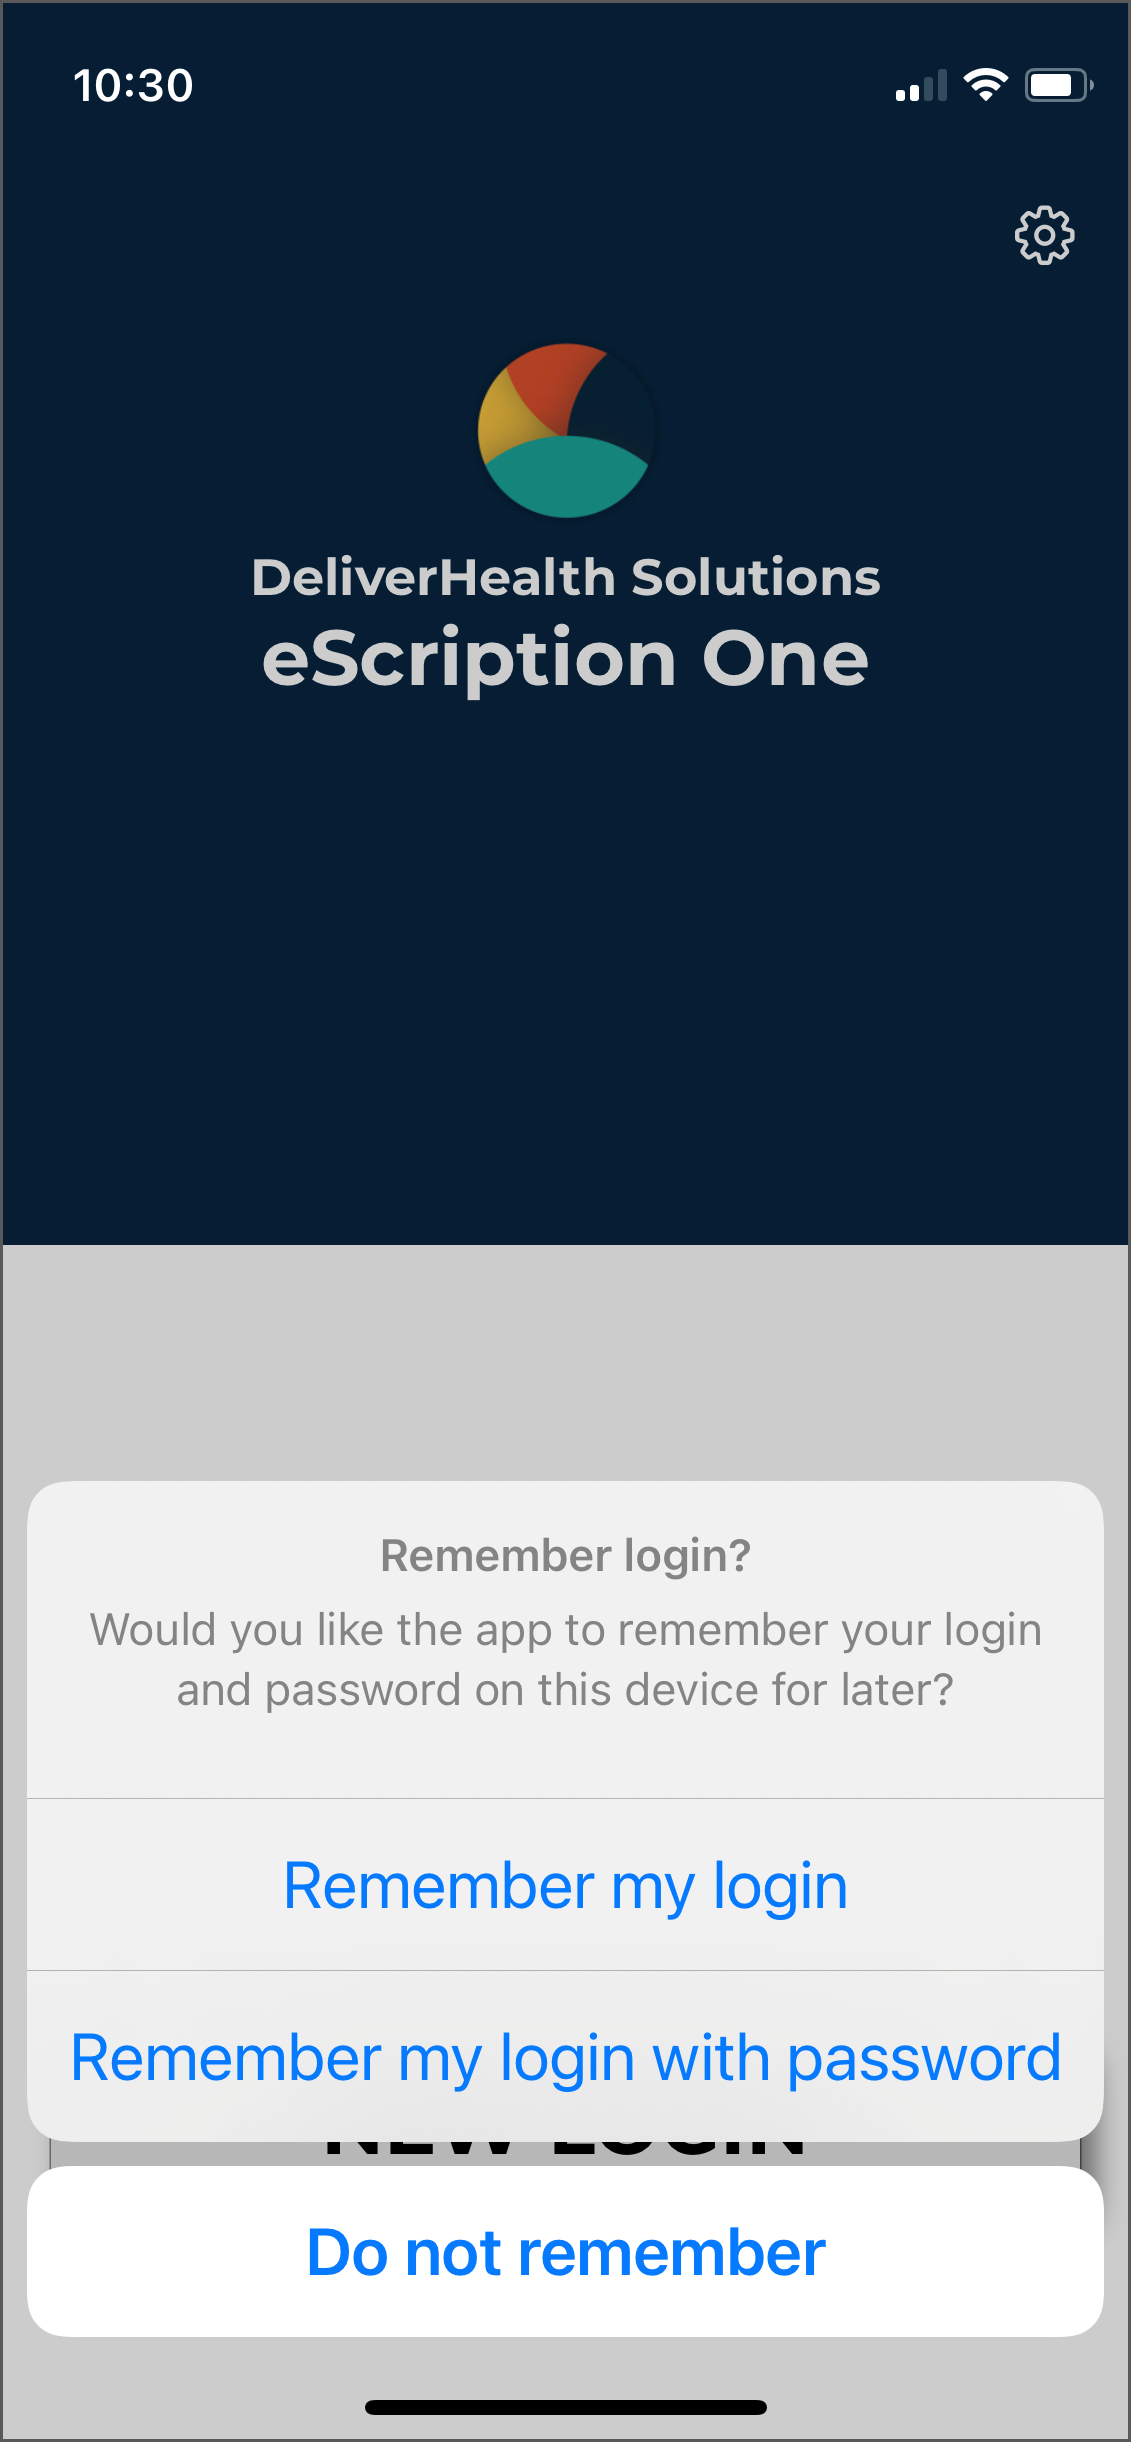 The first time you log in, the Remember Login screen will appear next, asking if you want the app to remember the login name or login name and password on the device you are logging into.
(The 'Remember my login with password' option will not appear if the admin has disabled this feature for clients/users.)
You can also choose Do not remember.
After you make your selection(s), a confirmation box appears. Select OK.
Note
This screen will initially appear for each profile you log into if you have multiple profiles.
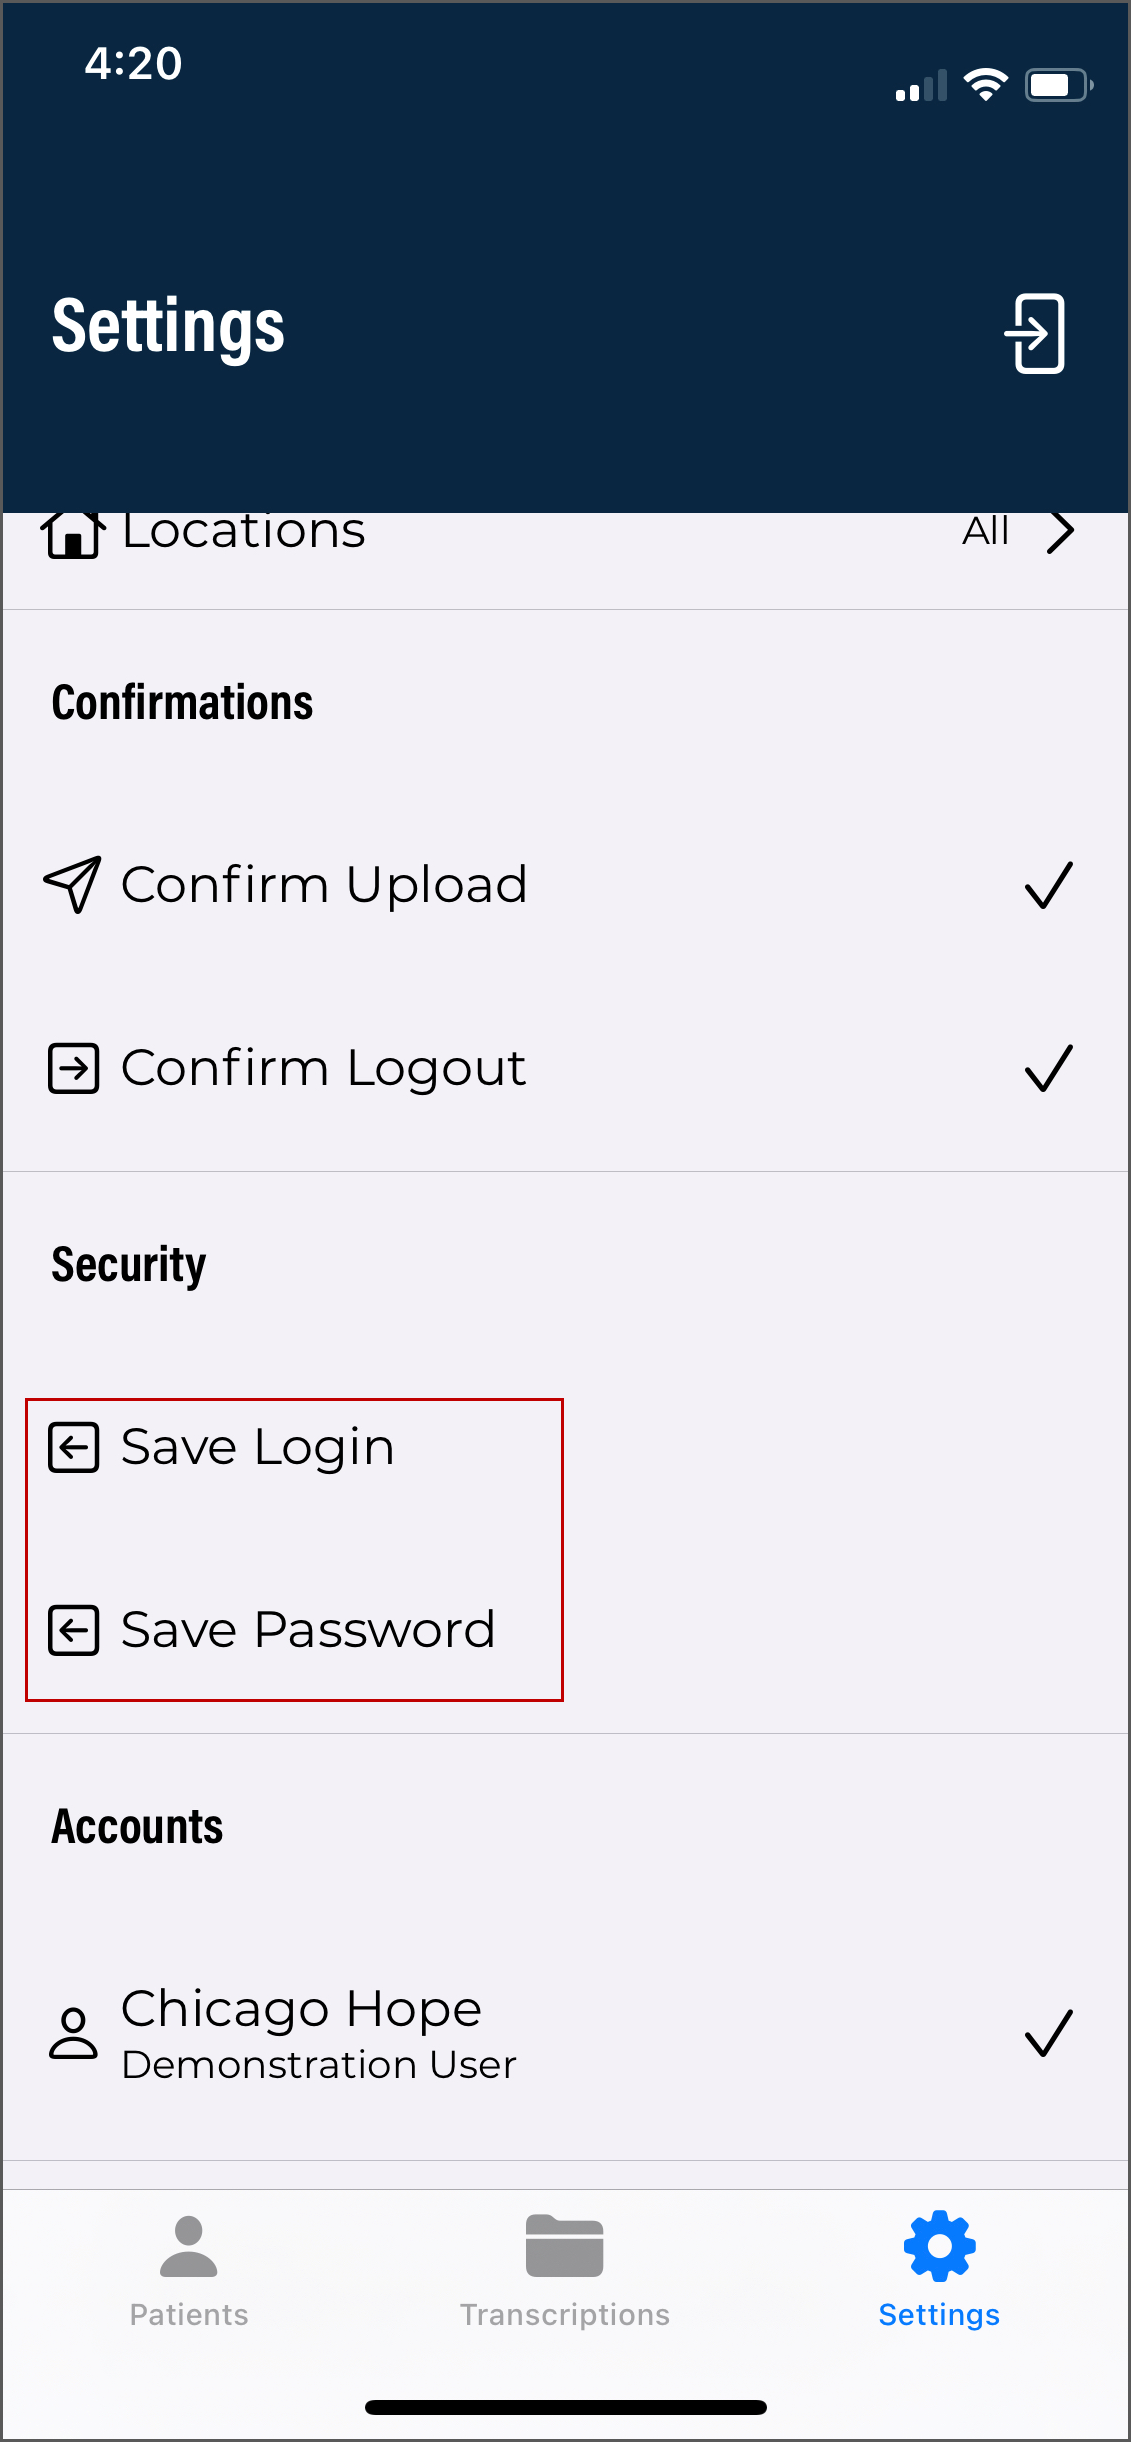 If you later want to change your login options, go to the app's Settings screen.
If saving passwords is not allowed for users, the 'Save Password' option will be disabled on the Settings screen.
Note
Please note that with 'Save Password' enabled, anyone with access to your device can access your eSOne account and the confidential medical records in it.
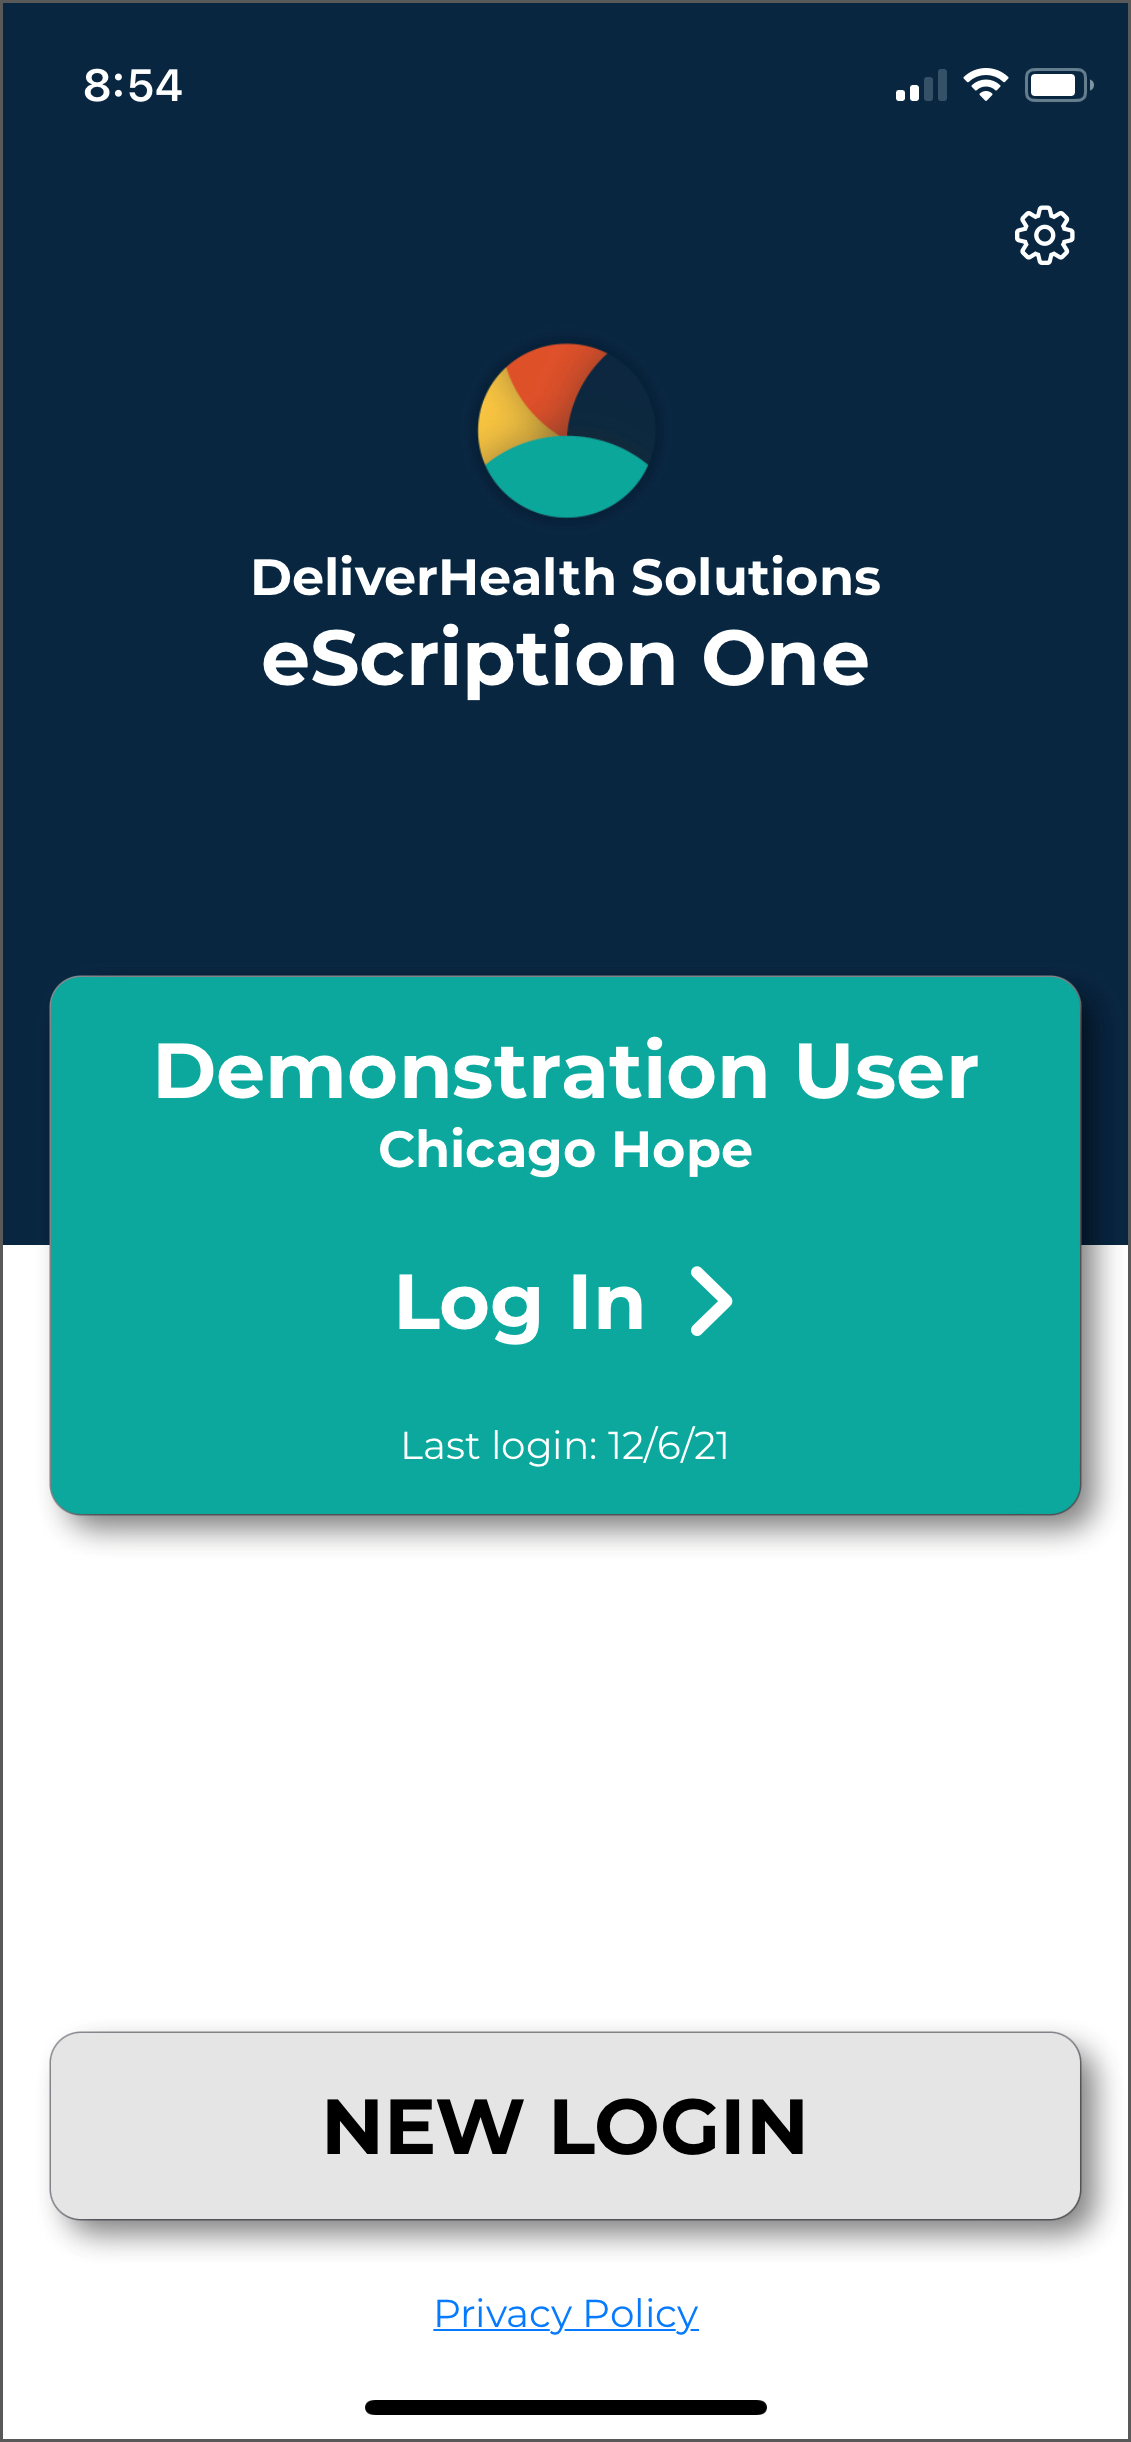 When the login name is saved, the profile appears on the login screen (with a combination of First name Last name). Tap the profile to log in as that user. You will be prompted for the password if it has not been (or cannot be) saved.
Only the last saved profile to log in will appear on the login screen. You can still link multiple profiles in the Settings tab to switch between profiles quickly.
Setting up Multi-Factor Authentication
Multi-factor authentication is another way to verify a user’s identity, adding an extra level of security to the login process. For eSOne applications, it is recommended that users set up MFA using the Auth0 Guardian authentication application. However, due to a limitation with the Auth0 Guardian app, users cannot set up MFA for the mobile apps on a mobile device. To do so, you must perform the initial setup on InQuiry or InSync. Once this initial setup is complete, MFA will work for the mobile app as well. Logging in will require you to accept a notification sent to your phone.
Note
Other authentication apps may work as well but are not officially supported.
Logging in with Multi-Factor Authentication
Once the initial MFA setup has been completed, you will subsequently log in to your mobile app as shown in the steps below.
Note
If you log in with saved credentials for both username and password, you will not need to authenticate with MFA. No notification will be sent to your phone.
-
Launch the eSOne mobile app.
-
Enter your login credentials.
The 'Verify Your Identity' screen opens, indicating that a notification has been sent to your phone and is awaiting confirmation. -
Verify Authentication.
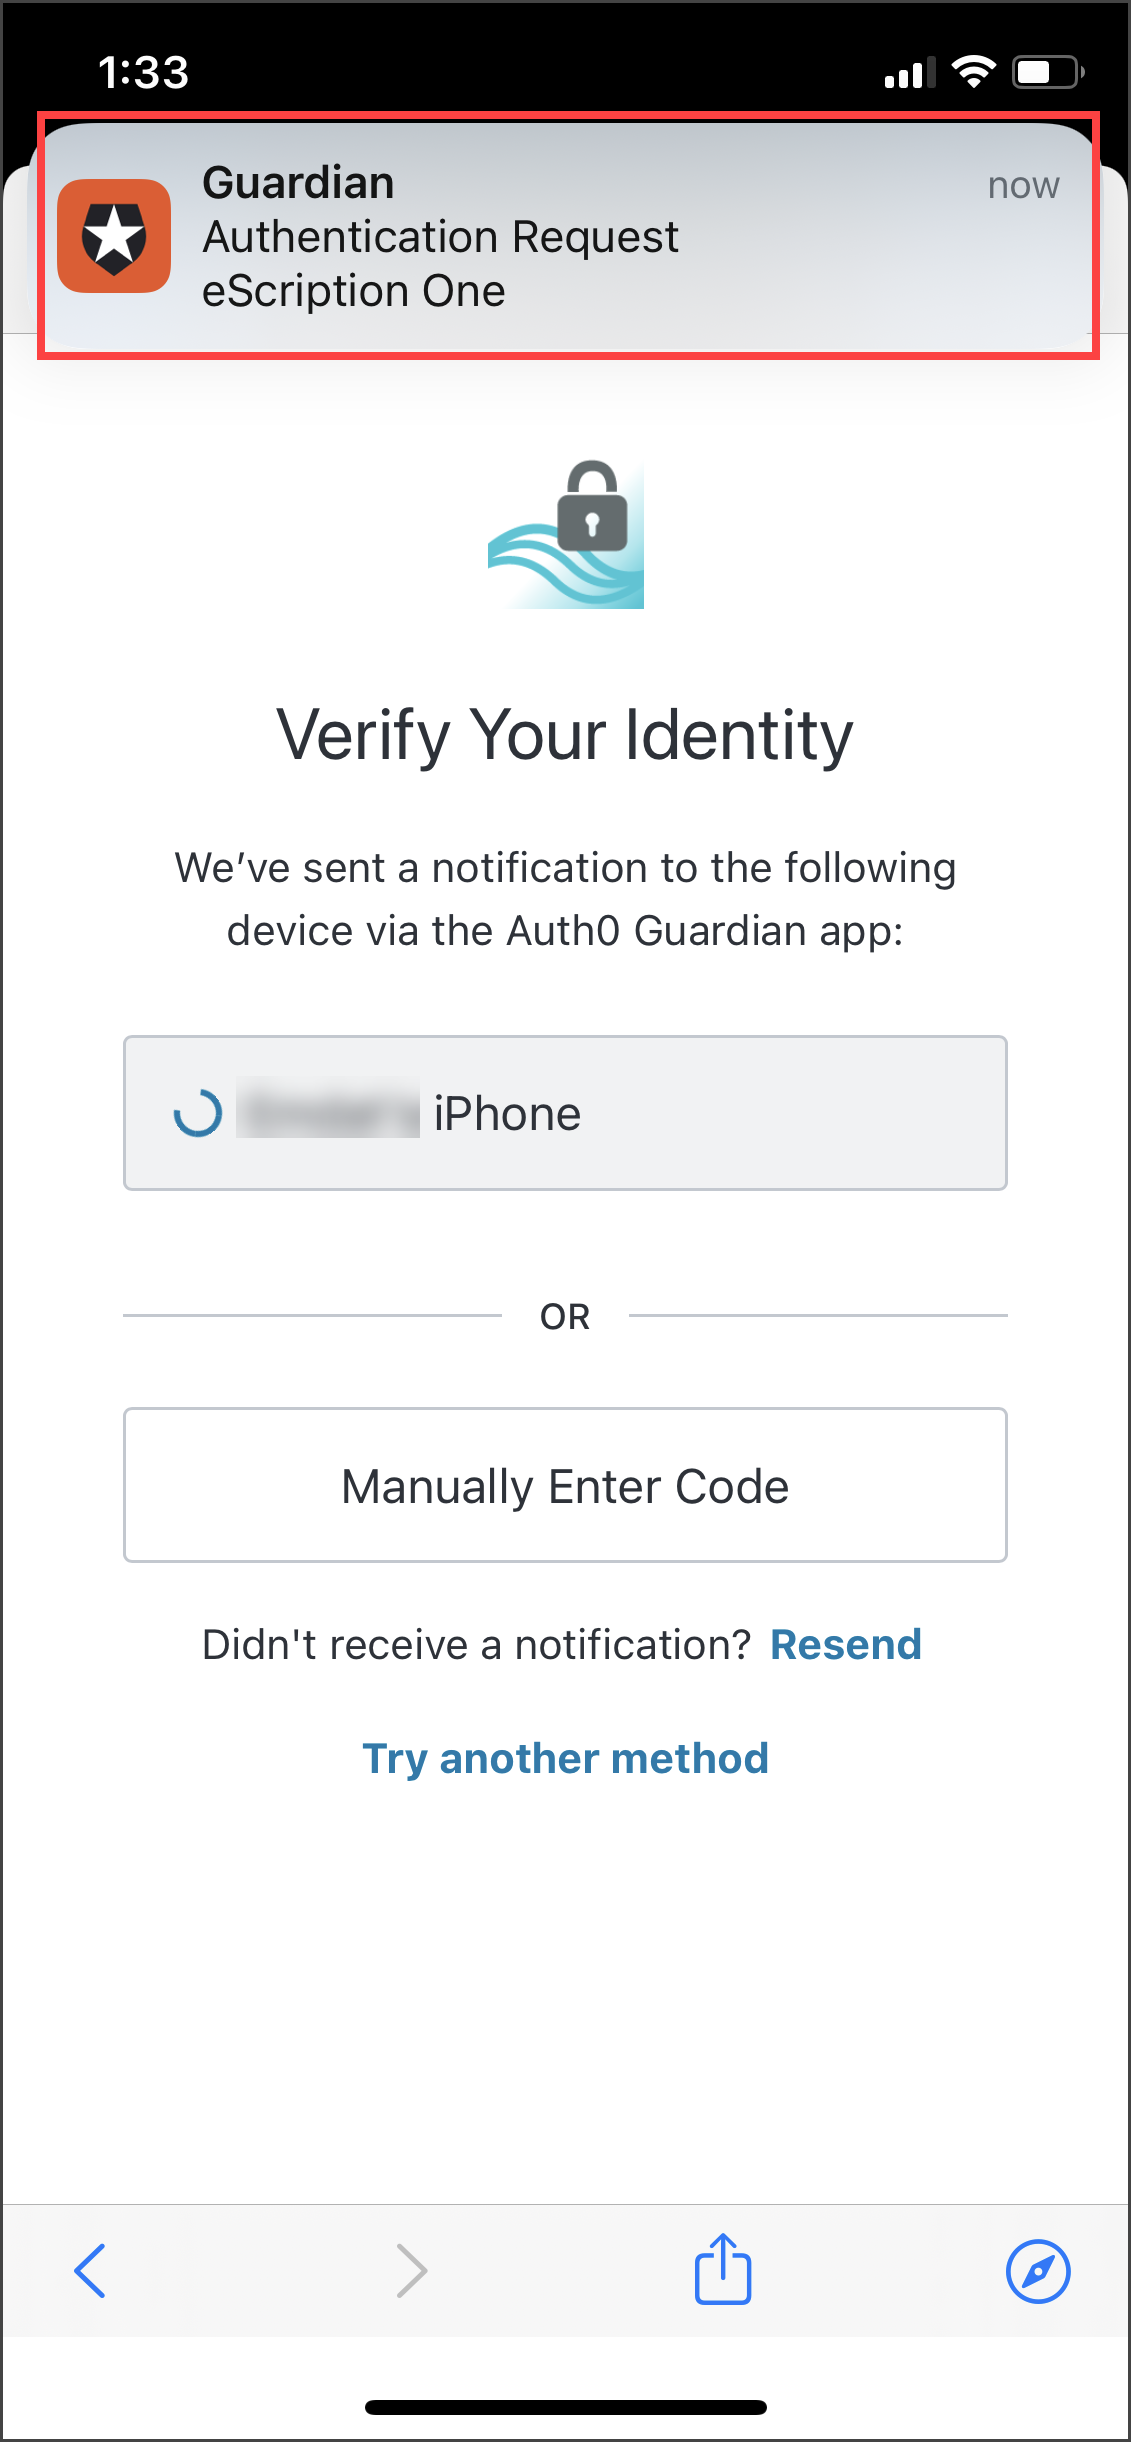 Depending on your device and Guardian app settings, you may receive a push notification for the authentication request. If so, tap on the push notification to easily open the authentication request.
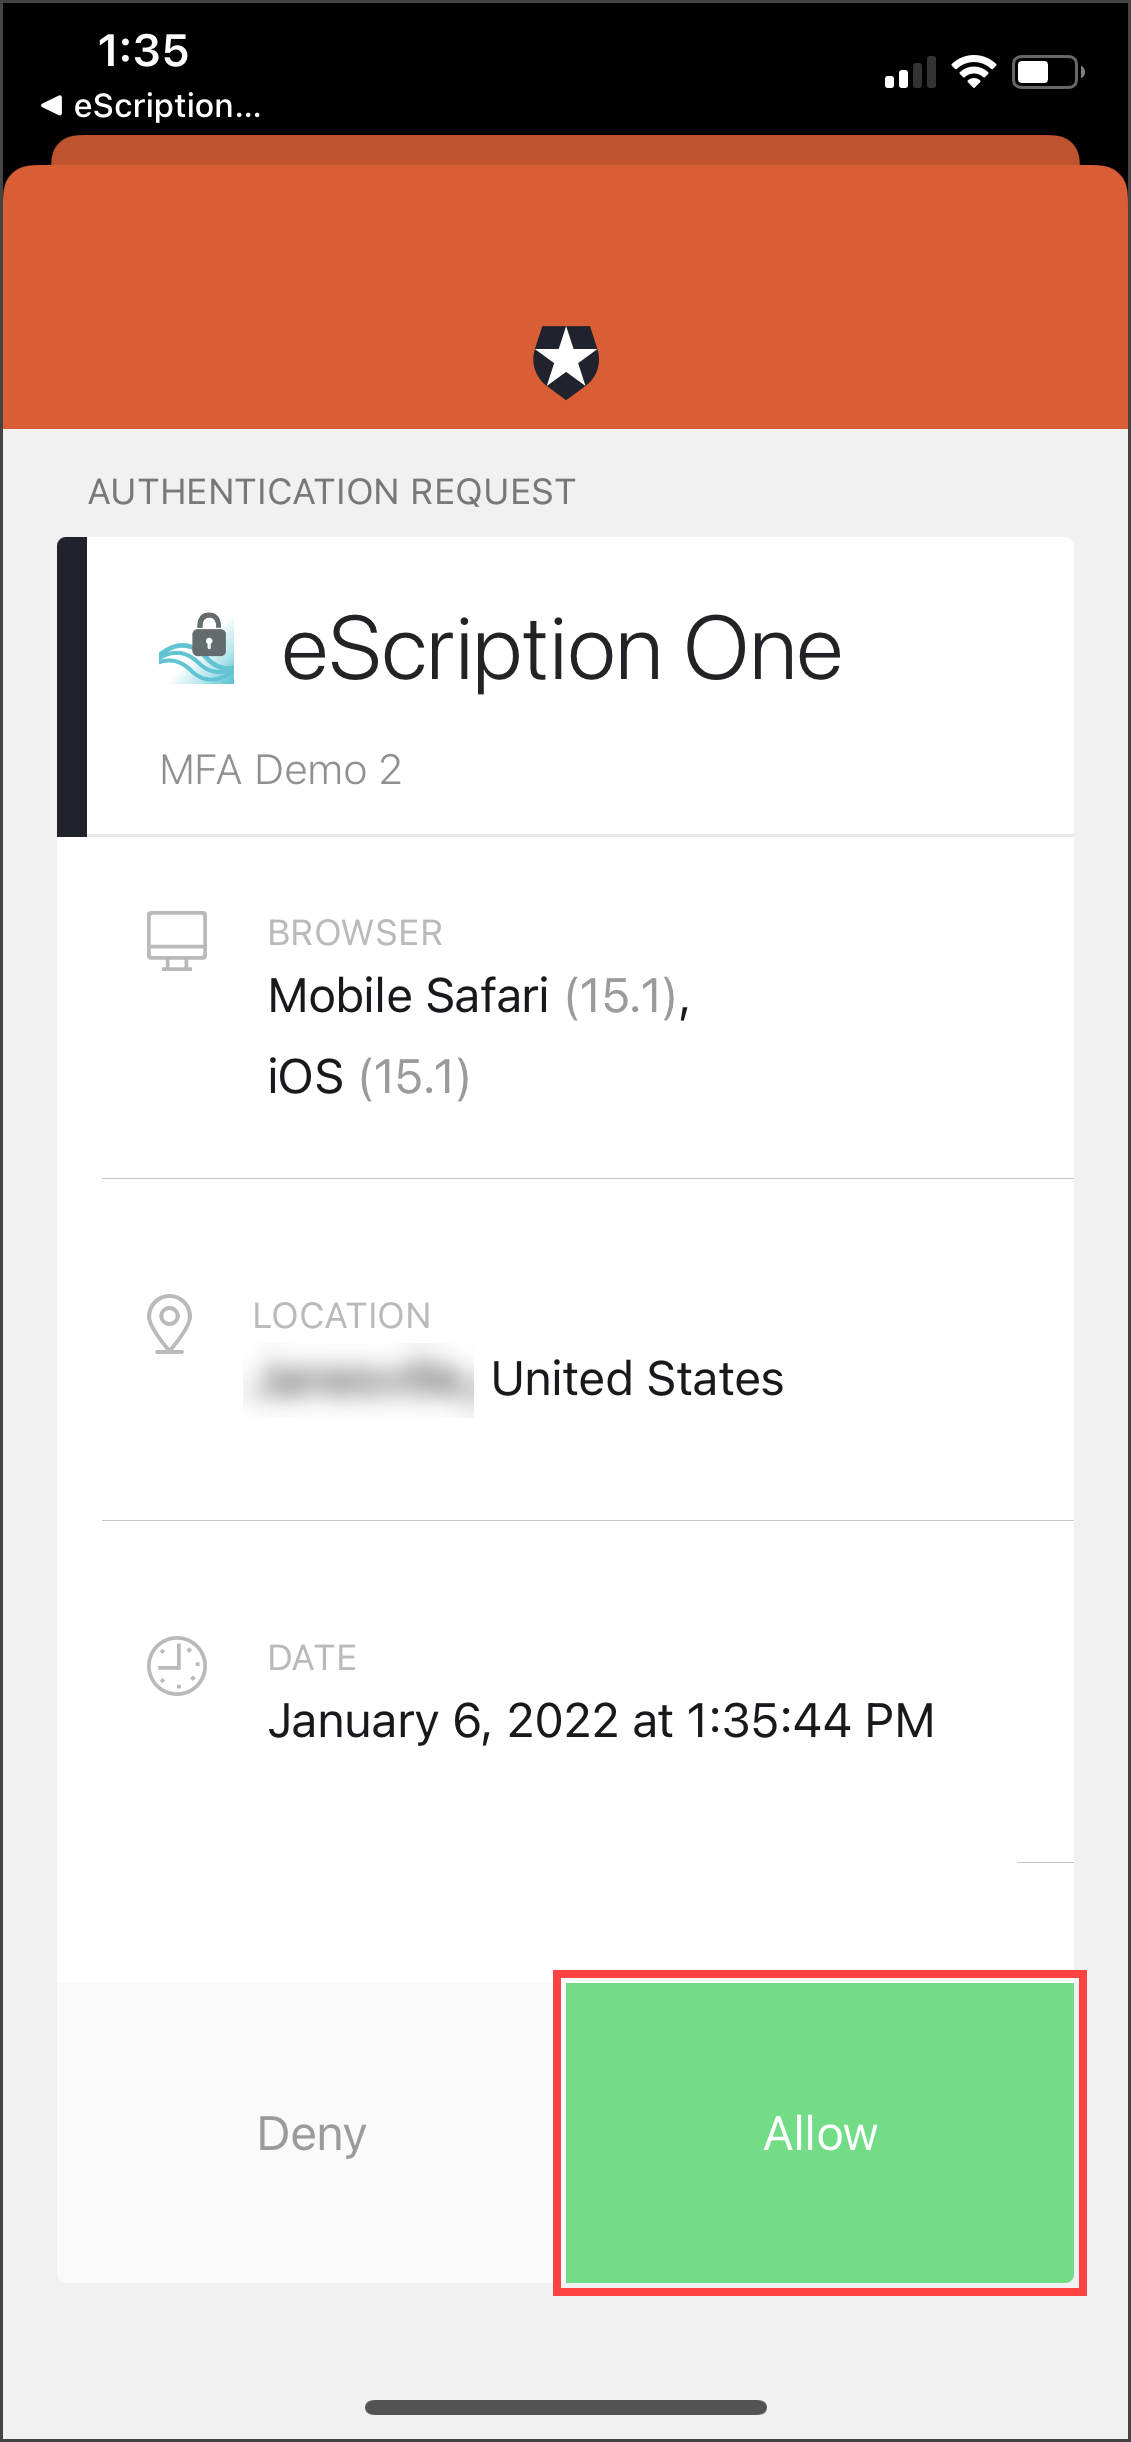 If a push notification was not received, open the Guardian app and tap Allow on the appropriate request.
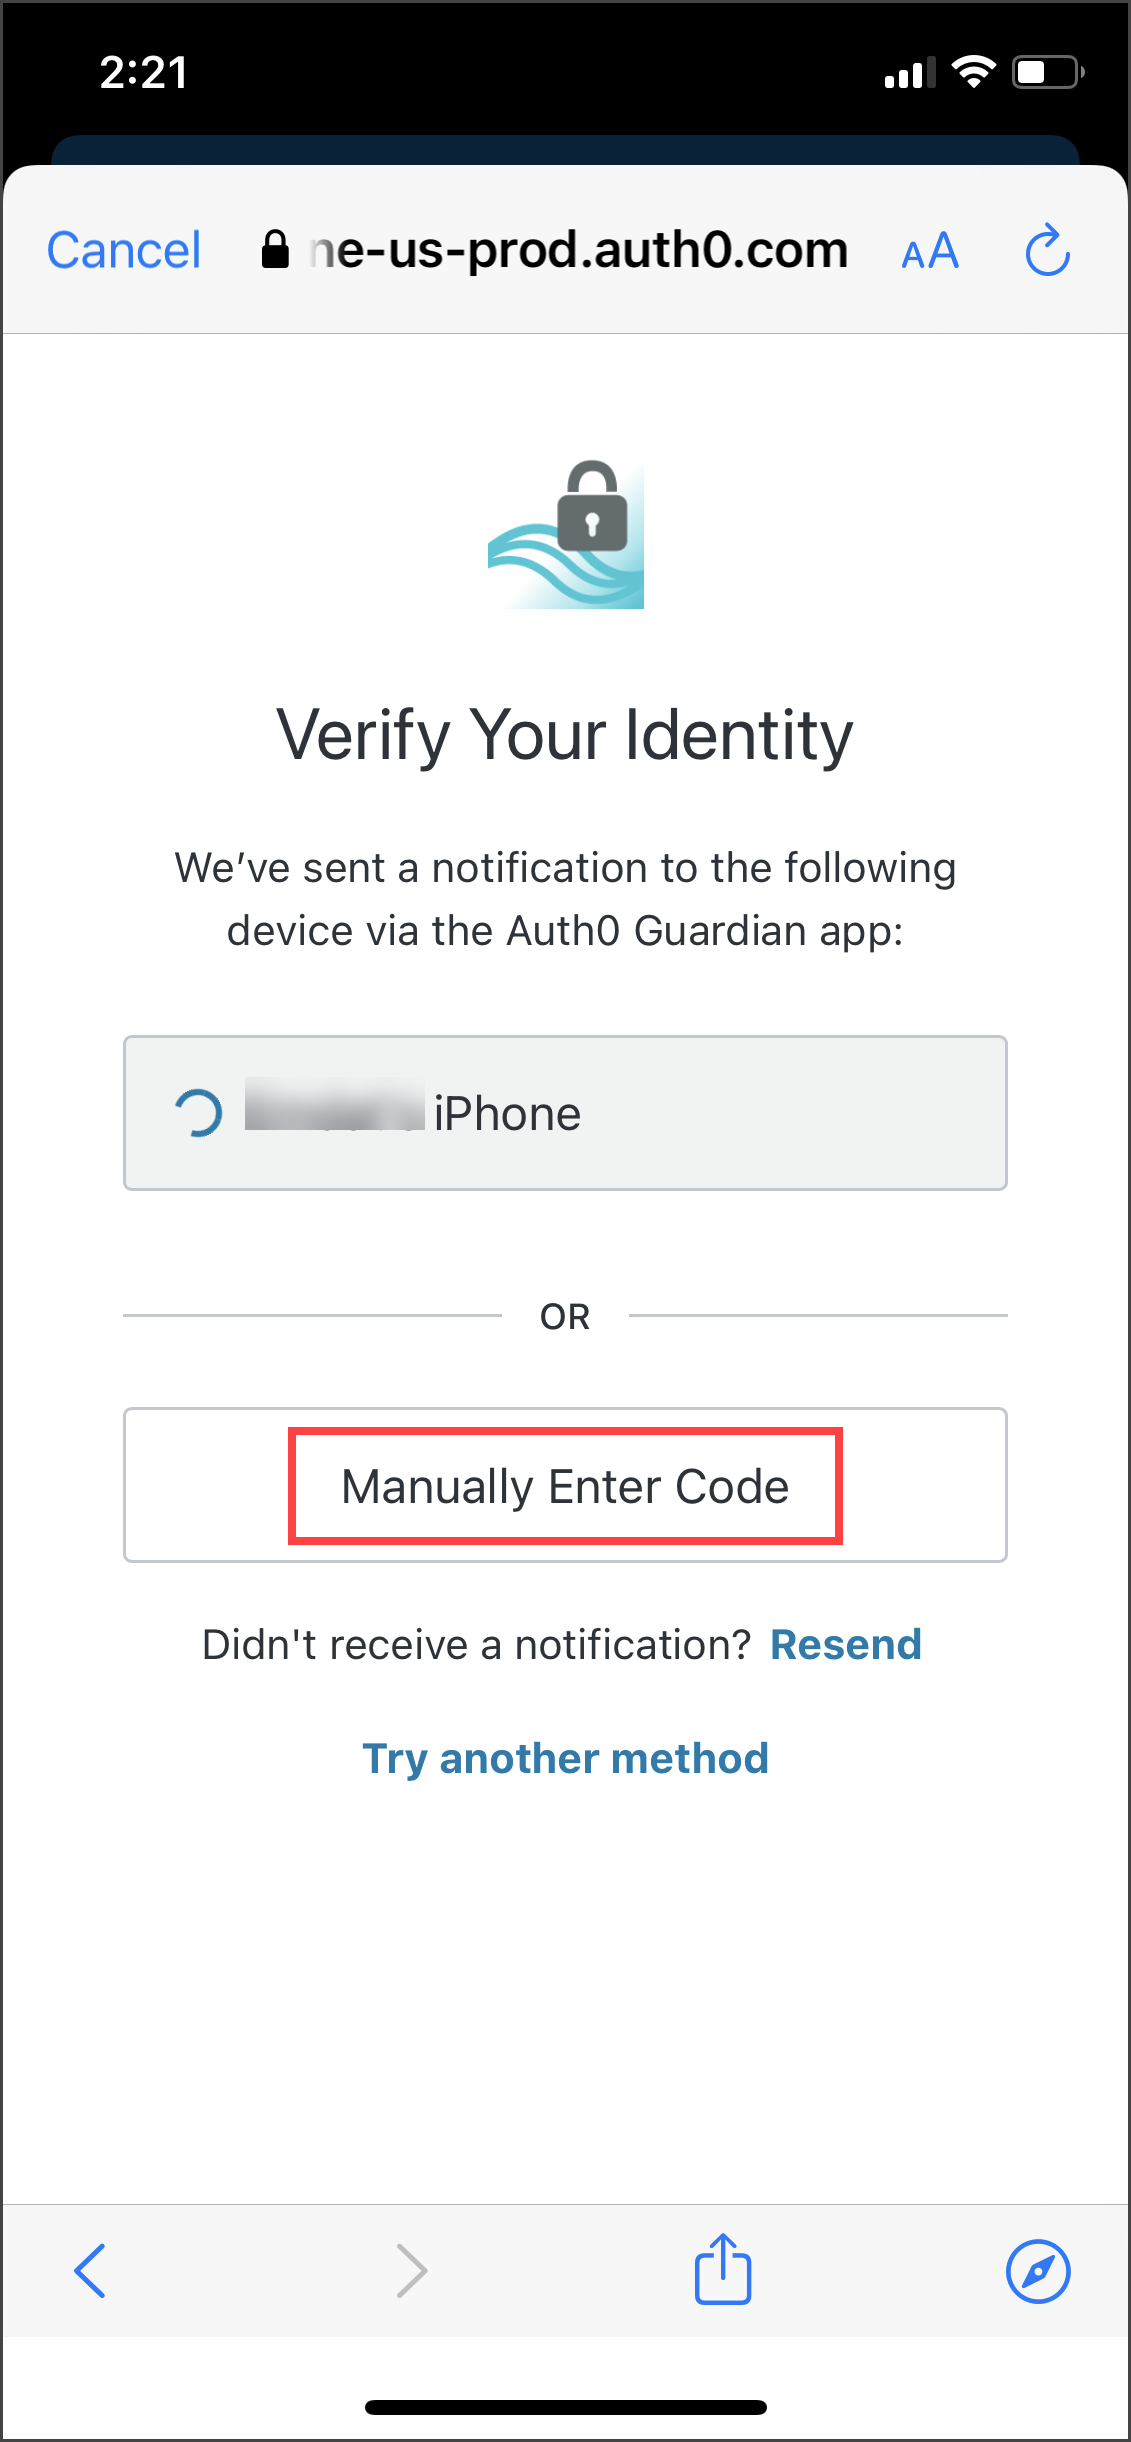 If you do not receive the notification, you can choose to have the notification resent, or you can manually enter the code at the bottom of the Guardian app (see below).
To manually enter the code, choose Manually Enter Code on the 'Verify Your Identity' screen.
Open the Guardian app and choose the token for your user. A one-time code will appear at the bottom of the Guardian app. Enter this code on the 'Verify Your Identity' screen.
Click Continue. After successful authentication, you will automatically be logged into your eSOne app.
Note
If you cannot log in with MFA after having done so previously, please contact your admin to have it reset.
Email Verification
After logging in, the eSOne Mobile application checks for a valid and verified email address (if your client requires this).
Valid Email Check: If you have not entered an email address, you will be prompted to add one. You can skip this step, but you will be prompted again on your next login.
Email verification: Once an email address is added, an email is sent to your address to verify it.
Click the link in the email, and your address will be verified.
When accessing the eSOne Mobile application without a verified email address, you will receive a notice, but will still be able to use the application.
Editing email address: To edit the user email address, go to Contact Information in the Settings tab. If the email address has previously been verified and is then edited, you will be prompted to verify the updated email address.
Resetting your Password
If you have forgotten your password, you can reset it using the steps below.
 2. On the 'Forgot Password' screen, click either the Send Email button or Have reset code? link (if you already have a reset code).
If you did not enter your Username and Client Code on the login screen, you will need to enter them here.
 3. If you choose Send Email, you must have a verified email address (see Email Verification). If so, an email will be sent to you with instructions and a link for resetting your password. Once you click the link, the 'Reset Password' screen appears with the reset code filled in. Enter the remaining information, then click the Reset Password button.
If you choose Have reset code?, the 'Reset Password' screen appears without the reset code filled in. Enter the code and remaining information, then click the Reset Password button.
If you selected Send Email, you can also copy the code from the email and paste it on this screen.
Using eSOne Mobile
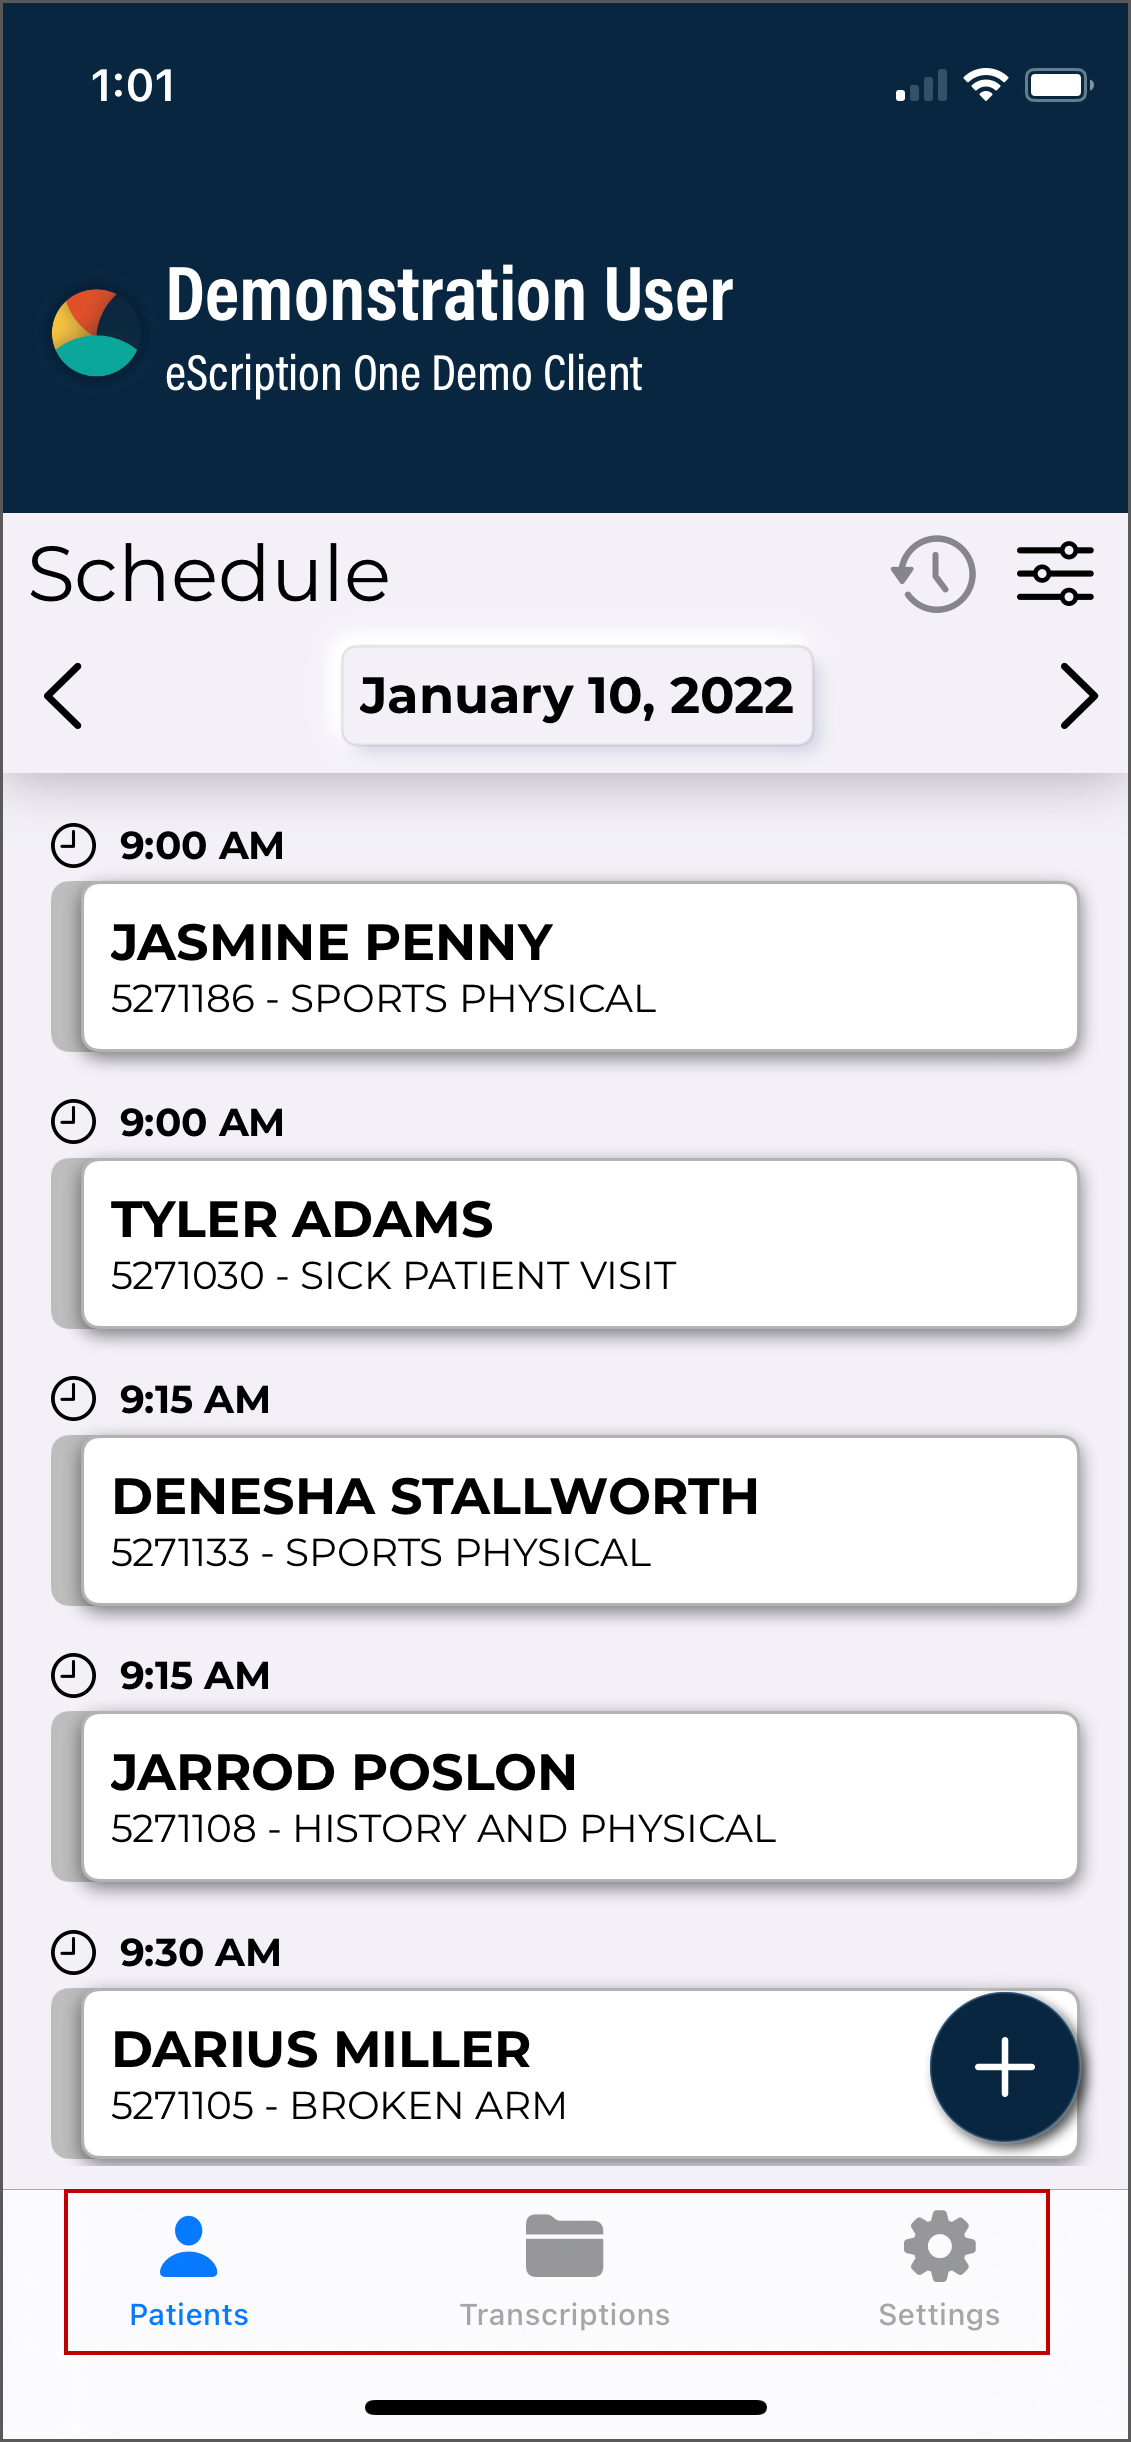
The Mobile iOS application screens have three tabs at the bottom: Patients, My Notes, and Settings. Use these to navigate between the main screens of the app. The active tab is indicated with blue coloring. The eSOne Mobile application displays the Patients tab after your initial login, or the last screen you visited in your previous session.
Patients
![]()
The Patients tab is where users can record new dictations and view patient appointments and/or inpatient encounters.
My Notes
![]()
The My Notes tab is where users can view, approve/sign, and edit notes.
Settings
![]()
The Settings tab is where users can configure default settings for appointments, document types, locations, and other application features. Users can also add or switch to linked accounts from this tab, as well as log out of the mobile app.
Logging Out
![]()
For security reasons, we recommend logging out of the mobile app when it is not in use. To do so, navigate to the Settings tab then tap the Logout icon in the upper right corner.
Patient Confidentiality
To ensure patient confidentiality, app content will be hidden when switching between apps.
Patients Tab
Use the Patients tab to view the daily appointment schedule, open appointment details, and record dictations.
By default, this tab is named Patients. The account administrator can change this label to something more appropriate to the client.
The eSOne mobile app supports outpatient and inpatient schedules. By default, the app opens to schedule (outpatient) mode. The mode can be changed in Filters settings. This section of the user guide will focus on the outpatient schedule mode. See Inpatient Workflow for more information about inpatient mode.
Filter and Sort the Schedule
Filters
To change the schedule mode and filter the schedule, tap ![]() to open the Filters page. Tap the desired mode and/or filter and tap Done at the top of the Filters page to save changes.
to open the Filters page. Tap the desired mode and/or filter and tap Done at the top of the Filters page to save changes.
Mode
If the client supports both inpatient and outpatient workflows, users can switch between them by tapping the desired mode. For more information regarding the inpatient workflow within the mobile app, please see Inpatient Workflow. The following information in this section assumes an outpatient workflow is being used.
Resources
Schedule resources are used to assign patient appointments or encounters to specific clinicians or groups of clinicians. If a clinician belongs to multiple resource groups they can filter their appointment list to only display the selected resources.
Dictation Status
Users can minimize the number of appointments displayed on the schedule by filtering the list based on the dictation status. Statuses available for filtering are:
-
Dictation from another source - appointments with a dictation uploaded from a different mobile device or dictation source (InSync, InTouch, ShadowLink, etc.), or uploaded from this device but no longer stored on this device. Dictations uploaded from other devices or apps cannot be played from this device.
-
Dictation uploading - appointments with an uploading dictation from this device.
-
Dictation completed - appointments with a completed dictation from this device.
-
Hidden - appointments that have been marked as hidden.
On-hold dictations cannot be filtered from the schedule.
Sorting
One sort option can be applied to reorder the schedule based on user preference. The schedule can be sorted ascending (oldest to newest dates or A to Z) or descending (newest to oldest or Z to A). Tap the desired sort order (ascending or descending), then tap the sort option to sort the schedule based on:
-
Appointment Time - appointments will be ordered based on the time of the appointment (earliest to latest), then by dictation status in the following order: No Dictation, On-hold, Uploading, Completed, Dictation from another device).
-
Patient Full Name - appointments will be ordered alphabetically by the patients' full names (if the first names match then the middle initial and/or last names will be used to further order them).
-
Patient Last Name - appointments will be ordered alphabetically by the patients' last names, but will still appear in "First name Last name" format in the schedule list.
-
Patient First Name - appointments will be ordered alphabetically by the patients' first names.
-
Dictation Status - When sorted ascending, patients will be sorted first by dictation status (Dictation on Hold, Upload Complete, Dictation Not on Device) then by patient name.
Schedule
Outpatient appointments appear on the schedule based on the schedule resource code assigned to the user and appointment records. Appointments will only appear in the schedule if the client is providing eSOne a data feed. If a data feed is not provided, users can create new dictations and optionally input a patient identifier.
The schedule displays the appointment time above each patient appointment. Each appointment includes the patient name, patient ID, and a multi-use text field, the contents of which are dependent on client setup, but often include the appointment reason or provider name. An additional custom encounter field can be added from the Settings tab.
The schedule loads the current date or the last date viewed if the prior session was not on the current date. To view the prior or next day’s schedule, press the left or right arrow buttons.
To navigate to a specific date, tap the date in the center of the screen to open the calendar. Choose the desired date in the displayed month, or tap the Month Year text to change the selected month and/or year. Tap the blue Month Year text again to select the date from the calendar and return to the schedule. To jump to today's date, tap the date to open the calendar view, then tap Today.
Swipe the schedule down to refresh the list. Note that this only works when the view is already scrolled to the top.
Tap an appointment to open the Record screen and view patient and appointment details as well as recording controls.
Dictation Status
An appointment may have one of several status icons and color coding to indicate the dictation status for that appointment.
![]()
The appointment has a dictation that has been started but not yet uploaded.
![]()
The appointment has a dictation that is currently uploading.
![]()
The appointment has a recorded dictation and has been successfully uploaded.
![]()
The appointment has been recorded and uploaded from another device.
![]()
The appointment has been hidden from the appointment list.
Note
An appointment without a dictation will not have an icon next to it.
Incomplete Dictations
A reminder will be presented when navigating to the Patients tab if there is at least one started dictation 3 or more days old (based on appointment date) that has not yet been uploaded. This reminder will only be presented once per day.
Tap Ignore to continue to the schedule as normal, or tap Show to open the schedule to the date of the oldest started dictation.
Tap ![]() (Earliest Started Dictation) at the top of the schedule list to open the calendar to the earliest date with a started dictation that has not yet been uploaded.
(Earliest Started Dictation) at the top of the schedule list to open the calendar to the earliest date with a started dictation that has not yet been uploaded.
Dictating from the Schedule and Search
Selecting an appointment from the schedule opens the Record screen with all available patient and appointment details and dictations controls. If the desired patient cannot be easily found in the schedule list or does not appear on the schedule, a patient or appointment search can be performed.
Patient and Appointment Search
Tap the Search button to search for an appointment already on the schedule list or to add the patient/appointment to the schedule that may not have previously appeared.
The Search dialog will open and prompt for Patient ID, Patient Name, and/or Account Number. The search field labels are customizable per client and may not match what is shown here. Patient and appointment records can only be searched if eSOne receives a data feed from the client.
Enter one or more search criteria. The Patient ID and Account Number must be full matches and the Patient Name can be a partial match of the first or last name. Tap the search key in the on-screen keyboard or ![]() to submit the search.
to submit the search.
Search results will appear in two tabs: Appointments and Patients. Tap the desired patient or appointment to add the patient/appointment to the schedule and open the record screen.
Choosing an appointment from the Appointments tab will place it on the schedule at the designated date and time, including all associated appointment details.
Choosing a patient from the Patients tab will add that patient to the schedule, setting the appointment date to the current date and time. The appointment date and time can be changed if needed.
To return to the schedule without selecting a search result, tap the < icon.
Dictating Without an Appointment
To create a new dictation without selecting a scheduled appointment, tap the Patients tab then the Add button ![]() . Depending on the client setup, the document type selected can change the demographic fields presented and also determine which patient identifier field is editable: Patient ID, Account Number, or Order Number. Tap the patient identifier field to enter data. If the patient identifier matches with an existing patient the name, ID, gender, age, and DOB will populate in the dark blue header area.
. Depending on the client setup, the document type selected can change the demographic fields presented and also determine which patient identifier field is editable: Patient ID, Account Number, or Order Number. Tap the patient identifier field to enter data. If the patient identifier matches with an existing patient the name, ID, gender, age, and DOB will populate in the dark blue header area.
The appointment date will populate with the date that was loaded in the schedule, along with the current time stamp. Editable fields appear with a blue border and include the patient identifier, Document Type, Location, and Appointment Date and Time fields. Tap the Document Type or Location field to open a selection list. Tap the Appointment Date field to open the date picker. The Templates tab is available for reference. The History tab will populate with any prior transcriptions related to that patient.
Note
The process to create a new dictation for an inpatient encounter is different. Please see Inpatient Workflow for more information.
The Record Screen
The Record screen can be accessed from the Patients tab by selecting a patient/appointment or pressing the Add button.
The Record screen opens to the Template sub-tab by default, unless changed in Settings tab > Record Screen. If an appointment that already has an uploaded dictation from the same device is opened, the Record screen will open to the History sub-tab.
The top header section of the Record screen contains basic patient information, including the patient name, Patient ID, gender, birth date, and age. When a new dictation is created and a patient identifier has not been entered, the header information will display "New dictation" instead of a patient name. The screen has three tabs: Templates, Information, and History.
Templates Tab
The Templates tab displays Document and Dictation templates to be referenced during dictation. To view the full text of a template, tap the arrow to expand the list of available templates then tap the desired template. A document type must be selected in the Info tab to view the document template.
Info Tab
The Info tab contains information about the patient and appointment, divided into five sections.
Document Type - Allows user to edit the document type associated with this dictation. Tap on the field and make a selection from the provided list to add or change the document type. This field is highlighted in yellow when a selection has not been made and is required prior to uploading the dictation.
Location - Allows user to edit the location associated with this dictation. The facility scheduling software or EMR can also set the location for an appointment. This location will appear by default but can be changed. Tap on the field and make a selection from the provided list to add or change the location. This field is highlighted in yellow when a selection has not been made and is required prior to uploading the dictation.
Only the document type and location can be edited for dictations created from an appointment in the appointment list.
Tip
Use the Settings tab to set default and favorite document types and locations. See Settings Tab for details.
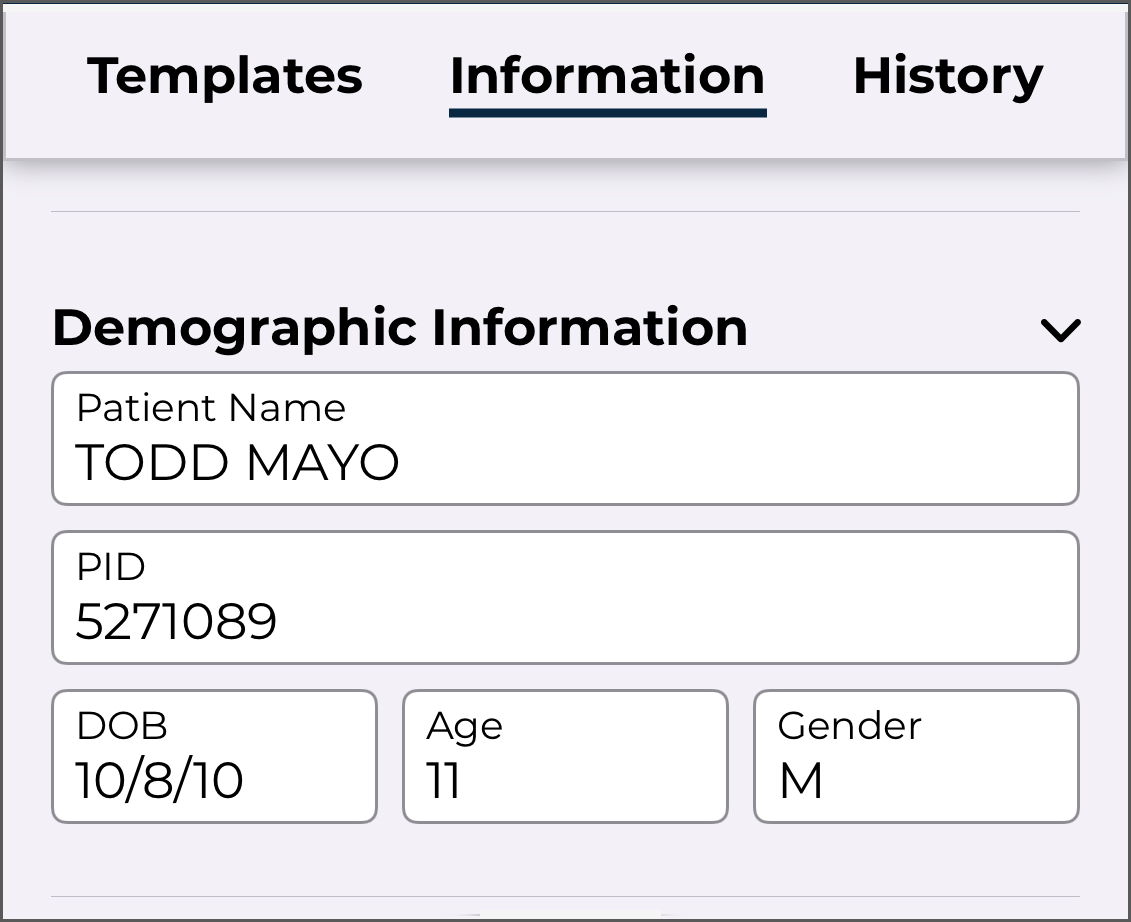 Demographic Information - Displays patient information. The user cannot edit these fields for an existing appointment.
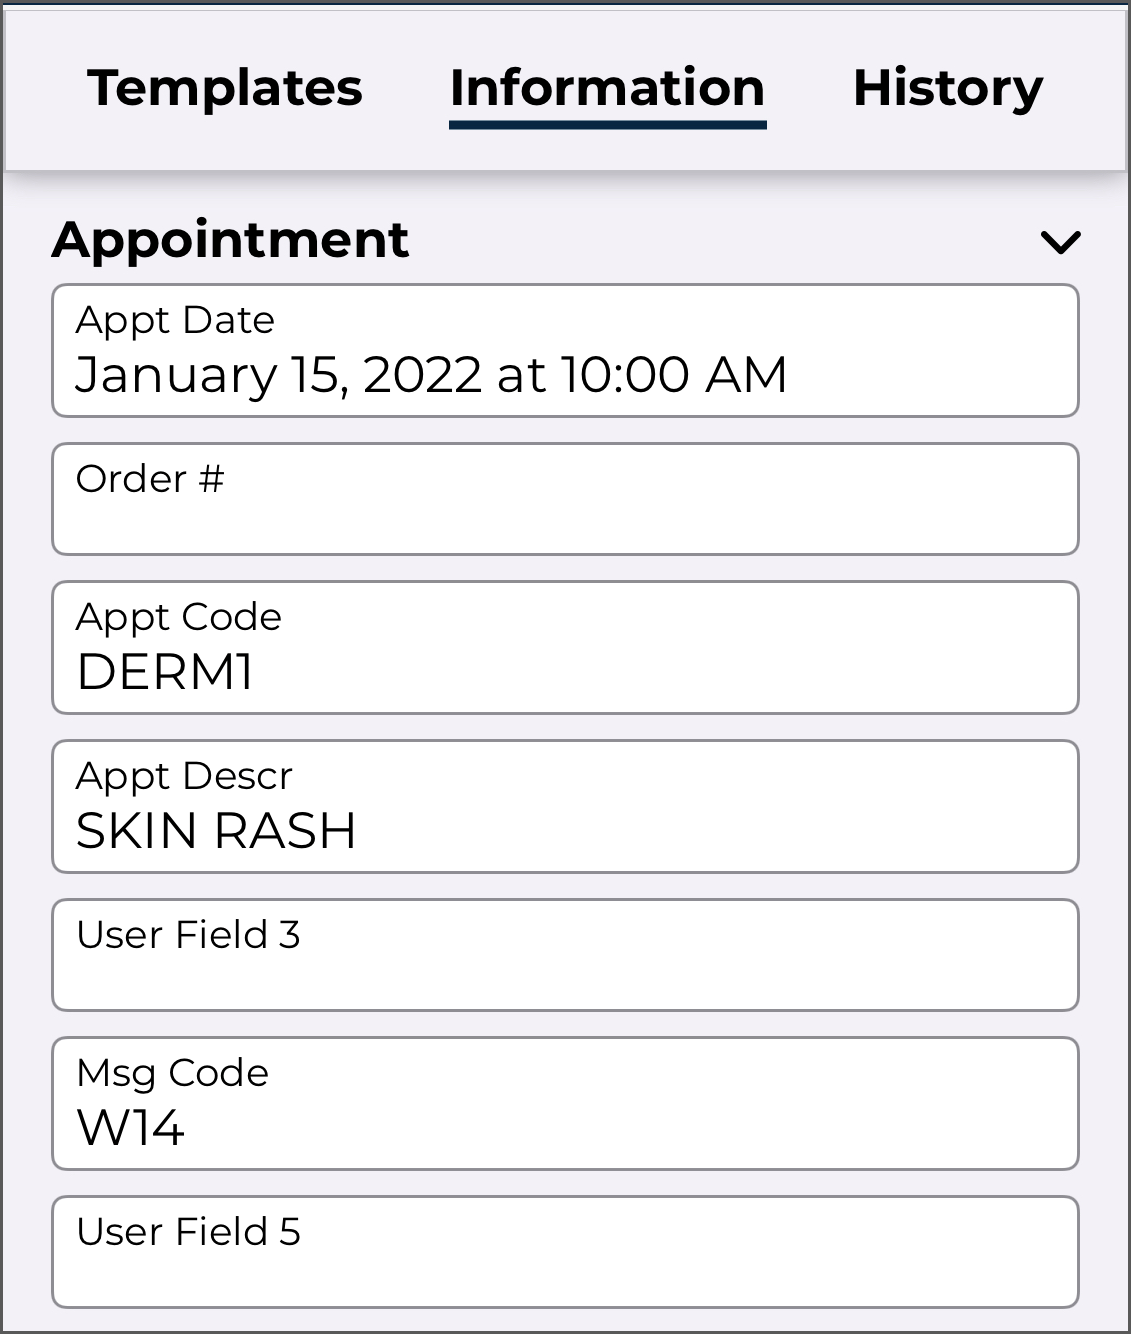 Appointment - Displays any additional information about this appointment. The user can make changes to Appointment Date and Time for new dictations, but not for appointments selected in the Patients tab.
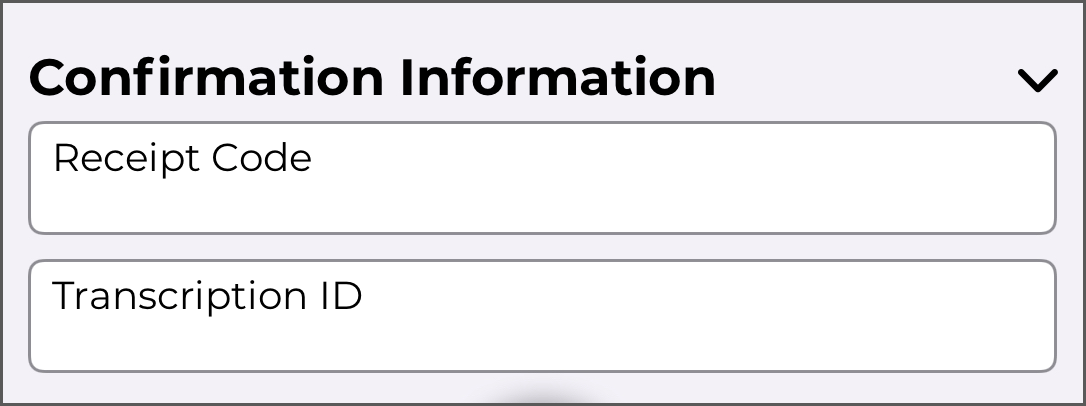 Confirmation Information - Displays the Receipt Code and Transcription ID for this dictation. If more than one dictation has been uploaded for this appointment on this device, the most recent confirmation information will be displayed. eScription One Mobile fills in the Receipt Code and TID fields after uploading the dictation; these fields cannot be changed by the user.
Orders Tab
For document types that support the orders workflow, orders can be viewed and selected prior to dictation upload. This functionality ensures orders are associated correctly during dictation and reduces the need to attach orders after upload.
The Orders tab displays a list of available orders with the following information for each order:
- Order Number
- Date Observed
- Order Status
- Order Description
- Ordering Physician
Tapping an order opens additional order details for review:
- Item Code
- Account Number
- Order Status
The orders list and details panel have a checkbox. Tapping the checkbox selects or deselects the order for attachment to the dictation. Orders checked (selected) at the time of upload will be associated with the dictation.
Orders may be preselected based on the method used to create the dictation. See Preselected Orders for more information.
Preselected orders can be deselected, and other available orders can be selected as needed prior to upload. Order selections remain editable until the note is uploaded.
Selecting Multiple Orders
Multiple orders can be selected for a single note. The same selection rules apply as in InQuiry:
- Only orders associated with the same appointment can be selected together, or
- Orders that are not linked to an appointment can be selected together
Orders associated with different appointments cannot be selected on the same dictation. If an order from a different appointment is selected, any previously selected orders will be deselected automatically.
Preselected Orders
When dictating on an appointment from the schedule, orders linked to that appointment will be preselected automatically.
Orders can also be accessed when working outside the schedule, but the available orders and pre-selection will be determined by the method used to create the dictation:
- A patient is selected from the Patients sub-tab after performing a search.
- All orders linked to the patient will be listed.
- No orders will be preselected.
- An appointment is selected from the Appointments sub-tab after performing a search.
- All orders linked to the same appointment or not linked to an appointment will be listed.
- Orders linked to the selected appointment will be preselected.
- An ad-hoc dictation is created using the Add button.
- All orders linked to the patient will be listed.
- The orders preselected will depend on the patient identifier entered (Patient ID, Account Number, or Order Number, depending on document type configuration).
- Patient ID - No orders will be preselected.
- Account Number - All orders linked to the appointment associated with the Account Number will be preselected.
- Order Number - The order matching the entered Order Number will be preselected.
Finalize the order selection by checking the boxes to attach orders or unchecking them to exclude orders.
Viewing Orders After Upload
After upload, the Orders tab only displays the orders that were selected at the time of upload. Orders cannot be modified after upload.
History Tab
Tap the History tab to display existing transcriptions that have the same Patient ID as the current patient. These transcriptions are available for reference while dictating, but cannot be edited from this screen.
Prior transcriptions are identified by document type, dictating clinician, and appointment date. Tap the desired appointment to view details, which are broken into two tabs: Information and Transcription.
The Information tab includes the following sections and corresponding data.
Please note that eSOne’s Patient Display functionality has been extended within the mobile app to the patient history tab when recording a dictation. Patient Displays allow administrators to customize which fields are displayed based on a transcription’s selected document type.
If configured, users will see different displays when viewing the information section on the patient history tab when recording a dictation.
If a document type includes read-only fields, these fields will appear on the screen in a light gray color and cannot be edited. The app will also check for required fields when saving or completing transcriptions. If one or more required fields is not filled out, a message appears indicating which ones. Names of required fields appear in red text.
At this time, Patient Displays only support the required fields setting for user fields.
Note
Please be aware that certain fields will always appear regardless of the document type, and some newer fields are not currently available for the mobile app and will not display.
Default fields:
-
Document Type - Displays the document type assigned to the transcription.
-
Location - Displays the location assigned to the transcription.
-
Demographic Information - Displays patient information.
-
Appointment - Displays appointment details.
-
Dictation Information - Displays Transcription ID, Date Dictated, and the dictating Clinician.
-
Comments - Displays comments and comment tags on the transcription, if the user is granted permission to view comments.
-
Signatures - Lists signatures on the transcription and date signed (no date appears if the transcription has not yet been signed).
-
Associates - Lists all copied associates on the transcription.
The Transcription tab displays the transcription text.
To return to the list of prior transcriptions, tap the back arrow in the upper left corner of the screen.
Recording Controls
The recording and audio controls appear at the bottom of the Record screen of all three tabs. There is a progress bar and buttons for Record, Play, Rewind, and Fast Forward. Tap the Record button (red microphone) to begin recording; the record button will then become a Pause button. Tap the Pause button to pause recording; recording can be resumed by tapping the record button again.
The active recording device (microphone) is displayed at the bottom of the screen. If multiple Bluetooth devices are connected, the recording device can be changed. Tap the device name to open the list, then tap the desired device. The selected device will be remembered as the preferred device and will be used for subsequent dictations, if still connected.
When a Bluetooth device is connected or the connection is lost during dictation, recording will automatically pause and a notification will be displayed. Close the notification, verify the desired device is selected, then press Record to resume dictating.
Tap the Play button to play back the dictation. The selected recording device will also be used for playback if the device supports audio output. Use the Rewind and Fast Forward buttons to navigate within the location of the dictation in increments of 5 seconds per button press. Alternatively, the dictation slider can be used to navigate to the desired dictation location.
Underneath the Record button, the Progress Bar shows which part of the dictation is currently playing or being recorded. The slider can be dragged to play different parts of the dictation or to insert or overwrite the dictation where desired.
The STAT button is to the left of the record button. STAT can be toggled on and off at any time prior to uploading the dictation. When a red circle with an exclamation mark appears next to the word 'Stat', the dictation is marked STAT.
Note
Marking a dictation as STAT may increase the price for the transcription.
The current recording mode is displayed to the right of the Record button. Tapping the record mode opens a menu and allows the mode to be changed to one of the following options:
- Append (the default mode) - Adds new dictation at the end of the existing dictation regardless of where the dictation playback is.
- Overwrite - Allows the user to replace dictation from the selected playback position with new dictation.
- Insert - Adds additional dictation by inserting new dictation at the playback position.
Recording must be paused to change the record mode. The last used recording mode will automatically apply to the following dictation.
The Voice Detection bar replaces the progress bar while recording, showing the level of sound detected. The higher the volume of the dictation received, the further the colors progress from red to green. The Silence Detection option can be enabled in the Settings tab; recording will automatically be paused if continuous silence is detected for the set number of seconds while recording.
The ![]() Upload button submits a dictation for transcription. Uploaded dictations cannot be edited in the eScription One mobile app. This button only appears after a dictation has been started.
Upload button submits a dictation for transcription. Uploaded dictations cannot be edited in the eScription One mobile app. This button only appears after a dictation has been started.
The back arrow, located in the top left corner of the record screen, allows the user to Save the dictation and return to the Patients tab without uploading the dictation. Saved dictations can be reopened, changed, and uploaded. If the user leaves dictations on the device for longer than three days without uploading, eScription One Mobile displays a reminder.
The Menu button also appears in the upper right corner after recording has started. Tapping the Menu button opens a menu with the following option:
Delete Audio - Deletes the dictation file. eScription One Mobile displays a warning screen to confirm removal of the dictation. An appointment from an uploaded schedule will remain on the Patients tab after the dictation has been automatically removed. Deleting audio on a new dictation removes the appointment from the schedule.
If a dictation has not been started, the option Hide Appointment appears in the menu. This option removes the appointment from the Patients tab. To view the appointment again, add Hidden Appointments to the status filter in the Patients tab (the appointment will be marked with the hidden appointment icon). Opening the hidden appointment and tapping the menu button will give the option to unhide the appointment.
Note
The options available from the Menu button change depending on the status of the dictation.
New Dictation: If it is necessary to create an additional transcription for an appointment, return to the Patients tab and select the appointment.
Press the Menu button and select 'New Dictation'. Select Document Type and Location, then record normally.
Press the Upload button and eScription One Mobile will prompt for the dictation type:
-
Append - Attach this transcription to the end of the prior transcription.
-
Prepend - Attach the new transcription to the beginning of the prior transcription.
-
Upload as New Dictation - Upload this dictation as a standalone transcription. This transcription will not be attached to any prior transcriptions.
Uploading Dictations
Once a dictation is recorded, it must be uploaded to be processed. To upload a dictation, ensure the device has a stable internet or Wi-Fi connection and tap the ![]() Upload button.
Upload button.
If the network or Wi-Fi connection is lost during the upload process, the upload will pause automatically. Once the connection is restored, the upload will resume from where it left off, ensuring the dictation is successfully delivered without requiring any manual intervention.
For best results, it is recommended to upload dictations when connected to a reliable Wi-Fi network to prevent interruptions and ensure timely processing.
My Notes Tab
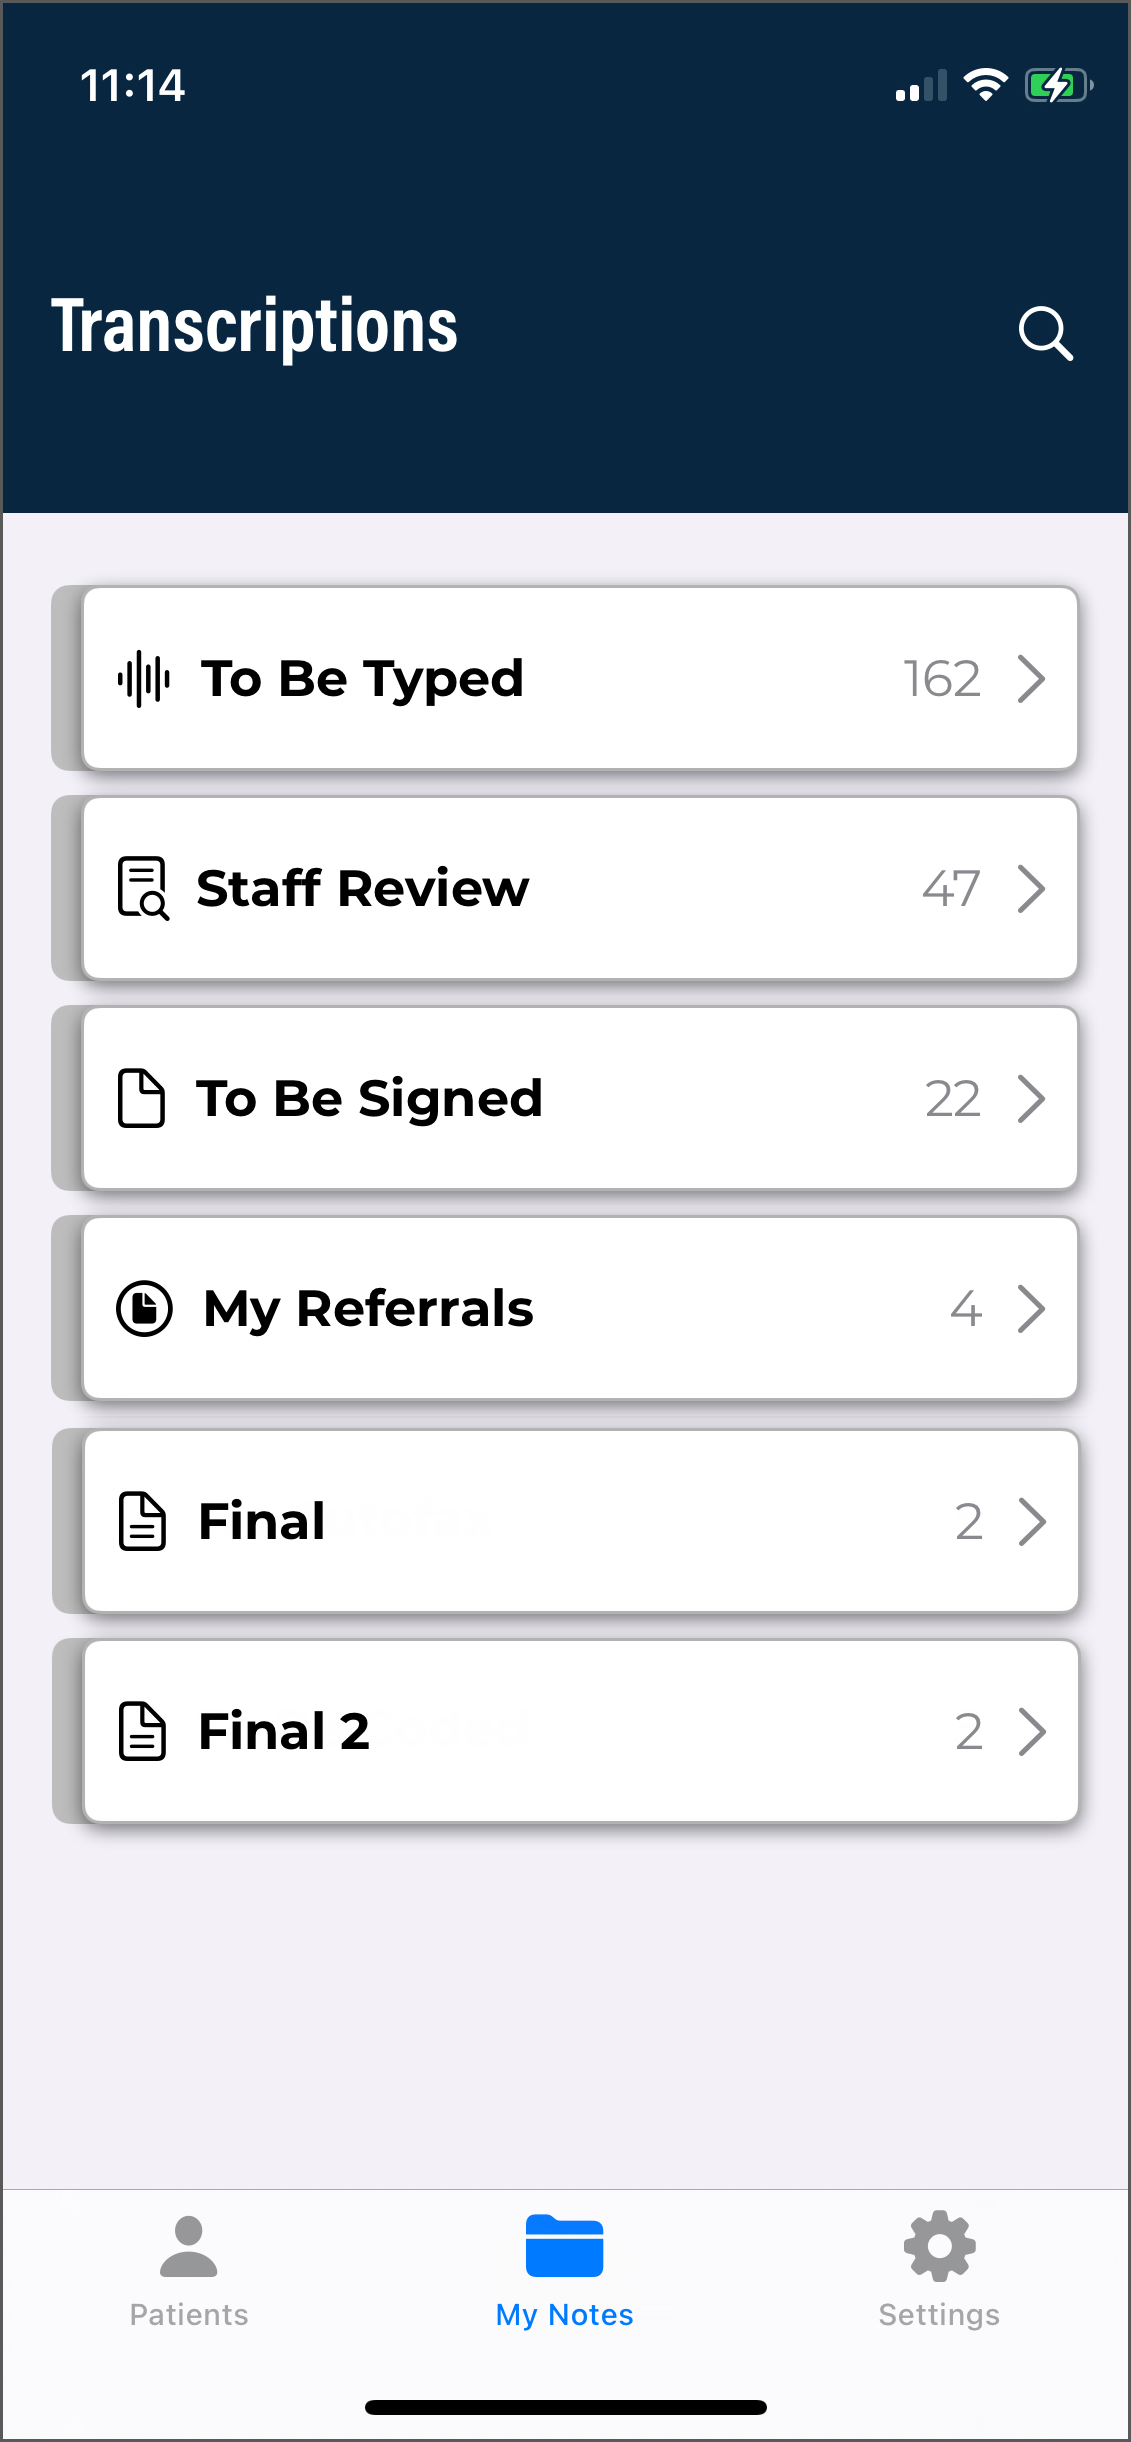 My Notes tab provides a view similar to the workflow summary in InQuiry. Use this tab to review, complete, or edit notes.
The main notes screen gives an overview of how many notes appear in each workflow folder. The workflow folders display the label name assigned by your medical facility. The first folder, here called "To Be Typed", contains dictations that are at the note company, but have not yet been delivered as a note.
Use the Search button in the upper right corner of the main notes screen to search for notes in any workflow folder, including notes that have completed the workflow. Tap the back arrow to return to the main notes screen. See Note Search below for more details on performing a note search.
The Folder View
 Tap on any of the folders on the main notes screen to show a list of the notes that are currently in that stage of the workflow. The workflow folder name is displayed at the top of the screen. To return to the summary list of all workflow folders, tap on the back arrow or name of the current folder.
When a workflow folder is opened, the patient name, patient ID, appointment date and time, and dictating clinician’s name are shown for each note in that folder. An additional user field can be added to the folder view from the Settings Tab. If a patient has not been added to a note, the patient name field will display as "No Patient"; if a patient ID has been entered without a linked patient name, the patient name will display as "No Patient Name".
The list of notes can be sorted by Date Dictated, Patient Name, or Appointment Date by pressing the Filter button and making a selection.
Comments and Comment Tags
Comments and Comment Tags are messages that can be placed on a note. Comments are free-form text, whereas Comment Tags are predefined notes. Notes with Comments and/or Comment Tags will display an icon on the right side of the note.
The following icons are used to indicate which type of comment or tag is on the note:
![]() The note has Comments and one Comment Tag.
The note has Comments and one Comment Tag.
![]() The note has one Comment Tag and no Comments.
The note has one Comment Tag and no Comments.
![]() The note has multiple Comment Tags and no Comments.
The note has multiple Comment Tags and no Comments.
![]() The note has multiple Comment Tags and Comments.
The note has multiple Comment Tags and Comments.
If the medical facility has assigned colors to comment tags, those colors appear on the left tab of the note, as well as in the comment icon. Instead of reading the tags, users can simply look at these visual cues and know which tags have been assigned. If multiple comment tags are on the note, the note and icon will be multi-colored.
Comments and Comment Tags cannot be read from the folder view. Open the note viewer to read the comments/tags. Note Comments and Comment Tags can be read in the mobile app, but not edited. Please use InQuiry if edits are needed on those items.
Completing Notes from the Folder View
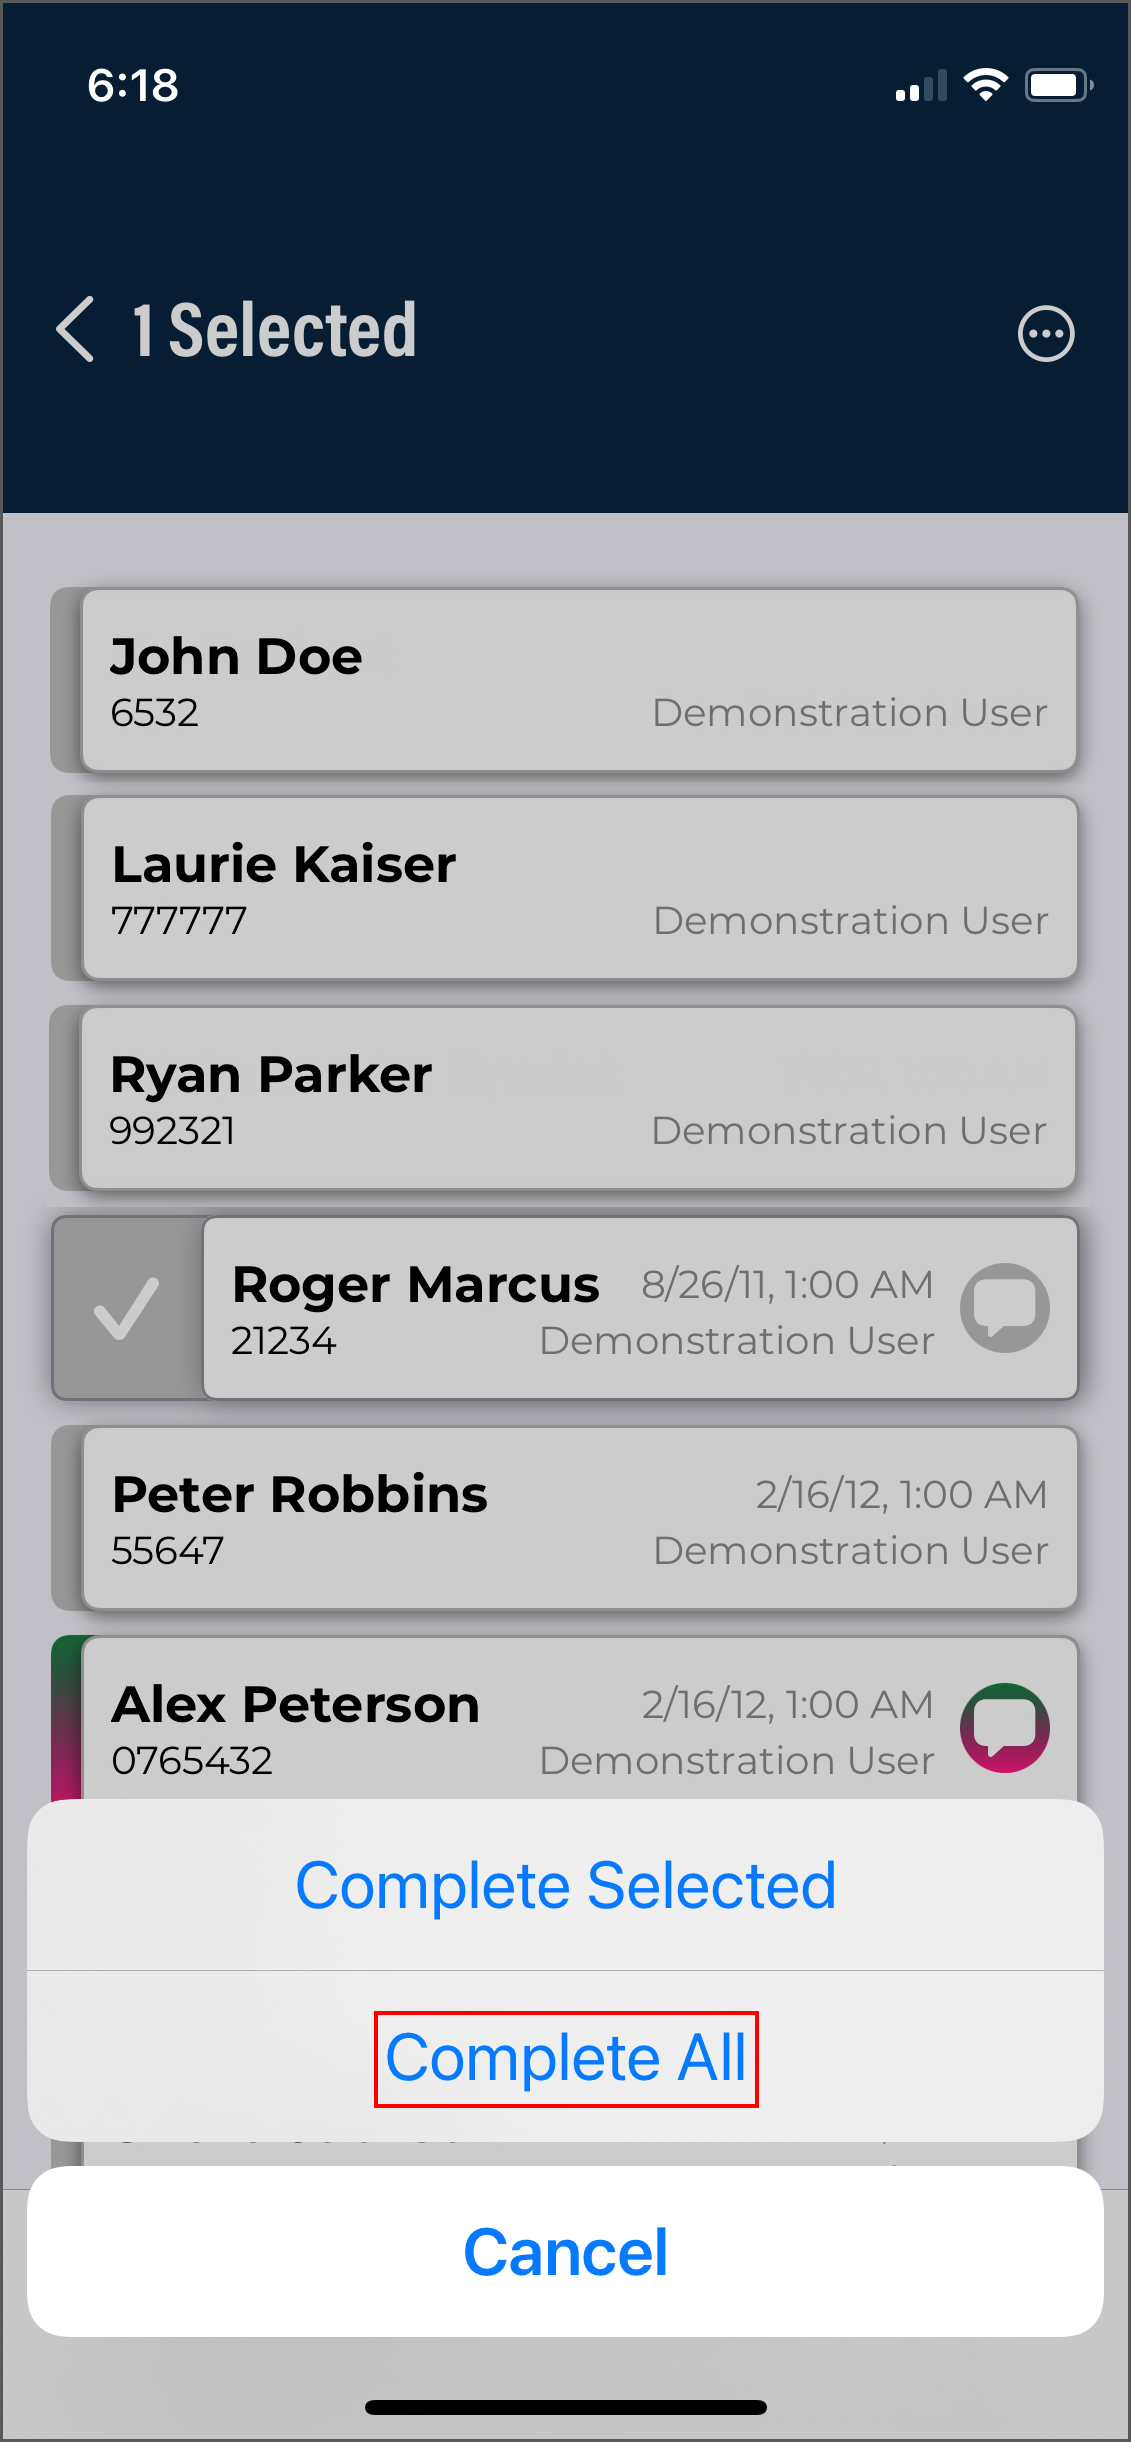 Completing a note from a workflow folder progresses it to the next stage of the workflow. When a note is completed from the Preliminary folder it is considered signed. Notes being completed from the final stage of the workflow will be saved in the repository.
Notes can be completed as a group or individually from the folder view to advance to the next stage of the workflow (if allowed by the medical facility).
To complete all notes in the folder, long-press a note until the Menu button appears in the upper right corner. Tap the Menu button then select Complete All. At least one note must be selected for the Menu button to appear; when Complete All is tapped, all notes will be completed, not just the selected notes.
If a note search is performed prior to using Complete All, only the notes in the search results will be completed from the workflow folder. Other jobs that are in the folder but did not appear in the search results will remain in the workflow folder.
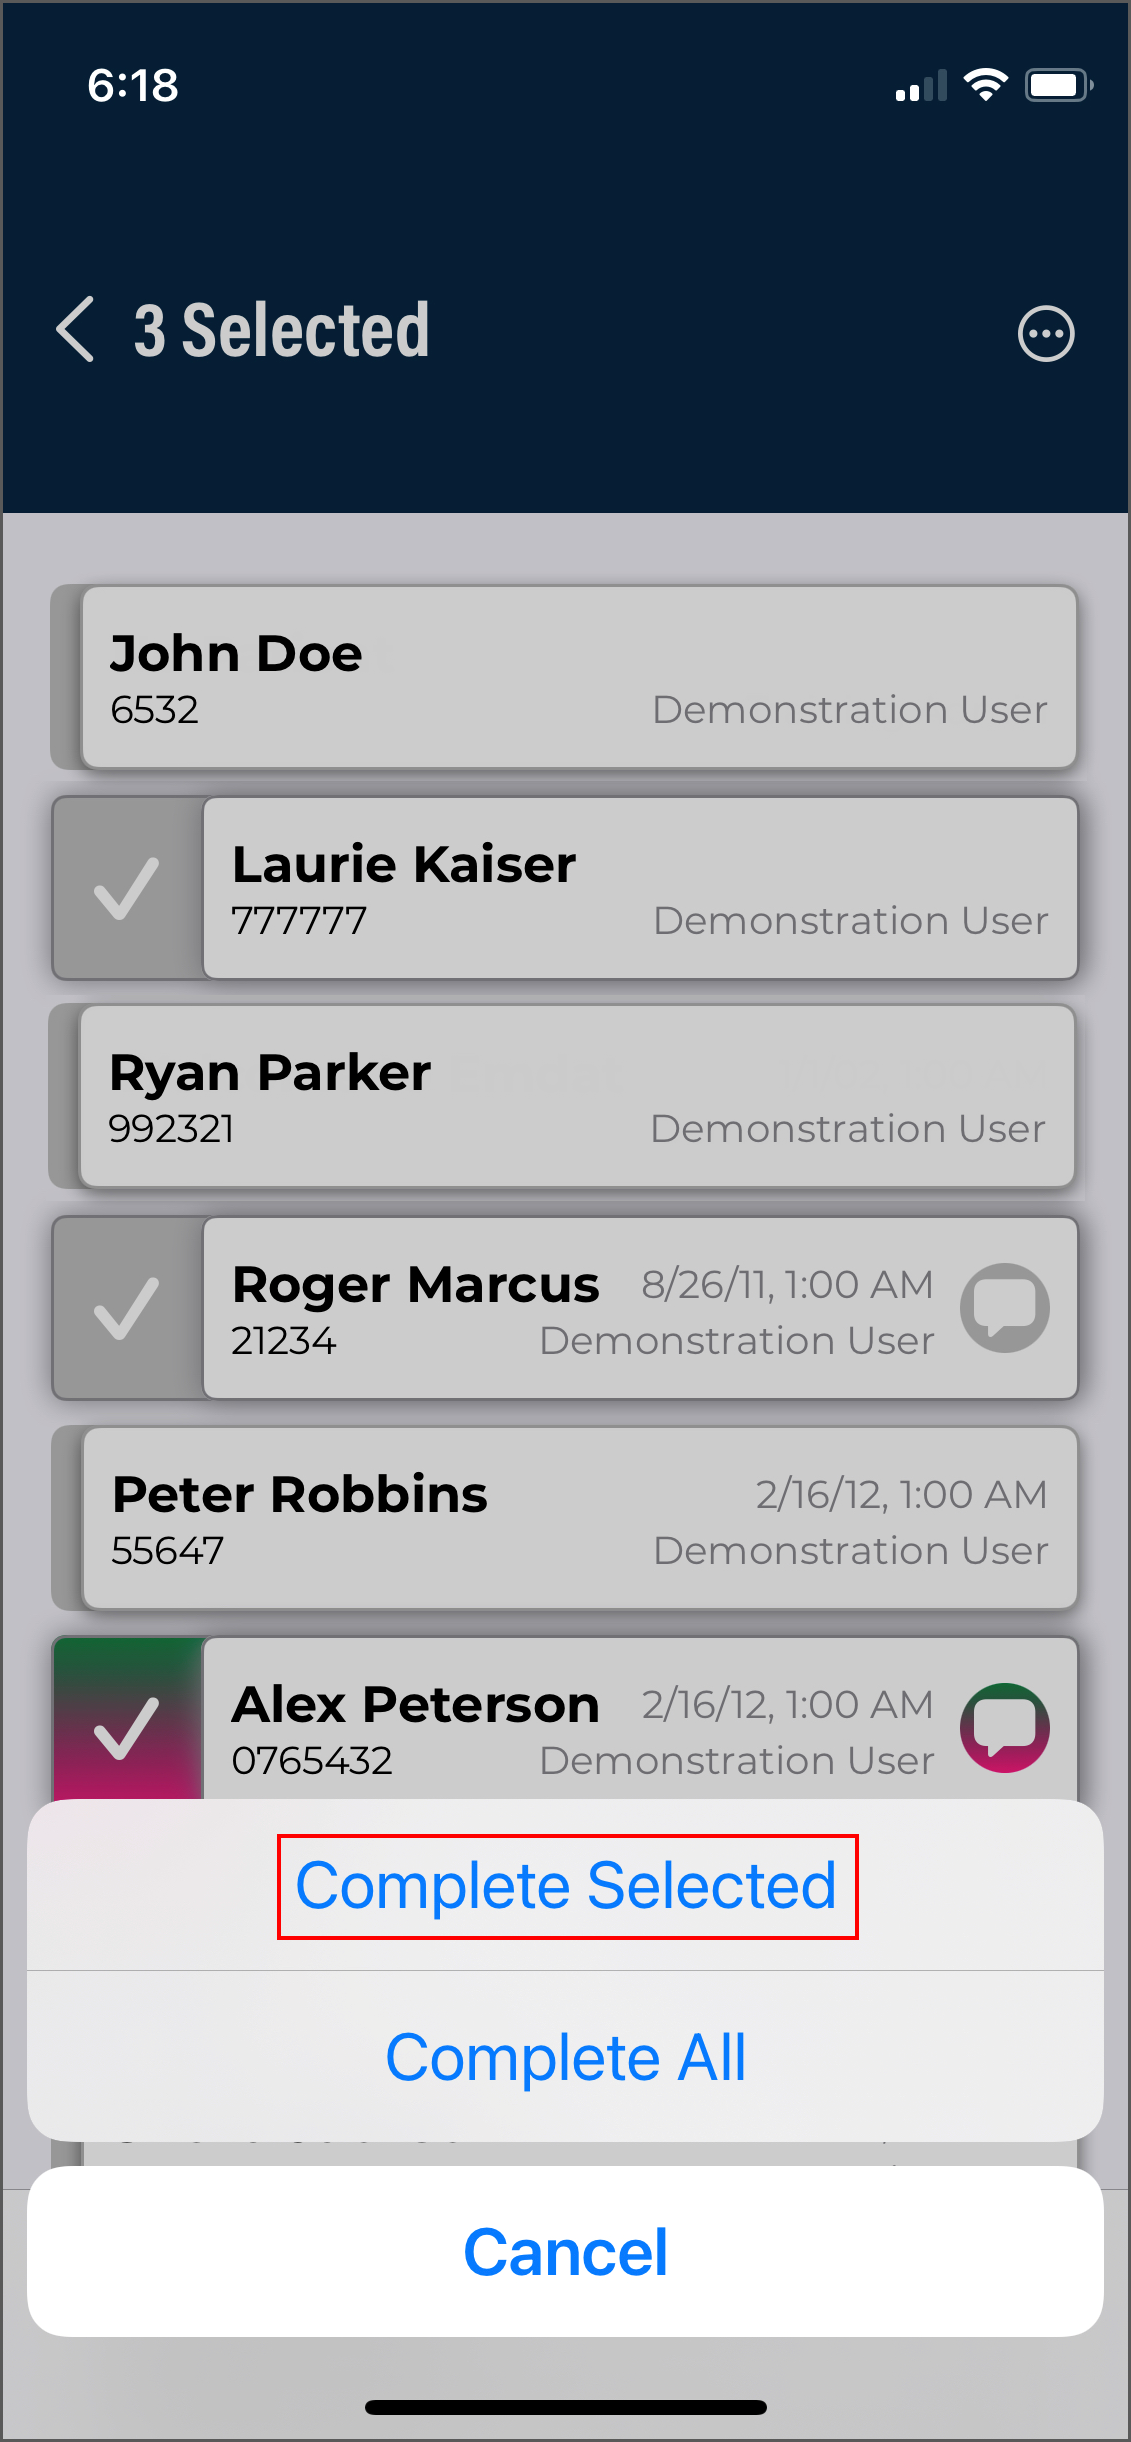 To complete only selected notes, long-press each note to be completed until a check mark appears on the left tab of the note. Tap the Menu button in the upper right corner of the screen (this button will not appear until at least one note has been selected) then tap Complete Selected.
Depending on the setup of the medical facility, some notes cannot be completed with Complete All/Selected, such as jobs with incomplete fields in the note text, failed validation rules, or those requiring an attestation statement. In this case, a message will be presented to the user stating how many notes could not be completed. Those notes will remain in the workflow folder and will need to be completed from the note viewer, while the other notes will proceed through the workflow.
The completion of a note cannot be undone. The Complete All/Selected options will be available to you based on the settings of your facility and user account. eSOne Mobile will present a confirmation prompt before completing the notes with Complete All/Selected; this prompt cannot be disabled.
Note Search
Note searches can be performed within a specific workflow folder or across all workflow stages and can be based on a number of criteria.
Use the Search button in the upper right corner of the main Notes screen to search for notes in any workflow folder (except Referral), including notes that have completed the workflow. This is known as Search All. Select or type in the desired search parameters, then tap the Search button to run the search. A list of results will appear. To return to the main Notes screen, tap the back arrow.
If a note is in the Marked for Review and Marked for Review 2 folders or Final and Final 2 folders it will appear in the search results twice.
The Search All results will each have an icon on the left side that represents where the job is in the workflow:
![]() Dictation Status - The dictation is still being typed by the transcription company.
Dictation Status - The dictation is still being typed by the transcription company.
![]() Marked for Review/Marked for Review 2 - The note has been delivered to the medical facility and is in one or both Review folders.
Marked for Review/Marked for Review 2 - The note has been delivered to the medical facility and is in one or both Review folders.
![]() Preliminary - The note is ready for clinician review and signature.
Preliminary - The note is ready for clinician review and signature.
![]() Final/Final 2 - The note has been signed and is in one or both Final folders for additional processing (printing, faxing, etc.)
Final/Final 2 - The note has been signed and is in one or both Final folders for additional processing (printing, faxing, etc.)
![]() Repository - The note has completed the workflow. This is also known as Search All. The Folder field in the Information tab will be blank.
Repository - The note has completed the workflow. This is also known as Search All. The Folder field in the Information tab will be blank.
Note
The facility can customize the workflow and may not use all of the above folders.
To search only a specific workflow folder, tap the desired folder from the main Notes screen, then tap the Search button. Select or type in the desired search parameters, then tap the Search button to run the search. A list of results will appear.
Search results can be sorted by Date Dictated, Patient Name, or Appointment Date, by tapping the Filter button.
Tap an item from the search results list to view the note details and text.
Tap the back arrow to return to the workflow folder view without the search criteria applied.
Note Viewer
Tap on one of the entries in any workflow folder or search results to view the note text and details. The Patient Name, Patient ID, Gender, Date of Birth, and Age are displayed in the top. Tap the back arrow above the patient name to return to the folder view or search results. The Action Menu button appears in the upper right corner.
Recorded dictations are stored on the phone for two weeks after the dictated date, but they cannot be listened to from the note viewer. To listen to a recorded dictation that is still saved on the device, go to its entry in the Patients tab.
The Note Viewer has three tabs: Information, Note, and Comments. Tap on the desired tab to open it, or swipe left or right to switch tabs. The Note Viewer opens to the Notes tab by default. The tab that is being displayed is underlined.
Information Tab
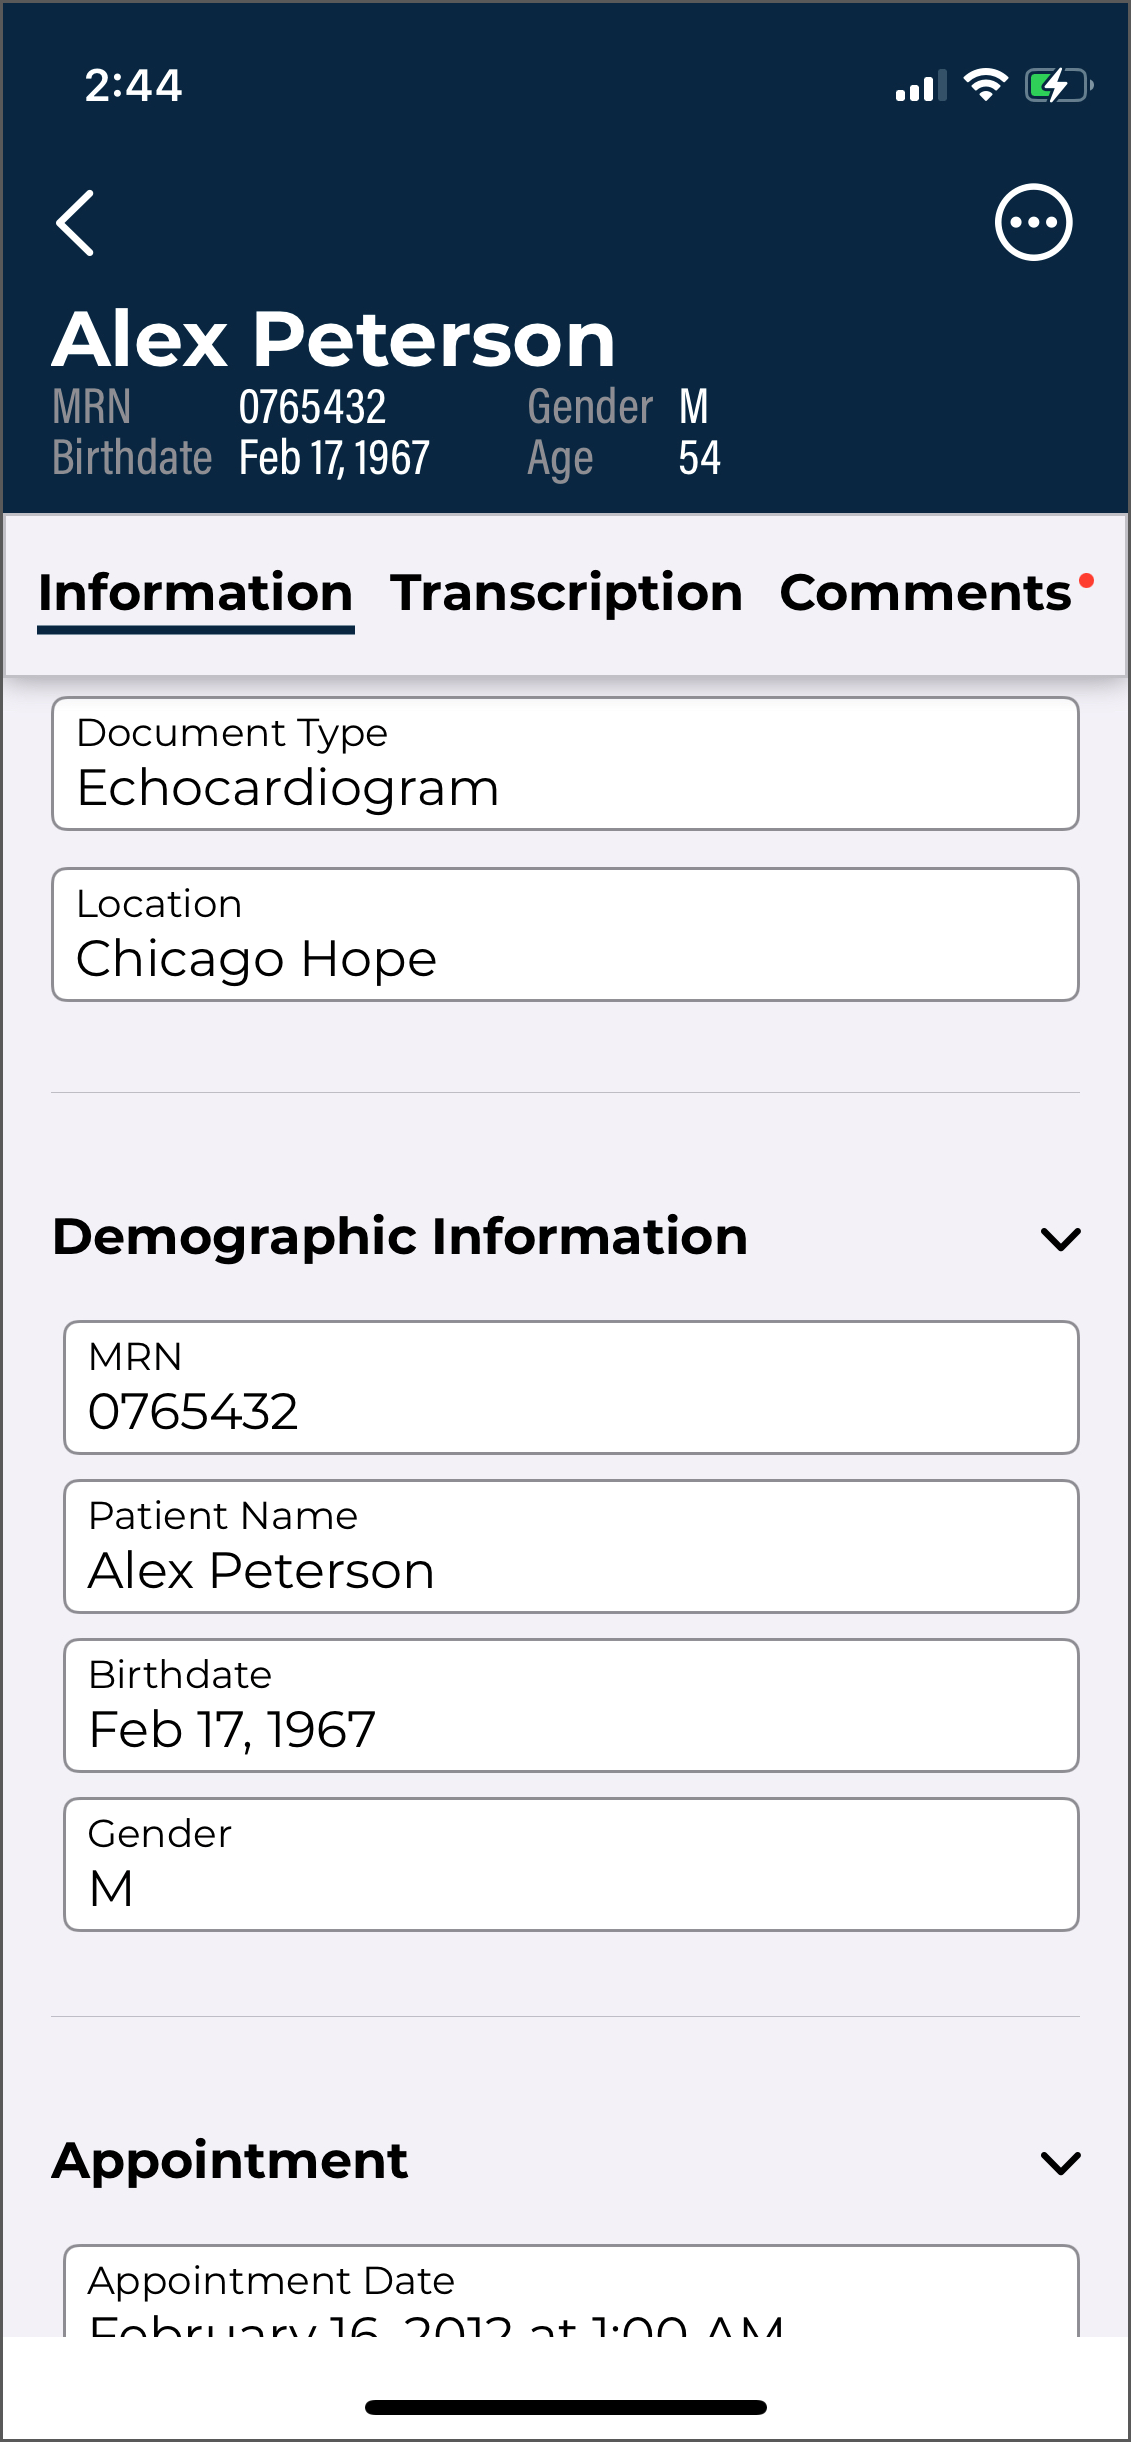 The Information tab contains header information about the note and is broken into sections, similar to the Information tab on the Recording screen.
Please note that eSOne’s Patient Display functionality has been extended within the mobile app to the information sections of a note. Patient Displays allow administrators to customize which fields are displayed based on a note’s selected document type.
If configured, users will see different displays when viewing the information sections of a note.
If a document type includes read-only fields, these fields will appear on the screen in a light gray color and cannot be edited. The app will also check for required fields when saving or completing notes. If one or more required fields is not filled out, a message appears indicating which ones. Names of required fields appear in red text.
At this time, Patient Displays only support the required fields setting for user fields.
Note
Please be aware that certain fields will always appear regardless of the document type, and some newer fields are not currently available for the mobile app and will not display.
Default fields:
-
Document Type - Displays the document type of the note.
-
Location - Displays the location of the appointment for the note.
-
Demographic Information - Displays patient name, MRN, birth date, age, and gender.
-
Appointment - Displays details related to the appointment, including the appointment date.
-
Dictation Information - Displays the workflow folder the note is currently in, note ID (formerly known as "Transcription ID"), date dictated, and the dictating clinician.
-
Signatures - Lists all clinicians who will sign the note. The date signed will appear next to or below the signing clinician's name after it has been signed.
-
Associates - Lists all associates to receive a copy of the note.
Note Tab
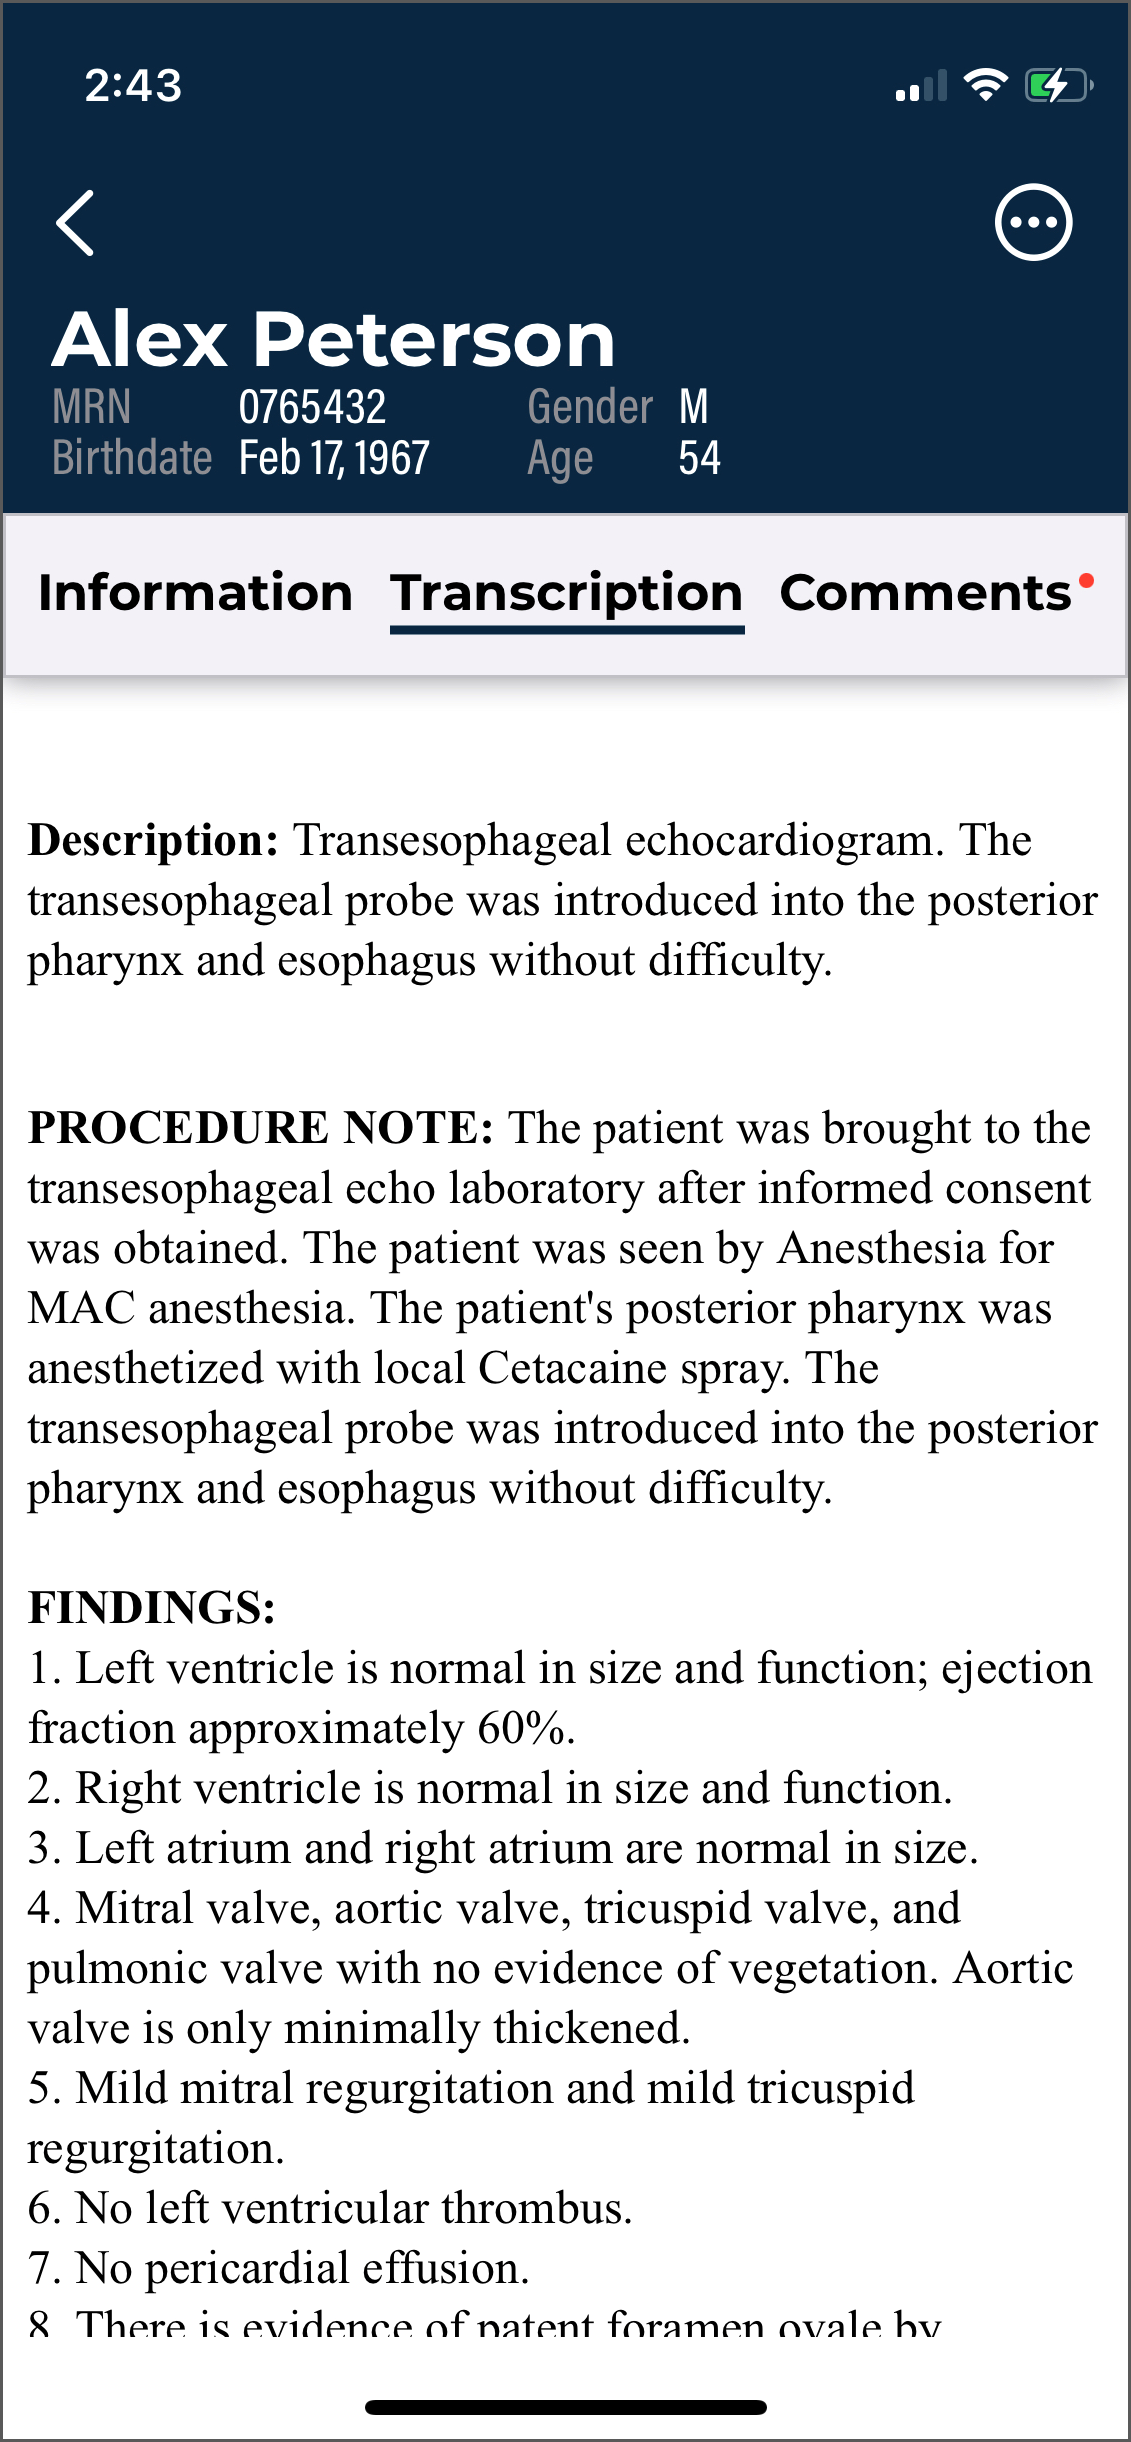 The Note tab within the Note Viewer displays the text of the note.
Comments Tab
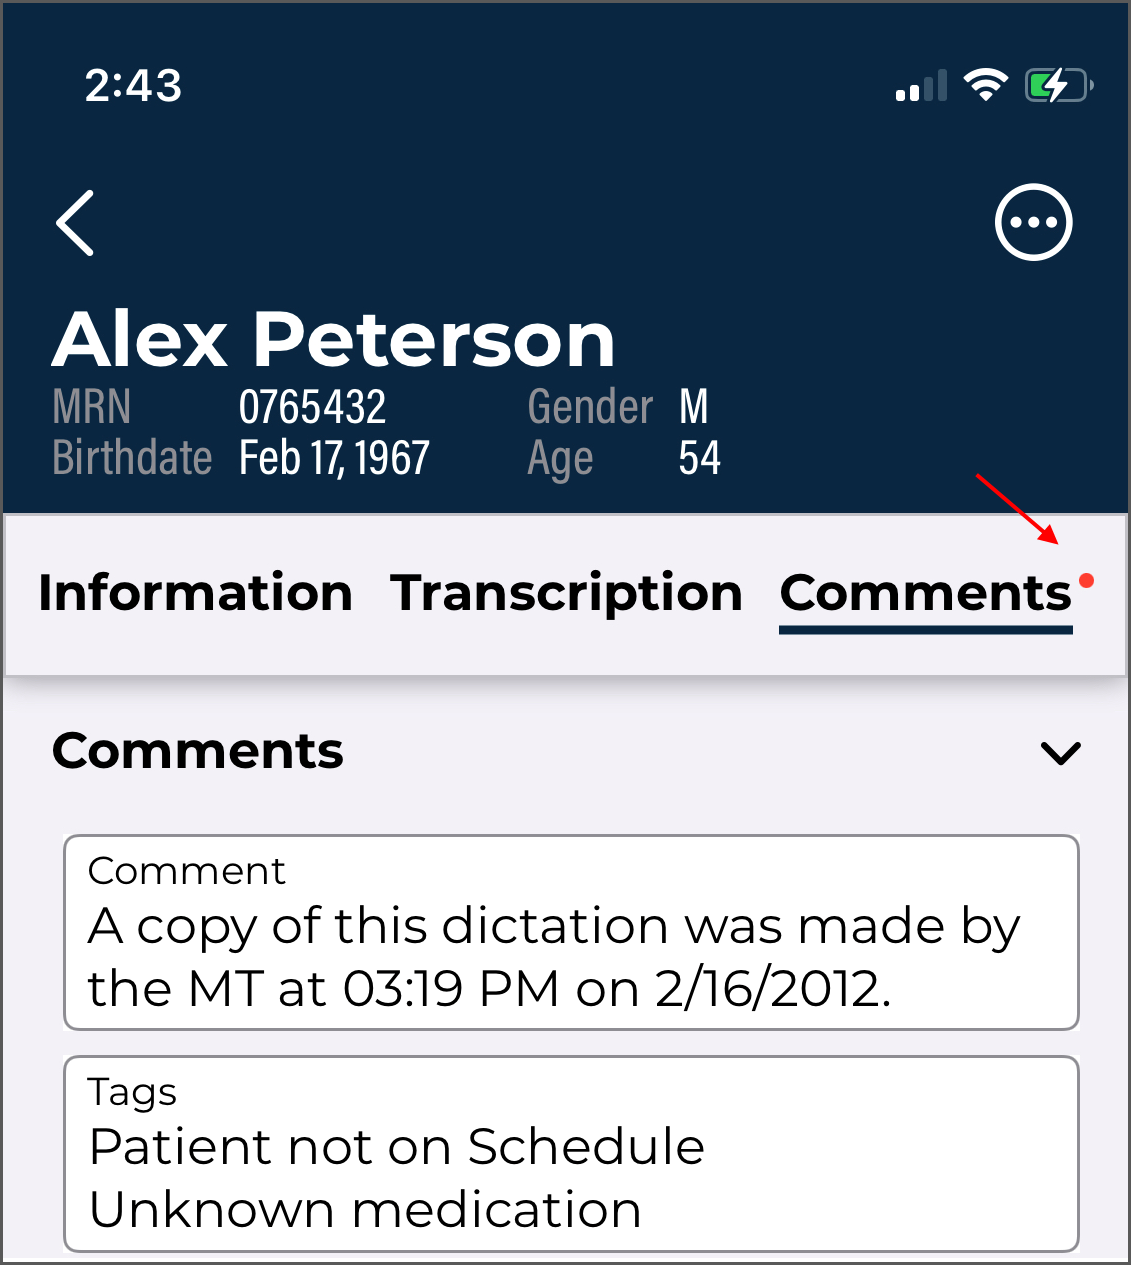 The Comments tab displays comments and comment tags on the note. The Comments tab will not appear if the managing transcription company or facility has not granted access to the user.
A red dot will appear on the Comments tab if the note has at least one comment or comment tag.
Action Menu
Tap the Action Menu button in the upper right corner to create a new dictation, edit, or complete a note.
New Dictation
Tap the Menu button then New Dictation to start a new dictation with the same demographic information as the original document. The Recording screen will open with the patient and demographics populated. The appointment date can be changed. Record the dictation as normal (see The Record Screen).
When the new dictation is uploaded, a prompt will be presented to determine how or if the new dictation should be linked to the original note. The options are:
-
Append to Dictation - The note text from the new dictation will be added to the end of the original note.
-
Prepend to Dictation - The note from the new dictation will be inserted before the original note text.
-
Upload as a New Dictation - The note text from the new dictation will not be linked to the note text from the original note; they will both appear as separate notes.
The new dictation will create a separate note and note ID when appended or prepended, but will be linked to the original note. The two notes will appear as one when viewed (after the new dictation has been typed and delivered by the transcription company).
Edit
The note text and demographics can be edited to correct mistakes or add additional information. By default, only documents that are in the Marked for Review and Preliminary Folders can be edited. The Edit option in the eSOne mobile app is intended for small or minor edits. If more extensive editing and formatting is needed, consider using InQuiry on a desktop computer.
To access the Edit screen, tap the Action Menu button at the top right corner of the note viewer, then choose Edit. The top header area will become orange and the note text and demographic fields will be editable.
To edit demographic fields, tap the Information tab while in edit mode. Tap on the field to open the keyboard or selection list, depending on the field type selected. The signatures, associates, comments, and comment tags cannot be edited in the eSOne mobile app; please use InQuiry to make those changes.
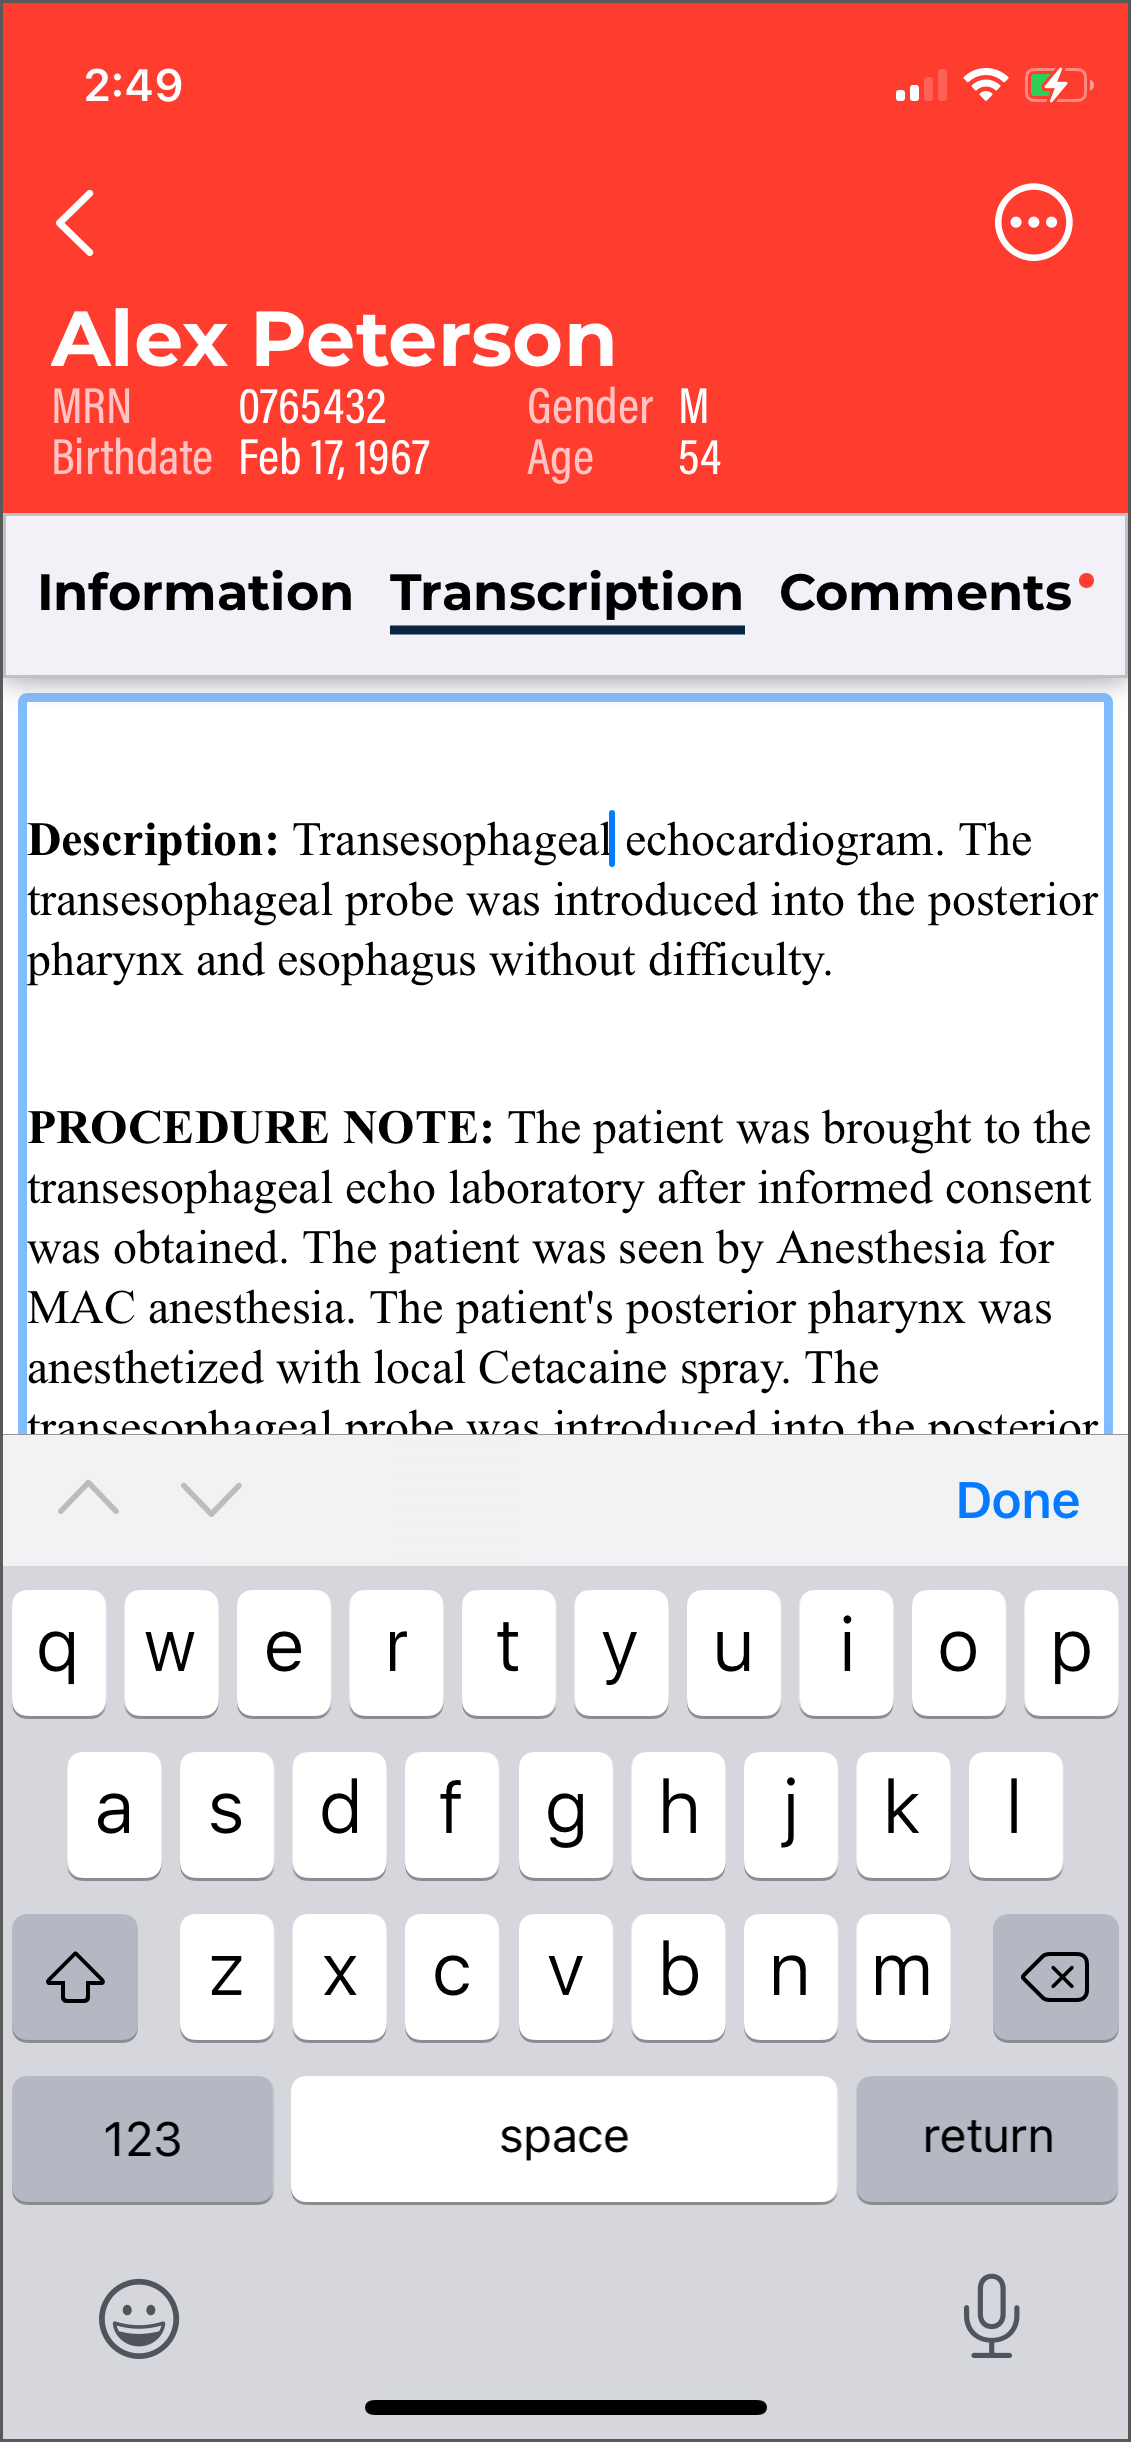 To edit the note text, tap the Note tab while in edit mode, then tap the note text to position the cursor and open the keyboard. A blinking cursor will mark the cursor position.
Tap the Action Menu then Undo Changes to cancel all unsaved changes made to the demographics and note text and return to the note viewer.
Switching between the Information and Note tabs in edit mode will not lose unsaved changes to either tab, but it is recommended to save often.
Use Save in the Action Menu to save changes to the demographics and note text and return to the note viewer. Tapping Complete in the Action Menu while editing will save changes and complete the job from the workflow folder.
If navigation back to the workflow folder is attempted prior to saving changes, a confirmation dialog box will be presented with the options to Cancel or Discard. To return to the editor to make additional changes and/or save changes, tap Cancel. To return to the workflow folder list without saving changes, tap Discard.
Note
Changes are not saved automatically.
Complete
Tap the Action Menu then Complete to progress the note to the next stage of the workflow. When the document is Completed from the Preliminary folder by the dictating clinician or additional authenticator, the electronic signature is also applied, if the provider is using that feature. When the document is completed from the final workflow folder, the note will be saved in the repository (also known as Search All).
When the note cannot be completed due to incomplete fields within the note text, a notification will appear. The Complete action will be canceled. The user can then enter edit mode to make the necessary edits, then complete the note.
If the client is using workflow validation rules and the job fails validation, a message will appear upon completion, stating which validation rule failed. Depending on the setup of the validation rule, a warning may be given, which allows the user to cancel the complete action to edit the note or continue with the complete action and leave the note as-is; if the validation rule prevents completion the user must edit the note to meet validation requirements, unless the user has the rights to override the prevention.
The completion of a note cannot be undone. By default, eSOne Mobile will present a confirmation prompt before completing the note. This prompt can be disabled in the Settings tab.
Complete with Attestation
If the medical facility requires attestation statements from attending physicians (authenticators) signing notes, the Complete action becomes Complete with attestation in the Action Menu.
After tapping Complete with attestation, the Attestation editor opens. The last used attestation template will automatically load. To change to a different template, tap Templates in the bottom left corner or Load Template from the Action Menu in the upper right corner. A list of available attestation templates will be presented. Tap on the desired template to load it. If edits need to be made to the attestation text, tap within the text to position the cursor and open the keyboard.
To delete all attestation text tap Remove Attestation. The attestation text can then be manually typed in by tapping in the white editor area, or a template can be selected again.
After the attestation text has been finalized, tap the Action Menu then Complete to apply the attestation template and signature and advance the note in the workflow.
Cancel
The Cancel button in the Action Menu closes the Action Menu without taking any action.
Dual Resident Attending Workflow
If the facility uses the dual resident/attending workflow, attending physicians (authenticators) will be allowed to complete documents in the workflow even if the dictating resident has not yet reviewed or approved the document. With this option, documentation can be completed more quickly if needed.
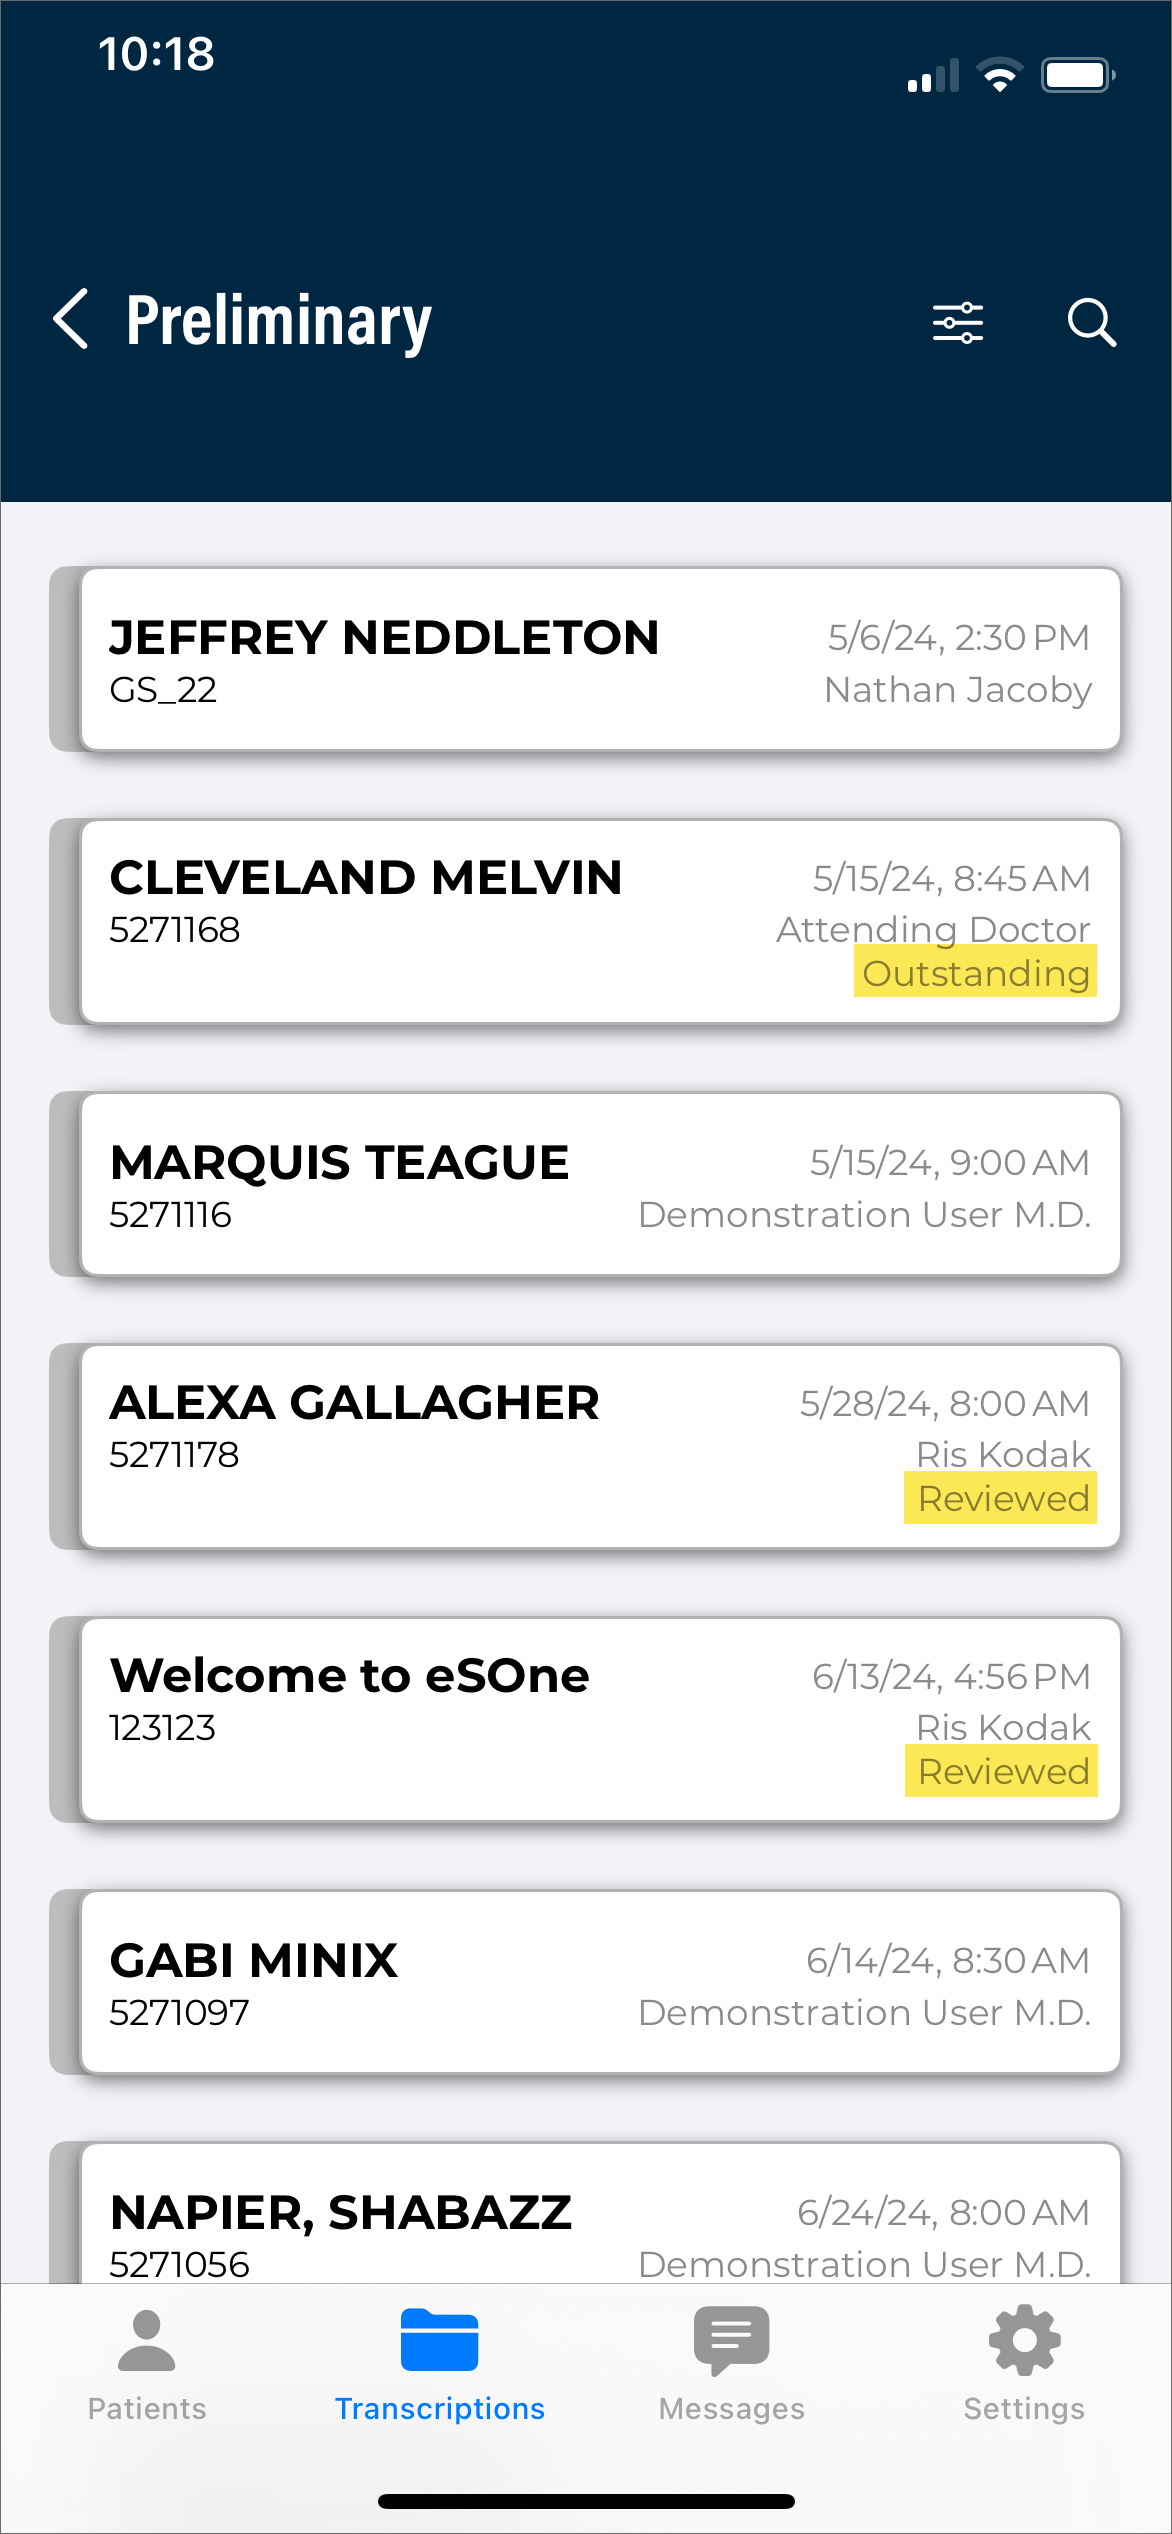
There are two paths this workflow can follow:
-
Resident reviews/approves an outstanding note, then the attending completes.
- The resident can see the note in the Preliminary folder with an "Outstanding" status and can review and approve the note. After the resident completes the job, it is removed from their Preliminary folder.
- The attending will see the "Reviewed" status from the Preliminary note list and can complete the note. It will move on to the next workflow folder.
-
Attending Completes an Unreviewed Note
- The attending will see the note in the Preliminary folder with an "Outstanding" status prior to the resident reviewing/approving the note.
- Once the attending completes the job, the note moves on in the workflow and out of their Preliminary folders. The next time the resident searches or refreshes their Preliminary folder, the note will not be available.
If the facility does not use the dual resident/attending workflow, notes will not appear in the attending physician's (authenticator) Preliminary folder until after the dictating resident has approved the note and the review status will not appear.
The Settings Tab
Use the Settings tab to set default screens and behavior for the eSOne Mobile application.
Logout
Tap the Logout button in the upper right corner to log out of the eSOne app.
Support
- User Guide - Click to open and view the user guide within the app. After viewing the guide, tap Cancel in the upper left-hand corner.
- Help Desk Support - Contains contact details for support, along with the version number of the mobile app.
- Change Password - If the password does not meet the password requirements set for the client, the screen will display which ones have not been met after the user presses the Change button. Remember that InQuiry, InSync, and eSOne Mobile all use the same password.
- Contact Information - Change and verify the user's email address. When the address is changed, an email will be sent to verify the new email address. Tap the Resend button in the upper right corner to resend the verification email. If the user does not have a verified email address the Contact Information text in the Settings tab will be red.
Defaults
- Recording Screen - Choose which tab is selected when opening a patient appointment: Templates, Information, or History. Information is selected by default until changed here.
- Document Type - Select a default document type to be preselected on the record screen. The document type can be changed on each dictation if needed. If "Prompt on Upload" is selected, eSOne Mobile will prompt you to select a document type when uploading a dictation that does not have one selected. "Prompt on Upload" is the default setting.
- Location - Select a default Location for all dictations. The Location can be changed on each dictation if needed. If "Prompt on Upload" is selected, eSOne Mobile will prompt you to select a Location when uploading a dictation that does not have one selected. "Prompt on Upload" is the default setting.
- Silence Detection - Select the length of time silence can be recorded before eSOne Mobile pauses the recording. The default value is "None" and recording will not automatically pause when silence is detected.
- Transcription Text Size - Select how large text is when viewing a transcription. Please note that this setting does not change the text size in all screens of the mobile app.
- Custom Encounter Field - Select an additional data field to be displayed to the right of the patient name on the appointment listing.
- Set Inpatient Appointment Date to Dictation Date - In the inpatient workflow, auto-populate the Appointment Date with the current date and time when the patient encounter is opened.
Favorites
-
Document Types - Filter the document types that are available when choosing a document type for a dictation. If a facility has thirty document types, but a dictator only needs five of those document types, this setting is used to remove the other twenty-five from the list of document types. Tap the document name to toggle the favorite setting on (blue check mark) and off (no check mark).
-
Locations - Filter the locations that are available when choosing a location for a dictation. If a facility has fifteen locations and a dictator only works at three of them, this setting is used to remove the other twelve from the list of possible locations.
Confirmations
- Confirm Uploads and Confirm Logout - Turn the confirmation pop-up for those actions on or off.
Security
- Save Login - Save the username to avoid having to enter it at each log in.
- Save Password - Save the password to avoid having to enter it at each log in. This option will be disabled if the client does not allow password saving.
Warning
When 'Save Password' is enabled, anyone with access to the device can access the eSOne account and the confidential medical records in it.
Accounts
eSOne Mobile can access user accounts across multiple medical facilities by linking accounts. The Accounts list includes all Linked accounts and allows the user to quickly switch between user profiles.
Tap Add Account Site to link a new user account. eSOne Mobile will prompt for the username, password and client for the initial setup. The new linked account will appear in the Accounts list with the full client name, followed by the user's first and last name.
To switch to a linked account, tap on the desired account profile; login credentials are not required to switch to a linked account where credential saving has been enabled. A check mark indicates the current logged-in account. Patients and transcriptions in those respective tabs will now show data for the current logged-in account only.
To remove a linked account, tap the Delete button next to the account to be removed.
Inpatient Workflow
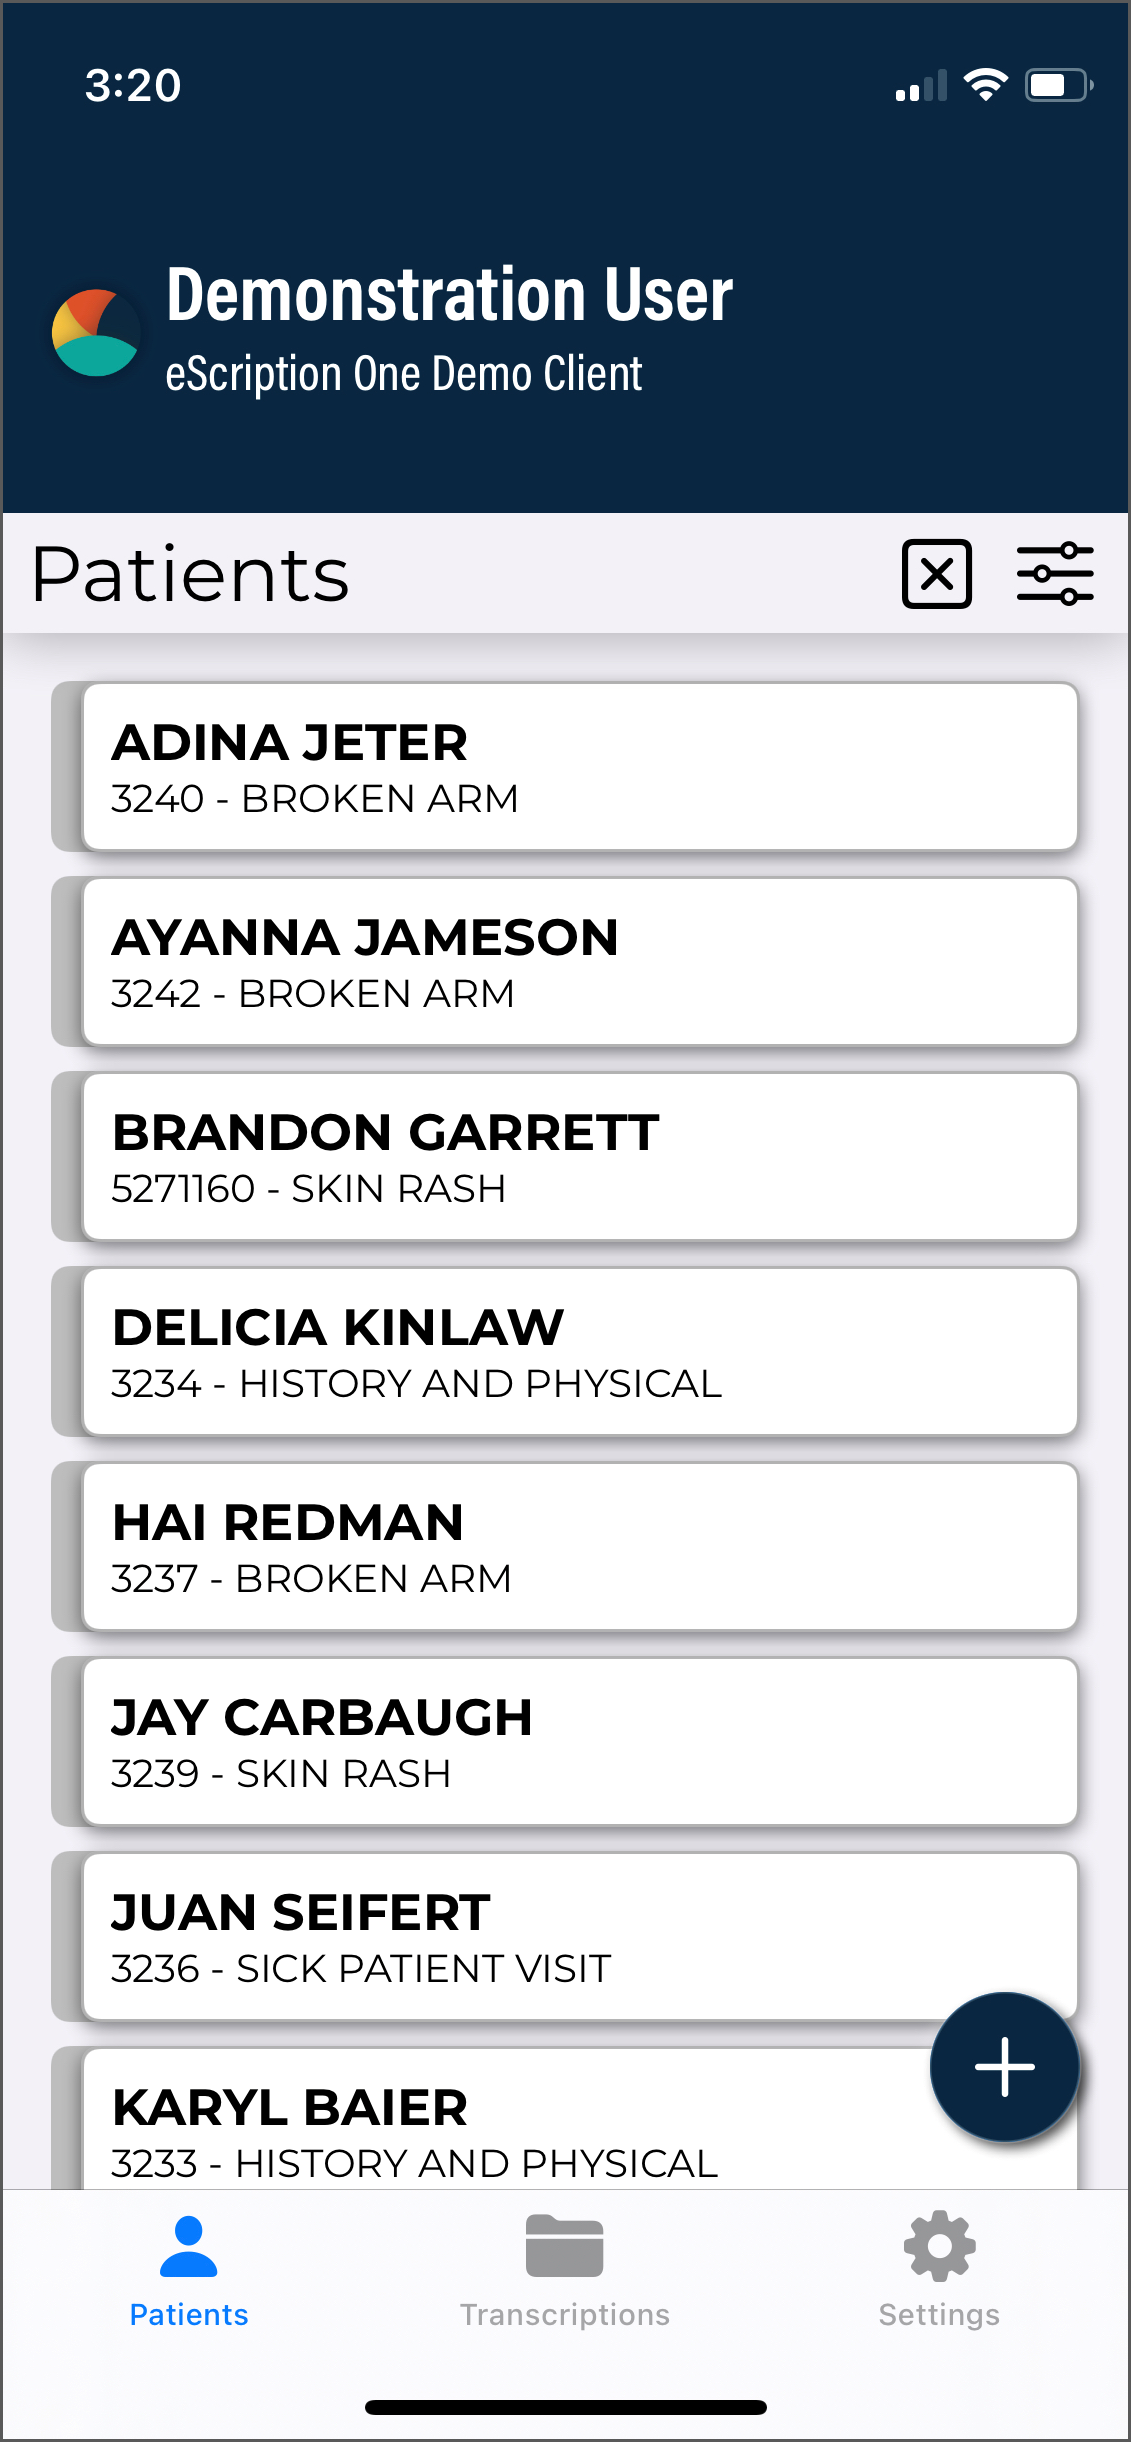
The inpatient workflow is an alternative scheduling method that lists patients based on inpatient encounters, rather than listing patients by appointment. This workflow feature is only available when enabled by the client, and is not available for all users.
For example, a physician is required to make regular rounds to all patients admitted to Critical Care. The inpatient workflow allows the physician to easily track which patients are on his ward, and if he has dictated on them today, or if he still needs to visit them. Inpatient also allows the physician to clear his schedule manually when he needs to see patients more frequently.
To switch between the standard appointment screen and the inpatient workflow, tap the Filters button ![]() on the upper right corner of the Patients screen, then tap Inpatient in the Mode section. To change back to the outpatient appointments view, tap the Filters button then tap Schedule (OutPatient).
on the upper right corner of the Patients screen, then tap Inpatient in the Mode section. To change back to the outpatient appointments view, tap the Filters button then tap Schedule (OutPatient).
Patient List
The Patient List on the Patients tab provides a comprehensive overview of patients based on the filters and sorting criteria set by the provider. This list offers valuable information at a glance, allowing providers to quickly identify and select the correct patient for dictation, streamlining the workflow and enhancing efficiency in managing inpatient care.
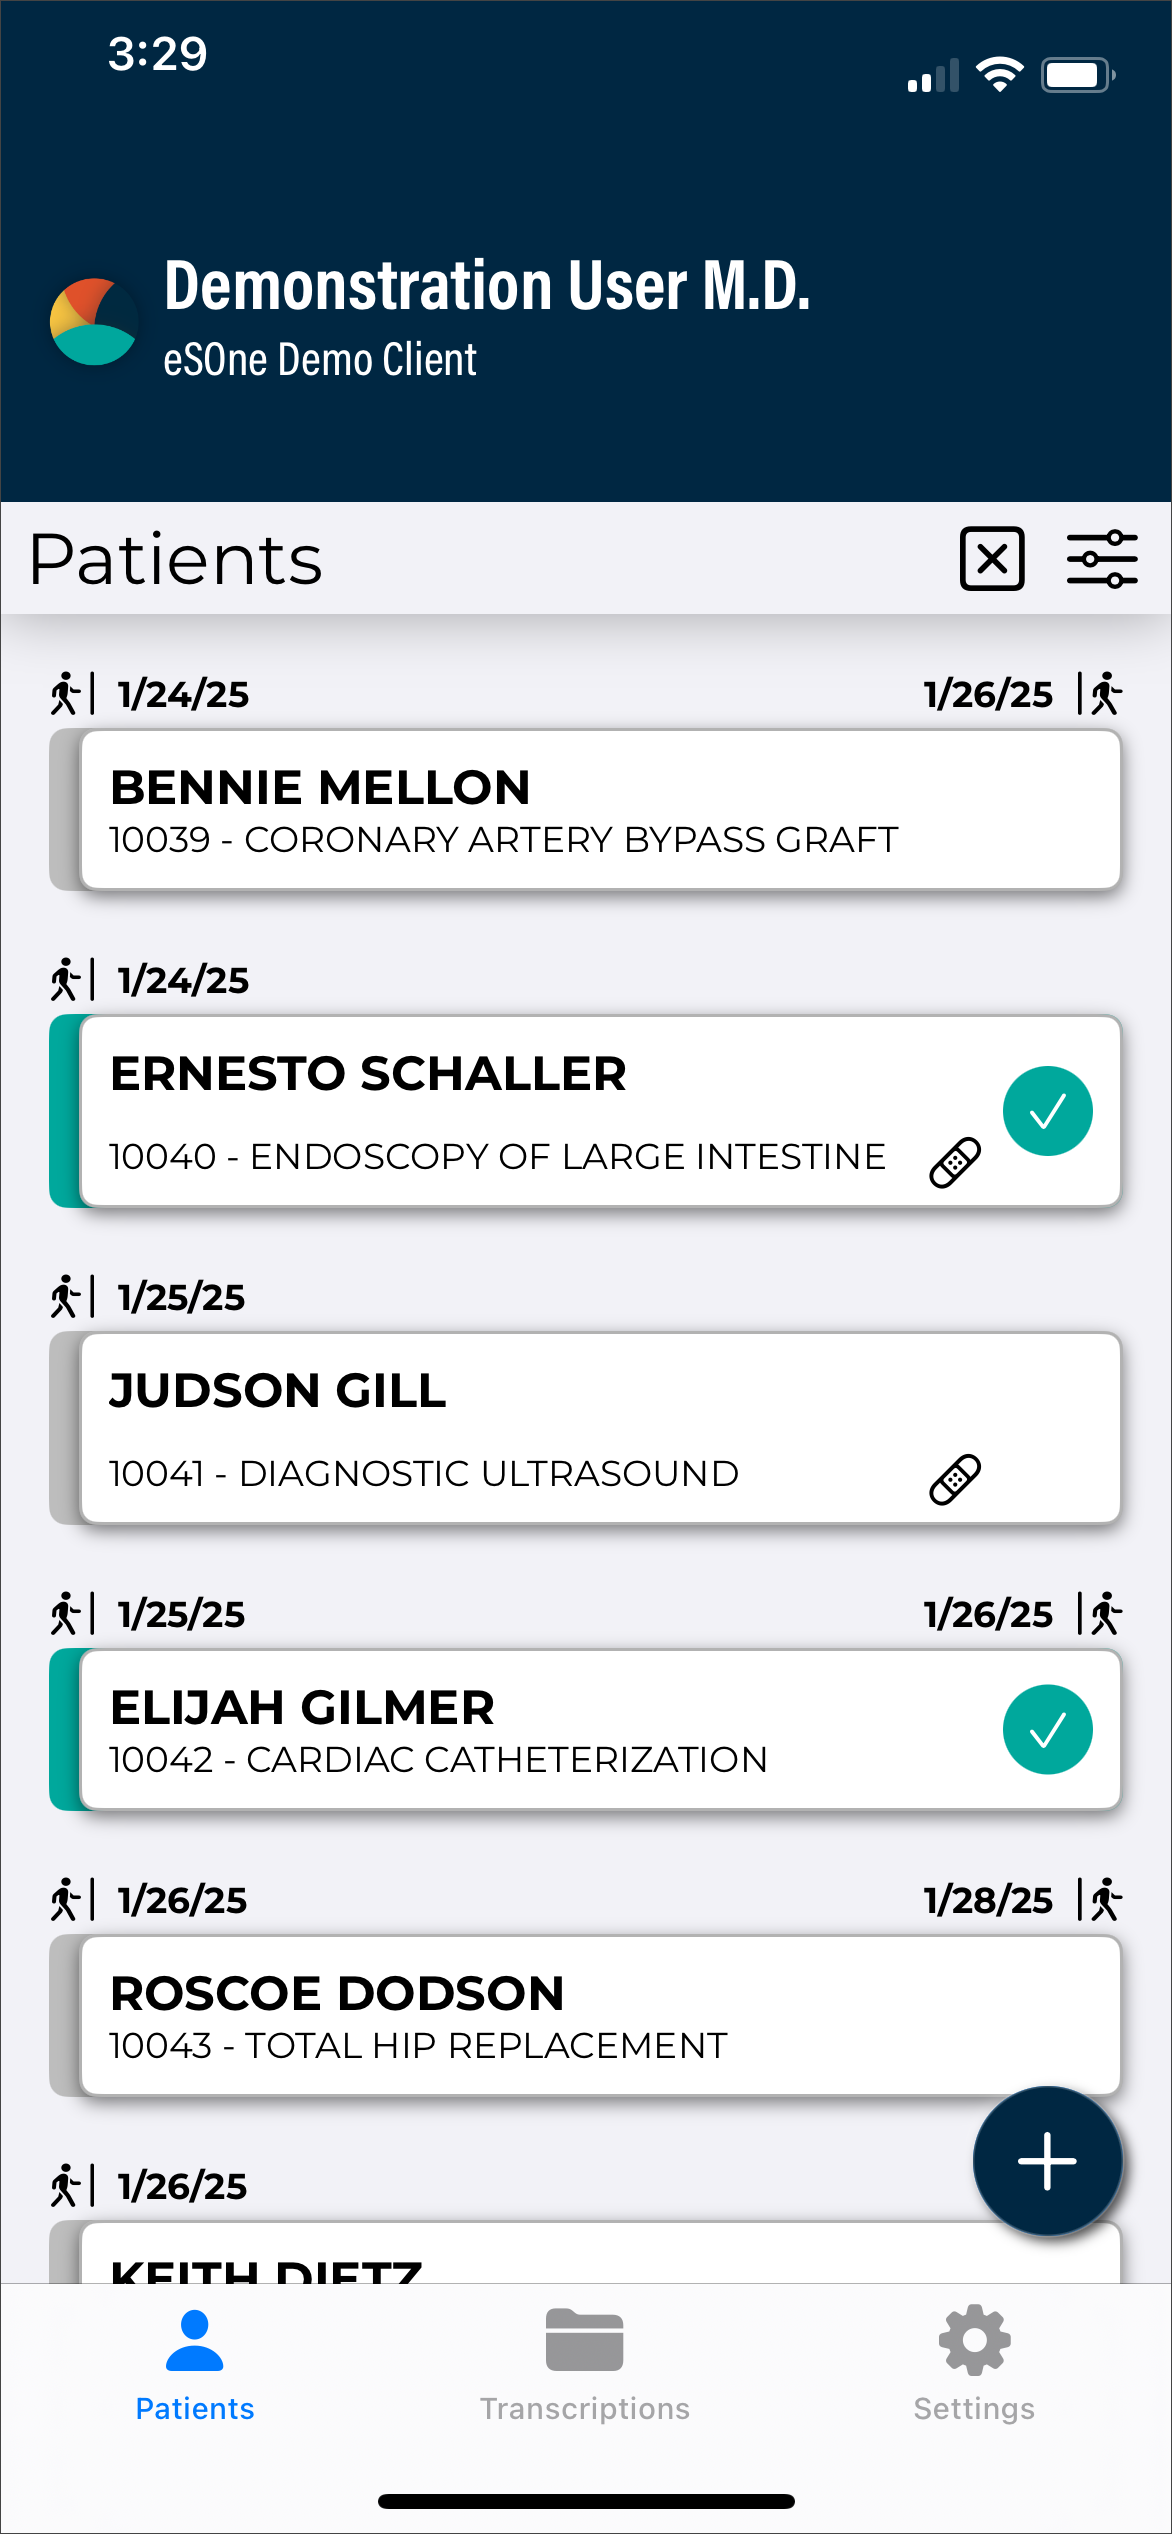 Each patient encounter card includes essential identification details:
 Admit Date - When available, the admit date will be displayed above the patient card on the left.
 Discharge Date - When available, the discharged date will be displayed above the patient card on the right.
- Patient Name
- Patient ID
- Encounter Data Field - The contents of the encounter data field varies based on client configuration. It will appear next to the Patient ID.
- Custom Encounter Field - An additional data field can be added to the patient card by navigating to the Settings tab, tapping Custom Encounter Field, and selecting the desired field. The data will then appear to the right of the patient's name.
 Treatment Status - Indicates whether the patient has been treated, marked by a bandage icon. This status can be reset to help track which patients still need to be visited during each round of care.
- Dictation Status - Icons and color coding indicate if a dictation has been started, is uploading, or is completed. If no icon exists, a dictation has not been started on this device.
 Dictation on Hold - The patient has a started dictation that has not yet been uploaded.
 Uploading - The patient has a dictation that is currently uploading.
 Complete - The patient has a recorded dictation and has been successfully uploaded.
Additional buttons available on the Patients tab include:
![]() Add - Add a new patient the Patient List. See Add and Remove Patients for more details.
Add - Add a new patient the Patient List. See Add and Remove Patients for more details.
![]() Filters - Switch between Inpatient and Outpatient workflows, and select sorting, filters, and patient list views.
Filters - Switch between Inpatient and Outpatient workflows, and select sorting, filters, and patient list views.
![]() Clear Treatment Status - Reset the treatment status for all patients, marking them as untreated.
Clear Treatment Status - Reset the treatment status for all patients, marking them as untreated.
Inpatient Views
The default inpatient view is "My Patients" which lists all patients whose inpatient counter uses the work list scheduling resource assigned to the logged-in user. eSOne Mobile can also list inpatient encounters by Author Groups or Location Resource. To change views between My Patients, Author Groups and Locations, tap the Filter button. The Author Groups section will first list My Patients, followed by all Author Groups setup for the client. The Locations section follows, listing all inpatient location resources for the client. Tap on a view to load it in the Patients tab; a check mark will indicate which view is selected.
-
My Patients - Displays all patient encounters linked to the default schedule resource of the logged-in user. This is the default view in inpatient mode.
-
Author Groups - The Author Group view allows the provider to see all patients associated with any providers enrolled in the selected Author Group. By tapping on an Author Group name, the provider can view the full list of patients for that group, regardless of whether they are enrolled in the group themselves. Enrolling in a group enables other users within the group to view the provider's patients as well. To enroll or disenroll from a group, tap the slider button.
-
Locations - Use Locations to show all inpatient encounters based on the location resource, regardless of the associated schedule resource.
Filter Patient List
Patient lists can be filtered based on the status of the patient. When the filter is enabled, indicated by a checkmark, patients with that status will appear in the list. Both status filters, Discharged and Treated, are on by default, but can be disabled, hiding the patients with that status.
- Discharged - Patients have a date populated in the Discharge Date field. Unchecking this filter will hide discharged patients.
- Treated - Patients marked as Treated (by starting a dictation or manually marking the patient treated). Unchecking this filter will hide treated patients.
If a patient is both discharged and treated and only one of the filters is enabled, the patient will be hidden from the patient list.
Sort Patient List
Choose a sort option in the Filters screen to order the inpatient list. Each option can be sorted ascending or descending by choosing the desired setting above the Sort options list.
-
Admit - Sort patients based on the admit date and time. When sorted ascending, patients without an admit date will appear first; when sorted descending, patients without an admit date will appear at the bottom of the list.
-
Discharge - Sort patients based on the discharge date and time. When sorted ascending, patients without a discharge date will appear first; when sorted descending, patients without a discharge date will appear at the bottom of the list.
-
Treatment Status - Patients not marked as Treated will appear at the top of the list, Treated patients will appear at the bottom.
-
Patient Full Name - Patients will be ordered alphabetically by the patients' full names (if the first names match then the middle initial and/or last names will be used to further order them).
-
Patient Last Name - Patients will be ordered alphabetically by the patients' last names, but will still appear in "First name Last name" format in the schedule list.
-
Patient First Name - Patients will be ordered alphabetically by the patients' first names.
-
Dictation Status - Patients will be ordered based on the status of the dictation. When sorting in ascending order, the status are arranged as follows:
- No Dictation
- On-hold Dictation
- Dictation Uploading
- Dictation Completed
If multiple patients have the same primary sort order value, they will be sorted alphabetically by full patient name. If those patients also share the same name, they will then be sorted by dictation status. However, if the primary sort order is set to patient name, the secondary sort order will be dictation status.
Treatment Status
Patients who have received treatment are marked with a bandage icon ![]() .
.
Patients are automatically marked as treated when a dictation has been started. The treatment status can be toggled on and off using the Set treatment status option from the Record Screen menu.
To remove the Treatment Status icon from all patients, press the Clear Treatment Status icon ![]() from the patient list.
from the patient list.
Add and Remove Patients
Patients can be added to the inpatient list by tapping the ![]() Add button.
Add button.
Search for an existing encounter by entering the Patient ID, Patient Name, and/or Order Number. Tap the Search button to run the search and view matches. Tap on the patient in the search result to begin a new dictation.
If the Patient ID was used for the search and no matches are found you will have the option to create a new dictation using the Patient ID. Tap Cancel to return to the Search window; tap Use to apply the search criteria to the appropriate fields in a new dictation.
To remove patients from a work list, choose Remove from my work list in the record screen menu.
Record Screen
To view encounter details and record a dictation, select the desired patient from the patient list. Recording controls are available at the bottom. When recording is completed, tap ![]() Upload in the upper right corner to submit the dictation.
Upload in the upper right corner to submit the dictation.
Please see Record Screen for additional details on dictating from the eSOne Mobile App.
Date of Service
The record screen is similar to that of an outpatient appointment, with a minor difference in the Date of Service. The Date of Service, which is labeled as Appointment Date by default but can be customized by the client, can be set to reflect the date and time the patient was treated while admitted. This date can be manually edited by tapping on the field or auto-populated by enabling the Set Inpatient Appointment Date to Dictation Date option in the Settings tab. When enabled, the Appointment Date will automatically populate when the patient encounter is opened from the Patient List.
Please note the client configuration settings determine which fields are visible and editable.
Uploading Multiple Dictations for the Same Patient
Multiple dictations can be uploaded for the same patient without needing to add the patient to the list again. To do this, follow these steps:
- From the Patient List, select the existing patient encounter.
- Open the Record Screen Menu.
- Select New Dictation.
This process starts a new dictation while retaining the same patient encounter information. Once the dictation is completed it can be uploaded. Only the last dictation can be played back from the mobile device.
Messages Tab
Clients who use DeliverHealth for medical coding can enable a Messages tab in the eSOne mobile app. This tab allows providers to receive messages from medical coders and send replies, shortening the turnaround time for coder queries and finalizing billing sooner.
The top of the Messages tab contains a count of message threads that have not been replied to. When the provider sends a reply to a message the message count will decrease. When a new message is received from a coder the message count will increase.
Tap the Search icon  to filter messages by patient ID, patient name, or account number. The search is performed as characters are typed. Press the clear icon
  in the text box to clear the filter criteria, or the close icon
  to close the search box.
Worksheet List
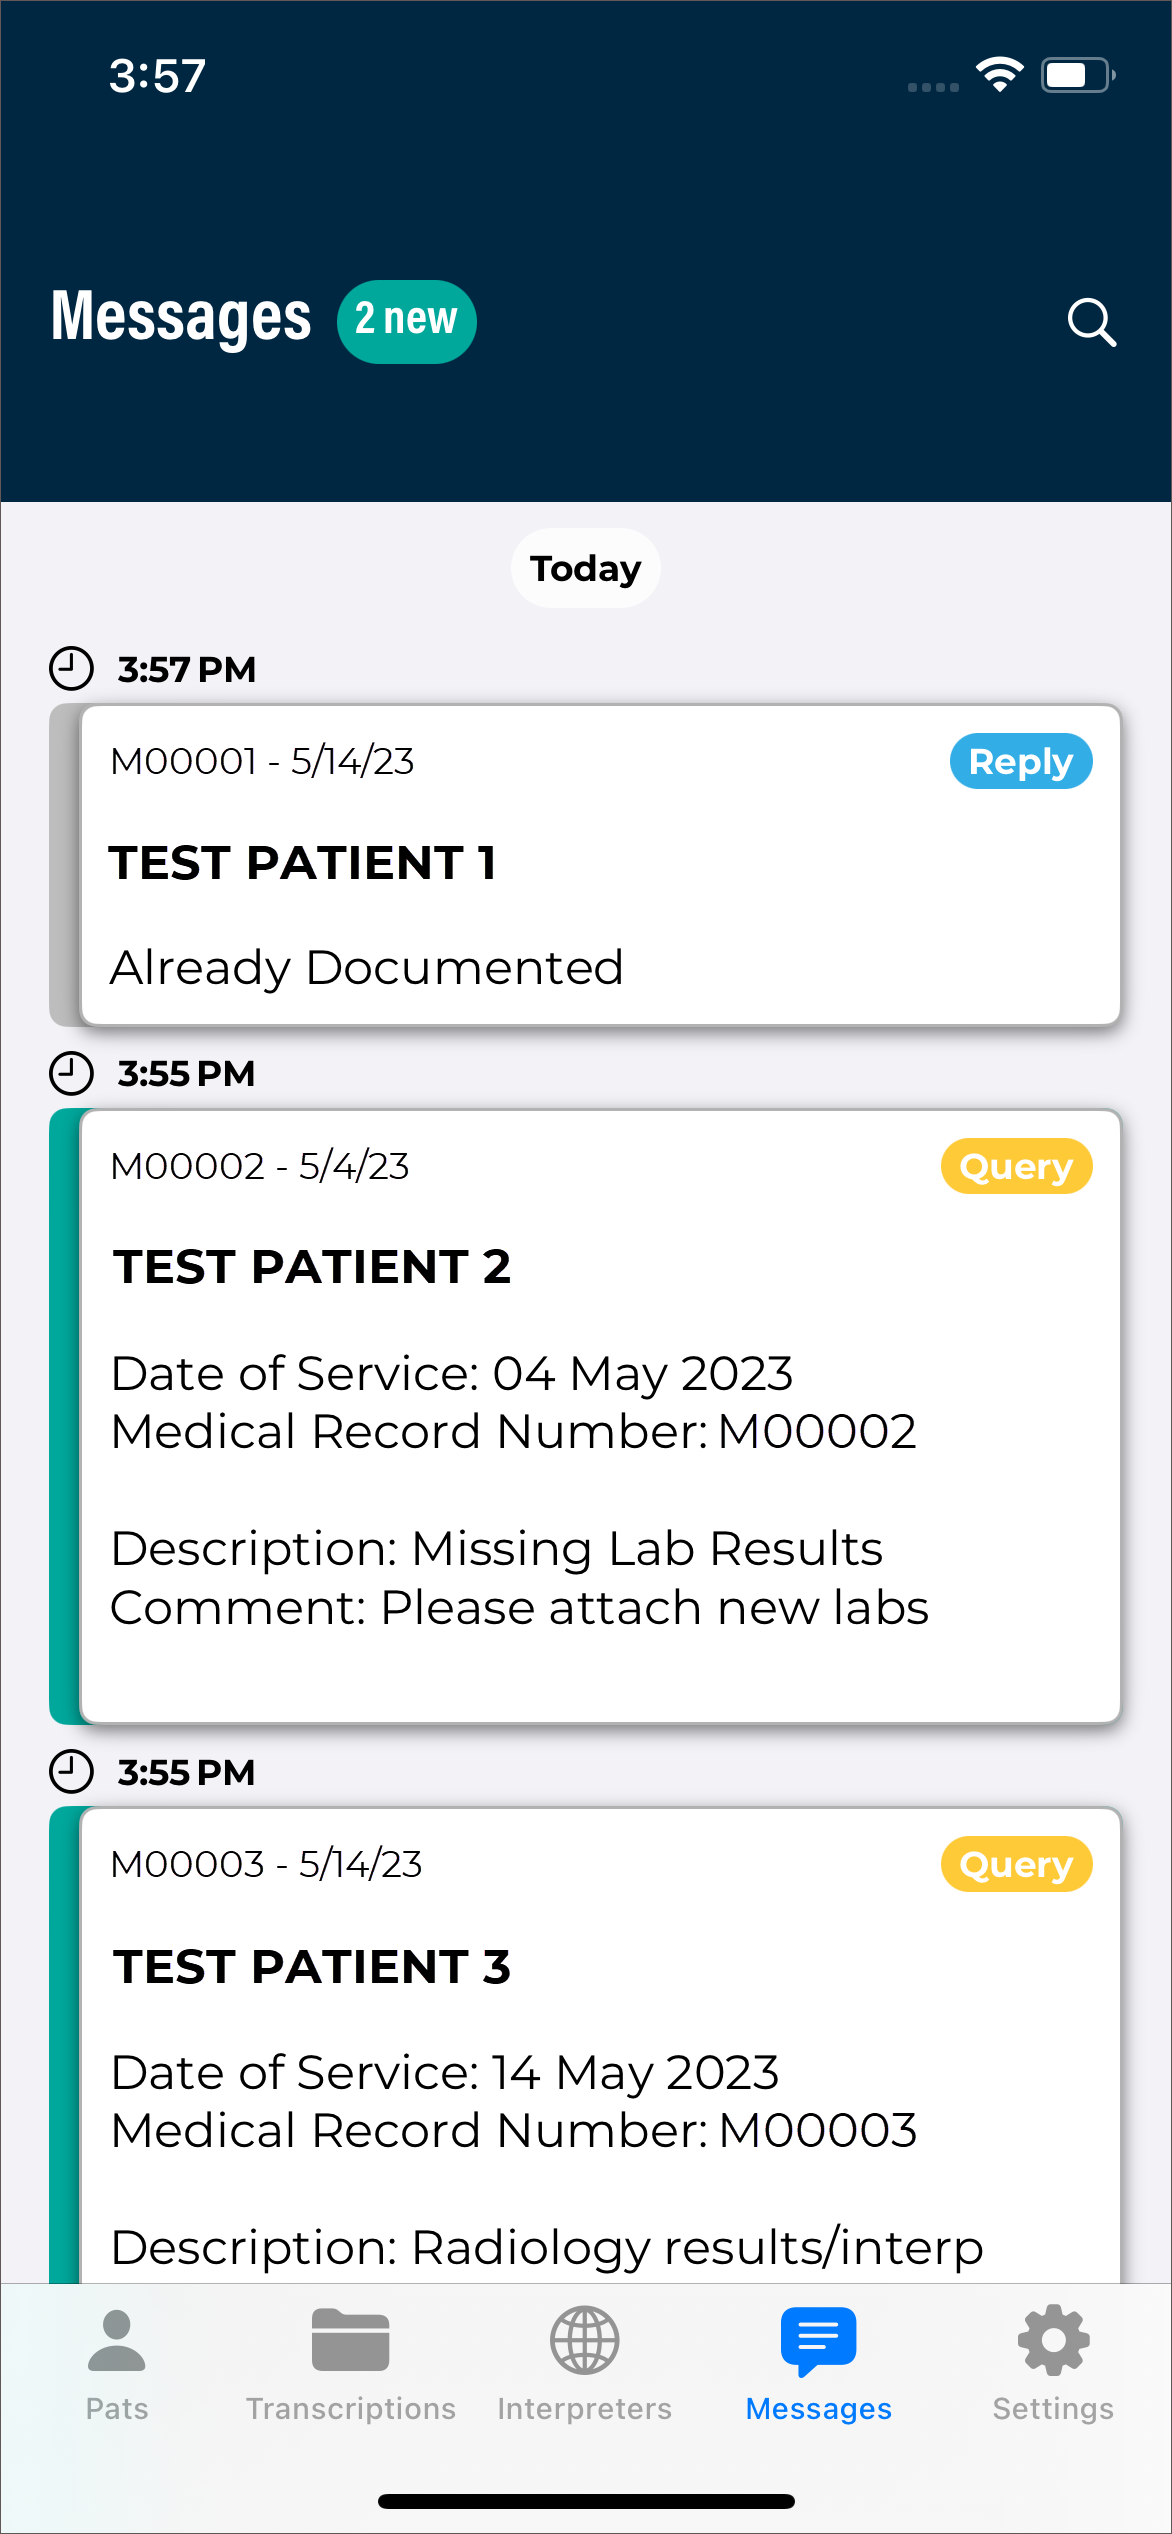 Messages received for the same patient and account number are grouped together in one thread, referred to as a "worksheet". The worksheet list is grouped and sorted descending by the date of the last sent or received message, then sorted by the time the message was sent/received, then by full patient name.
Worksheets are color-coded in the worksheet list.
- Teal - The last message was an incoming message from a coder and has not been replied to.
- Gray - The last message was an outgoing reply to the coder.
Worksheet Contents
Each worksheet in the list displays details about the patient, visit, and the type of message.
- Patient MRN, Visit date, and Name: The patient ID and visit/appointment date.
- Message type: The last incoming or outgoing message type; "Query" for an incoming message from a coder and "Reply" for an outgoing message to a coder.
- Message text: The contents of the last message received or sent.
Worksheet Message Thread
 Tap on a worksheet to read all associated messages and find additional patient and visit information.
The patient name, MRN and visit date are displayed above the message thread. Tap the information icon ![]() to view additional patient demographic information.
to view additional patient demographic information.
To return to the Worksheet List, tap the back arrow in the upper left corner.
Message Contents
Messages are grouped in ascending order by the date sent/received, then ordered ascending by time. The message thread will automatically scroll to the bottom to display the most recent message.
Each incoming and outgoing message is color-coded.
- Yellow: An incoming query from a coder.
- Teal: A reply from the provider to the coder.
If the coder has multiple queries, a new message will be sent for each query.
Replying to the Coder
Underneath the message thread are quick-reply options; scroll left and right to see all options. Tap a quick-reply to send the message to the coder. The quick-reply text cannot be edited and will be sent immediately.
Alternately, custom text can be typed. Tap the "Write a message..." text box to open the on-screen keyboard. Tap the Send button to send the message to the coder.
Once the coder's query has been resolved or the message has timed-out (duration determined by the client), the worksheet will no longer appear in the message list. It is important to reply promptly to ensure coding is completed efficiently.
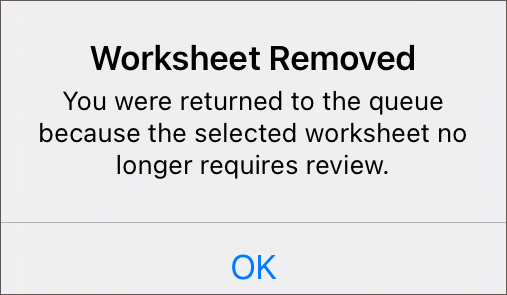 If a worksheet message thread is open when the query is resolved or coding is completed, you will be returned to the worksheet list and a message will be given explaining the selected worksheet no longer needs review.
Reminder Messages
If the client is configured to send reminder messages, the coder query messages will be resent to the provider in configured intervals until the worksheet no longer requires review.
Notifications
The eSOne mobile app can send notifications, alerting users when new messages are received from coders.
Note
The user must have the esOne mobile app running and logged in to receive notifications.
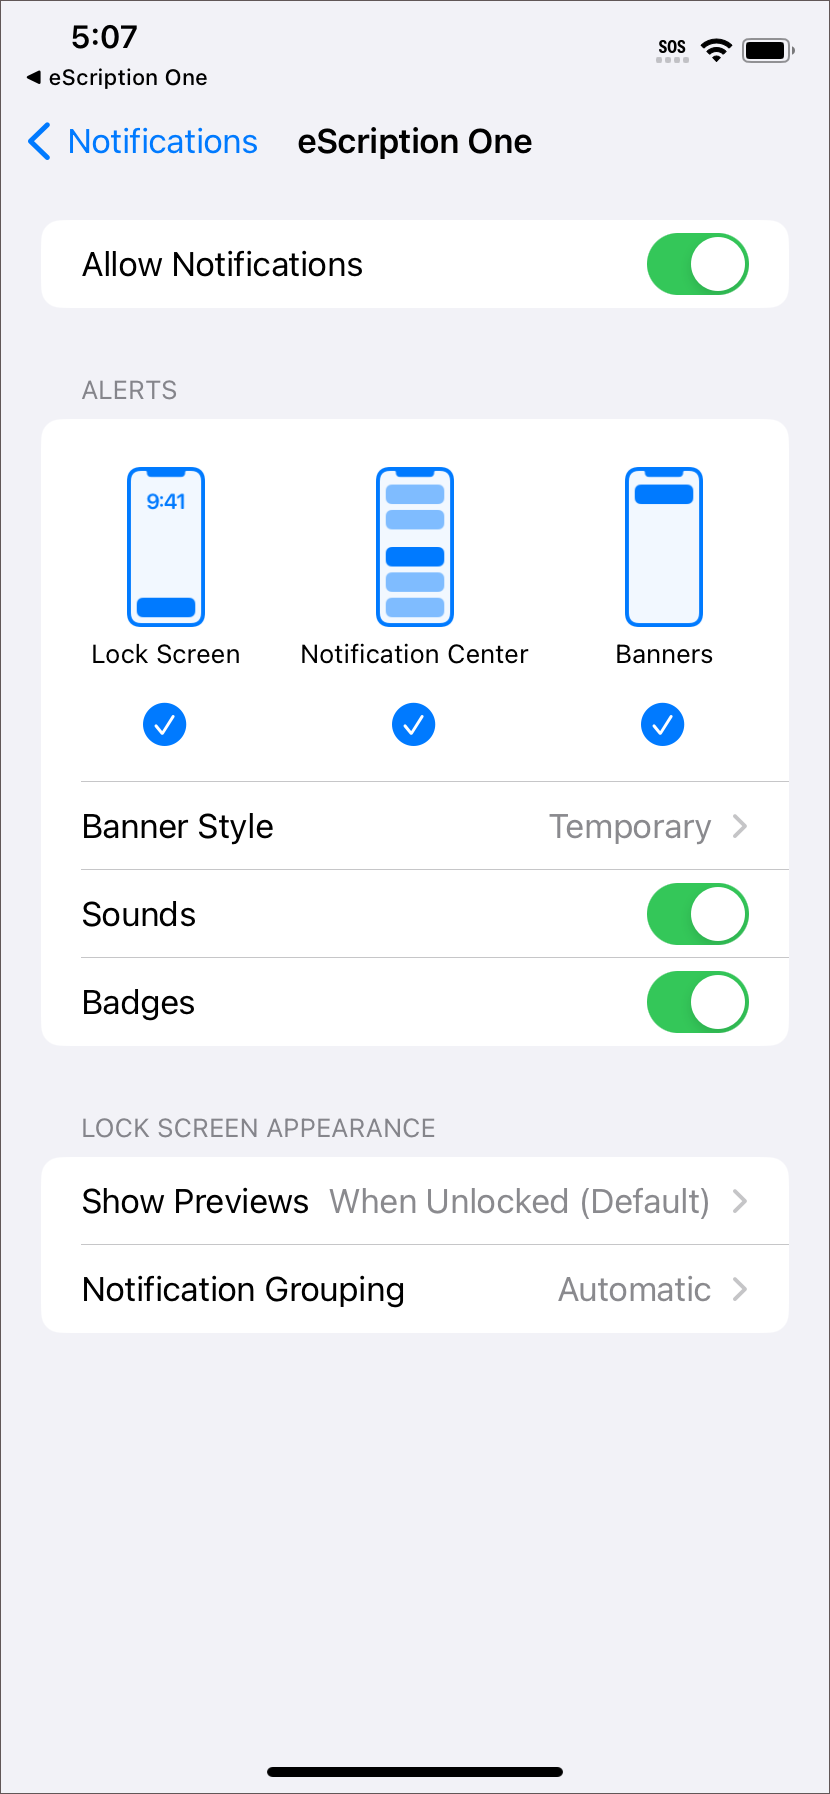
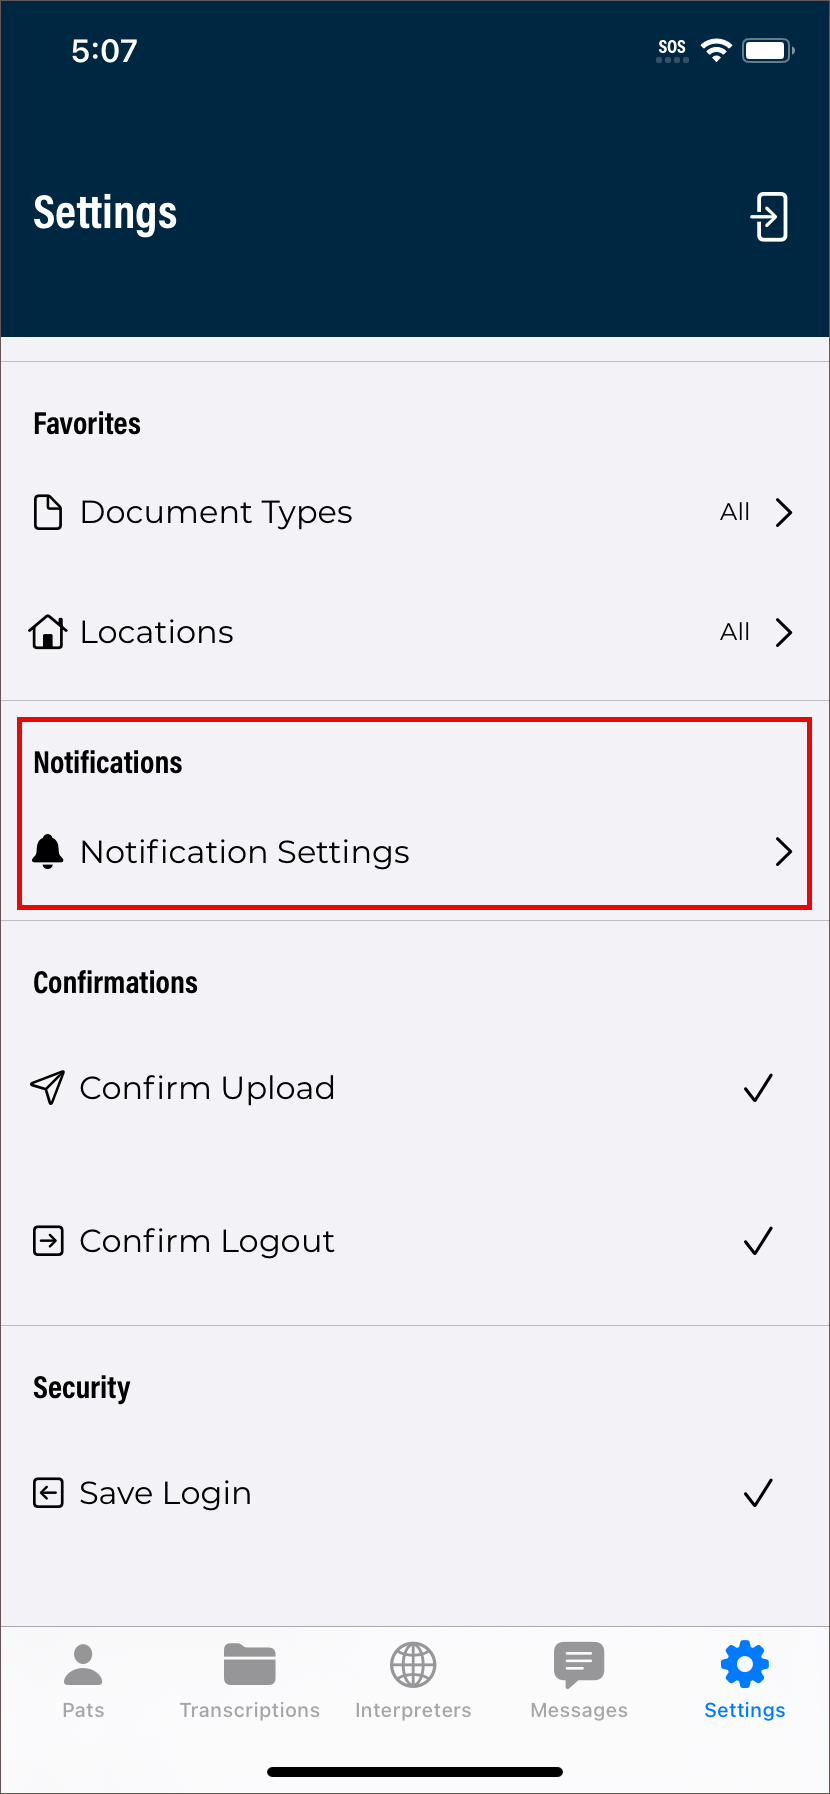
Tap on Notification Settings in the Settings tab to open the system app notifications settings for the eSOne mobile app. Each time a new message or reminder message is received the enabled notification(s) will apply.
Tap the notification to open the Messages tab. If you are not currently logged in to the eSOne mobile app, you will be prompted for login credentials.
Updating eSOne Mobile
To update eSOne Mobile to the newest version, open the Apple App Store application from your device, search for eSOne Mobile, tap the Update button, if available. If your app is up to date, a View button will appear. If you would like the application to auto-update, mark the check box to enable auto update start the Settings app, tap App Store, turn on App Updates.
Beta Testing the eSOne Mobile App
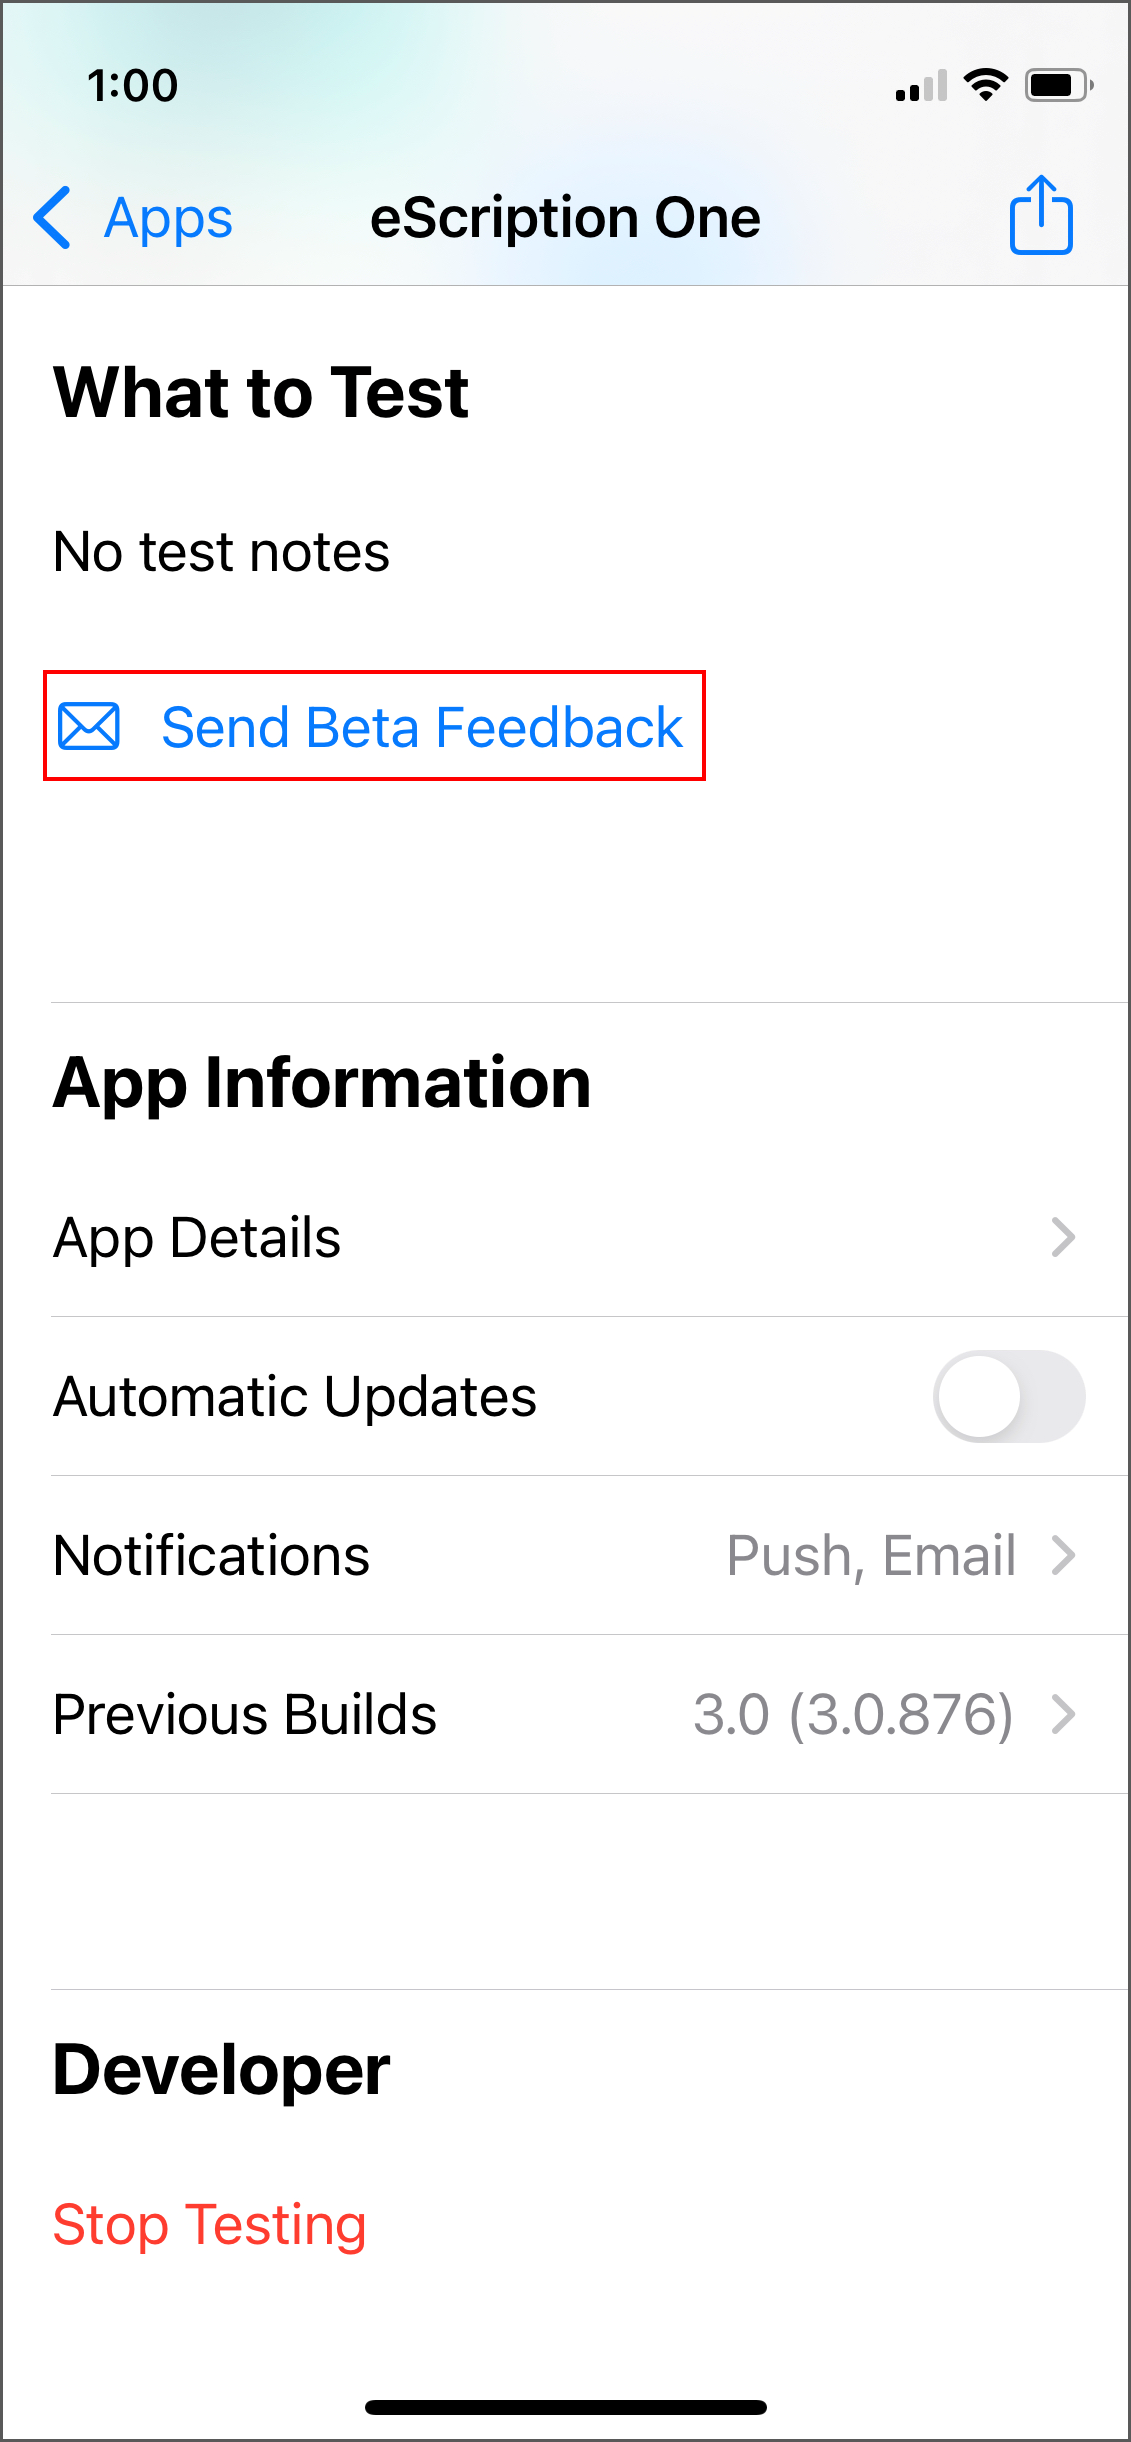 If you are interested in receiving pre-released versions of the app, we encourage you to sign up for the beta testing program. This gives you the opportunity to preview upcoming releases and provide feedback.
Register for the beta testing program by emailing beta@deliverhealth.com. Request enrollment in the iOS eSOne Mobile beta testing program and provide the email address you would like enrollment instructions to be sent to. After eSOne has enrolled you, you will receive installation instructions from TestFlight.
As beta versions of the app become available you will be able to download them from the TestFlight app. You can submit feedback, including what you like/dislike about the app, new features you would like to see, usability comments, etc., by submitting feedback in the TestFlight app or emailing beta@deliverhealth.com.
Versions of the app released to beta testers are still in the development stages and may not fully represent the version to be released to the public. You can leave the beta testing program at any time. In the TestFlight app tap eSOne, scroll down to the bottom in the Developer section, then tap Stop Testing.
Removing eSOne Mobile
Remove eSOne Mobile the same way as any other application on your iOS device. From the Home Screen touch and hold the eSOne Mobile icon then tap Remove App.
FAQ
Q: My dictations are interrupted when I receive a phone call on my iPhone; how do I stop this from happening?
A: By design, Apple does not allow our application to block incoming phone calls while you are dictating. You will not lose any work if a phone call comes in while dictating. When the Accept/Message/Reject screen pops up, recording will pause. You will be returned to the record screen upon ending or rejecting the phone call. You can then resume dictating by pressing the Record button.
If you have concerns about incoming phone calls while dictating, you can switch your phone to 'Airplane Mode' or 'Do Not Disturb' and turn on Wi-Fi.
Q: How do I get a list of my appointments to show up on my device?
A: Your transcription company can do this manually, or we can set up an export from the software your facility uses for scheduling. ShadowLink, an eSOne application, can import information delivered to us by your facility into our system.
Q: My appointments are gone or are not appearing as they should.
A: There are two common causes of this problem. The most frequent is that the filter view has been changed. Please see Appointment Filters for filtering information. There could also be an issue with the way appointments have been uploaded to our system from your facility’s scheduling software or EHR. Please call our Help Desk at 1-800-858-0080 to help resolve this issue.
Q: How is my data protected in the app?
A: All data that is stored on the device is protected by Apple's AES 256-bit crypto engine. Additionally, all the data that is transferred over the Internet is encrypted by a TLS connection, the same protection that banks use to give you safe and secure access to your accounts. Both mechanisms ensure that data-at-rest and data-in-motion are always secure when you use eSOne Mobile.
The encryption keys are derived from the pass code that you set to lock your device, therefore using an alpha-numeric password is much more secure than a four-digit PIN.
Q: Why am I logged out every time I switch to a different app then return to the eSOne app?
A: For security reasons, the application will log you out when switching apps or minimizing the app. We do offer a feature that allows users to remain logged in during other mobile activity as long as the eSOne app is still running. The managing MTSO or client must enable this feature.
Q: How long is a dictation that I have put on hold and not uploaded kept on the device?
A: An On-hold dictation stays on the device until you complete it. There is no expiration on saved dictations. However, if the app is uninstalled from the device, any on-hold dictations will be permanently deleted.
Q: How long are the audio files saved on my device after I dictate and upload them?
A: eSOne Mobile keeps dictations for two weeks.
Q: My device stopped recording and is preventing me from making any more recordings. What is happening?
A: Your device does not have enough storage space to save the audio files. Remove files or programs from the device until there is enough memory to save additional dictations.
Q: I pressed the Record button but nothing is being recorded and the dictation playback buttons do not appear. Why?
A: The eSOne Mobile app must have permission to use the microphone. To ensure it is enabled, go to your device’s Settings menu, then tap Apps. Find and tap on the eSOne Mobile application, then tap Permissions. Make sure permissions for all three settings (Microphone, Phone, and Storage) are enabled.
Q: What happens to my dictation if I lose my network and Wi-Fi connection while recording or uploading?
A: If the internet or network connection is lost while recording a dictation in eSOne Mobile, the recording continues without interruption, as it is stored locally on the device. However, if a phone call is received during recording, the dictation pauses until manually resumed. If the connection is lost while uploading a dictation, the upload pauses automatically. Once the network connection is restored, the upload resumes from where it left off, ensuring the dictation is successfully delivered without requiring a restart.
InQuiry
Introduction to InQuiry
InQuiry is a highly customizable HIPAA-compliant web-based application with various features that allows health care providers to attend live scribe sessions, as well as review, edit, search, and electronically authenticate transcriptions. InQuiry integrates a patient demographic database, referring physician information, and the facility's Electronic Health Records (EHR) system. This allows health care providers to quickly and easily complete a quality document. Using InQuiry can help produce a document that is more reliable and consistent than one produced with traditional transcription services.
Requirements
For optimal compatibility, your system must meet the following software and hardware requirements:
Minimum Requirements:
- Windows 10
- RAM: 1 GB or more
- Web Browser: Chrome, Edge, Firefox
- A monitor capable of displaying a resolution of 1366x768 pixels
- Internet Bandwidth: 3 Mbps download; 1 Mbps upload or greater
Recommended Requirements:
- Windows 10 or higher
- RAM: 4 GB or more
- Web Browser: Chrome, Edge, Firefox
- A monitor capable of displaying a resolution of 1366x768 pixels or higher
- Internet Bandwidth: 3 Mbps download; 1 Mbps upload or greater
- Sound Card with Speakers (or Stereo Headphones)
Logging In to InQuiry
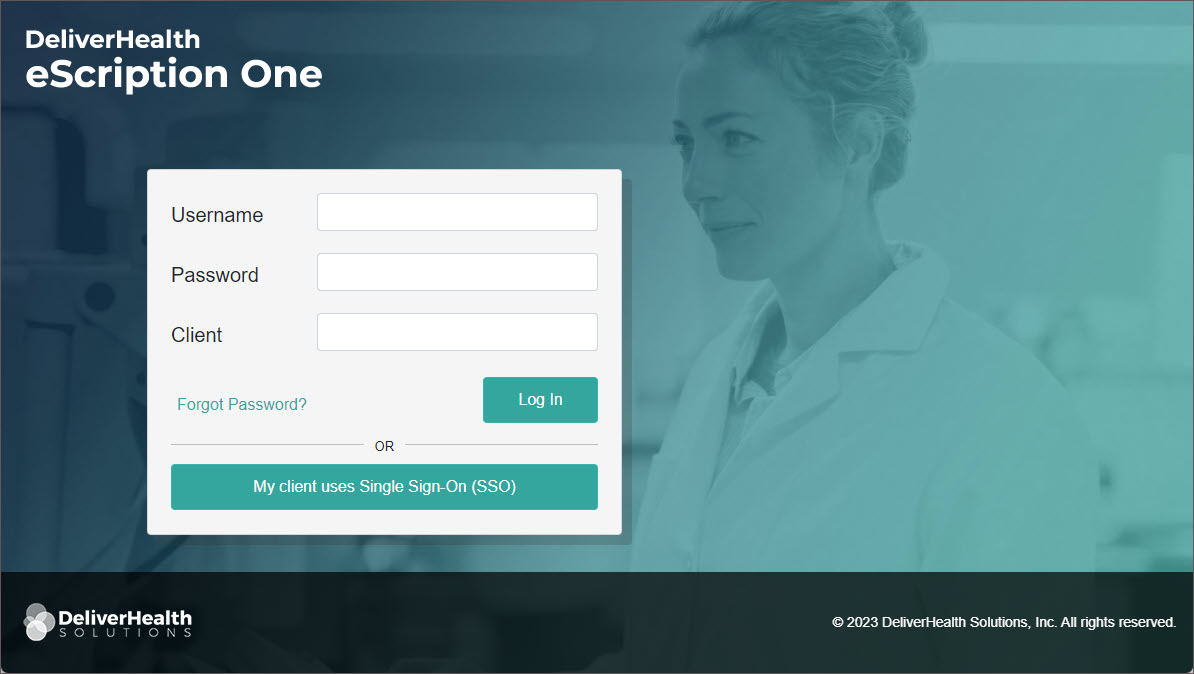 InQuiry is a web-based application that can be accessed from a web browser. Obtain a username, password, and client code from your company's system administrator prior to logging into InQuiry.
Navigate to the proper regional website:
Australia https://www.escription-one.com.au/inquiry/
Canada https://www.escription-one.ca/inquiry/
United States https://www.escription-one.com/inquiry/
Log into InQuiry with the User, Password, and Client information provided by the Transcription Company or system administrators. All three fields are required to access the InQuiry website. eSOne recommends users keep login information confidential and not share login information with other users.
If Single Sign On (SSO) has been enabled for your client, please see the eSOne SSO Configuration and User Guide for more details.
If multi-factor authentication (MFA) has been enabled for your client, please see Setting up Multi-Factor Authentication.
The Forgot Password? link next to the Login button allows users who have saved a valid email address to receive password reset instructions by email if it is lost or forgotten. For more information see Email Verification and Password Reset.
Once successfully logged in, InQuiry displays the Home tab. The navigation tabs appear along the left side of the InQuiry website. These tabs are persistent throughout the InQuiry application and allow users to quickly navigate to the most commonly accessed destinations. Each navigation tab is explored individually as each has a unique function in the overall application. Not all Navigation tabs are available to all users.
Setting Up Multi-Factor Authentication
Note
Other authentication apps may work, but Auth0 Guardian is the only officially supported authentication app used by eSOne.
Multi-factor authentication is another way to verify a your identity, adding an extra level of security to the login process. If your client has MFA enabled there will be a one-time procedure that requires you to download an authentication application called Auth0 Guardian onto your mobile device and create an account. Subsequent log ins will only require you to accept a notification sent to your mobile device. This one-time procedure does not need to be repeated for each client app.
MFA Initial Setup
- Navigate to the InQuiry log in page.
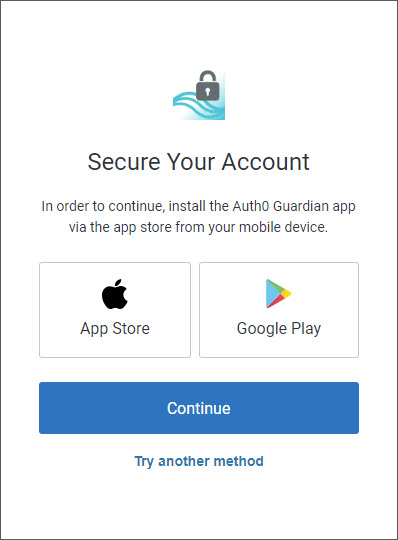
- Enter your username, password, and client code and click Log In or press Enter.
- Download the Auth0 Guardian app.
- If the Auth0 Guardian app is not installed on your phone, install it from the Apple store (for iPhone) or Google Play (for Android). Choose the appropriate button from the InQuiry log in page to view the app in the store, or search for 'Auth0 Guardian' in the app store.
- Open the Auth0 Guardian app after installation has completed.
- In InQuiry, click Continue on the 'Secure Your Account' screen to proceed.
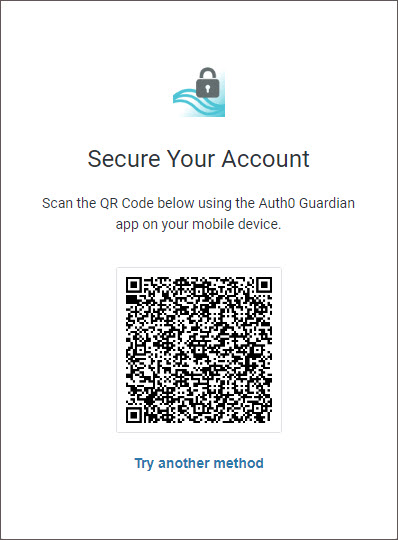
- Scan the Activation (QR) code.
- Next, use the authentication app to scan the activation code that appears in InQuiry by holding your phone up to the code. This will link the authentication app to your InQuiry application.
- If the scanner does not automatically open, you may need to click the plus button at the top of the Guardian screen to add a new account.
- Copy the Recovery Code.
- After scanning the code, you will receive a recovery code (in InQuiry). If you need to log in and do not have your mobile device, you can paste or enter this code to access InQuiry. Copy the code and keep it somewhere safe.
- If this is the first time you are using Auth0, the authentication app will also provide a recovery code for you to copy to a secure location.
- Click the check box indicating that you have recorded the code, then click Continue.
You now have an account to which a notification request will be sent each time you log in to InQuiry or the eSOne mobile apps.
You have successfully set up multi-factor authentication. Remember to have your phone nearby when you log in from now on. See the next section for details.
Logging in with Multi-Factor Authentication
Once you have completed the initial MFA setup process above, you will subsequently log in to InQuiry as shown in the steps below:
- In InQuiry, enter your login credentials.
- The 'Verify Your Identity' screen opens, indicating that a notification has been sent to your phone and is awaiting confirmation.
- Tap Allow in the banner notification or in the Guardian app.
After successful authentication, you will automatically be logged into InQuiry.
If you do not receive the notification, you can have the notification resent, or you can choose Manually Enter Code.
Open the Guardian app and choose your InQuiry profile. Enter the code from the bottom of the Guardian app into InQuiry.
Click Continue to complete the log in process.
Administrators can reset MFA in Client Maintenance for users who cannot log in with MFA after having done so previously.
Email Verification
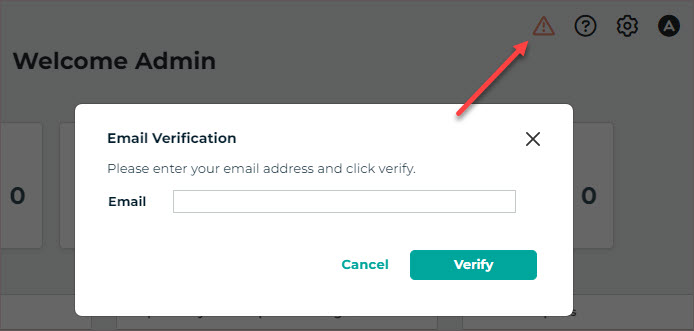 Upon login, if the user has not already entered and validated an email address, a notification window will appear asking for an email address, along with an alert in the upper right corner. This email address is used for the reset password process.
The email address is not required, and the email verification window can be closed by pressing the Cancel button. However, the user will continue to be prompted for their email address at each subsequent login.
The user can type an email address in the Email Verification window and press the Verify button. This will send a verification email to that email address containing a link. When the link is clicked the email address will be verified and the user will no longer be prompted to enter and verify an email address. If the user saves an email address but does not verify it by clicking the link the verification email, they will continue to see an orange alert icon in the upper right corner of InQuiry. This icon can be clicked to open the Email Verification window. The alert icon will be removed after an email address has been verified.
If an email address needs to be edited the user can click on the gear icon to open the Settings menu, click Preferences, then edit or enter an email address in the Password Reset Email field. The verification process will need to be repeated.
Password Reset
If the user has forgotten their password, it can be reset using the steps below. A verified email address is required to reset an InQuiry password (see Email Verification).
- On the login screen, enter the Username and Client code, then click Forgot Password?
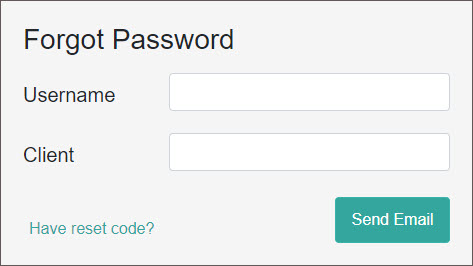
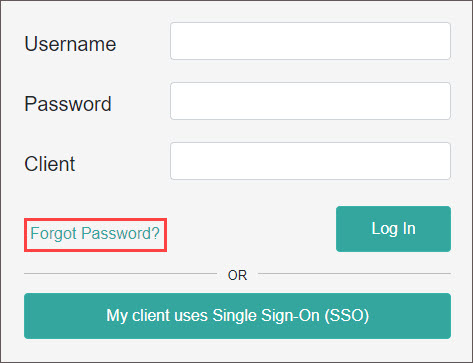
- On the 'Forgot Password' screen click either the Send Email button or Have reset code? link (if a reset code has already been received via email). An email will be sent to the user's verified email address with instructions and a link for resetting the password.
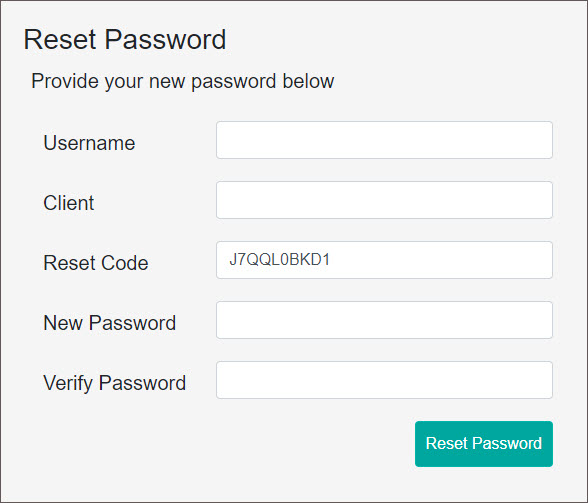
- Click the link in the email to open the 'Reset Password' screen with the reset code populated. Enter the remaining information, then click the Reset Password button. If 'Have reset code?' was clicked, the 'Reset Password' screen appears without the reset code filled in. Enter the code from the email and remaining information, then click the Reset Password button.
- If the password is successfully changed a confirmation message will appear. Return to the InQuiry log in page to log in with the new password.
Home Tab
The Home tab is the first view after logging in and allows a quick view of the status of transcriptions, reports, and services.
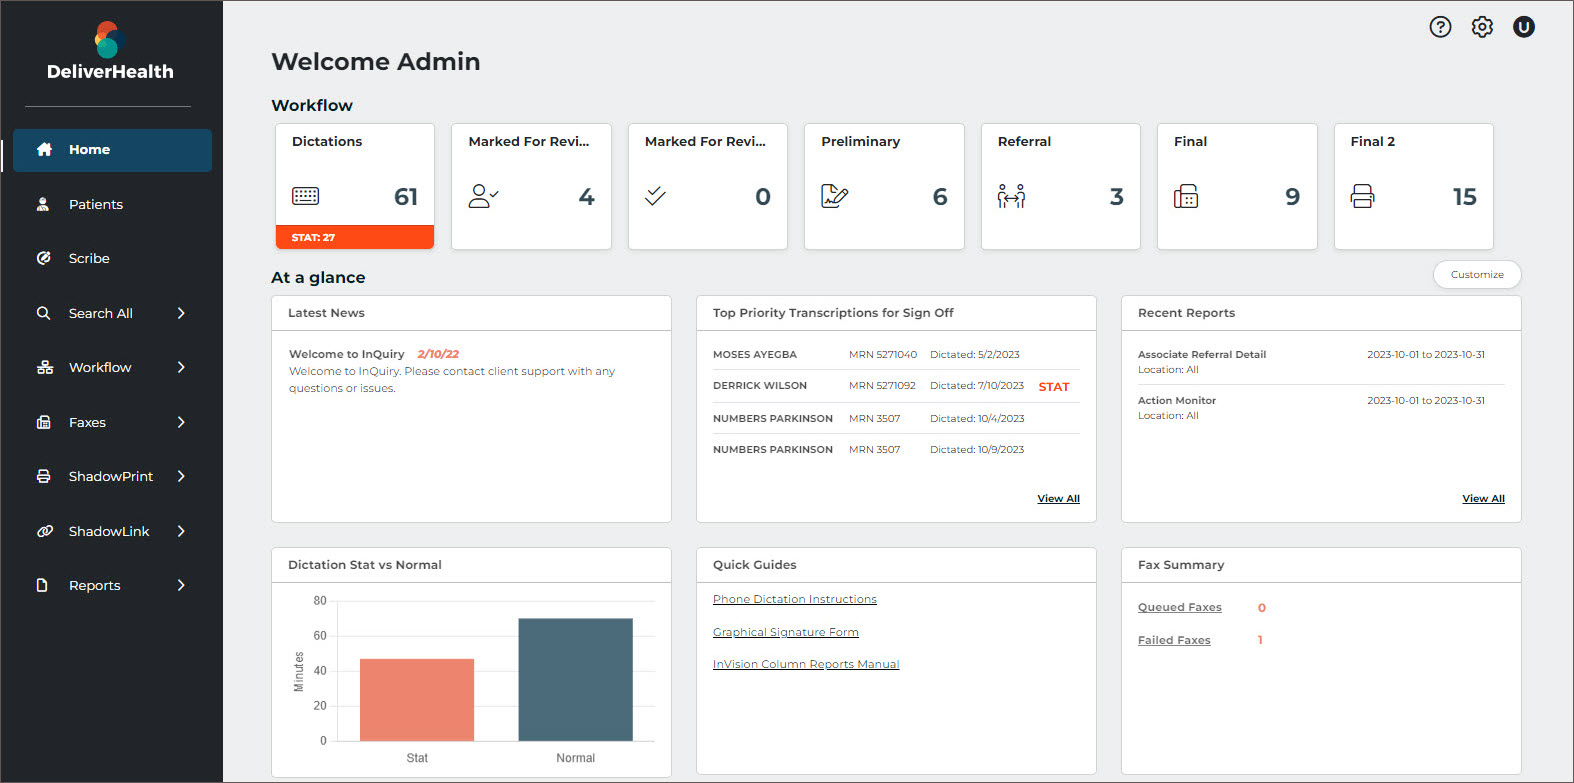
Workflow Summary
The Workflow summary provides a graphical representation and numerical count of documents as they go through the workflow. Only active folders are displayed in the workflow summary. Active folders the user does not have access to are shaded gray and do not open the folder when clicked. Only Documents the user has access to are counted in the summary.
Click on a workflow folder to navigate to the folder, where transcriptions can be viewed, edited, printed, signed, and more. The workflow summary persists across the top of the page when viewing any workflow folder to allow for easy navigation throughout the workflow. Jobs that have been completed from the last workflow folder are only viewable in Search All, but jobs still in the workflow can also be found in Search All.
Note
The labels of workflow folders are customizable for the client and may not match was is displayed in this user guide.
At a Glance
This dashboard provides summaries of information to help the user focus on areas of importance. The dashboard can be customized to include only relevant summary cards. Click the Customize button and check the boxes for each summary box to be displayed on the Home tab of InQuiry. Summary boxes can be rearranged by placing the cursor in the box where the cross arrows appear, hold down the left mouse button and drag the box into place.
The available summaries include:
- Latest News - News and announcements from the Medical Transcription Services Organization (MTSO).
- Top Priority Notes for Sign Off - Displays the four oldest transcriptions in the Preliminary folder. Click on View All to navigate to the Preliminary Folder. This card is only available if the user has access to the Preliminary folder.
- Recent Reports - Displays the last three reports that were scheduled to run (does not include one-time-run reports). Click on a report title to open the report or View All to open the Scheduled Reports tab to run a new report.
- Dictation Stat vs Normal - Displays a bar graph illustrating the number of dictation minutes for STAT and non-STAT jobs for a comparison view.
- Quick Guides - Provides links to useful guides, forms, and user guides.
- Fax Summary - Displays a count of queued and failed faxes. Clicking on Queued Faxes or Failed Faxes will run a query for all queued or failed faxes, respectively.
Patients
The Patients tab provides a daily view of patient appointments and the option to record dictations for appointments directly from InQuiry. The schedule view is only available to clients who provide an appointment data feed.
Upon opening the Patients tab, the current day's schedule loads based on schedule resources assigned to the logged-in user and the appointment data feed received from the client.
Patient Appointment Filter
To find a particular patient appointment, enter filter criteria in the filter box and press Enter or click ![]() .
.
Only the data fields displayed in the grid will be searched for matches. Clear the search box to display all appointments for the chosen date. A patient search cannot be performed without an appointment date.
Multiple data types can be searched at once by separating the data with a space. For example, to find an appointment with "Knee" in the appointment reason field and "Derk" in the patient name, type "knee Der" in the search text box.
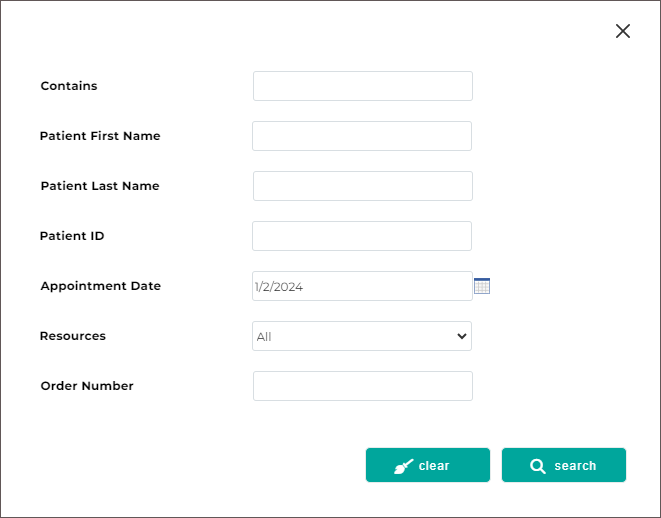 Click Advanced Search to enter additional search parameters.
- Contains - Search by full or partial data to match in any data field displayed in the search results grid.
- Patient First Name - Search by the patient's full or partial first name.
- Patient Last Name - Search by the patient's full or partial last name.
- Patient ID - Search by the patient's full or partial MRN.
- Appointment Date - Select a single date to search for the patient. This field is required.
- Resources - Specify which appointment resource code to filter by. Only resource codes assigned to the user will be displayed in the selection list. Select All to show matches from all resource codes.
- Order Number - Search by the full or partial appointment order number.
Click the clear button to remove all advanced search criteria and display all appointments for the selected date, or search to perform the patient search.
Tip
If the search criteria needs to be removed from Advanced Search use the clear button in the Advanced Search window; clearing the Search text box will not clear the Advanced Search criteria.
Patients Data Grid
The data grid displays patient appointments that match the search criteria and can be customized by changing the included fields, grouping, and sorting.
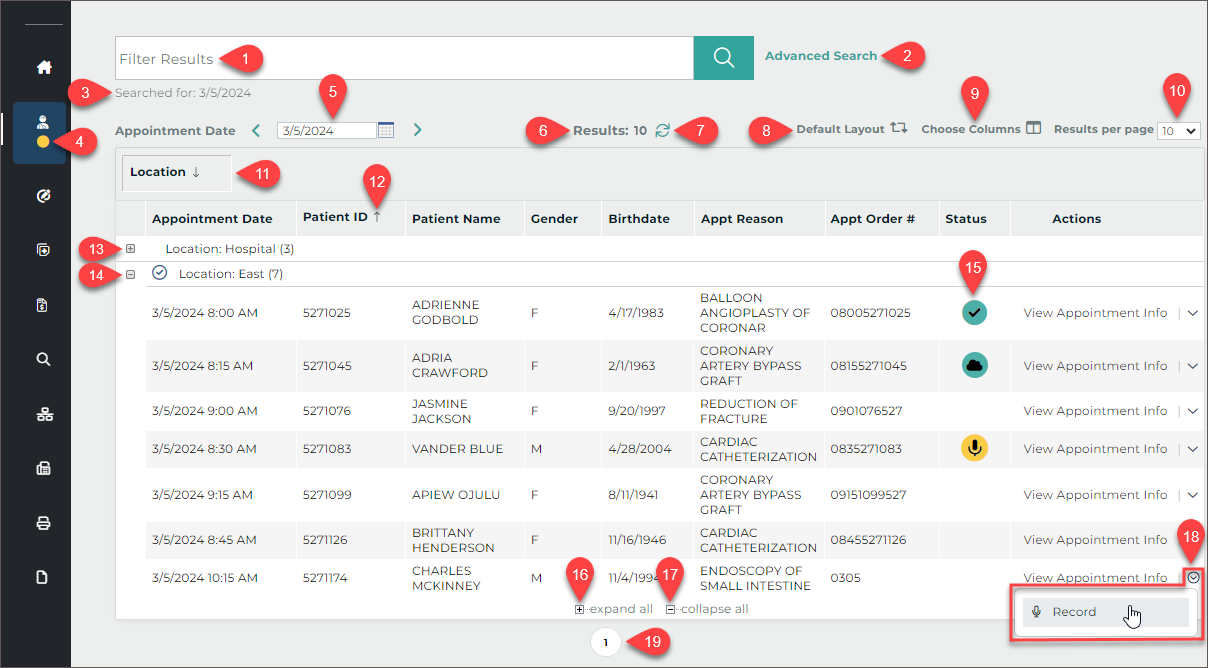
- Filter Results - Allows filters to be applied to the appointments for the given date.
- Advanced Search - Opens the Advanced Search window to apply search criteria to specific data fields.
- Searched for - Displays the submitted search criteria from Advanced Search.
- On-hold Dictation Indicator - A yellow dot appears in the Patients tab of the left navigation menu when a dictation has been recorded but not uploaded.
- Appointment Date - Type a date into the text field or click the calendar icon to choose a date from the calendar.
- Results - Displays a count of matching appointment records.
- Refresh - The refresh button performs the same search again.
- Default Layout - Resets the data grid to the default layout, removing any changes previously made to the included columns, grouping, and sorting.
- Choose Columns - Opens the Column Chooser. Drag columns from the chooser to the desired location in the grid to add a new column. Drag a column from the grid to the Column Chooser to remove a column.
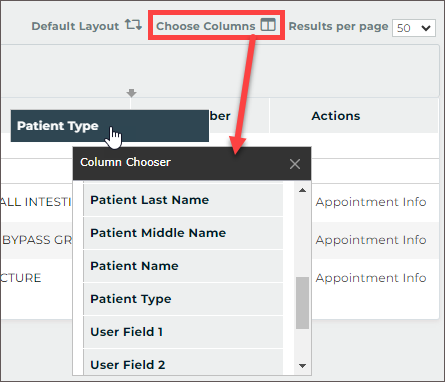
- Results per page - Choose how many appointment records to return per grid page.
- Group - Drag any column header from the grid or Choose Columns window to the grouping row to group the results based on that data criteria. For example, drag Location to the grouping row to group all appointments at the same location together. Multiple groups can be added. Groups will automatically be used to sort the data. Click the group column to toggle between ascending and descending order.
- Sort - Click any column header to sort results by data in that column. Click the column header again to toggle between ascending and descending order. The sort order will be identified by an up arrow (ascending) or down arrow (descending). To sort by multiple columns hold the Shift key while clicking the column headers; data is sorted by the first column added to the sort, then by the second column added, and so on. To remove the sort from a column hold the Ctrl key while clicking the column header.
- Expand Group - Click + at the head of a collapsed group to display all records within the group.
- Collapse Group - Click - at the head of an expanded group to hide all records within the group.
- Status - Displays the dictation state for the corresponding appointment.
Blank - No dictations have been started or received for the appointment.
 The appointment has a dictation that has been started but not yet uploaded.
 A dictation has been uploaded for this appointment from another device.
 A recorded dictation for this appointment has been successfully uploaded from this device.
 - Expand all - Click to display all records for all groups.
- Collapse all - Click to hide records for all groups.
- Actions - A list of available actions to take. The default action is to view appointment details.
- Reorder - Drag and drop columns to reorder grid columns.

- Remove Column - Hover the mouse pointer over the column header and click X, or drag the column into the Choose Columns window to remove it from the grid.

Patients Actions
Two actions can be performed in the Patients tab. The default action will be performed when the Actions column text is clicked. Click the Actions menu expansion button  to display an additional option.
View Appointment Info
The default action in the Patients grid is to view the appointment details. Click View Appointment Info in the Actions column to open a read-only view of appointment information.
InQuiry Dictation
Dictations can be recorded and uploaded directly from InQuiry. A microphone device is required. Choose Record from the Actions menu to begin a new dictation or resume an on-hold dictation for the corresponding appointment. Dictations cannot be recorded without an appointment.
The New Dictation record window will open displaying the Patient ID, name and appointment date. The document type and location can be selected. If the user or client has a default document type and/or location, those will be pre-selected, but can be changed using the selection list. The STAT check-box allows the STAT status to be toggled on and off. Marking a dictation as STAT may incur additional charges.
Recording and Playback Controls
Click Start or the Record button  to begin recording. Access to the microphone must be granted to continue. There will be a slight delay while the microphone initializes. Audio is being recorded when "Duration" is displayed below the recording controls.
The Stop  buttons become active when recording or playback begins. Press either button to stop recording. Recording can be resume by pressing either record button. Additional dictation will always append to the end of the recording.
The recorded audio can be played back after recording has stopped. Press any of the three Play buttons to begin playback. The seek bar slider can be used to change the position of the playback, but does not change where additional recorded audio is inserted.
To increase or decrease the playback volume, hover the mouse over the speaker icon to open the volume slider, then click or slide the volume position as needed. Click the speaker icon to mute the playback volume.
Upload Dictations
After recording the dictation press the Complete button to upload it to eSOne. The New Dictation window will remain open until the upload has completed and a confirmation window appears. The appointment will display a check-mark in the Status column to indicate a dictation has been completed from InQuiry on this device.
An uploaded dictation cannot be played back from the Patients tab. Navigate to the Dictations folder in the InQuiry Workflow tab to play the dictation (note that the folder may have a different name).
If additional dictations are needed for the same appointment, select Record from the actions menu. Subsequent dictations will not be appended to the first dictation at the time of upload, but can be appended later in the workflow.
Save and Delete Dictations
To save a started dictation without uploading it, press On Hold. A confirmation message will display and the Status column will indicate a dictation has been placed on hold.
The left navigation menu will also have a yellow dot to indicate there is at least one dictation on hold in the Patients tab.
To complete or add to an on-hold dictation, choose Record from the Actions menu for the given appointment. The saved dictation will load. Press Record to append additional audio to the end of the dictation or Complete the dictation to upload it to eSOne.
To delete a started or on-hold dictation open the record window, click Cancel, Delete, Close  or press the Esc key.
A dialog will prompt for an action: Place Dictation on Hold, Complete Dictation, or Delete Dictation. Choose Delete Dictation to remove the dictation without uploading it to eSOne. Once the dictation has been deleted it cannot be restored.
Scribe
DeliverHealth’s Synchronous Scribe solution lifts the burden of documentation so providers can focus on what matters most – spending time on patient care. Providers connect with our highly trained medical scribes in real time. The scribes listen to the encounter and create a structured EHR note for physicians to review and sign off on.
Starting and Joining a Scribe Room
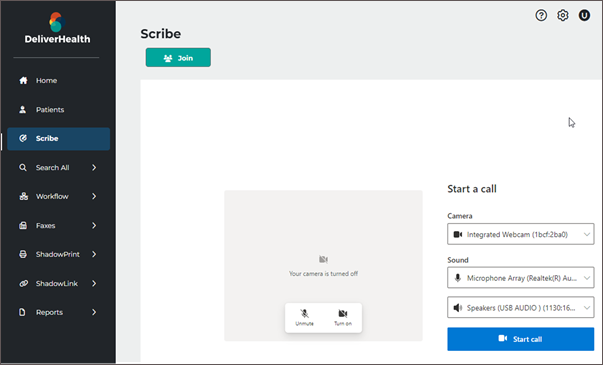 To create a virtual Sync Scribe room, click on the Join button. The call settings will load prior to the room opening.
If multiple cameras, microphones, or speakers are connected choose which devices to use by expanding the selection list for each device. If only one device is found it will be selected by default. Devices can also be changed after joining the scribe room.
The camera is turned off and the microphone is muted prior to joining the scribe room. Click on the microphone icon in the camera preview window to toggle mute on and off. Click on the camera icon to toggle the camera on and off. When the camera is turned on a preview will appear.
Click Start call to join the scribe room and begin the call.
Tip
The browser will request permission to use the camera and microphone upon starting the first call. Permission must be granted to join a synchronous scribe call. If permission is granted and saved, access will not need to be granted for each call.
Scribe Room Notification
 Multiple scribes may join the scribe room, but only one provider can join. If a scribe begins the call before the provider, the provider will receive a pop-up notification in InQuiry, similar to report notifications, stating the scribe room has been opened and by whom. This notification is only presented when the provider is not in the Scribe tab.
The notification contains a link to join the scribe room directly. Scribe rooms can also be joined by navigating to the Scribe tab, then click Join.
Scribe Room Controls
The scribe room offers features for audio, video and screen-share, with a simple layout to allow for easy interaction with the scribe and focused attention on the patient.
- Click Unmute and Mute to toggle the microphone on and off.
- Click
 to expand the microphone device list and choose a different microphone.
- Click Turn on and Turn off to toggle the camera on and off.
- Click
 to expand the camera device list and choose a different camera.
- Click Present to share a browser tab, Window, or Entire Screen with the scribe room participants.
- Upon clicking Present, the provider can choose which content to share.
- Click Stop Presenting to end screen-share.
- Click to end the call.
![]() People Click to view a list of room participants.
People Click to view a list of room participants.
- The participant list will replace the chat feed. Click Chat to return to the feed.
![]() Chat Click to read and send scribe room messages.
Chat Click to read and send scribe room messages.
- Messages received from other participants will include their name.
- Messages are shown in ascending order by time received with the newest message at the bottom.
- To send a message, type in the text box and press Enter or click
 .
. - The chat history is deleted daily at midnight.
- The chat feed replaces the participant list. Click People to return to the list.
If a scribe has not joined the room, the provider's camera feed or initials will be displayed in the main camera box, depending on if the camera is enabled. Once a scribe has joined the room their camera feed or initials will fill the camera box and the provider's camera feed or initials will be displayed in the lower right corner of the camera box.
Alert
It is important that the provider unmute their microphone prior to beginning the patient interaction to ensure the scribe does not miss important details.
Once all participants have entered the scribe room the provider can unmute their microphone and proceed with the patient appointment as normal. The scribe will create the medical documentation in real-time.
Click ![]() to leave the scribe room. Each participant must leave the call to fully close the scribe room. Participants can rejoin the call in the same manner they originally joined.
to leave the scribe room. Each participant must leave the call to fully close the scribe room. Participants can rejoin the call in the same manner they originally joined.
Search All
The Search All tab allows users to search for transcriptions without knowing specifically where that document is in the workflow. It is also the only way to locate transcriptions that have been completed from all workflow folders and into the Search All repository. Documents located with the Search All feature can be interacted with normally. Users are not automatically granted access to the Search All folder. The label of the Search All folder can be changed by the client.
There are three sub-tabs in the Search All folder. Hover the mouse over the Search All tab to expand the list of sub-tabs.
- Basic Search: Search for transcriptions in any stage of the workflow or Search All repository.
- Invalidated: Search for transcriptions that have been removed from the workflow or "deleted." By default, users do not have access to this sub-tab.
- Faxes: Opens the Manage Faxes tab. Search for and view the status of fax jobs, clear fax errors, and re-fax jobs. Manage Faxes can also be opened from the Faxes tab of the navigation menu.
Click the desired sub-tab to navigate to that page. After one of the sub-tabs is loaded the three Search All sub-tabs will appear at the top of the page to allow for easy navigation between searches.
Basic Search
Transcriptions currently in or completed through the workflow can be searched for in Basic Search. This is helpful when searching for a transcription without knowing the current workflow status.
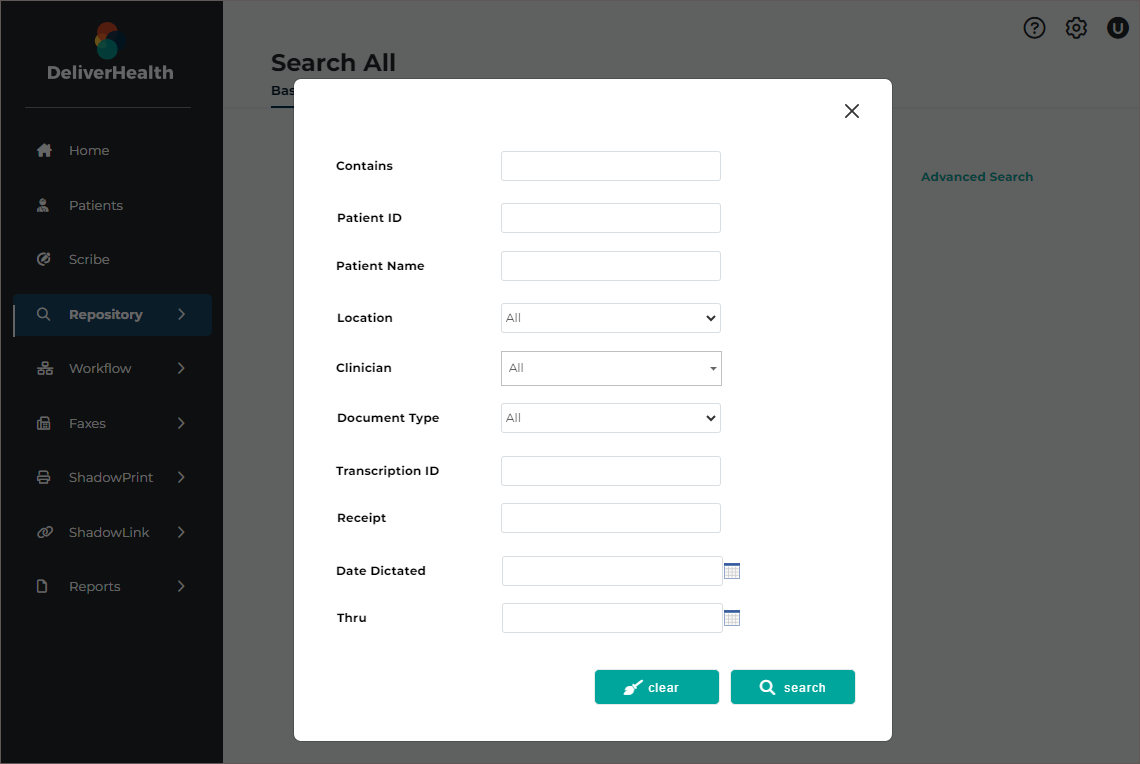 Upon opening Basic Search, the Advanced Search parameters window is presented. Data is not returned until a search is submitted. If the Advanced Search window is closed without submitting a search, the data grid will be empty. Click on Advanced Search to enter criteria and submit a search.
An Advanced Search must be submitted to further filter the search results. A search can be submitted without defining search criteria, but this will return all transcriptions the user has access to, which could result in a lengthy load time or a time-out. The Advanced Search is used to define criteria to ensure relevant transcriptions are returned in the data grid.
Building a Search
All fields in the Advanced Search window are optional and all fields, except for "Contains", will search specific data fields. Criteria entered in "Contains" will filter transcriptions returned by the other search criteria and will only match data in the fields displayed in the data grid. Fields can be added to and removed from the data grid before or after search results have been returned. See Data Grid for more details.
- Contains - Filter by full or partial data to match in all or a specified field of the search results data grid; criteria entered here will also appear in the Search text box above the data grid and vice versa. See Filter Search Results below for additional details.
- Patient ID - Search by the patient's full or partial MRN.
- Patient Name - Search by the patient's first, last or full name. Partial and full matches will be returned.
- Location - Select a location to filter on based on the visit location. Select All to search across all locations.
- Clinician - Filter results based on the dictating clinician. To search for a clinician enter a sequence of characters in the search box. The more characters you enter, the more refined your search becomes. You can use alphanumeric and special characters, including spaces, apostrophes, and parentheses. Both first and last names are searched.
- Document Type - Filter results based on the document type. Select "All" to include all document types or choose one document type to find jobs with only that document type.
- Transcription ID - Search for a specific transcription with the full Transcription ID.
- Receipt - Search for a transcription with the full Receipt Code.
- Date Dictated - Enter a start date range to filter the search results based on the Date Dictated. Both date fields are optional and a start or end date can be submitted without the other.
Click clear to remove all advanced search criteria, or search to run the query.
Search criteria submitted in Advanced Search will be displayed under the Filter Results box as a reference.
As an example, searching for the location "East" returned 575 records.
Filter Search Results
Once a search has been submitted and data is returned in the grid, a filter can be applied to further refine the results. Criteria entered in the Filter Results text box will be compared to results in the data grid. Any partial or full matches will remain in the data grid and non-matches will be filtered out. If the filter matches a data field on the transcription but is not displayed in the grid, the transcription will be filtered out and removed from the data grid.
To filter across all data fields in the grid, enter the criteria in the filter box. Continuing the example from Building a Search, filtering for "123" returns 66 records with "123" in multiple data fields. The Order Number column has been added to the grid for this example.
To restrict the filter to a particular data field, call out the field name in quotes, followed by a colon, then the data in quotes. The field name must match the header in the data grid. For example, to find records with "123" in the Order Number only, enter "Order Number":"123". Now the results have been filtered down to 40 records.
Multiple filters can be applied by separating the data with a space. All filter criteria must be met. For example, filtering the original search results for "123" in the Order Number, a Document Type of "Chart", and "Mel" in any of the fields in the grid returns 3 results. Note: The Document Type search in Advanced Search could have been used instead of the Document Type filter.
When an additional field is added to the grid, the filters take that field into consideration. For example, the Comment field is added to the grid. "Mel" was found in the comments for a new transcription, which has now been added to the data grid.
Data Grid
The data grid displays transcriptions that match the search criteria and can be customized by changing the included fields, grouping, sorting, and how many results are displayed on each page. Actions can be taken for individual transcriptions or in bulk by selecting multiple or all transcriptions.
- Filter Results - Allows filters to be applied to data in the grid. Columns with the matching data must be in the grid to match the filter. See Filter Search Results for more details.
- Advanced Search - Opens the Advanced Search window to specify search criteria. See Building a Search for more details.
- Select All - Toggles between selecting and unselecting all transcriptions on the current page of the search results. Transcriptions on prior and subsequent pages are not selected. Transcriptions with "Dictations" status will not be selected with this option because bulk actions cannot be applied to dictations not yet typed.
- Bulk Actions - Choose an action to apply to selected transcriptions. See Basic Search Actions for more information.
- Results - Displays a count of matching appointment records.
- Refresh - The refresh button performs the same search again.
- Default Layout - Resets the data grid to the default layout, removing any changes previously made to the included columns, grouping, and sorting.
- Choose Columns - Opens the Column Chooser. Drag columns from the chooser to the desired location in the grid to add a new column. Drag a column from the grid to the Column Chooser to remove a column.
- Results per page - Choose how many appointment records to return per grid page.
- Group - Drag any column header from the grid or Choose Columns window to the grouping row to group the results based on that data criteria. For example, drag Location to the grouping row to group all appointments at the same location together. Multiple groups can be added. Groups will automatically be used to sort the data. Click the group column to toggle between ascending and descending order.
- Reorder - Drag and drop columns to reorder grid columns.

- Sort - Click any column header to sort results by data in that column. Click the column header again to toggle between ascending and descending order. The sort order will be identified by an up arrow (ascending) or down arrow (descending). To sort by multiple columns hold the Shift key while clicking the column headers; data is sorted by the first column added to the sort, then by the second column added, and so on. To remove the sort from a column hold the Ctrl key while clicking the column header.
- Remove Column - Hover the mouse pointer over the column header and click X, or drag the column into the Choose Columns window to remove it from the grid.

- Comments - Open the transcription comment window to view, edit, or remove comments and comment tags. See Comments for more information.
- Actions - The Actions column displays the status of the transcription and allows actions to be taken. If the transcription is in the workflow, the name of the folder will be displayed; if the transcription has completed the workflow, "Search All" will be displayed. Click
 to view additional actions that can be taken. See Basic Search Actions for more information.
 - Expand Group - Click + at the head of a collapsed group to display all records within the group.
- Collapse Group - Click - at the head of an expanded group to hide all records within the group.
- Expand all - Click to display all records for all groups.
- Collapse all - Click to hide records for all groups.
- Legend - Opens the legend for color-coded transcriptions. See Legend for more information.
Comment vs Comments
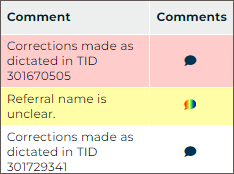
The Comments column is in the default grid layout and displays an icon when a transcription has a comment and/or comment tag. The icon can be clicked to open the comment/tags window.
The Comment column can be added to the grid and will display the comment text, but not comment tags.
Legend
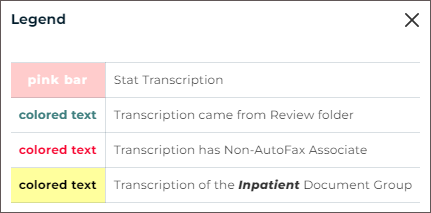 The background and/or text color of each transcription line item in the search results may indicate a specific group or priority status of the transcription. To open the legend for these color codes, click on legend in the bottom right corner under the search results. Some color indicators, such as Non-AutoFax Associate and transcriptions coming from the Review folder, will not apply in the Search All folder, but will apply in the workflow folders. Colors and document groups can be customized per client and may not match what is shown here.
Comments
If a transcription has a comment and/or comment tag(s) an icon will appear in the Comments column. Click icon to open the transcription comment window where the comments and comment tags can be viewed, edited or deleted. There are three different types of comment icons to indicate the type/number of comments on the transcription:
 A black-filled comment icon indicates a typed comment has been added to the transcription.
 A color-filled comment icon indicates a comment tag (a predefined comment) has been added to the transcription and a text comment may also be included. A different color can be assigned to each comment tag; if only one comment tag appears on the transcription then the color assigned to that comment tag will fill the comment icon.
 A rainbow-filled comment icon indicates multiple comment tags have been added to the transcription and a text comment may also be included.
Basic Search Actions
By default, clicking a transcription from the Basic Search data grid will open the Transcription Viewer. Depending on user settings, additional actions can be selected from the Transcription Viewer button ribbon.
 The Actions column in the Basic Search data grid displays the status of the transcription and allows actions to be taken. If the transcription is in the workflow, the name of the folder will be displayed; if the transcription is in multiple folders, such as Marked for Review and Review 2, it will appear in the grid twice (once for each folder). If the transcription has completed the workflow, "Search All" will be displayed.
The Actions column also provides a selection of actions to perform for the given transcription. Available actions vary based on user access and the status of the transcription. From Search All, actions may include playing the dictation, edit, print, fax, and complete the transcription from the current workflow folder. Click  to view available actions for the given transcription.
The Play option opens the playback control to allow users to play/pause audio. Users can also play/pause the audio using the Ctrl+Space shortcut. Foot pedals that are capable of being configured to send specific keystrokes can be used to play/pause audio as well. Please refer to your foot pedal manufacturer's user manual for assistance in configuring the Ctrl+Space shortcut. Dictations are stored on the eSOne system for 90-days and cannot be played after that time. The Play option will not appear when the dictation is not available.
Printing transcriptions, cover letters and envelopes for multiple transcriptions at once can be achieved by selecting the desired transcriptions with the check box at the beginning of each row, or the select-all box above the grid, then clicking the appropriate print option in the bulk action menu. Specific dictators or document types may not generate envelopes or cover letters.
Note
A separate printing component is required to print transcriptions. The user will be prompted to download it if it is not found when printing is initiated. See the Printing Agent User Guide.
Invalidated
The Invalidated tab gives access to transcriptions that have been invalidated or removed. There are several reasons a transcription could be invalidated. If a dictation remains untyped for an extended period of time it may be automatically invalidated. Some clinicians may mistakenly dictate on the same appointment twice, asking that one be invalidated. Regardless of the reason, invalidated transcriptions can be searched for and restored from the Invalidated tab.
The search and data grid performs the same as Search All - Basic Search. See Basic Search for details on how to build a search. Search results will be displayed in the data grid.
Invalidated Actions
The Actions column of the data grid will display one of two statuses:
- Transcription - Prior to being invalidated, the transcription was completed by the transcription company.
- Not Transcribed - The dictation was invalidated prior to the transcription being delivered by the transcription company.
Faxes
Facsimiles are generated through Fax on Demand or by utilizing the eSOne AutoFax or Distribution Rules features. There are search tabs in Faxes, Manage Faxes and Pending Faxes to help manage fax jobs. See Faxes for additional details.
Workflow
The contents of the Workflow tab are highly customizable and can be configured to the specific needs of the client. The workflow folders are listed in the order documents move through the workflow.
The Dictation status folder is always active, but all other folders in the workflow may not be in use by the client or can be made unavailable to specific users. Folders that are not in use or the user does not have access to cannot be opened and are gray-out in the Workflow Summary. The names of the workflow folders can be renamed by the client administrator, but their function and place in the workflow will remain unchanged.
Each workflow folder has a specific purpose. An example of the typical workflow and folder usage is:
- Dictations - The dictation is going through the document creation workflow and is not yet available for review.
- Review - Both review folders are typically used by administrative staff to make edits or answer outstanding questions prior to review by the provider..
- Preliminary - The medical provider reviews, edits, and signs notes.
- Final - Used by administrative staff to print, fax, and distribute the notes.
Each accessible folder can be opened from the Workflow Summary on the Home tab and along the top of each workflow folder, or by choosing it from the Workflow menu in the left-side navigation menu. All notes in the given folder will automatically load in the data grid. Additional filters can be applied to further refine the data. See Refining Workflow Folder Lists for more details.
The default action in all workflow folders, except for Dictations, is Edit. A note will open in edit mode when clicked anywhere in the row, except for the Actions column. See Note Editor for details on editing notes.
To view a note click View Note in the Actions column for the given note. Additional actions can be selected from the Actions menu. An action can be applied to multiple selected notes using Bulk Actions. See Workflow Actions for more details on available actions.
Workflow Folders
Dictation Status
Notes in the Dictation Status folder have recently been uploaded and have not been delivered as completed documents. Two actions can be performed on dictations that are in the Dictation Status workflow folder.
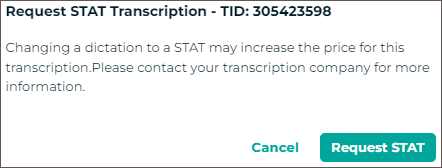 Toggle STAT Status
A Note can be marked as a higher priority dictation. Notes marked STAT are completed before other notes and may have a higher cost per line. The STAT status can be toggled with "Make STAT" and "Remove STAT" in the Actions column. Notes that are highlighted in pink have been marked STAT (the color is customizable by the client and will be reflected in workflow folder legend).
Play Dictation
Expand the Actions menu and select "Play" to open and listen to the dictation in a new web-browser tab. Playback buttons and keyboard shortcuts are available for play, pause, rewind, and fast forward. Foot pedals that are capable of being configured to send specific keystrokes can be used for playback controls as well. Please refer to your foot pedal manufacturer's user manual for assistance in configuring shortcuts. Dictations are stored on the eSOne system for 90-days and cannot be played after that time. The Play option will not appear when the dictation is not available.
Marked for Review
Notes in the Marked for Review and Marked for Review 2 folders have been delivered to the client, but may require additional edits from staff members. Comments or comment tags are commonly added by the transcription company or validation rules detailing why the document was selected for the Marked for Review folder. Access to view comments must be granted to InQuiry users and is disabled by default. Notes printed from the Marked for Review folders include a "Preliminary" watermark by default.
Preliminary
Notes in the Preliminary folder are ready for provider review. If the provider is using the electronic signature option, completing documents from the Preliminary folder applies the electronic signature to the document. If multiple signatures are required, such as a resident and attending physician (authenticator), the signatures must be applied in order. The note will not appear in the Preliminary folder for the authenticator until after the resident has reviewed and signed the document.
The Preliminary folder is the last folder in the workflow that users can edit notes without additional security access. Notes in the Preliminary folder print with a "Preliminary" watermark by default.
Dual Resident/Attending
If the 'Dual Resident/Attending Workflow' option has been enabled for the client, attending physicians (authenticators) will be allowed to complete documents in the workflow even if the dictating resident has not yet reviewed or approved the document. A note requiring an extra signature(s) will appear in the resident's and attending's Preliminary folders at the same time. Either the dictating resident or attending physician can review and edit the document.
Note
The attending physician should not have proxy to the resident dictator when this workflow is enabled.
When the Dual Resident/Attending workflow is enabled, a new column named 'Review Status' will appear in the Preliminary workflow grid showing one of two statuses:
- Outstanding – the note has not been completed from the Preliminary folder by the dictating resident or attending. The text color of this status can be changed using the new 'Dual Resident/Attending Color' option in Workflow Settings.
- Reviewed – the note has been approved by the dictating resident from the Preliminary folder. Or, in the case of multiple authenticators, one of the authenticators has completed the dictation. (This status will not show for the resident.)
Only jobs requiring more than one signature will display a value in the 'Review Status' column.
There are two paths this workflow can follow:
-
Resident reviews then attending completes.
-
When the note is 'Outstanding', the resident can review and approve the note. After the resident completes the job, it is removed from their Preliminary folder.
-
The attending will still see the note in their Preliminary folder with the status of 'Reviewed'. The attending can then complete the note and it will move on to the next workflow folder.
-
-
Attending completes an outstanding note.
-
An attending can complete an 'Outstanding' note prior to the resident reviewing/approving the note.
-
Once the attending completes the job, the note moves on in the workflow and out of their Preliminary folder and the resident's Preliminary folder.
-
If there is more than one attending on the dictation and the dictation has a status of 'Outstanding', the resident and all attendings can see the job in their Preliminary folders. Attendings can sign in any order.
If there is more than one attending on the dictation, and one of the attendings completes the dictation before the resident reviews it, the job is removed from that attending's Preliminary folder, as well as the resident's folder. The dictation will remain in the Preliminary folder for the other attendings with a status of 'Reviewed'.
Referral
The Referral folder contains notes the provider has been copied on as a referring associate.
The Actions column will display one of two statuses:
- preliminary - The note has not been completed from the dictating provider's Preliminary folder; changes could be made to the note prior to being finalized.
- note - The note has been completed from the provider's Preliminary folder.
Notes can be read, printed, and completed from the Referral folder, but not edited. Notes printed from the Referral folder while still in the dictating provider's Preliminary folder will print with a "Preliminary" watermark by default. Those that have been completed from Preliminary will not have a watermark. Completing notes from Referral will not advance them in the dictating provider's workflow, but will remove them from the Referral folder.
Final
Notes in the Final folders have been authenticated by the provider. Notes are prepared to be printed for the chart, paper record, or to be sent to referring associates who receive their copies by mail. Notes in the Final folders print without a watermark by default.
After notes are completed from the last workflow folder they will only be found in the Repository (Search All).
Refining Workflow Folder Lists
When a workflow folder is opened, an initial auto-search runs to return all notes in the given folder. The Search folder box or Advanced Search can be used to refine the list of notes or find a specific note in the data grid. The matching data will be highlighted in yellow in the grid. However, the Date Dictated column will not include highlighting for filter matches.
Use Advanced Search to choose specific data fields to search, or the Search folder text box to filter across all data fields or a specific field.
Advanced Search
 Click the Advanced Search slider to toggle the Advanced Search panel on and off. Advanced Search is off by default. The Advanced Search panel can be toggled off after submitting search criteria without losing the selected search data.
All fields in the Advanced Search panel are optional and will search only the notes in the given workflow folder.
- Contains - Filter by full or partial data to match in all or a specified field of the notes in the workflow folder; criteria entered here will also appear in the Filter Results text box above the data grid. See Filter Results below for additional details.
- Patient ID - Filter by the patient's full or partial MRN.
- Patient Name - Filter by the patient's first, last or full name. Partial and full matches will be returned.
- Clinician - Filter results based on the dictating clinician. To search for a clinician in the list, enter a sequence of characters in the search box. The more characters you enter, the more refined your search becomes. You can use alphanumeric and special characters, including spaces, apostrophes, and parentheses. Both first and last names are searched.
- Location - Select a location to filter on based on the visit location. Only locations assigned to notes currently in the workflow folder will appear in the selection list. Select "All" to include all locations in the folder.
- Document Type - Select a document type to return notes with that document type. Only document types assigned to notes currently in the workflow folder will appear in the selection list. Select "All" to include all document types in the folder.
- Additional Authenticator - Select one or more authenticators to filter notes where the provider is an additional signer. Only providers who are authenticators on at least one note in the given workflow folder will appear in the list. If a provider name does not appear, they are not an additional authenticator on any notes in that folder.
- Comment Tags - Select one or more comment tags to filter notes that have those tags applied. This field is not available in the Referral folder.
- Date Type - Choose the date type to search: either Date Dictated or Appointment Date. After selecting a date type, enter a date range to filter notes based on the chosen field. Both date fields are optional; you may submit a start or end date without the other, making the range open-ended.
- Previously Viewed - Available only in the Referral folder. When checked, the search results will include notes that match the other search criteria, including notes that were completed from the Referral folder previously and those still in the folder. When unchecked, only notes currently in the Referral folder will be included in the search results.
Note
Criteria entered in "Contains" will search within all data fields, regardless if they are displayed in the data grid. Please note that this behavior is different in the Search All tabs. An advanced search is required and only columns in the data grid will be searched for matches in Search All.
The Advanced Search criteria will be copied to the Filter Results text box (visible when Advanced Search is toggled off). A filter chip will also appear for each criterion. To remove a single filter, click the X next to the criterion; the search results and Advanced Search panel will be updated accordingly. Click Clear all to remove all search criteria; all notes in the folder will be displayed in the data grid.
In the example below, the Preliminary folder has 45 notes awaiting approval. Searching for the location "East" returned 40 records.
Filter Results
Filters can also be applied using the Filter Results text box, visible when Advanced Search is toggled off. Criteria entered in the Filter Results text box will be compared to data in any available field for the data grid, regardless if the field is in the grid or in the "Choose Columns" list. Any partial or full matches will remain in the data grid and non-matches will be filtered out.
Continuing the example from Advanced Search above, the location filter has automatically been copied from the Advanced Search to the Filter Results box. Because the filter was applied to search within a specific data field, Location, it is formatted in the Filter Results box to indicate the field being searched and the data being searched for. The same format used for the Location filter can be applied to any other field and will only look for matches in that particular field. Call out the field name in quotes, followed by a colon, then the data in quotes. The field name must match the header in the data grid.
For example, to find records with "123" in the Order Number field, enter "Order Number":"123". The results filtered down to 2 records.
Note that the Order Number column was added to the grid for visual purposes, but the same two results would still be returned if the Order Number column was not in the data grid.
To filter across all data fields in the grid, enter the criteria in the Filter Results box (or the Contains field in Advanced Search) without the field formatting. Removing the Order Number filter and adding "123" in the example returned 4 records with "123" in multiple data fields and "East" for the location. Also note the Order Number filter can be removed by deleting it from the Filter Results box, deleting the filter chip, or toggling on Advanced Search and deleting the filter from the Contains field.

Filters in the workflow folders apply to all columns available for the data grid, which includes fields in the data grid and fields in the "Choose Columns" list. In the example, the first two results do not have "123" highlighted in the grid. This means "123" is found in another field that is not in the grid. For these particular notes, "123" is found in the Comment and Receipt fields.
Multiple filters can be applied by separating the filters with a space. All criteria must be met. For example, filtering the workflow folder to the "East" Location, "123" in the Order Number, "Chart" Document Type, and "Mel" in any of the fields returned 1 result. The comment text contains "Mel", which is why the note was returned, even though the field was not in the grid.
When the "Comment" column is added, "Mel" is highlighted.
Notes can easily be located by Note ID or Receipt Code by entering the data in the Filter Results or Contains filters, even without the TID and Receipt fields in the grid.

Data Grid
The data grid displays notes that match the filter criteria and can be customized by changing the included fields, grouping, sorting, and how many results are displayed on each page. Actions can be taken for individual notes or in bulk by selecting multiple or all notes.
- Filter Results - Allows filters to be applied to the notes in the folder. See Filter Results for more details.
- Advanced Search - Opens the Advanced Search window to specify filter criteria. See Advanced Search for more details.
- Select All - Toggles between selecting and unselecting all notes on the current page of the grid. Notes on prior and subsequent pages are not selected. Notes in the "Dictations" status will not be selected with this option because bulk actions cannot be applied to dictations not yet typed.
- Bulk Actions - Choose an action to apply to selected notes. See Workflow Actions for more information.
- Create - Create a new note without a dictation. The note editor will open. This option is only available in the Preliminary folder and Patients tab if enabled for the client and user.
- Results - Displays a count of matching appointment records.
- Refresh - The refresh button performs a search for all jobs in the folder and re-applies any filters.
- Default Layout - Resets the data grid to the default layout, removing any changes previously made to the included columns, grouping, and sorting.
- Choose Columns - Opens the Column Chooser. Drag columns from the chooser to the desired location in the grid to add a new column. Drag a column from the grid to the Column Chooser to remove a column. Filters will apply to all fields in the grid and in this list, unless a specific field is called out in the filter.

- Group - Drag any column header from the grid or Choose Columns window to the grouping row to group the results based on that data criteria. For example, drag Location to the grouping row to group all appointments at the same location together. Multiple groups can be added. Groups will automatically be used to sort the data. Click the group column to toggle between ascending and descending order.
- Reorder - Drag and drop columns to reorder grid columns.

- Remove Column - Hover the mouse pointer over the column header and click X, or drag the column into the Choose Columns window to remove it from the grid.

- Sort - Click any column header to sort results by data in that column. Click the column header again to toggle between ascending and descending order. The sort order will be identified by an up arrow (ascending) or down arrow (descending). To sort by multiple columns hold the Shift key while clicking the column headers; data is sorted by the first column added to the sort, then by the second column added, and so on. To remove the sort from a column hold the Ctrl key while clicking the column header.
- Comments - The Comments column in the grid opens the Comments dialog, allowing you to view, edit, or remove comments and comment tags. See Comments below for more information.
- Actions - The Actions column displays the status of the note and allows actions to be taken. If the note is in the workflow, the name of the folder will be displayed; if the note has completed the workflow, "Search All" will be displayed. Click
 to view additional actions that can be taken. See Workflow Actions for more information.
 - Expand Group - Click + at the head of a collapsed group to display all records within the group.
- Collapse Group - Click - at the head of an expanded group to hide all records within the group.
- Toggle Group Selection - Click to select/un-select all notes in the group.
- Expand all - Click to display all records for all groups.
- Collapse all - Click to hide records for all groups.
- Legend - Opens the legend for color-coded notes. See Legend for more information.
Comment vs Comments

The Comments column is in the default grid layout and displays an icon when a note has a comment and/or comment tag. The icon can be clicked to open the comment/tags window.
The Comment column can be added to the grid and will display the comment text, but not comment tags.
Legend
 The background and/or text color of each note line item in the grid may indicate a specific group or priority status of the note. To open the legend for these color codes, click on legend in the bottom right corner under the grid. Some color indicators, such as Non-AutoFax Associate and notes coming from the Review folder, will not apply in the Search All folder, but will apply in the workflow folders. Colors and document groups can be customized per client and may not match what is shown here.
Comments
If a note has a comment and/or comment tag(s), an icon will appear in the Comments column. Click the icon to open the note's comment window, where you can view, edit, or delete the comments and comment tags. Only users with the appropriate permissions will see the Comments icon and be able to open, edit, or delete comments and comment tags.
There are three different types of comment icons to indicate the type/number of comments on the note:
 A black-filled comment icon indicates a typed comment has been added to the note.
 A color-filled comment icon indicates a comment tag (a predefined comment) has been added to the note and a text comment may also be included. A different color can be assigned to each comment tag; if only one comment tag appears on the note then the color assigned to that comment tag will fill the comment icon.
 A rainbow-filled comment icon indicates multiple comment tags have been added to the note and a text comment may also be included.
Workflow Actions
A variety of actions can be performed on notes within the workflow. While many of these actions are available in both the Note Viewer and Note Editor, they can also be accessed directly from the workflow folder. Certain actions are only accessible from the workflow folder.
The Actions column in the workflow folder grid displays the "View Note" option. Clicking "View Note" will open the Note Viewer. Clicking anywhere else on the record will open the Note Editor.
The Actions column also provides a menu of available actions for the selected note. The available actions may vary depending on user access and the specific workflow folder. Click  to view the full list of available actions for the note.
The following workflow actions are applicable to all workflow folders except Dictations and Referral. However, some options may not be available depending on client and user configurations. For available actions in the Dictations and Referral folders, refer to Dictation Status and Referral, respectively.
| Action | Action Description | Action Location |
|---|---|---|
| View Note | View the note contents in a separate web-browser tab. | Actions column |
| View Info | View additional dictation and note information. | Actions menu Note Viewer |
| Edit Note | Edit the note text, demographics, referrals, signatures, and more. | Click the grid row Actions menu Note Viewer |
| Play | Opens the dictation playback control in a new web-browser window. | Actions menu Note Viewer Note Editor |
| View Cover Letter | Opens a preview of the document cover letter(s). Cover letters are only generated for associates on the note who receive documents by mail. Specific dictators or document types may not generate cover letters. | Actions menu |
| View Envelope | Opens a preview of the document envelope(s). Envelopes are only generated for associates on the note who receive documents by mail. Specific dictators or document types may not generate envelopes. | Actions menu |
| View Patient Letter | Opens a preview of the patient letter. | Actions menu |
| Fax | Opens the Fax on Demand dialog window. When opened from Bulk Actions, all selected notes will be faxed to the same associate. | Actions menu Note Viewer Bulk Actions menu |
| Preview Note | Opens a rendered preview of the note in the InQuiry Printing Agent. | Actions menu Note Viewer |
| Print Note | Prints the note from the InQuiry Printing Agent. | Actions menu Note Viewer Bulk Actions menu |
| Print Cover Letter | Prints the cover letter and note from the InQuiry Printing Agent. | Actions menu Bulk Actions menu |
| Print Envelope | Prints the envelope from the InQuiry Printing Agent for the patient and/or associate. Specific dictators or document types may not generate envelopes. | Actions menu Bulk Actions menu |
| Print Patient Letter | Prints the patient letter and envelope from the InQuiry Printing Agent. | Actions menu Bulk Actions menu |
| Append | Add, edit, or remove the append chain. An append chain is two or more notes linked together and printed as one document in the configured order. | Actions menu Bulk Actions menu Note Editor |
| Complete | Completes the note from the current workflow folder and progresses to the next stage of the workflow or to the Search All repository. | Actions menu Bulk Actions menu Note Editor |
| Download | Downloads a PDF file of the note. This option is only available for notes in the Preliminary folder. | Actions menu Bulk Actions menu Note Viewer |
| Download with Format | Opens the Select Format window to download the note in PDF or DOC format. | Actions menu Bulk Actions menu View Note |
Play Dictations
The Play option opens the playback control to allow users to play/pause audio. Users can also play and pause the audio using the Ctrl + Space shortcut, rewind using Ctrl + ←, and fast forward with Ctrl + →. Foot pedals that are capable of being configured to send specific keystrokes can be used to control playback as well. Please refer to your foot pedal manufacturer's user manual for assistance in configuring the shortcuts. Dictations are stored on the eSOne system for 90-days and cannot be played after that time. The Play option will not appear when the dictation is not available.
Printing
Notes print in the order they appear in the grid when using bulk printing. To change the order in which notes are printed, resort the table, then print.
Note
A separate printing component is required to print notes. The user will be prompted to download it if it is not found when printing is initiated. See the Printing Agent User Guide.
Append
Use the Append feature to combine multiple notes for the same patient into a single appended note. The append action must be initiated from a workflow folder or the Search All > Basic Search view. It is not currently available from the Note Editor, Note Viewer, or Note Info pages. You can adjust the order of the notes and manage which ones to include in the chain.
To Append Notes:
-
Navigate to a workflow folder or Search All > Basic Search.
-
If needed, enter search criteria or apply filters to locate at least one note for the append chain.
-
Do one of the following:
-
Click Append to open the append window.
-
When the append dialog opens, one or two grids will appear depending on how the append action was initiated:
- If two or more notes were selected before clicking Append, a single grid will appear at the top. Below it, you'll see a link labeled Display 5 most recent notes… that can be used to load additional notes for the same patient.
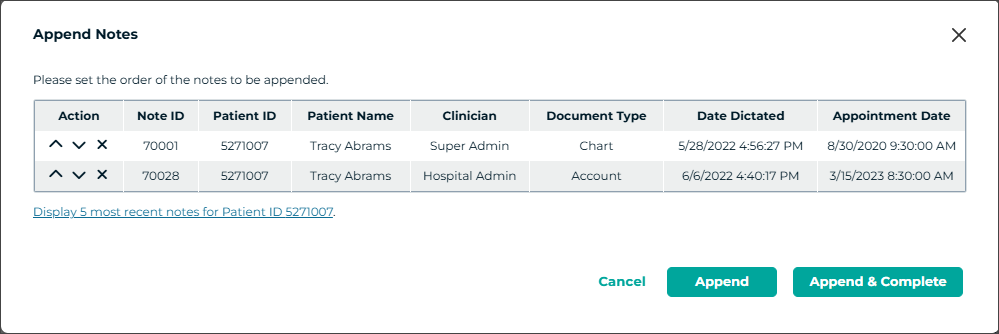
- If only one note was selected, you will see two grids:
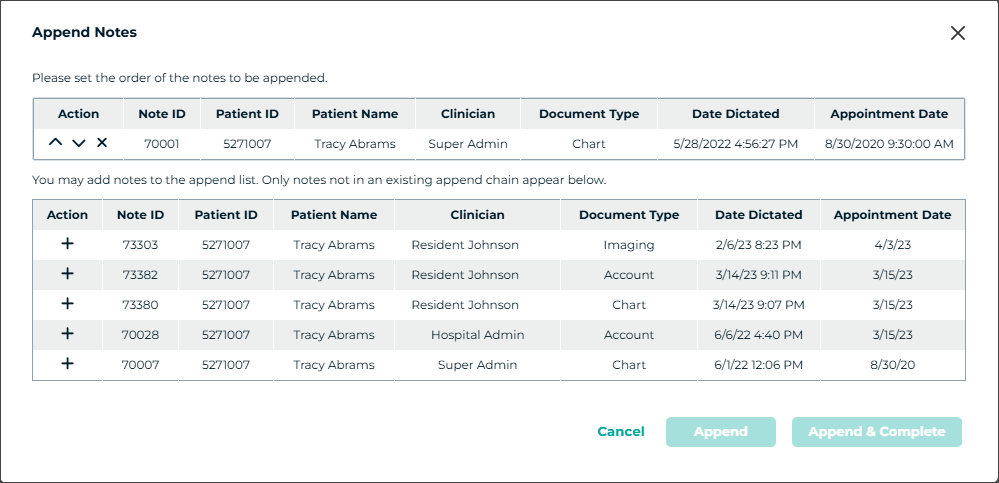
- The top grid shows notes currently in the append chain, listed in the order they will be appended (top to bottom).
- The bottom grid displays additional notes for the same patient that can be added to the chain.
- If two or more notes were selected before clicking Append, a single grid will appear at the top. Below it, you'll see a link labeled Display 5 most recent notes… that can be used to load additional notes for the same patient.
-
To add more notes to the append chain, click the + button next to a note in the bottom grid. The selected note will be added to the end of the top grid.
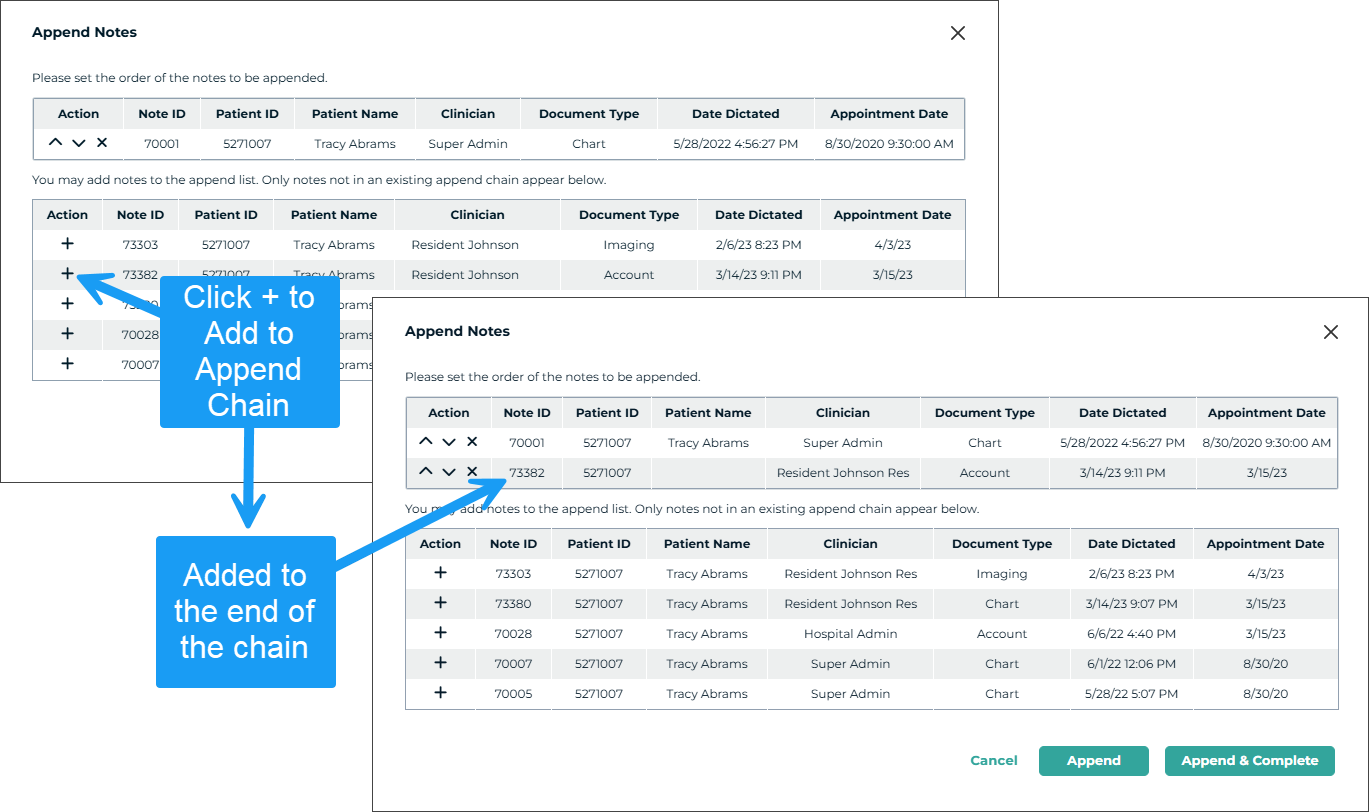
- The top grid displays all notes currently in the append chain, listed in the order they will be appended—first at the top, last at the bottom.
- If the note you need is not visible in the bottom grid, try adding one or more visible notes first. As space becomes available, older eligible notes will automatically load in the bottom grid. After you've added the necessary notes to the top grid, remove any that should not be in the chain by clicking the X next to those notes.
Important
Only notes for the same patient ID that are not already part of another append chain are eligible to be appended together.
-
Use the arrow buttons to reorder notes in the append chain in the top grid.
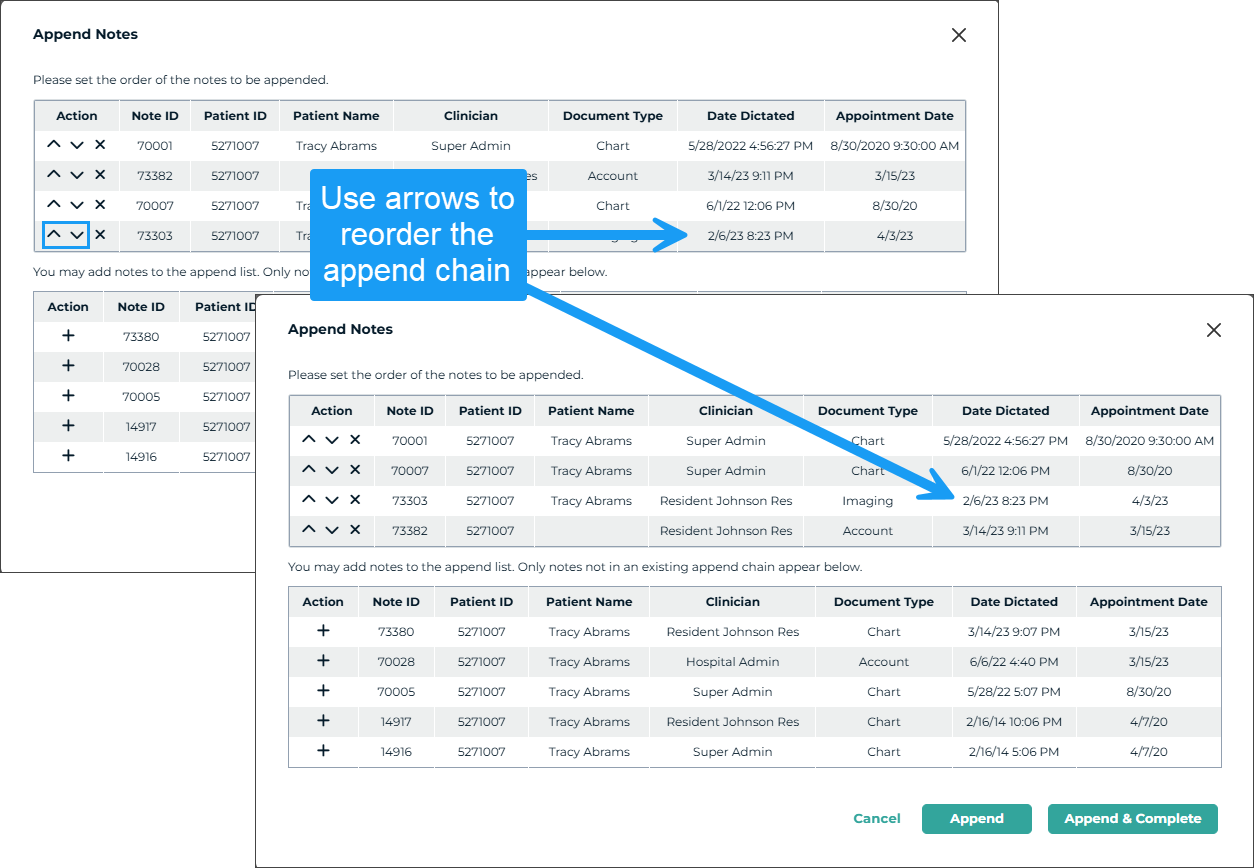
-
Repeat as needed to add additional notes.
-
To remove a note from the append chain, click the X next to that note.
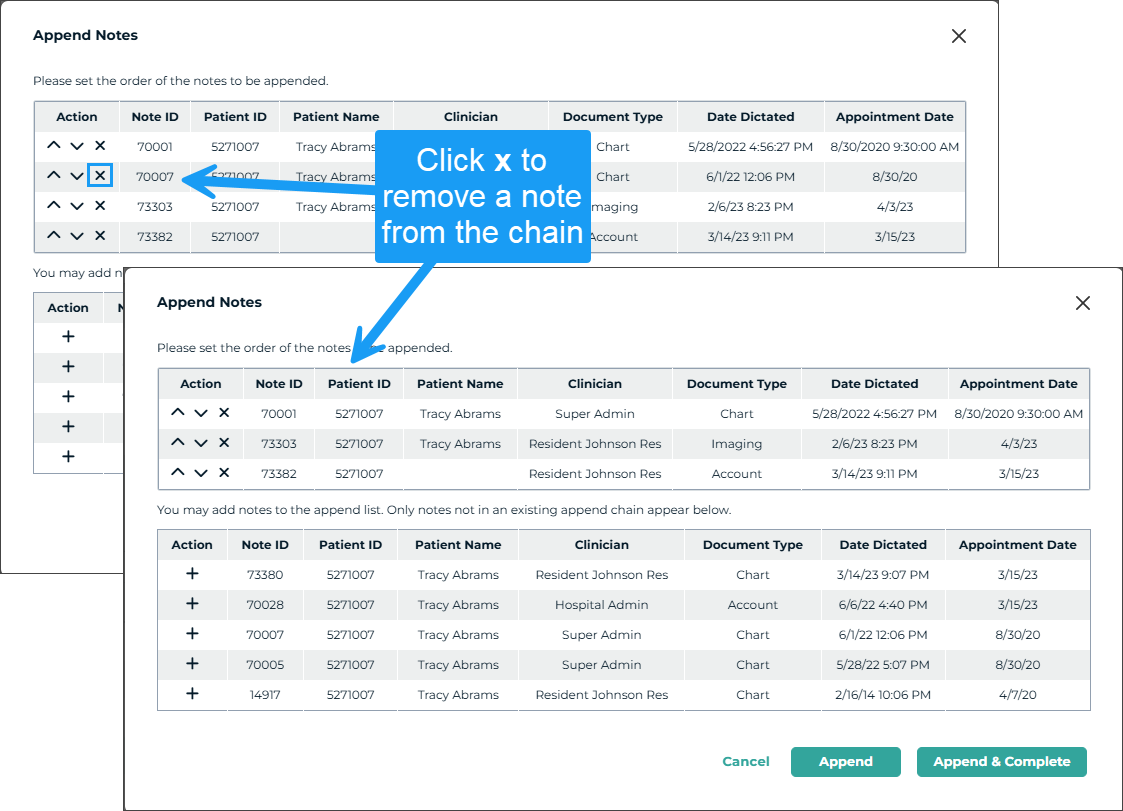
-
When finished:
- Click Cancel to close the window without saving.
- Click Append to save the chain and leave the notes in their current workflow status.
- Click Append & Complete to save the chain and complete only the appended notes that are in the same workflow folder from which the append was initiated.
- Notes from other folders will remain in their current workflow status.
- If the append is initiated from Search All, the Append & Complete option is not available.
-
If any notes cannot be completed, a message will appear identifying the affected Note ID(s).
- Notes may be blocked from completion due to required attestation templates, proxy or authorization issues, or failed validation rules.
Edit an Existing Append Chain
To edit an existing append chain:
- Select only one note from the append chain before choosing the Append action. Selecting multiple notes will result in a message stating that one or more notes are already part of an append chain.
- From the Actions menu or Bulk Actions menu, choose Append.
- All notes in the append chain will appear in the top grid.
- To remove notes from the chain, click the X next to each note.
- To add new notes, select them from the bottom grid by pressing the + button.
- Click Append to save the updated chain and retain the notes' current workflow status, or click Append & Complete to save and complete only the appended notes that are in the same folder from which the append was initiated.
- A confirmation message will appear indicating the "append" was successful, even if the append chain was cleared entirely.
After notes are appended the text for all notes in the chain will be visible in the note viewer. If a note in an append chain is opened in the editor, only that note will be visible. Other notes in the chain can be edited by clicking on the link in the note viewer or searching for the note in Search All or the workflow folder.
Bulk Actions
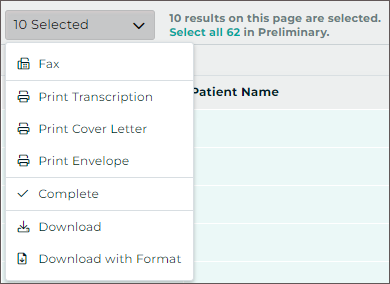 Performing the same action for multiple notes can be achieved by selecting the desired notes with the check box at the beginning of each row, or the select-all box above the grid, then clicking the appropriate action from the bulk action menu. The select-all check-box above the grid will select all notes on the current grid page. To select all notes that meet the applied filter criteria, check the select-all check-box, then click the "Select all" link in the text next to the bulk action menu. Actions chosen from the bulk actions menu will apply to all selected notes.
Note Viewer
The Note Viewer provides a read-only preview of the typed note and is available only for notes that have progressed beyond the Dictations folder in the workflow.
You can open the Note Viewer by selecting View Note from the Actions column in the workflow folder grid or from the ellipsis menu in the Note Editor or Note Info screens.
At the top of the viewer, the Action Panel offers quick access to basic patient demographics and available actions. For details on the Action Panel, see Action Panel.
The note content in the viewer may reflect formatting elements from the assigned print template, such as:
- Patient and appointment information with field labels
- Signature blocks with timestamped sign dates (once signed)
- Watermarks based on the document type, current stage in the workflow, and where the Note Viewer was accessed (e.g., from a workflow folder or Search All)
Note
The viewer does not always match the final print layout of the note.
To view the note in its final formatted layout, select Print Preview from the ellipsis menu to generate a rendered PDF.
For more details on printing and configuration, see InQuiry Printing Agent.
Note Info
The Note Info page provides detailed information about the note, along with an activity log that tracks the history of changes. It can be accessed from either the Note Viewer or Note Editor.
To open Note Info, select Info from the ellipsis menu in the Action Panel, or choose View Info from the Actions menu in the workflow folder grid.
Note Info appears as an overlay on top of the Viewer or Editor when opened from those pages. Use the Close Info button below the Action Panel on the right side to return to the Viewer or Editor.
Note Info includes five main sections:
- Action Panel
- Document Info
- Dictation Info
- Append Info
- Activity Log
The Note ID is displayed beneath the Action Panel on the left. A Refresh button on the right reloads the page with the most recent data.
Action Panel
The Action Panel appears consistently across the Note Viewer, Note Editor, and Note Info. It contains basic patient demographics, action buttons, and the ellipsis menu. Available options depend on the user's permissions and the note’s position in the workflow.
See Action Panel for more details.
A timestamp indicating the last save is shown below the ellipsis menu.
Document Info
This section displays read-only details related to the patient, appointment, orders, and workflow. These fields reflect the current values linked to the note. Editing patient or appointment information in the Note Editor updates what is shown here.
The note's current position in the workflow is displayed at the top of this section.
Dictation Info
Dictation Info displays a read-only view of the original data associated with the dictation. It includes metadata received at the time of dictation, and does not update if patient or appointment details are changed later.
Append Info
This section shows whether the current note is appended to or prepended by any other notes. All linked note IDs are listed, along with their current workflow status.
The current note always appears in the list, even if it’s not part of an appended group.
To view the activity log of a listed note, click View Activity Log next to its ID. Only one log can be displayed at a time in the Info page.
Activity Log
The Activity Log tracks actions performed on the note. Entries older than 90 days are archived and can be retrieved by clicking View Older Activities at the bottom of the log.
Click column headers to sort by ascending or descending order. The time zone in use appears above the table.
Activity Log Columns
-
Date: Date and time of the action.
-
Activity: Description of what was done.
-
User: The username, user ID, or function that performed the action.
-
Type: The login type or automation responsible for the action (e.g., “Interfacing”).
Some actions include additional information. Click the caret ^ next to the date to expand the details. Click ![]() to open the Version History.
to open the Version History.
Version History
Each time the note is saved, a version history entry is created. These are marked by a version history icon ![]() next to the date. Click the entry to open the version details.
next to the date. Click the entry to open the version details.
The Version History controls enable you to filter the displayed data and navigate through the note's version history.
Version History Controls
- Expand All: Show details in all sections.
- Collapse All: Hide details in all sections.
- Show Changes Only: Toggle to display only changed fields.
- Older / Newer: Navigate through different version records.
- Close: Exit Version History record and return to Note Info.
Version History Sections
 The Version History is divided into four sections:
- Document & Patient Info - Includes document details, patient demographics, and appointment information.
- Document Body - Displays the full text of the note for the prior and current versions.
- Associates - Shows associates who have been added to or removed from the note. A separate Associate section appears for each associate.
- Additional Authenticators - Displays additional authenticators added to or removed from the note. A separate section appears for each authenticator.
In all sections except Document Body, changed fields are highlighted in orange. Toggle Show Changes Only on to display only fields with changes, or off to show all fields.
The Document & Patient Info, Associates, and Additional Authenticators sections display data in two columns:
- Current Version - Right side; shows the data after the action listed in the Current column header was completed.
- Prior Version - Left side; shows the data before the Current action occurred.
Each column header includes the action performed, the timestamp, and the user who made the change.
Document Body Tabs
The Document Body section contains three tabs:
- Comparison View – Left tab - A merged view of the prior and current versions showing added, removed, and stylized text with color-coded markup.
- Prior Version – Middle tab - Read-only view of the previous version’s note text.
- Current Version – Right tab - Read-only view of the current note text.
By default, the Comparison View tab is selected. This view merges the Prior and Current versions to show differences using inline markup.
Select the Prior Version tab to view the note text as it appeared before the change. Select the Current Version tab to see the updated version.
The column header of the selected tab appears in green text.
Restore Prior Versions
With appropriate permissions, you can restore a prior version of the note text. Patient and appointment demographics, referrals, and additional authenticators cannot be restored. The note must be open in the editor, and Info must be accessed from there to enable the restore function.
To restore:
- Open Info from the workflow folder Actions menu, or from the ellipsis menu in the Note Editor or Viewer for the note you want to restore.
- In the Activity Log, click a version history entry from an Edit action.
- In the Document Body section, choose the Prior or Current tab.
- Scroll down to the bottom of the Document Body section and click Restore.
- Confirm your action in the pop-up window.
- Save the note in the editor to complete the restore.
Important
If you close the editor without saving, the restore will not be completed.
Using the Note Editor
Edits can be made to patient and appointment demographics, note text, referring associates, and authenticators in the note editor. By default, only documents that are in the Marked for Review and Preliminary Folders can be edited.
The note editor can be accessed multiple ways:
-
From a Workflow Folder
- Click anywhere in the corresponding data grid row, except for the Actions column (the area in the green box in the image below).
- Expand the Actions list in the data grid and choose Edit Transcription (the area in the blue box in the image below).
- Click View Transcription in the Actions column (the area in the yellow box in the image below) to open the note viewer, then click Edit.
-
From Search All - Basic Search
- Click anywhere on the given row in the data grid to open the note viewer, then click Edit in the top right corner of the Action Panel.
Note Editor Layout
The Note Editor consists of five main sections, color coded in this image. Each section can have multiple components to it:
- Action Panel
- Patient and Appointment search
- Save and Complete actions
- Ellipsis menu
- Exit editor
- Dictation Player
- Dictation playback controls
- This section is hidden by default, but can be toggled on from the ellipsis menu
- Dictation playback controls
- Header Panel
- View and change Document Type, Location, Clinician
- View the note's status in the workflow
- Draft Editor
- Edit the note text
- Side Panel
- View and edit:
- Patient, Appointment, and Orders
- Comments and Comment Tags
- Associates
- Additional Authenticators
- View and edit:
The widths of the Draft Editor and Side Panel can be adjusted by hovering your mouse cursor between them until the resize cursor appears. Then, hold down the left mouse button, drag left or right to resize the panels, and release the mouse button when they reach the desired size.
Action Panel

The Action Panel displays a read-only view of the patient ID, birthdate, age, gender, and appointment date. It also provides options to search for a new patient or appointment, save, complete, preview and print notes, and perform additional actions from the ellipsis menu.
Patient and Appointment Search
A patient and/or appointment search can be performed to replace, correct, or add a missing patient and/or appointment to a note. This functionality is only available if the client sends a data feed to eSOne or patient data is manually entered into the eSOne system.
To initiate a search click Search ![]() . Two of three options will be presented: Search for a different Appointment for this Patient or Search for a different Order for this Patient (depending on the document type selected) and Search for a different Patient.
. Two of three options will be presented: Search for a different Appointment for this Patient or Search for a different Order for this Patient (depending on the document type selected) and Search for a different Patient.
The available search parameters and returned data fields can vary depending on client configuration.
Search for a Different Patient
To add or change the patient on a note click Search ![]() then select Search for a different Patient.
then select Search for a different Patient.
Enter one or more search criteria in the search fields on the left and click Search. Matching patient records will load in the grid on the right.
Click the desired patient. If there are patient or order records (based on the document type chosen) for the selected patient, the Appointment or Order list will open.
If no appointments or orders exist for the patient, you will be returned to the editor. The new patient demographics will be populated in the Action Panel and Patient Info tab in the Right Panel.
Search for a Different Appointment or Order
Document types can be configured to contain appointment records or orders. The appointment or order search option presented in the patient search menu will depend on the document type selected.
To search for a different appointment for the same patient select Search for a different Appointment for this Patient. To search for a different order for the same patient select Search for a different Order for this Patient. If a Patient ID or patient is not selected, the search options for Appointments or Orders will be disabled.
A list of appointments or orders (depending on the document type configuration) for the patient will be displayed. The available data fields in the search results may vary based on the client configuration.
Click the desired appointment or order then Select to attach it to the note. The demographics in the Action Panel and the Right Panel will update with the appointment information.
Open Previous/Next Note
 Use the Open Previous Note and Open Next Note buttons to quickly navigate to the previous or next note in your workflow folder or within your Search All results.
Save
The Save button has two modes:
 Press the left side of the button to save changes to the note, including text and demographics, and keep the current note loaded in the editor.
 Press the right side of the button to expand the save menu and choose Save and Next. Changes will be saved and the next note in the grid will load in the editor.
The mode last used will be saved and appear as the default save mode when the editor is opened again.
Complete
The Complete action saves the note and moves it forward in the workflow. The Complete button also has two modes:
 Press the left side of the button to save the note and progress it to the next step of the workflow. The editor window will close and you are returned to the workflow folder view.
 Press the right side of the button to expand the complete menu and choose Complete and Next. Changes will be saved, the note will progress to the next step of the workflow, and the next note in the grid will load in the editor.
The mode last used will be saved and appear as the default complete mode when the editor is opened again.
Ellipsis Menu
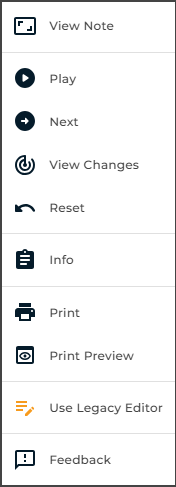 The ellipsis menu provides additional options based on client configuration, workflow status, and user access rights.
- View Note - Opens the note in read-only mode. This option is available only for notes that have moved beyond the Dictations folder.
- Play - Opens the dictation player controls and begins playing the dictation. If the dictation player is already open or a dictation is not available for the selected note, this option will not appear in the ellipsis menu.
- Next - Opens the next note in the workflow folder or the next result from the Search All search results in the editor.
- View Changes - Opens the Current Changes window with a color-coded view of changes made to the note text since the last save.
- Reset - Removes unsaved changes to the note text, patient and appointment demographics, orders, and additional note attributes.
- Info - Opens Note Information in a new tab.
- Fax - Sends the note by fax. You can choose a recipient from the associates listed on the note, search for one in the associate database, or manually enter fax recipient details.
- Export - Attempts to deliver the note using the selected format and delivery method, if the criteria defined in the selected ShadowLink Rule are met.
- Print - Prints the note through the Printing Agent, applying any configured letterheads and watermarks for the document type.
- Print Preview - Displays a preview of the formatted note in the Printing Agent, including any letterheads and watermarks configured for the document type.
- Feedback - Opens a form in a new tab, allowing you to submit feedback, ask questions, or report minor issues related to the note editor or InQuiry. See Your Feedback Matters below for details.
Your Feedback Matters
Your feedback is essential in helping us identify areas for improvement and ensure a seamless experience for all users. We encourage you to share any minor issues, suggestions, or comments by clicking Feedback in the ellipsis menu.
Important
If you require immediate assistance with InQuiry Note Editor, Viewer, or Info pages, please follow your standard support procedures instead of submitting feedback.
When reporting an issue or sharing suggestions, please include the following information whenever possible:
- Note ID: Include the unique identifier of the affected note.
- Steps to Reproduce: Provide a step-by-step description of the actions that led to the issue, including the workflow folder, screen or feature you were using.
- Screenshots or Recordings: Visuals can help us understand the issue faster. If you share screenshots, please ensure all Protected Health Information (PHI) is redacted.
- Expected vs. Actual Behavior: Let us know what you expected to happen and what actually occurred.
- Device Details: Mention the operating system and web browser version (e.g. Windows 11 Enterprise 24H2 x64, Chrome 131.0.6778.266)
- Additional Context: Share any other details that might help us understand the issue better, such as your internet connection or time of occurrence.
Your thorough feedback helps us improve the experience for everyone.
Close
 The Close button exits the note editor without saving changes. If there are unsaved changes, a confirmation message will appear, allowing you to save before closing.
Dictation Player
InQuiry supports an in-editor dictation player, allowing users to control audio playback while editing a note. The dictation player is hidden by default, but can be opened by selecting Play from the ellipsis menu.
Once opened, the dictation will begin playing and dictation playback controls will appear below the Action Panel. The playback controls may display differently depending on the browser used.
To hide the dictation player click the X at the far right side of the player controls.
The dictation player status is saved. If the player is open when the note editor is closed, it will be open in the next note. If the dictation player is hidden, it will not appear in the next opened note.
Use the controls to adjust the playback speed, play/pause the audio, and move forward and backwards in the audio.
The following keyboard shortcuts are available:
- ALT + Shift + S - Go To Start
- ALT + Shift + R - Rewind
- ALT + Shift + P - Play/Pause
- ALT + Shift + F - Fast Forward
- ALT + Shift + E - Go To End
Foot pedals that are capable of being configured to send specific keystrokes can also be used to control audio while simultaneously editing. Please refer to your foot pedal manufacturer's user manual for assistance in configuring the shortcuts.
Header Panel
The Header Panel displays the Note ID and the current workflow status of the note. It also allows key details to be edited, including the Document Type, Location, and Clinician associated with the note.
- Note ID - Identification number for the note. This can be used to search for notes in workflow folders and Search All.
- Workflow Status -Displays the current stage of the note within the workflow, represented by its assigned folder name.
- Document Type - Specifies the work type assigned to the note, which may determine its formatting and structure.
- Location – Depending on the client’s setup, this field represents either the appointment location or the department within the facility.
- Clinician – The provider who dictated the note.
Depending on user access rights, the Document Type, Location, and Clinician fields may be edited. To make a change, expand the selection list and click the desired value or click the X in the field to clear the existing value and begin typing the desired value to filter the list.
Draft Editor
The Draft Editor enables users to make changes to the body of the note. The toolbar provides various tools to enhance document formatting, including options to create and modify tables, add lists, run a spell check, and more.
If the user has access to edit note header information but not the note text, the draft editor toolbar will not appear and the text will be read-only.
Click the > icon between the Draft Editor and the Side Panel to collapse the Side Panel and allow the Draft Editor to expand across the full width of the browser window.
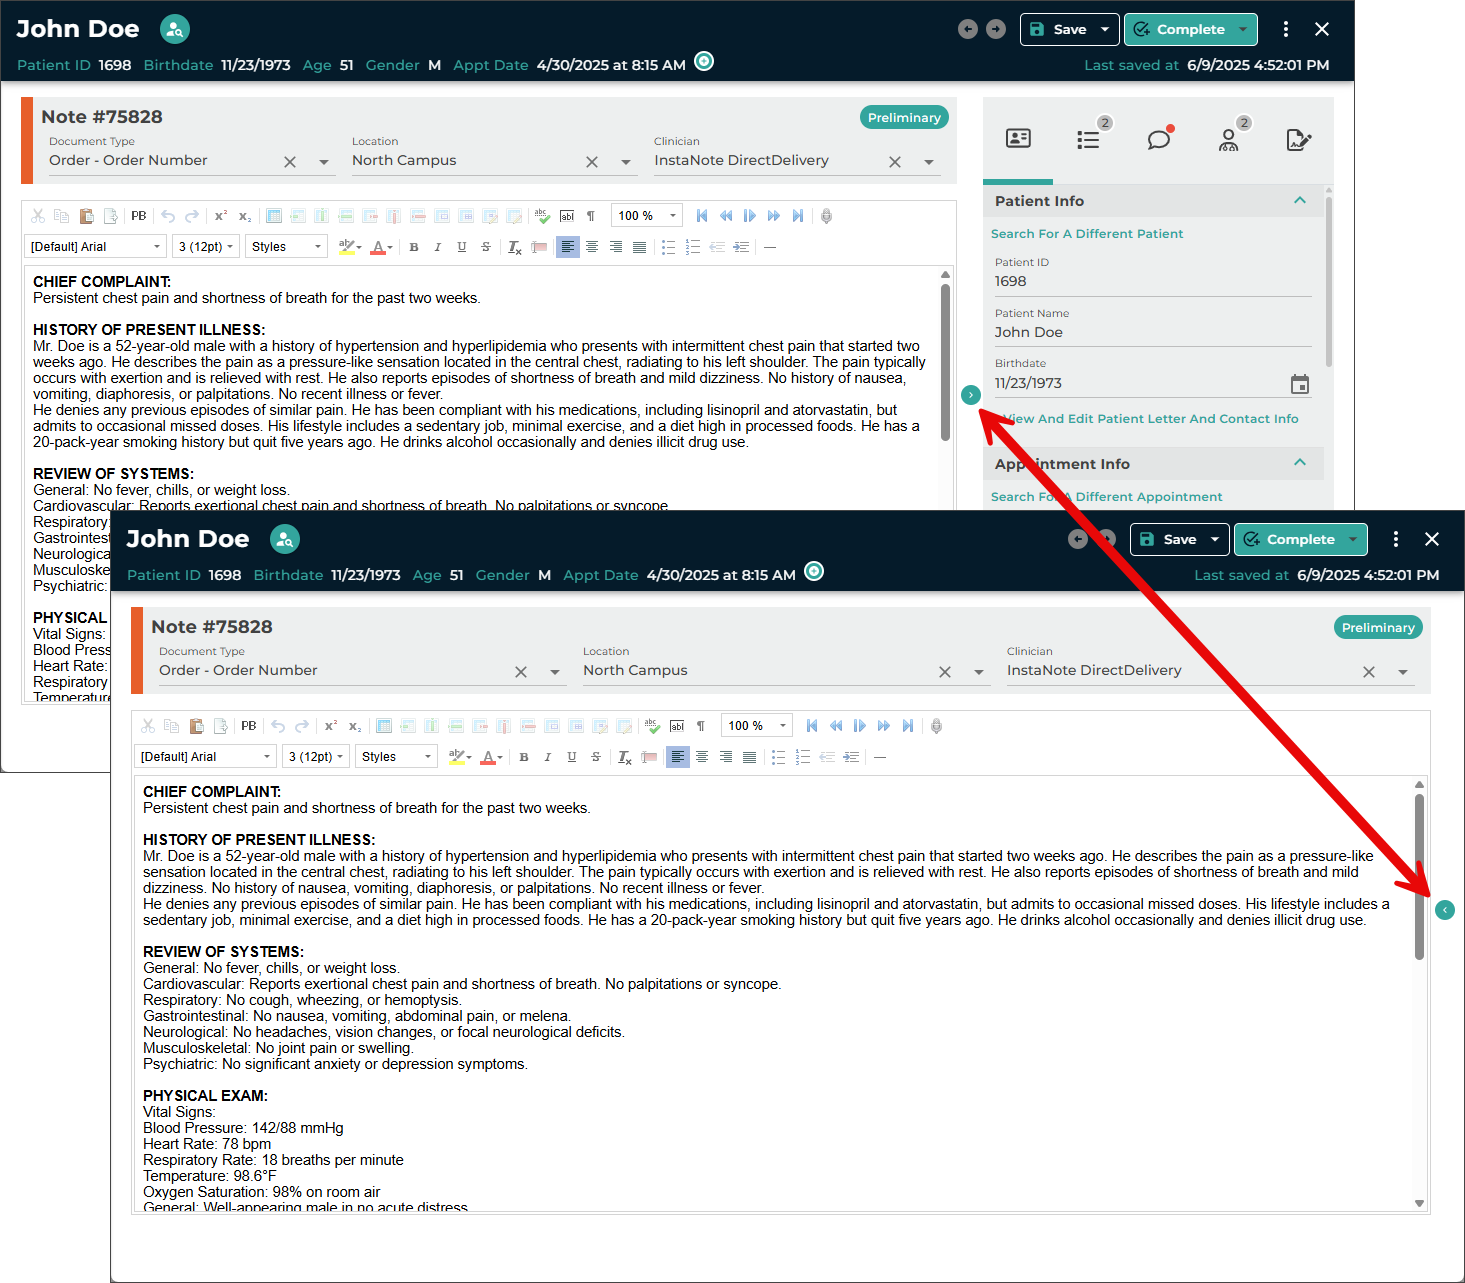
Side Panel
The Side Panel displays key details about the patient, appointment, orders, and other note attributes. It is organized into sub-tabs, each grouping related information for easy navigation. The last side-panel tab that was opened is saved in cookies and automatically opens that tab the next time the Note Editor is opened. The availability, layout, and data fields, as well as which fields are editable or read-only, are determined by client configuration and user access rights. This ensures that users only see the relevant details for a given note, tailored to their specific access.
- Patient Info – Displays patient and appointment information and allows for edits.
- Orders – Displays attached orders related to the note.
- Comments – View, edit, add, or remove comments and comment tags associated with the note.
- Referred Associates – Lists associates who will receive a copy of the note, with options to add, remove, or edit associates.
- Signers – Manage additional authenticators by viewing, adding, or removing them from the note.
Patient Info
The Patient Info sub-tab contains patient and appointment information. The layout and data fields in the demographics are customizable by the client, as well as which fields are editable or read-only. If a patient record is attached to the note, data from that record will automatically populate the fields here. Alternatively, patient and appointment information can be manually entered.
The Patient Info sub-tab is divided into two sections: Patient Info and Appointment Info. Each section can be collapsed and expanded.
Patient Info Section
The Patient Info section contains general patient information. The default fields displayed are Patient ID, Patient Name, Gender, and Birthdate.
Additional patient contact details, including address and phone numbers, can be edited by clicking Edit at the bottom of the Patient Info section in the Patient Info sub-tab. A patient letter can also be selected within this window. To save the updated contact information to the patient's record in the eSOne system for use in future notes, check the Update Patient Info in Database checkbox.
A patient search can be initiated by clicking Search For a Different Patient at the top of the Patient Info section. This performs the same action as clicking Search in the Action panel, then choosing Search for a different Patient.
To add or update patient information without searching for a new patient, type in the desired fields and press Save to apply the changes. The patient demographics in the Action Panel will update with the new information.
Appointment Info Section
Appointment details are displayed in the Appointment Info section.
The Search For a Different Appointment link at the top of the Appointment Info section will allow you to choose an appointment affiliated with the patient ID. This link performs the same action as clicking the Search button in the Action panel and selecting Search for a different Appointment for this Patient. The link is disabled if the Patient ID is not populated, as a valid Patient ID is required to perform an appointment search.
To add or update appointment information without searching for a patient, enter the desired information in the appropriate fields and click Save. The patient demographics in the Action panel will update to reflect the changes.
Orders
The Orders sub-tab displays order-related details and is available in the side panel only when the selected document type is configured to be orders-based instead of appointment-based. A count of attached orders will appear next to the Orders sub-tab icon.
Each order attached to the note appears in its own card within the Orders sub-tab. Each card includes the order number, description, and date observed.
When an orders-based document type is selected and a patient search is performed, affiliated orders will be available to select and attach to the note after choosing a patient.
You can also add orders by:
-
Clicking the Search button in the Action panel and selecting Search for a different order for this patient, or
-
Clicking the Search link in the Orders sub-tab.
This functionality is only available if the client sends a data feed to the eSOne system or if order data is manually entered into eSOne.
The fields displayed in the Orders list depend on client configuration. If any data is cut off due to space constraints, hover over the field to view the full text.
To add orders to the note:
Check the box next to each applicable order.
Click Select to attach the selected orders to the note.
Multiple orders may be attached to the same note only if all selected orders are linked to the same appointment record or none of the selected orders are linked to an appointment record.
If one or more of the selected orders is linked to an appointment, the Appointment Info sub-tab will also populate with the related appointment details.
To remove an attached order:
- Perform an order search again and select only the orders you want to keep. This will overwrite the previously selected set.
- To remove all orders from the note, change the document type to one that is not orders-based. If needed, you can then change the document type back to the original type.
Comments
The Comments sub-tab allows users to view and manage comments and comment tags associated with a note. Comments are internal and are not included in the printed note.
Using Comments
Comments are used to share information related to a note that may be helpful to transcriptionists, providers, or other staff members. Comments can be accessed in two ways:
- By clicking the Comments sub-tab in the side panel
- By clicking the Comments icon in the workflow folder grid
To add or edit a comment, click inside the Comments text box and make the desired changes. To remove all Comment text, click the X in the text box.
Press Save in the Action panel to save the comment.
Using Comment Tags
Comment Tags are optional, preconfigured labels that can be added to notes. They are typically used to flag notes with common issues, making them easier to identify and sort in Review folders. Tag names and colors are customizable by the organization.
Notes that contain comments and/or comment tags are visually marked in workflow folders and mobile apps:
- A dark blue icon indicates the note contains a comment only
- A colored icon indicates the note has one comment tag
- A tri-color icon indicates the note has multiple comment tags
Adding and Removing Comment Tags
To add comment tags:
- Click Add Tags
- Check the box next to each tag you want to apply
- Close the tag list to return to the note
- Press Save in the Action panel to add the comment tags
To remove comment tags:
- Click the X on a tag displayed below the comment text box
- Or, uncheck the tag in the Add Tags list
- To remove all tags, click Clear Tags
Not all users have access to view or edit comments and comment tags. Access is controlled by user role and system configuration.
Referred Associates
The Referred Associates sub-tab displays individuals or organizations who should receive a copy of the note. These can include physicians, clinics, or other relevant parties.
Each associate appears as a card in the Referred Associates list. A count of associates added to the note is displayed next to the Referred Associates sub-tab icon.
Each card contains:
- The associate’s name and/or business name
- If the associate is configured as an AutoFax recipient, the card will display AutoFax followed by the fax number
Example:AutoFax: 555-123-4567
Viewing and Editing Associate Details
Click View and Edit Details on any associate card to open the Edit Associate window. From here, you can:
- Edit the associate's contact details
- Configure note-specific or permanent changes
- Mark the associate as the patient’s Primary Care Provider (PCP)
- Set the associate as the Primary Associate for the note
- Enable or disable AutoFax
To apply changes only to the current note, leave the Update info in database checkbox unchecked.
To update the stored associate record for future use, check the Update info in database checkbox.
Associate Options Explained
- Patient's PCP: Indicates the associate is the patient’s Primary Care Provider. PCPs are copied on all notes for that patient, but can be manually removed.
- Make Primary: Designates the associate as the Primary Associate. This is typically the main recipient of the note. Only one primary can be selected.
- AutoFax: Automatically sends a faxed copy of the completed note when the client’s AutoFax trigger is met.
- To enable AutoFax: check AutoFax and Update info in database
- To disable AutoFax for this note only: uncheck AutoFax and leave Update info in database unchecked
- To disable AutoFax permanently: uncheck both AutoFax and Update info in database
Click Update to save changes, or Cancel to discard them.
To immediately fax the current version of the note, click Fax. Be sure the note is finalized and accurate before sending.
Caution
Clicking Fax sends the note immediately. There is no preview.
Adding and Removing Associates
To add a referred associate:
- Click Add Associate at the top of the Referred Associates sub-tab.
- Choose one of the following options:
- Search – If your organization uses an associate database, enter at least one search term and click Search. Select the desired associate, then click Add.
- Enter Manually – Enter the associate’s information directly. Complete all relevant fields and click Add.
To remove an associate, click the trash can icon on the associate card.
Important
There is no confirmation prompt when removing an associate.
This action cannot be undone, but the associate can be re-added by searching the database or entering the information manually.
Final Step: Save Changes
After making any changes to the Referred Associates list, always click Save in the Action panel of the note editor to retain your updates.
Signers
The Signers sub-tab allows you to designate additional signers (also known as authenticators) who must review and sign the note in addition to the dictator. This is commonly used in teaching clinics or hospitals, where attending physicians must attest to the accuracy of a resident's note.
Use Case Example
Attending physicians signing off on residents' notes is a common scenario for additional signers.
Adding Additional Signers
To add a signer:
- Click Add Signer in the top-right corner of the Signers sub-tab.
- A list of eligible signers will appear.
- Check the box next to each signer you wish to add, clicking them in the order they should sign.
The signers are added in the order selected. This order determines the signature workflow:
- The first added signer will sign after the dictator approves the note.
- Subsequent signers will have access to the note in sequence in the traditional workflow.
- The last added signer will complete the signing process.
The signing order cannot be changed after signers are added. To adjust the order, remove all signers and re-add them in the desired order.
Removing Signers
To remove a signer click the trash can icon next to the signer's name.
Faxes
Facsimiles or faxes are generated through Fax on Demand or by utilizing the eSOne AutoFax or Distribution Rules features. The Manage Faxes tab is available to track or resend faxes, and Pending Faxes is used to monitor AutoFax jobs that have not yet reached the fax trigger.
Manage Faxes
The Manage Faxes tab looks similar to the Search All screen, but the search fields have been optimized for searching through faxes and recipients. By default, users do not have access to the Manage Faxes or Pending Faxes tabs. Manage Faxes can be accessed from the left Navigation menu > Search All > Faxes or Faxes > Manage Faxes.
Upon loading the Manage Faxes page, the Advanced Search parameters window is presented. Data is not returned until a search is submitted. If the Advanced Search window is closed without submitting a search, the page will be empty. Click on Advanced Search to enter criteria and submit a search.
Searching and filtering in the Faxes tabs is very similar to searching in Search All - Basic Search, but the Advanced Search window has different criteria fields. See Building a Search and Filter Search Results for more details.
Facsimiles Functions
Several actions are available to manage facsimiles. Actions can be taken on individual fax jobs or selected fax jobs. To perform an action on an individual fax, click on the proper action in the Actions column of the fax line item (expand the Actions menu with  . To perform an action on multiple fax jobs, select the needed jobs by clicking the check box in each line item and select the appropriate action from the Bulk Actions list above the grid.
Pending Faxes
Use the Pending Faxes page to search for transcriptions that will queue up for AutoFax, but that have not passed the AutoFax trigger point. Manage Faxes can be accessed from the left navigation menu > Search All > Faxes, then select the Pending Faxes tab at the top of the page, or navigation menu > Faxes > Pending Faxes.
Upon loading the Pending Faxes page, the Advanced Search parameters window is presented. Data is not returned until a search is submitted. If the Advanced Search window is closed without submitting a search, the page will be empty. Click on Advanced Search to enter criteria and submit a search.
Pending Facsimiles Functions
Three actions can be taken on transcriptions with pending faxes. Actions are found in the Actions column. View Transcription Info is the default action. Expand the actions menu to view and select additional options.
- View Transcription Info: Display the Info screen for the transcription. Click
- Download: Download the TIFF image generated that will be sent through the fax service.
- Cancel: Prevent the AutoFax job from being created when the transcription passes the trigger point.
- Restore: Restore a canceled AutoFax job so a fax will be created when the transcription passes the trigger point.
Shadow Print
ShadowPrint is a service that automatically prints transcriptions to a specified printer after the document has passed a trigger point in the workflow. Shadow Print is configured in InCommand and managed through the InQuiry application and has a manual for installation, configuration and maintenance. The Shadow Print manual can be found at the links below:
Australia https://www.escription-one.com.au/Software/ShadowPrint/
Canada https://www.escription-one.ca/Software/ShadowPrint/
United States https://www.escription-one.com/Software/ShadowPrint/
ShadowLink
ShadowLink is a service capable of interfacing with client side HER and patient scheduling software using a variety of formats. ShadowLink is configured in InCommand and can be managed in InCommand InQuiry. The manual for installation, configuration and maintenance can be found at:
Australia https://www.escription-one.com.au/Software/ShadowLink/
Canada https://www.escription-one.ca/Software/ShadowLink/
United States https://www.escription-one.com/Software/ShadowLink/
InVision
The InVision tab contains the administrative reporting tools. By default, InQuiry users do not have access to the InVision tab. Access to the InVision tab does not indicate that the user has access to all reports. Report access can be managed in InCommand. The InVision tab contains three sub-tabs: Reports, Scheduled Reports and Saved Reports.
Reports
 The Reports tab lists all reports available to the user. InQuiry InVision contains reports in six different groups: Production Reports, Workflow Reports, User Reports, Miscellaneous Reports, ShadowScribe Reports and Performance Reports. Clicking on a report title takes opens the New Report tab and presents report parameters and scheduling options.
*Not all reports are listed in the above screenshot.
Report Parameters
The options in this section change depending on the report selected. Parameters with a red asterisk beside the name are required. Below are some guidelines for date fields:
- For Reports to be run immediately for specific dates : enter a date as 'm/d/yyyy', such as 8/19/2019. Or click the Calendar control button and select the date from the pop–up calendar.
- For Scheduled Reports: Click the down–arrow to select relative system dates. All relative dates are dependent on the date when the report runs. After selecting a relative system date, it can be modified by entering plus (+) or minus (–) and the number of days.
The available relative dates are:
- Today – @Today
- Yesterday – @Today - 1
- First Day of Current Month – @FirstOfMonth
- First Day of Previous Month – @FirstOfPreviousMonth
- Last Day of Previous Month – @LastOfPreviousMonth
- First Day of Current Quarter – @FirstOfQuarter
- First Day of Previous Quarter – @FirstOfPreviousQuarter
- Last Day of Previous Quarter – @LastOfPreviousQuarter
Report Schedule
The Report Schedule section contains options for running the report, including the name, report format, notifications.
Reports can be run immediately or scheduled to run once or on a reoccurring basis. The following fields are available:
- Schedule Name – Use this field to give the report a unique name that will be recognizable in the list of saved reports.
- Format – The report can be generated in CSV, Excel, MHTML, PDF, XLSX, or XML. Choose the format that works best for the intended use.
- Active – Use this checkbox to determine if the scheduled report will be active. Inactive reports will still be added to the scheduled reports tab but will not run automatically. They can still be run manually.
-
 Notification – Choose if and to be notified when the report is ready to be viewed. One, both, or neither of the options can be selected.
 -
On-Screen – A pop-up notification with a clickable link will appear within the InQuiry window when the report is ready. If multiple reports are ready at the same time the last report to run will be listed.
-
Email – An email will be sent to the address in the text box when the report is ready to be viewed. The email address is pre-populated with the address saved in the user profile but can be edited in the provided text box. Multiple email addresses can be entered separated by commas.
-
 Schedule Options – Choose to have the report run immediately (Queue Now) or at a scheduled time (Schedule).
If Schedule is selected in Schedule Options, this section will be available.
The frequency that the report runs depends on the schedule options selected. The report can run once at a specified time, daily, weekly, monthly and can also be schedule run every x number of days/weeks/months. The schedule options change depending on the frequency selected.
-
Example – This data is only needed once but I want to run it at mid-day.
-
 Daily – Choose to have the report run every x days or every weekday at the specified time.
 -
Example – I would like to run the report every two days at 2:00pm.
-
 Weekly – Choose to have the report run every x weeks or every week on the selected day(s) at the specified time.
 -
Example – I would like to run the report every other week on Monday and Friday at 5:00pm.
-
 Monthly – Choose to have the report run every x days of every x months or have the report run on the first, second, third, fourth or last day, weekday, weekend day, or specific day of the week every x months at the specified time.
 -
Example – I would like to run the report on the first Monday of every month at 7:00am.
Note:The scheduled time does not indicate when the report will be available to view, but when it starts running. If there is a high volume of reports running at the scheduled time or if there is a large amount of data to gather for the report, there may be a delay in the delivery of the report. We recommend scheduling reports to run during off-peak hours, such as midnight.
Submit and Reset
To submit the report parameters and run the report (if Queue Now is selected) or schedule the report for a future run, press Submit after all options are selected. After pressing Submit a confirmation window will appear with the next run date for the report.
To reset the report parameters and scheduling options to their default values press the Reset button.
Scheduled Reports
 The Scheduled Reports tab lists reports that have been recently run or are scheduled to run. Report schedules and parameters can be edited from this screen.
Grouping and filtering functions are the same as in the Faxes grid. Please see Grouping, Sorting and FilteringGrouping, Sorting and Filtering for more information
Scheduled Report Actions
 Several actions can be taken on a scheduled report.
-
Report Information – Use the arrow buttons to expand or collapse information about individual reports or groups. Information about the report, schedule, and specified parameters are available when clicking on an individual report's row.
-
Check Box – Use this checkbox to mark the report as Selected. All line items can be selected by pressing the Select All button in the column header.
- Edit Button – Clicking this button opens a new window that allows users to edit the report parameters and run schedule.
- Copy Button – Clicking this button opens a new window to copy the selected report and its parameters to a new scheduled report.
- Delete Button – This button deletes the scheduled report. To temporarily stop a scheduled report from running, edit it so that it is inactive rather than deleting it.
-
Run Button – This button runs the scheduled report immediately using the saved report parameters.
-
 Delete Selected / All buttons – Use these buttons to delete selected schedules or all schedules in the current filtered list. Use the checkbox located in the report information to select specific reports for use with the Delete Selected button.
Saved Reports
 The Saved Reports tab contains the report output for all reports run manually or from a schedule. The list is very customizable to easily find the report based on specific criteria. See Grouping, Sorting and FilteringGrouping, Sorting and Filtering for more information. Clicking a report row prompts the user to download or open the report file.
-
Report Information – Use the arrow buttons to expand or collapse information about individual reports or groups. The parameters used when the report data was generated is available to view but cannot be changed.
-
Check Box – Use this checkbox to mark the report as Selected. All line items can be selected by pressing the Select All button in the column header.
- Delete Button – This button deletes the saved report.
-
Download Button – Download or open the report file.
-
 Delete Selected / All buttons – Use these buttons to delete selected schedules or all schedules in the current filtered list. Use the checkbox located in the report information to select specific reports for use with the Delete Selected button.
InQuiry Printing Agent
InQuiry Printing Agent
InQuiry supports custom printing in multiple browsers using a printing agent application. Users can preview and print notes, cover letters, envelopes, and faxes from Chrome, Edge, and Firefox.
Minimum Application Requirements
- Operating system: Windows 10 x64
- Browsers: Chrome, Edge, Firefox
- RAM: 2 GB or higher
- Hard Drive Free Space: 1 GB or higher
Installing the Printing Agent
Info
An MSI installer is available at Application Downloads if one is needed for group policies. For individual installations, please follow the steps below.
If needed, a Cleanup Tool is also available on the Application Downloads page. This tool fully removes all versions of the Printing Agent that cannot be uninstalled through standard methods.
If it is your first time using this feature, you must install the agent.
To begin, initiate a preview or print job from the Note Viewer or use Print All/Print Selected from a workflow folder. The Print Request Progress window will open.
Click the InQuiry Printing Agent link in the Print Request Progress window to download the installer. Admin rights are not required.
Click on the downloaded file to install the Printing Agent.
When installation is complete, close the Print Request Progress window in InQuiry and initiate the preview or print command again to be prompted to log in to the Printing Agent.
Logging in to the Printing Agent
To preview and print from the Printing Agent, log in using your InQuiry credentials. You only need to log in the first time you print. You will stay logged in until you log out of InQuiry.
Previewing and Printing Documents
You can preview and print notes from workflow folder grids, the Note Viewer, Note Editor, and Note Info. The Printing Agent also supports printing envelopes and cover letters.
Print a Single Document From the Grid
From any workflow folder or Search All, select Preview Note, Print Note, Print Cover Letter, or Print Envelope from the Actions column.
Print Multiple Documents from the Grid
Check the box next to each note, open the Bulk Actions menu above the grid, and choose Print Note.
Print from the Viewer, Editor, or Info
Use the ellipsis menu in the Note Viewer, Note Editor, or Note Info to select:
- Print – sends the note to the default printer without previewing
- Print Preview – opens a rendered PDF of the note in the Printing Agent
Allow Permission to Open the App
Your browser may ask if you want to allow InQuiry to open the eSOne Printing Agent. To prevent the dialog from appearing every time, allow your browser to always open links of this type. Click Open InQuiry Printing Agent or Allow.
Note
Granting permission to open the Printing Agent is required to preview and print documents.
After clicking Print Preview, the Printing Agent opens and renders the document. Print settings appear on the left. If changed, the document re-renders automatically. Click Stop to cancel rendering.
Click Print to send the document to the printer.
If you print without previewing, the document prints immediately to the default printer. The preview pane remains blank.
Note formatting uses the dictating provider’s settings—not the settings of the logged-in user.
Printing Faxes
You can also print faxes, notes, cover letters, and envelopes directly from Services > Manage Faxes.
Print Settings
The left panel in the Printing Agent allows customization of print output. Changes apply to the current job unless overridden by the Ignore Document Supplied Options setting.
System printers appear in the printer list, with the default printer selected.
Print Settings Categories
- Paper Options – Choose paper size, orientation, and printer tray.
- Margins – Adjust page margins. Use First Page Custom Margins for different first-page values.
- Line Spacing – Adjust space between lines.
- Copies – Set copy count, enable collating, and duplex printing.
- Page Range – Choose to print all, the current page, or custom pages.
- Advanced Options – Override InCommand defaults. Click Reset Everything to Defaults to restore original settings.
Canceling a Print Job
Click Cancel Printing in the InQuiry print dialog to cancel the job and any follow-up actions like completing or logging batches.
Closing the Printing Dialog
Click Close to exit the print dialog. You can still print from the agent, but no batch log will appear.
The agent continues running in the Taskbar Corner Overflow. To reopen it, click the up arrow in the taskbar and then click the Printing Agent icon. It also reopens automatically on the next preview.
Updating the Printing Agent
When updates are available, a message appears after logging in. Click the link to download the update or dismiss the message.
Admins can suppress these messages at the user level.
Uninstalling the Printing Agent
To uninstall, open the Control Panel, go to Apps, search for InQuiry Printing Agent, and select Uninstall.
InstaNote
InstaNote
InstaNote leverages generative AI to transform healthcare documentation by instantly converting dictations and conversations into structured clinical notes.
The eSOne platform enhances the InstaNote experience with an integrated suite of tools designed to support every step of the documentation workflow. From capturing and refining dictations to verifying and finalizing accurate clinical notes, the platform ensures a smooth, efficient, and precise process. InstaNote empowers providers to streamline their workflows, reduce documentation burdens, and deliver high-quality care with confidence.
This guide focuses on two key features available exclusively for users of InstaNote Direct Delivery: Reprocess InstaNote and InstaNote Correction Note. These functionalities empower users to efficiently resubmit and correct documentation, ensuring accuracy and compliance in patient records.
By mastering these features, you can enhance your documentation workflow, reduce errors, and improve overall efficiency.
Reprocess Note
InstaNote's Reprocess feature enables InScribe and InQuiry users to regenerate the AI processing of a document using the original speech-to-text (STT) draft created when the dictation was received, along with the InstaNote configuration of the selected document type. Since the original dictation is not reprocessed, the turnaround time for the reprocessed note is faster. This feature is especially helpful when a dictation was submitted with an incorrect document type. By utilizing the Reprocess feature, you can maintain the integrity and accuracy of your clinical documentation, thereby enhancing the quality of patient care.
Reprocess in InScribe
InstaNote documents can be reprocessed in InScribe if the dictation was previously processed by InstaNote and both the selected document type and dictator have InstaNote enabled. In addition, InScribe version 7.20.25055 or later must be installed, and the InScribe user profile must have the reprocess option enabled.
Reprocessing an InstaNote document in InScribe includes an additional enhancement not available in InQuiry. The speech-to-text (STT) draft can be edited to correct or add any parts of the dictation that were misinterpreted or omitted during the initial processing. With the updated STT draft, InstaNote will generate a more accurate and detailed note.
Reprocess InstaNote - InScribe
- Access the note.
- Log in to InScribe.
- Select the note from the queue.
- Verify the correct Document Type and Dictator are selected in the Info tab.
- If the dictation was received with the incorrect document type or dictator, change these values before reprocessing the note.
- Review the speech-to-text draft.
- Open the STT Draft tab and compare its contents with the dictation to verify accuracy.
- If the content in the STT draft is incorrect or incomplete, make the necessary edits directly in the STT Draft tab.
- Reprocess the note.
- Navigate to the Transcription tab in the InScribe menu.
- Press Reprocess in the Transcription tab.
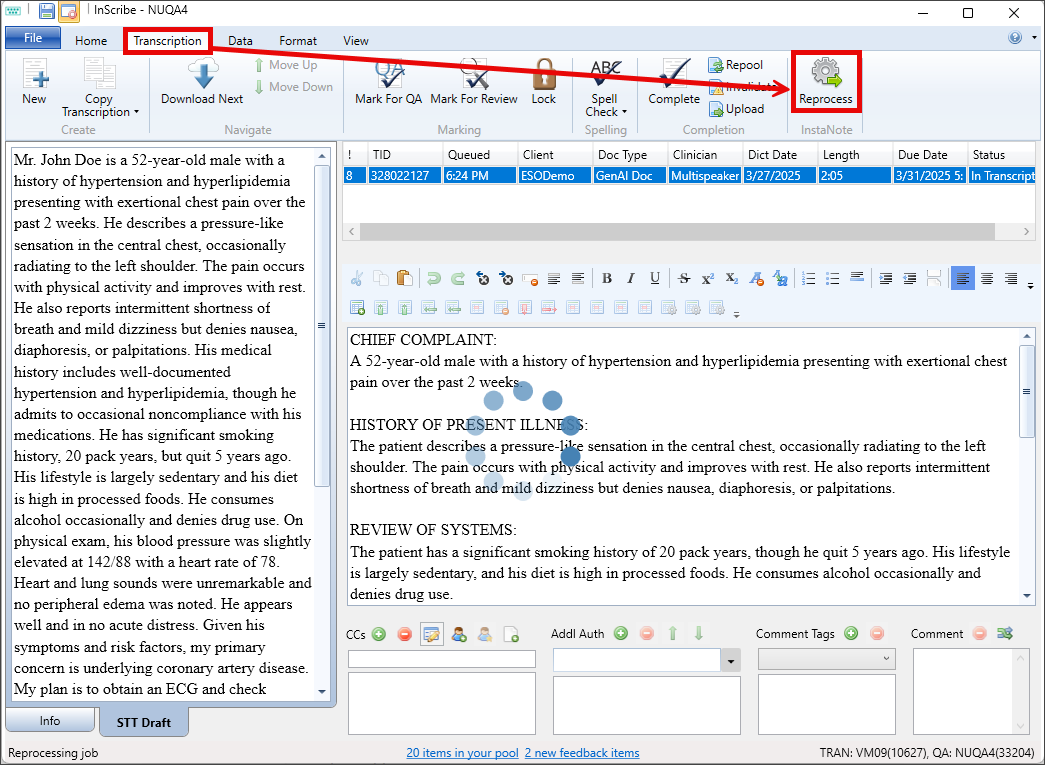
- The reprocess button will be disabled or removed if the dictation was not previously processed by InstaNote or if the document type or dictator do not have InstaNote Direct Delivery enabled.
- Processing time varies based on the length of the note and is considered complete when the blue processing status bubbles in the text editor disappear.
- Review the updated note.
- Review the reprocessed note in its entirety to confirm accuracy and completeness.
- To revert to the previously saved version of the note, press Undo in the editor toolbar.
- Upload the note.
- Complete and upload the note.
Reprocess in InQuiry
InstaNote documents can be reprocessed in InQuiry if the dictation was previously processed by InstaNote and both the dictator and selected document type have InstaNote Direct Delivery enabled.
Reprocess InstaNote - InQuiry Legacy Editor
- Access the note.
- Log in to InQuiry.
- Navigate to the given workflow folder or Search All and location the note.
- Open the note in Edit mode.
- Verify the correct Document Type and Dictator are selected in the demographics.
- If the dictation was received with the incorrect document type or dictator, change these values before reprocessing the note.
- Reprocess the note.
- Press reprocess job in the toolbar.

- The reprocess button will be disabled or removed from the toolbar if the dictation was not previously processed by InstaNote or if the document type or dictator do not have InstaNote Direct Delivery enabled.
- Processing time depends on the length of the note and is completed when the "in process" message closes.

- Press reprocess job in the toolbar.
- Review the updated note.
- Review the reprocessed note in its entirety to confirm accuracy and completeness.
- To revert to the previously saved version of the note, press Undo in the editor toolbar or close the editing window without saving changes.
- Save changes.
- Save changes by either saving or completing the note (completing the note will advance it to the next stage of the workflow).
Important Information
Changes made as a result of reprocessing InstaNote documents are not saved until Save or Complete has been pressed.
The Complete button may also sign notes, depending on their position in the workflow.
Reprocess InstaNote - InQuiry Note Editor
- Access the note.
- Log in to InQuiry.
- Navigate to the given workflow folder or Search All and location the note.
- Open the note in Edit mode.
- Verify the correct Document Type and Dictator are selected in the demographics.
- If the dictation was received with the incorrect document type or dictator, change these values before reprocessing the note.
- Reprocess the note.
- Expand the ellipsis menu in the upper right corner.
- Press Reprocess Note
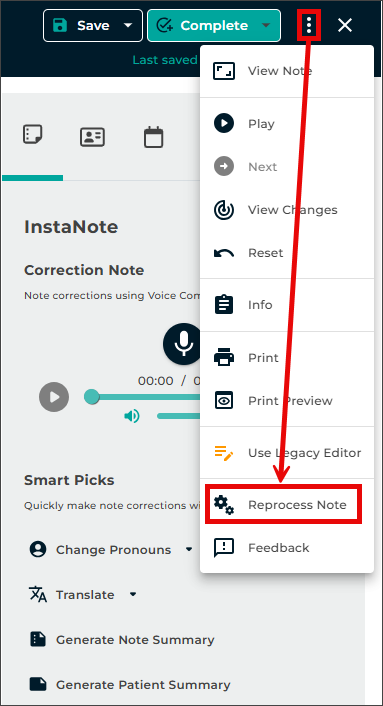
- The reprocess button will be disabled if the dictation was not previously processed by InstaNote or if the document type or dictator do not have InstaNote Direct Delivery enabled.
- Processing time depends on the length of the note and is completed when the "in process" message closes.

- Review the updated note.
- Review the reprocessed note in its entirety to confirm accuracy and completeness.
- To revert to the previously saved version of the note, press Undo in the editor toolbar or close the editing window without saving changes.
- Save changes.
- Save changes by either saving or completing the note (completing the note will advance it to the next stage of the workflow).
Important Information
Changes made as a result of reprocessing InstaNote documents are not saved until Save or Complete has been pressed.
The Complete button may also sign notes, depending on their position in the workflow.
Correction Note
The Correction Note feature transforms how you edit medical notes on the eSOne platform. With the power of generative AI, you can now make precise edits to your notes simply using voice commands. Whether you're refining details or restructuring content, this feature streamlines the editing process for greater efficiency.
Correct Note is available in InQuiry and the eSOne Mobile apps for Android and iOS.
Using Correction Note in InQuiry
- Access the Document:
- Log in to InQuiry.
- Navigate to the designated workflow folder or use Search All to locate the note.
- Open the note in Edit mode.
- Open the Correction Note Controls:
- Record the Correction Note:
- Submit the Recorded Correction Note:
- Review the Edited Note:
- The generative AI edits will appear in the note editor. Review the note thoroughly to ensure accuracy.
- Click Diff to view a comparison of edits made to the note.
- To revert the changes, click Undo in the editor toolbar, or close the editing window without saving changes.
- Make any additional edits, such as updates to demographics, document type, location, or note text, as needed.
- Save the Edited Note:
- Save the edited note by selecting one of the following options:
- Save
- Save & Close
- Complete or Complete/Next to finalize the changes and move the note along in the workflow.
- Save the edited note by selecting one of the following options:
Important Information
Changes made using the Correction Note feature are not saved until Save or Complete has been pressed.
The Complete button may also sign notes, depending on where they are in the workflow.
Using Correction Note in eSOne Mobile for Android
- Access the Document:
- Log in to eSOne Mobile for Android.
- Navigate to the designated workflow folder or use Search All to locate the note.
- Open the note in Edit mode.
- Tap the note to open the viewer.
- Tap the pencil to open edit mode.
- Record the Correction Note:
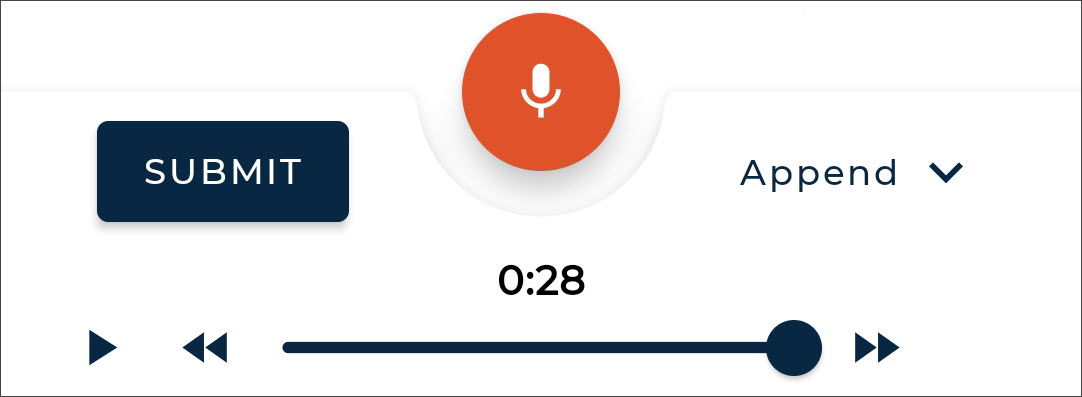
- Submit the Recorded Correction Note:
- Tap Submit.
- Wait for the edits to process. Processing time depends on the length of the note and is complete when the "Please Wait" message disappears.
- Review the Edited Note:
- The generative AI edits will appear in the note editor. Review the note thoroughly to ensure accuracy.
- Tap the Diff button
 to show or hide color-coded highlights indicating the changes made to the note text.
- Green represents added content.
- Red represents deleted content.
- Blue represents formatting changes.
- To revert the changes, click Undo
 or Back
  without saving changes.
 - Make any additional edits, such as updates to demographics, document type, location, or note text, as needed.
- Save the Edited Note:
Important Information
Changes made using the Correction Note feature are not saved until Save or Complete has been pressed.
The Complete button may also sign notes, depending on where they are in the workflow.
Correction Note Examples
eSOne Mobile for Android Example
Below is a step-by-step sample of the capabilities of Correction Note in the Android mobile app.
- Access the Document:
- Record the Correction Note:
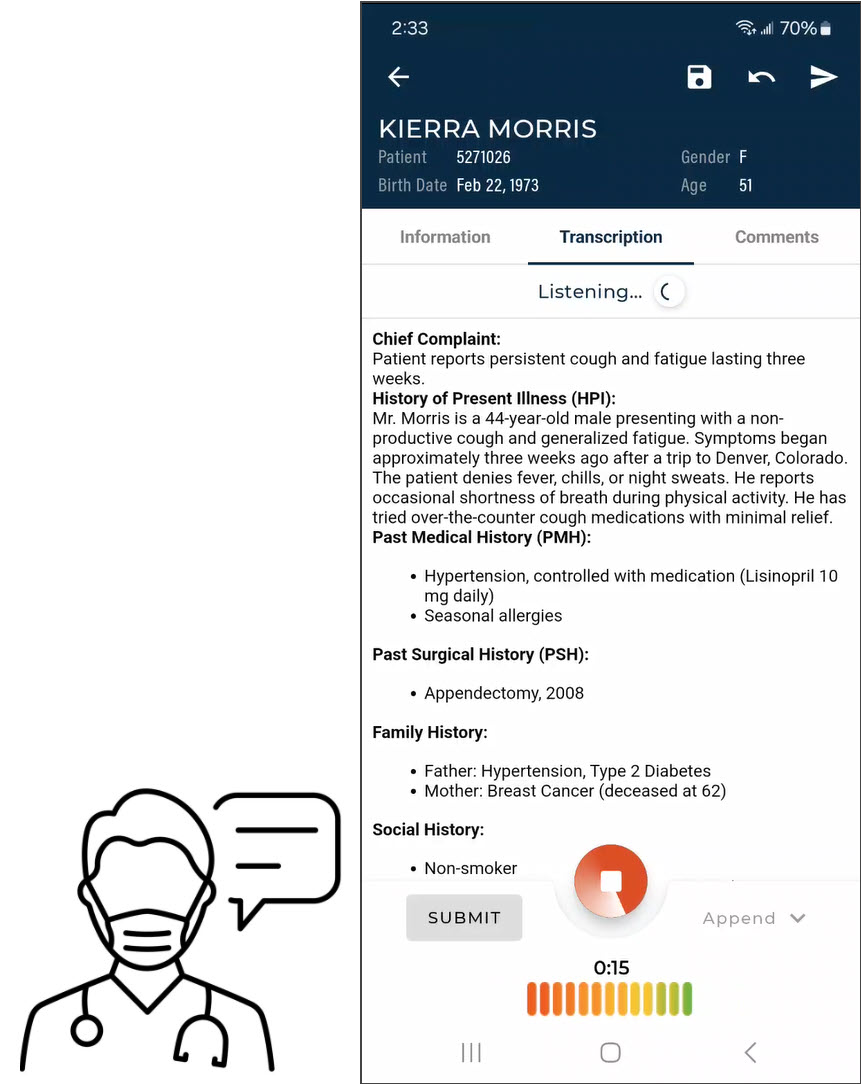 - Tap Record
  at the bottom of the screen and dictate the necessary edits.
- Recording will continue while navigating between the Information, Transcription, and Comments sub-tabs.
- The dictation used for this example correction note was:"Add a blank line after the Chief Complaint section header, add a blank line before and after the History of Present Illness section header, add a blank line before and after the Past Medical History section header.
Change all gender references to female.
Bold Appendectomy and change the year to 2009." - Submit the Recorded Correction Note:
- Review the Edited Note:
- The generative AI edits will appear in the note editor. Review the note thoroughly to ensure accuracy.
- Multiple correction note dictations can be recorded on the same note.
- Manual edits can also be made to the note text and demographics.
- To revert the changes, click Undo
 or Back
  without saving changes.
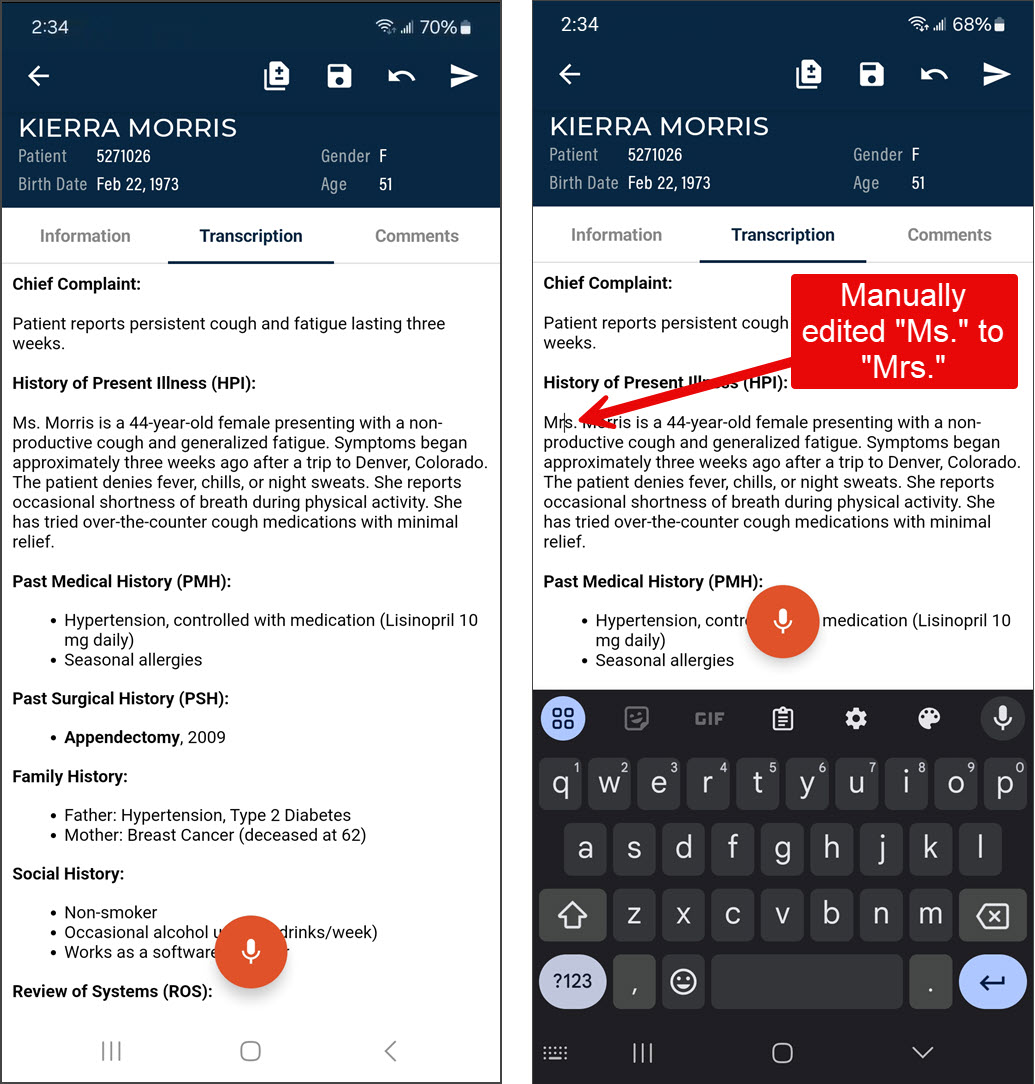
- Tap the Difference View button
 to show or hide color-coded highlights indicating the changes made to the note text. Manual edits cannot be made while in Difference view. To make edits, toggle off Difference view first.
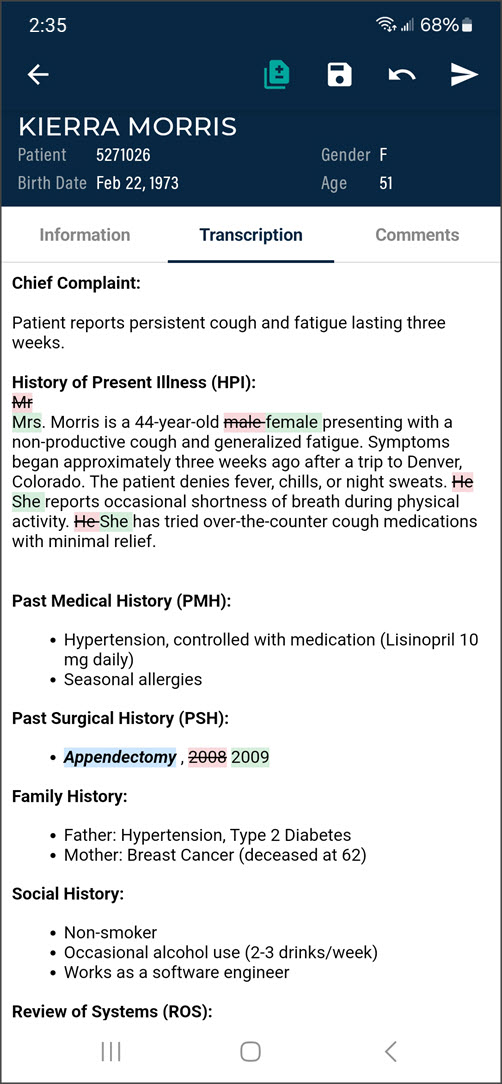
- Green represents added content.
- Red represents deleted content.
- Blue represents formatting changes.
- Save the Edited Note to finalize the changes:
Application Downloads
The following software downloads are available for established eSOne users:
| Application | Description |
|---|---|
| InQuiry Printing Agent MSI Installer | Used to print from InQuiry in Chrome, Edge, and Firefox. The MSI installer is for IT Administrators. For individual local installations follow prompts when printing. |
| InQuiry Printing Agent Cleanup Tool | Removes all versions of the InQuiry Printing Agent when standard removal methods fail. |
